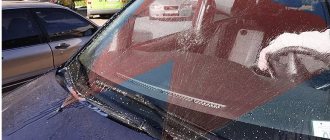
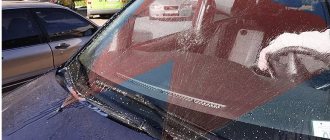
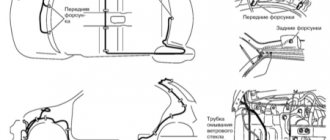
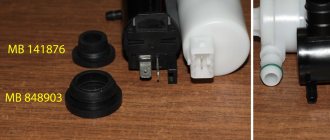
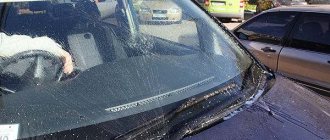
Hello everyone, today I want to look at the reasons why the windshield washer does not spray on a Lada Kalina car. Moreover, this problem is very relevant in the spring. In the spring, you can’t go anywhere without a washer. So, let's go.
The first reason why the washer nozzles do not spray is tritely simple, perhaps you simply have run out of fluid in the washer reservoir, you need to check and top up if necessary.
The second reason is the hoses. Perhaps they slipped off somewhere or perhaps they got crushed somewhere. Everything needs to be carefully inspected and eliminated.
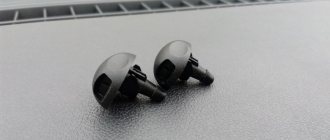
The third reason is clogged injectors, you need to try to clean them with a needle, and if that doesn’t help, you will have to change them.
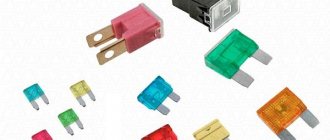
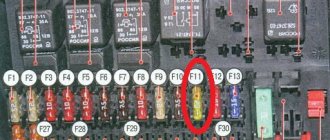
The fourth reason is a blown fuse. Fuse F 4 is responsible for the washer motor on Kalina. If it is blown, you need to replace it.
The fifth reason lies in the terminals of the washer motor; they often oxidize and even fall off; they need to be checked and, if necessary, corrected.
The sixth reason is the motor itself, you need to check it and, if necessary, replace it.
The seventh reason is the switch itself, which is located under the steering wheel. If necessary, you need to replace it.
If you had other reasons, then write in the comments. Well, that’s all, I looked at the main reasons why glass cleaner does not spray on a Lada Kalina car. Bye everyone.
How and what to fill in the washer reservoir?
Above we looked at how to remove the washer reservoir, check the system sensor and change the container (if it is damaged). But there are situations when the container body is intact, and the only thing that needs to be done is to add liquid.
In such a situation, proceed as follows:
- Pull the hood handle located in the cabin.
- Open and secure the hood.
- Unscrew the cap that is installed on the tank. In this case, unscrew only the cover that does not have wires.
- Add liquid (water or anti-freeze). If the container is empty, it holds about five liters.
An equally important question is what to put in the tank.
It is important to consider the time of year here. So, in winter it is recommended to pour non-freezing liquid, which will protect the system from freezing
Watch the video on how to remove the washer reservoir.
As for the summer period, water with the addition of a cleaning additive is suitable. To ensure the best effect, first pour the additive into the container, and then add water. With this sequence, the liquids mix more easily and quickly. Good luck on the roads and of course no breakdowns.
Lada Kalina Sedan EGOIST › Logbook › Replacing the driver's window
This entry is more for the future potential buyer of my Kalina. So that there would be no questions later about why the glass was changed. Last summer, the driver’s window was in the trash. At the end of the summer, I stuck modelin on all the velvet covers, but it didn’t save. There are continuous scratches on the driver’s glass, both on the outside and on the outside. from the inside. I’m surprised how these scratches didn’t appear before me for eight years?
It doesn't look great, although it didn't interfere with the view. I ordered new glass from a BSZ representative and a week later it arrived. Price 2000 rubles. China market 1500. Glass arrived from 2007))) If I had known, I would have asked to send 2008)))
I removed the old one. It’s not difficult to remove.
It was more difficult to remove the fasteners from the old glass. But with the help of an ordinary table knife everything worked out. But first, try it on the new glass
And of course, I changed all the velvet covers. I bought Croatian ones. 800 rubles for a set of external ones and 800 rubles for a set of internal ones. In total I paid 1,500 rubles for them))) I hope they won’t scratch the glass.
I ordered stickers for the door pillars with the trailer, since the old ones were starting to peel off with age. It seemed like it cost 700 rubles with delivery.
I glued it to the old ones, since it was impossible to tear them off. I messed up one side a little, tearing off the old ones. The result was a pattern under the new sticker.
And finally, I painted the moldings. I was sick of the look of peeling chrome.
I haven’t done the door yet, because the insurance company hasn’t transferred the money yet. Or maybe I won’t do it and will sell it. I’ll think about it.
Where is the washer fluid container located?
Novice car owners often do not know where the washer reservoir is located. They often confuse it with a coolant or brake fluid container. In fact, finding the tank you are interested in is not difficult.
Let’s say in VAZ cars it is located under the hood, on the left or right side of the engine, depending on the model, and there may also be two of them, on the rear and front windows. And on foreign cars it can be located under the front bumper.
If the level of water or antifreeze in the tank is insufficient, it is enough to top up. But what to do when the windshield washer reservoir bursts? In such a situation, the only salvation is to replace the failed device.
How to replace the washer reservoir:
Lift the hood and find the sensor that monitors the washer fluid level (not found on all cars). Disconnect the connector that fits this device. Also, disconnect the connectors from the wires from the electric pump that pumps up the washer fluid. At the same time, remove the wires from both pumps - for the windshield and for the rear.
Then remove the washer reservoir from its mounting and remove the tubes from the fittings of both pumps. Remove electric pumps from the container. To do this job, you will have to overcome a certain force created by the sealing bushings.
Carefully pry the said sleeve (you can use a flat head screwdriver or something similar) and then remove it from the hole in the container. Assess the condition of the bushing for elasticity
If it is damaged, replace it.
Unscrew the cap and remove from the container the sensor that controls the level of windshield washer fluid (if, of course, your car has one). Check the functionality of the sensor. To perform this task, connect a test lamp to its connectors, then power the device with 12 Volts.
If the float is at the bottom (that is, it signals the absence of liquid), the light should light. Now lift the float up and control the behavior of the light bulb - there should be no glow. If the algorithm is not the same as described above, the sensor needs to be replaced.
Washer fluid level sensor
This completes the removal of the washer reservoir. Next, you need to decide whether you will change the device or try to make a repair, that is, seal it. The first option is more preferable. And the cost of the product is not so high as to save.
Now replace the container and follow the reverse order. If problems arise with the installation of electric motors, and they are difficult to fit through the seals, use soap to lubricate the edges.
Once the tank and motors are mounted, return the nozzle pipes to their place. To simplify the process of installing the tube on an electric motor, heat the tip of the tube with a lighter, after which they can be easily put on. During installation, ensure that the motor is securely fixed.
Removal instructions
The washer reservoir can become damaged for various reasons. If frost sets in and you forgot to fill in the frost-resistant liquid, in the morning there is a chance to see a burst container under the hood that will have to be replaced. The quality of the washer fluid is also not the best, which can lead to the same result. Regardless of the reasons, the burst reservoir must be removed from under the hood. This job has its own procedure, which differs depending on the make of the car. The fastenings can be either different or similar, and for work most often you need a flat-head screwdriver, as well as 10 and 13 keys.
Repairing an old tank is possible, however, the money and time spent on it are not always worth it. To put it more clearly, even a repaired tank will not perform all the functions assigned to it, it will look less aesthetically pleasing, and the service life after repair will still be reduced, because the wear of the plastic can be great. If possible, you should not neglect repairs. For older cars, repairs are acceptable; everything will work fine until it wears out completely. If you do not want to give preference to repairing this part in your car, it is best to go to the store.
There is a good chance you will find a tank that will fit your car according to its characteristics, and will be even larger in size. If the product is not the original model, it will be even cheaper, and in terms of characteristics – no less productive. There are tanks with a sensor for washer fluid and they are not difficult to buy. If the fasteners match, then the new system can be installed, even if its shape is slightly different from the original system previously installed in the car. If you want to maintain the make and equipment of your car, look for a tank that looks the same as yours.
How to remove the washer reservoir on a Lada Kalina?
What will be needed to replace the washer reservoir? To work, take a flat-blade screwdriver and a 10mm wrench.
- The first stage is unscrewing one nut and mounting bolt. The pumps can be removed with a screwdriver or simply by pulling them by hand. Next comes the clamp, which serves as a hose fastening. If it cannot be removed, then you can cut it and then install a new one - such hoses do not cost much. Note: before starting work, water or other liquid must be removed, as it may spill during the removal process.
- Once you have unscrewed the nut and bolt fastening, you can remove the container itself. During the procedure, you can replace worn-out pumps, hoses and wires by installing new ones.
Removing and installing a tank for Lada Priora
First the battery is removed. You can remove the terminal, for this you will need a 10mm wrench. The upper fastener is removed, for this you need a 13mm wrench. The mounting post is removed using a 13mm wrench. This should be done carefully so as not to drop the nut. The block with wires is disconnected from the washer pump. A block with a pink-blue wire is connected to the “plus”, and a black wire is connected to the “minus”. When removing the pumps, liquid may spill. Therefore, you should prepare rags to collect it. Everything is attached to the rack with two nuts, which are located in the headlight area. The old tank is removed from the niche and a new one is installed in its place. To do this, it is raised and removed from the pin.
It is very important to secure it well. To prevent water from spilling, close the hole with your finger, after which it is drained into a clean container. The pump installation locations can be lubricated with sealant. Thus, the rubber seals will fit more tightly, eliminating the possibility of water leakage
Also, the connection points with the hoses can be washed if necessary. Installation proceeds in the opposite sequence to removal.
Lada Kalina Sedan EGOIST › Logbook › Replacing the driver's window
This entry is more for the future potential buyer of my Kalina. So that there would be no questions later about why the glass was changed. Last summer, the driver’s window was in the trash. At the end of the summer, I stuck modelin on all the velvet covers, but it didn’t save. There are continuous scratches on the driver’s glass, both on the outside and on the outside. from the inside. I’m surprised how these scratches didn’t appear before me for eight years?
It doesn't look great, although it didn't interfere with the view. I ordered new glass from a BSZ representative and a week later it arrived. Price 2000 rubles. China market 1500. Glass arrived from 2007))) If I had known, I would have asked to send 2008)))
I removed the old one. It’s not difficult to remove.
It was more difficult to remove the fasteners from the old glass. But with the help of an ordinary table knife everything worked out. But first, try it on the new glass
And of course, I changed all the velvet covers. I bought Croatian ones. 800 rubles for a set of external ones and 800 rubles for a set of internal ones. In total I paid 1,500 rubles for them))) I hope they won’t scratch the glass.
I ordered stickers for the door pillars with the trailer, since the old ones were starting to peel off with age. It seemed like it cost 700 rubles with delivery.
I glued it to the old ones, since it was impossible to tear them off. I messed up one side a little, tearing off the old ones. The result was a pattern under the new sticker.
And finally, I painted the moldings. I was sick of the look of peeling chrome.
I haven’t done the door yet, because the insurance company hasn’t transferred the money yet. Or maybe I won’t do it and will sell it. I’ll think about it.
Do-it-yourself troubleshooting
If the system stops working, the car owner is faced with the need to search and determine the malfunction. You can tell that the pump has failed by the lack of water when you try to activate the washer system. This problem requires maximum prompt intervention from the motorist, since its performance largely affects the safety of the driver and passengers. But it must be taken into account that the failure of a unit is not always associated with the failure of the pumping device.
The reasons may be as follows:
Lack of fluid in the expansion tank. If water stops flowing to the glass, every driver must first make sure that there is liquid in the tank. It may be that liquid leaves the tank because the tank has burst, damage and cracks have appeared on it, which contribute to leakage. You can try to patch the tank, for example, by cold welding, but this usually does not help for long and over time the tank will still have to be replaced. The nozzles or filter element, if any, are clogged. If the clogging of the injectors is minor, then you can always try to wash them, but it is best to completely disassemble all the elements. It is possible that the hoses themselves through which water is supplied are clogged. After flushing, it would be a good idea to blow out the system; to perform this task, you will need a compressor. Another reason why the system stopped functioning was that the tightness of the lines through which the liquid flows was damaged. The reasons can vary, but are usually associated with mechanical damage, for example, as a result of vibration or interaction with moving parts, or natural wear and tear. One way or another, worn elements must be replaced. It happens that the hose falls off from the connection point to the pump or nozzle. If it is silicone, then the problem can be solved by treating the joint with sealant, but before doing this, the end of the hose should be held for several seconds over a fire, for example, a lighter. This will allow the stretched part to shrink. Some system elements were incorrectly connected. As a rule, such a problem arises as a result of incorrect actions taken during repairs. The pump shaft and the electric motor shaft are poorly connected. With such a problem, all elements of the system simply need to be fixed more securely. Electric motor failure
Its breakdown may be due to natural wear and tear, but if the motor comes out earlier than necessary, then you need to pay attention to its contacts. They may need cleaning, brushes and other components should also be cleaned.
If there are traces of corrosion on parts of the motor, you need to get rid of them; for this you can use a simple office eraser (the author of the video is the channel Made in the Garage).
Cleaning the injectors
Their replacement and cleaning occurs in the same way and it begins with the removal of these parts, the process is as follows:
- open the hood;
- make sure that they have plastic plugs; if they are present, they must be carefully removed;
- take a flat-head screwdriver and open their spring fasteners to remove the injectors.
Installation of new parts occurs in the reverse order.
For sprayers that are too clogged, you need to prepare a wire and, after disconnecting the hose, insert it into the nozzle up to the nozzle.
Replacing the motor
It is quite difficult to repair the motor yourself, so most often it is simply replaced.
Installation of a new device is carried out as follows:
- remove all liquid remaining in the tank from the tank;
- disconnect the contact between the battery and the pump;
- if necessary, you can dismantle the tank, but if manipulations can be carried out with a fixed device, then you don’t have to do this;
- remove the electric pump from the tank and unscrew all the hoses going to it, but just remember their location so that after repair they can all be returned to the correct places;
- connect a new pump to the system;
- screw all the tubes;
- connect the battery to the motor;
- pour liquid into the reservoir.
Window washers don't work - problem solving
After driving about 50 kilometers towards the city, it started to rain lightly. I started turning on the wipers, but the washers didn't work. At first I thought that they were frozen, since when leaving the house the temperature outside was -1 degree. I stopped and warmed them up with a lighter, but water still did not flow through the nozzles.
Somehow I got to the city, the wipers worked on dry glass all this time, but it’s good that I recently installed new ones - they did a good job. It was already evening, and the solution to this problem was postponed until the morning. The next day, when I woke up, I went out into the yard, started my Kalina and again tried to turn on the washers, but neither the front nor the rear worked, the engine idled.
Then he got out of the car and noticed the injectors themselves; there were some white flakes next to them, and something white was also visible from the holes. And then I realized that when I poured water into the tank, the jar was filled with milk and there was sediment at the bottom, and it was because of this that everything clogged
I went back to the apartment and asked my wife for the thinnest needle, she found one from my clothes with a round plastic tip. He went outside again and began to pierce the clogged injectors with this thin needle, it was just the right size. Having thoroughly cleaned the front and rear washers, I decided to try what happened. I turn on the water supply and everything works great. I put this needle in the glove compartment just in case, otherwise such a misfortune would happen on the road; it would not be very pleasant to drive with a smeared windshield.
Source
Freezing of the “non-freeze”
With the onset of the autumn-winter season, the weather can change unexpectedly - just yesterday you were wearing light clothes, and today it’s freezing since the very morning. Car enthusiasts know that they need to be well prepared for this time. One of the most common problems is frozen fluid in the windshield washer reservoir. The problem is not fatal - the car will be able to drive, however, it will be impossible to clean the windshield - the brushes will simply smear the dirt.
What to do in this situation? — we’ll try to find a solution on the pages of our portal Vodi.su.
What can't you do?
There are a lot of articles on automotive topics on the Internet, but when you get to know them more closely, you realize that they were written by people unfamiliar with the topic. So, for example, you may come across advice - pour boiling water into the tank.
Why you can't do this:
- hot water may deform the plastic tank;
- water can overflow and flow directly onto the fuse box or any other important component;
- In cold weather, boiling water quickly cools and freezes.
Sometimes warming up the engine helps, but only in cases where the washer fluid container is mounted not closer to the car's fender, but directly next to the engine.
How to defrost an antifreeze?
The simplest solution is to drive the car into a garage or parking lot where there is heating, and wait until everything thaws. It is clear that this method is not always suitable. If your car is already parked in a garage or underground parking lot with heating, then there should be no problems with frozen anti-freeze.
Responsible drivers are ready for any situation, therefore, if the liquid has crystallized in the tank, pipes and injectors, they proceed as follows:
- always buy a windshield wiper with a reserve;
- take a plastic bottle with anti-freeze and heat it up a little - the key word is “a little”, that is, up to 25-40 degrees, for example, hold it under running hot water from a tap or place it under a stream of hot air from the cabin heater;
- the heated liquid is added to the tank, not to the top, but in small portions;
- After 10-20 minutes everything should thaw, the pump will start working and the streams from the nozzles will clean the glass.
After such an operation, it makes sense to drain the antifreeze, because in the next frost, it will freeze again. Or then add more concentrate without diluting it with water.
If you don’t have glass cleaning liquid on hand, you can use any liquid containing alcohol, for example vodka or isopropyl alcohol (IPA).
It is also worth remembering that due to the fact that ice crystals settle in the tubes themselves, under high pressure they can jump off the fitting. You will have to make some effort to put them back on. Don't forget that you can use a hairdryer to warm up the tank or pipes - this will speed up thawing.
Choosing a non-freezing liquid
Such questions will never arise if you buy a good antifreeze and dilute it correctly.
A wide range of products are available today:
- methanol is the cheapest, but it is a strong poison and is banned in many countries as an anti-freeze agent. If vapors leak into the cabin, severe poisoning is possible;
- isopropyl is also a type of toxic substance for humans, but this is only if you drink it. The liquid itself has a very strong and unpleasant odor, but it is hidden by strong flavorings;
- bioethanol - allowed in the EU, does not crystallize at temperatures down to minus 30, but is very expensive, a liter can cost 120-150 rubles.
There are also drivers who take ordinary vodka and add a little dishwashing liquid to it - this composition will definitely never freeze.
There are also many fakes. They are usually bottled not in plastic canisters but in ordinary PET bottles or, as they are called, 5-liter eggplants. They are obtained in artisanal conditions by mixing IPA with water and dyes. Preference should be given to proven products; they can be sold both in the form of a concentrate, which must be diluted in strict accordance with the instructions, and in the form of ready-to-fill liquids.
(2 ratings, average: 5.00 out of 5)
Pump repair or replacement?
The feasibility of repair is determined by the cost of a new pump. A large number of pumps are non-separable, so for repairs you will have to cut them and then glue the plastic case together. To repair it yourself, it is enough to completely disassemble the motor, clean its insides from dirt, corrosion and growths.
Of course, you won’t find spare parts for the washer pump, so the sealing lip will remain old. If it was this that caused the jamming, then within a year the windshield washer will most likely not work again.
How to remove and wash injectors
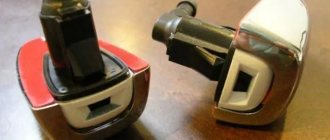
The windshield washer nozzles are held in place by plastic clips. To remove the injector without damaging the body, check its number in the original spare parts catalog. By finding a photo of the injector by number, you will see exactly where the latches are located. You can remove the nozzle with a thin slotted screwdriver.
For cleaning, you can use a needle smaller than the diameter of the sprayer hole. We recommend that you first leave clogged injectors in a citric acid solution for some time. After soaking, the deposit can be removed using carburetor cleaner or compressed air.
Driving a car turns into torture if the windshield is covered with streaks of dirt. Trying to see what is happening ahead, the driver gets tired and has less control over the situation on the road. And the wipers scratch the glass, spreading abrasive dirt over it. Let's look at the most common faults. Perhaps, after reading this article, you will be able to independently cope with diagnostics and repairs right in the yard of your home. Let’s discuss several points at once so as not to repeat ourselves many times in the future:
- a description of the method for finding the cause of the malfunction will be presented continuously. That is, we will assume that the breakdown has not yet been fixed. If everything works for you, complete the repair.
- If any actions are beyond your competence or the necessary tools and spare parts are not available, go to a store or car service center.
Design features
The car window cleaning and washing system must always be in good working order; traffic safety largely depends on it. Its main component is a special tank; the efficiency of the entire system will depend on its serviceability. The volume, size and shape of the vessel will depend on the make and model of the vehicle. On average, the product can hold from 2.5 to 4 liters of water. The volume may be increased if other components, such as the rear window or optical elements, are to be serviced.
Windshield washer reservoir with two necks
The design characteristics of the container may depend on its type. Most units can be divided into two main categories: universal types and designs used for a specific make and model of vehicle.
The product usually has a rectangular shape, one or more electric motors can be located on one side, and there must also be a hole for a sensor to control the water level in the tank. The vessel is made of white plastic, thanks to which the car owner is able to independently determine the amount of anti-freeze remaining.
Where is the structure located?
The windshield wiper container is located in the engine compartment, but the car owner has access to its neck and cap, so the windshield washer can be filled at any time.
Location of the Lada Granta washer reservoir
It is not possible to visually inspect the integrity of the system. To do this, you need to go to a car service center or independently disassemble the structure located under the bumper or from the bottom of the engine compartment. In some cases it may be necessary to remove the wheel. The exact location of the product will depend on the internal layout of the power unit components.
Draining liquid without dismantling
I cannot guarantee that the methods discussed will suit any car. There is only one universal method, but its use should be approached with extreme care.
First, look at the owner's manual for your car and see how the manufacturer itself recommends draining the windshield washer fluid from the windshield washer reservoir. Then decide whether to follow these instructions or use an alternative method.
Category:Tuning
First way
. It is universal and will fit all cars without exception. The idea is to squeeze the liquid out through the nozzles themselves. Extremely simple, but with its pitfalls. It is better to use it in situations where there is very little composition in the tank, and you do not have the time or opportunity to completely drain it. The simplicity lies in the fact that here you just need to turn on the washer and wait until the reservoir is empty. But there is also a difficulty. Working without stopping, the washer motor may fail. Be sure to give him time to rest.
Second way
. It involves draining using a hose from the washer itself. On many cars the method works easily and simply, and there are no problems with its implementation. You will need to remove your summer or winter windshield wiper blades by snapping them off. Be sure to wrap fabric around the leash. Next, open the hood and prepare a container for draining. Find the hose in the area where the injectors branch. Disconnect the hose and lower its end into the bottle. Turn on the engine and activate the window washer. The liquid will begin to gradually drain.
There is another option. It involves draining directly from the tank itself.
Third way
. Again, not suitable for all cars. Here you need:
- gain access to the tank;
- To do this, remove the linings or other easily dismantled elements;
- prepare a container for draining;
- find where the motor is located;
- unscrew the electric motor from the tank;
- place a container under it;
- wait for complete drainage;
- turn on the washer motor;
- return all parts to their place;
- add new fluid.
Alternatively, you can use a large syringe with a nipple attached to it to reach the bottom of the tank. The method is not the fastest, but you don’t have to remove or dismantle anything.
But what you shouldn’t do is insert one end of the hose into the tank, try to suck the mixture out with your mouth, and pour it into a container for draining. Swallowing such a liquid, even in small quantities, can cause serious poisoning.
Tank selection
Many drivers claim that the base part is made of rather fragile plastic, unsuitable for intense loads, sometimes cracking even from severe frost. In this regard, the rational solution seems to be the purchase of an analog part.
The main thing is to make sure of compatibility in advance. Some tanks may initially lack holes for connecting the pump nozzles, but special “blanks” may be provided that allow for quick installation. Purchasing such spare parts is also a financially justifiable decision; they cost less than the originals.
The original tank is quite expensive, but there is a replacement from SAT (ST-DTU2-101-A0). But it does not have a hole drilled for the high pressure pump for the headlight washer. We'll have to improve it.
Frequent unit malfunctions
The container for antifreeze liquid does not require maintenance during vehicle operation, but malfunctions may occur that require repair or complete replacement of the product. It is necessary to contact car service specialists in the following situations:
- If cracks have formed in the tank body.
- The seal of the product was broken and leaks began to form.
- The threaded connection is not tight enough, which can also lead to leaks.
- If the water freezes, the unit in this case becomes completely inoperable.
- Electric motor failure. Such a malfunction leads to a decrease in pressure, and the product will reach the nozzles in insufficient quantities or will not flow at all.
Add antifreeze to the windshield washer reservoir.
In case of accidents, vibrations or mechanical impact, the structure may completely collapse. If the washer reservoir has burst, it may need to be completely replaced. All types of faults are divided into two main categories: mechanical and electrical defects. The former are much more common, and, as practice shows, the car owners themselves are most often to blame
It is important to always monitor the fluid level and switch to a winter product in time
Electrical causes are less common; the most common are fuse failure and electrical pump failure.
Do-it-yourself troubleshooting
The main reasons for the lack of washer fluid can be eliminated with your own hands.
Cleaning the injectors
Their replacement and cleaning occurs in the same way and it begins with the removal of these parts, the process is as follows:
- open the hood;
- make sure that they have plastic plugs; if they are present, they must be carefully removed;
- take a flat-head screwdriver and open their spring fasteners to remove the injectors.
Installation of new parts occurs in the reverse order.
To wash the injectors and free them from dirt, you should prepare a special cleaning solution of non-chlorinated water and vinegar, taken in equal proportions. The mixture is mixed well and then poured into the tank. After which you need to press the washer lever, even if the water does not reach the glass, it’s okay. So that the components of the solution have time to break down all the contaminants, you need to leave it in the cleaning system for 2 hours, and then press the lever again. After the dirty solution flows out of the nozzles, rinse the hoses with distilled water.
The procedure for replacing door glass on a Lada Kalina car
So, first of all you need to do the following:
- Remove door trim
- Raise the window all the way up, temporarily connecting the power window button
- Free yourself from the glass rubber seals.
The inner and outer elastic bands are quite difficult to remove, as they fit tightly. But by slightly prying from the edge with a thin screwdriver, you can then pull each seal out of its seat without any problems.
And using an external example, it will look like this:
Now, from the top we have access to two bolts securing the glass to the window regulator on each side. You can see this clearly below:
To unscrew them, all you need is one 8 mm socket, a ratchet and an extension:
When you unscrew the second side, you need to fix the door glass so that it does not fall, or hold it. When all the bolts are unscrewed, you can carefully lower the front part of the glass down:
And then finally remove it from the door from the outside.
