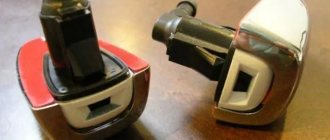
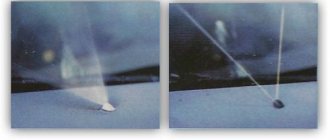
By default, production Lada Vesta models are equipped with jet washer nozzles. These are the most budget modifications. The small irrigation area is one of the main disadvantages.
Many car enthusiasts practice installing fan-type washer nozzles. Let's look at how to do this with your own hands and what is needed for this using the Lada Vesta as an example.
Algorithm for replacing injectors:
- Squeeze the parking brake.
- We turn off the engine.
- Open the hood.
- We snap off the eight clips.
- We remove the casing and rubber tubes.
- We remove the sprinklers.
- We insert new ones and assemble the structure in reverse order.
Principle of operation
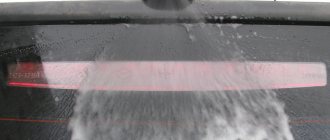
The windshield wipers clean the windshield from raindrops, dust, midges, and other contaminants using the washer. The efficiency of the device depends on the serviceability and correct adjustment of the jets. For high-quality cleaning, the direction and intensity of spraying are important.
Washer jet. Photo source: https://www.drive2.ru/l/524819440999598093
To choose the right washer nozzles for a Vesta or other car, you need to know the type of device:
- The simplest jet mechanism provides liquid supply to the surface to be washed through several channels. If the nozzle becomes clogged or the channel is contaminated, the quality of liquid atomization will be significantly reduced. Certain areas will not be washed, which will worsen the result and negatively affect the comfort and safety of movement.
- The fan model creates a wide front of water spray. This ensures that the glass is quickly coated with small droplets.
The second method is more effective.
Symptoms of clogged injectors
Loss of dynamics is one of the main signs of clogged injectors. If they are contaminated, the car simply will not accelerate properly.
- Unstable idling, the engine at idle will operate unstably and intermittently.
- Starting difficulties can occur when there is contamination or when the injectors stop holding pressure. Fuel begins to drip into the cylinder, which can cause popping sounds in the exhaust pipe.
- Ringing fingers are inevitable when the spray nozzle is clogged; this is due to the fact that the fuel entering the cylinder is mixed with air and the concentration of fuel in this mixture is quite small, so the engine experiences detonation.
Article number and price of factory injectors for Vesta
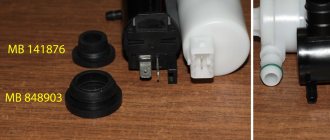
Knowing the article number, you can order new washer nozzles for the Lada Vesta in any store. Standard devices (with which the car comes from the factory) are usually one- or two-jet. The article number of the two-jet washer is VK005, the price is about 20 rubles.
Fan-shaped washer nozzles. Photo source: https://www.drive2.ru/l/498965524584071583
It is preferable to replace inkjet models with fan models. For the Lada Vesta car, the article number for the fan model is MR014. You can purchase it at a price of 60 rubles.
Review of Manufacturer Prices
| Name / catalog items | Price in rubles |
| Jet nozzles (30655605) | From 100 |
| New type sprayers (fan) 289308338R | From 120 – 150 |
| Renault Logan 7700846456, 289321198R | From 150 – 200 |
| Chevrolet Niva 00001-75046760 | From 170 |
| Ssang Yong 7845009010 | From 180 - 200 |
| Tank 8450008574 | From 1100 |
| Pump 8450008573 | From 300 |
| Pipe from pump 8450007341 | From 150 |
| Hex bolt 7703602209 | From 50 |
| Fastening clip 7703079631 | From 50 |
| Wire seal 21010372411800 | From 40 |
| Tube seal 11180520812400 | From 50 |
| *prices are indicated as of 04/06/2021 | |
Common faults
Washer problems can be divided into two types: mechanical and electrical in origin. Among the first type of problems, the most common problems are:
- There is no pressure (the channels are clogged or the liquid level is insufficient).
- When using ordinary water in winter, crystallization and ice formation are possible. You need to start the car and let the engine compartment warm up. It is also advisable to replace the water with antifreeze windshield washer.
- Liquid does not flow to the nozzle. A mechanical break or disconnection of the hose has occurred.
- Poor fluid pressure can also be a result of blockage. The reason is most likely due to the use of unfiltered tap water.
Electrical faults:
- The fuse has failed.
- An open circuit between the washer control lever and the device itself.
- Pump fault.
Even an inexperienced driver can replace the motor, put on a broken hose or clean the channels, as well as install a new fuse.
Why clean injectors and how to understand if they are clogged
The quality of gasoline atomization directly determines the optimal proportions of the air-fuel mixture for easier ignition.
In the design of a modern car, fuel is crushed into small particles and mixed with air by injectors. Inside these devices there is a solenoid-type needle valve. It is held closed by a return spring.
Impulses from the electronic control unit open the valve, allowing the enriched fuel mixture to pass through.
Poor fuel quality and operational difficulties lead to the accumulation of carbon deposits on the internal surfaces of the injectors. Because of this, the channels become clogged.
Too much gasoline gets into the combustion chamber, which impairs ignition and combustion. Unburnt fuel residues enter the catalyst, which becomes clogged and melts. As a result, the engine begins to detonate, its power is noticeably reduced, and fuel consumption increases.
Most car manufacturers recommend cleaning injectors every 30,000 kilometers. Malfunctions in their functioning are shown by the on-board computer. In addition, you can carry out diagnostics of fuel equipment in specialized car services.
On the other hand, clogged injectors show the following signs:
- problems starting the engine;
- interruptions in engine operation at idle speed;
- decreased power, poor vehicle acceleration;
- increased fuel consumption;
- dips when pressing the accelerator pedal.
Which injectors are best installed on Vesta?
If you are not satisfied with the performance of standard spare parts, they can be replaced with analogues from other manufacturers. Instead of standard jet injectors, fan-type injectors (1.6 2022 and other models) or equipment for other cars are often installed on Vesta.
Replacing injectors. Photo source: https://www.drive2.ru/l/497127141142430460
Most owners of Lada Vesta, Lada Cross and Grant prefer to install jets from Volvo (cost about 250 rubles), from the Korean manufacturer Sang Yong (number 7845009010 at a price of 120 rubles) or Toyota (catalog number 85381-AA042b).
How to remove the fuel rail of a Lada Vesta car
We remove the ramp to check the injectors and flush the ramp itself, as well as to repair the engine and its systems
We prepare the car for the job. We place the car on the lift.
We bleed the fuel pressure, to do this:
— Fold the rear seat cushion forward.
— remove cover 1, Figure 1, of the fuel pump hatch.
— disconnect block 3, Figure 2, of the rear wiring harness from the electric fuel pump module.
- start the engine and let it idle until it stops completely.
— turn off the ignition and disconnect the negative terminal of the battery.
After this, remove the intake module, as indicated in the article - “Removing the intake module”.
We press the spring clamps and, moving along the axis of the fitting, disconnect the tip of tube 1 (see Fig. 3) of the front fuel pipeline from the injector ramp 2.
If engine 21129 is installed, then additionally disconnect bracket 3 and move the front fuel pipe to the side.
We disconnect the connectors of the harness 1 (Figure 4), the wires from the fuel injectors 2, cut the two fastening clamps 3 and move the harness to the side.
Using a 5mm Allen key, unscrew two bolts 1 (see Fig. 6) and remove ramp 2 with the injector assembly.
Ramp installation
Before installing ramp 2 (see Fig. 6), you need to lubricate the injector O-rings with engine oil.
Install ramp 2 with injector assembly onto the engine.
Screw in and tighten bolts 1.
The tightening torque of the bolts is 9 - 14 Nm (0.9 - 1.4 kgf.m) (wrench 5 for internal hexagon, nozzle for internal hexagon, torque wrench).
Attach the harness blocks 1, Figure 4, of the wires to the fuel injectors 2 and secure the harness with two new clamps 3 to the injector ramp (for vehicles with engine 21129).
Attach tube 1, Figure 3, of the front fuel line to the ramp fitting 2.
When installing, attach the tube tip to the fitting until the spring clip clicks.
After installation, check that the tube is securely fixed.
For vehicles with engine 21129: attach bracket 3 securing the fuel pipeline to the injector rail.
Install the intake module assembly onto the cylinder head, as indicated in the article – “Removing and installing the intake module”.
Connect block 3, Figure 2, of the rear wiring harness to MEBN 1.
Install cover 1, Figure 1, of the fuel pump hatch.
Lower the rear seat cushion.
Connect the earth wire terminal to the battery.
Cleaning
If the quality of liquid atomization has deteriorated significantly, and the adjustment does not help correct the situation, most likely the jets need to be cleaned of dirt. You can do this yourself.
Fan washer nozzles for Vesta. Photo source: https://www.drive2.ru/l/521819973279023330/?m=521889242511573172
There are several ways to clean dirt from sprayers:
- Using a compressor. After removing the jet and washing it in soapy water, connect the nozzles to the compressor. Under strong air pressure, dirt will come out of the mechanism.
- Using a syringe. A less effective, but more affordable method, which also allows you to thoroughly clean the mechanism. Instead of a compressor, use a large-volume syringe filled with clean water. The dirt should come out of the jet along with the water.
- Mechanical method. You can clean the spray nozzles using a needle, pin or thin wire. The effectiveness of the method is low: it is used for significant contamination.
If such methods do not bring the expected result, and the injectors still do not provide the required pressure, it is better to remove the jets and buy new ones.
Vesta 1.6 runs cold + check. Help.
Thank you all very much for the advice, I'll dig in. I will answer everyone in one post.
Car 2022 I haven’t gone deep yet, several different candles, coils here and there. Today is the last attempt, another spark plug, and swapped the coils. But during these days I changed it in different ways, in the morning one horseradish first cylinder. I bought the car two weeks ago, of course I didn’t notice such a jamb, as usual it came out later. I don’t want to go to the officials yet, the warranty has expired. Tomorrow morning I'll try, if the same thing happens again, I'll change the wiring harness, it doesn't help, I'll go deeper.
I don’t understand the fuel system so deeply, but I think so, you can swap the injectors and look at the reaction?
You can change the injectors. But I don’t know about Westies, but on Grants/Kalinas the engine is 21126/21127 (almost like the author’s), in order to pull out the fuel rail you have to remove the intake manifold, or do proctology by removing the air intakes, 1 injector and trying to pull out the ramp. Checking the suction is easier and faster.
Which wiring harness are you going to change and why? If there was a tourniquet, it would hurt when driving on the kidneys when you shake it, but when it’s cold. Yes, and by pulling the tourniquet, when the pain should go away, and when it doesn’t, it should start.
While the cold oak gasket was siphoning, the parts warmed up and pressed harder and flattened them. But it will degrade quickly with cold weather. Soon the traffic lights will be freezing and hot.
If you don’t want to do it yourself, go to a diagnostician (if you have an NSC, don’t go to the officials). Otherwise you will now start capitalizing on the engine.
Adjustment
To understand how the nozzles on the Vesta are adjusted, you need to understand the design of the device. The mechanism is housed in a plastic case. The basis is made up of nozzles through which liquid is supplied and sprayed onto the glass under pressure. The desired direction is given using a regular needle.
The process of setting up the Vesta washer nozzles comes down to the following: carefully place the needle inside the hole, adjust the angle of inclination, changing the direction of the jet. At the same time, it is important not to overdo it, without underestimating or significantly increasing the indicator.
Replacing standard washer nozzles
To make a replacement:
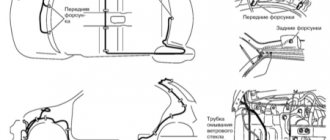
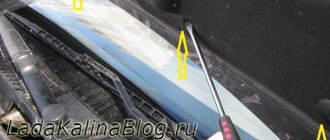
- It is necessary to open the hood and remove the trim from the inside. The casing is held on by clips and removal is not difficult.
- We find the rubber lines on the bottom of the cover (if the hood is open), which lead to the windshield washer.
- Disconnect the hose from the washer.
- We see two protruding tendrils, squeeze them towards each other and push it out. You may have threaded injectors, just unscrew them.
- We insert new jets, connect the tubes with pressure and sew up the outer part of the hood with trim, as it was originally.
Let's warm up
Fan nozzle models are in many ways superior to their jet counterparts, but still have some disadvantages that appear during long-term operation. The most unpleasant problem for most car enthusiasts is the mechanism’s ability to freeze at low temperatures. You can get rid of this by installing heated nozzles. A good set of such sprayers will cost much more than high-quality fan models.
Washer brushes. Photo source: https://www.drive2.ru/l/510665977571049722
You can avoid unnecessary expenses in another simple way. On the inside of the hood, where the injectors are installed, you need to cut out the insulation - a circle with a diameter of 20 cm. This will help warm the jets with the flow from the running engine. The method showed itself perfectly even in severe frosts. The main advantage of this modification is its simplicity and low cost.
Rules for operating the HR16DE engine
Assessing the many advantages of this motor is possible only if a number of rules are followed for safe operation that matches its service life.
Let us briefly list these conditions, set out in detail in the operating instructions for the vehicle equipped with this internal combustion engine:
- Use of gasoline with an octane rating of at least AI-92;
- Use of high-quality motor oil of the classes specified in the operating instructions;
- Taking into account the realities, reducing the mileage between oil changes from 15 thousand km to 10 thousand km.
- Use of consumable spare parts (filters, spark plugs, fuses, lamps, consumable fluids, etc.) only with parameters corresponding to the technical characteristics of the engine;
- Timely completion of technical inspection and preventive maintenance with the participation of qualified specialists.
In its standard version, the HR16DE engine, also known as the H4M, is designed not for sports, but for measured driving in most modes of a modern city. Without making risky or critical changes to its design and software, you can be sure that the resource of this internal combustion engine of 250 thousand km, based on the experience of car enthusiasts, is not minimal.
Methods for cleaning injectors
Injector flushing additives
There are a huge number of different additives for flushing the injector. Such additives are poured into the car tank and mixed with fuel. The mixture of fuel and additives enters the main elements of the fuel system and flushes them, including the injectors. But, as a rule, such washings do not bring much results, since all the dirt that was washed away to the injectors gets and settles on them, which can only aggravate the situation. Using this method is not recommended.
Source
How to clean the injector?
The injector is a device that controls the movement of the fuel mixture. The principle of operation of the injector is based on electronic control of fuel injection carried out by injectors, which are mechanisms with small holes designed to spray fuel into the combustion chamber. Due to low-quality Russian fuel, plaque forms on the valve. In this case, the fuel system becomes dirty, which necessitates its cleaning. Let's consider the process of self-flushing the injector. In the event of a significant increase in fuel consumption and a decrease in the power of the unit, it is necessary to carry out cleaning. For self-cleaning, we will use injector washing liquid. In car services, they usually use special equipment for cleaning, but at home you need to prepare: nipples, clamps, hoses, a compressor, flushing fluid and a plastic bottle.
The costs of these components will be less than the cost of similar services at a service station.
How to assemble an injector flushing device?
Take two nipples and a plastic bottle, a 1 meter hose, a fuel filter and clamps. You need to drill holes at the bottom of the bottle and the cap and place nipples in them. You need to connect a hose to the nipple located at the bottom of the bottle and secure it with a clamp. A fuel filter is attached to the other end of the hose. Pour the flushing fluid into the bottle and connect the nipple on the cap to the compressor. The bottle must be hung and the fuel filter connected to the valve. After assembling the homemade system, you need to increase the pressure in the compressor to 3 Atm. The power unit must operate in idle mode until a liter of this fluid is consumed. Next, the engine must be stopped for a quarter of an hour to allow the deposits that have accumulated inside the fuel system to acidify.
After this, the engine must be started again and it must run until the bottle runs out of liquid. After completing the procedure, you need to remove the homemade injector cleaning system and reconnect the machine’s fuel line. The final step is to vigorously drive the vehicle to remove any remaining contaminants from the system. Thanks to the actions performed, it is possible to remove deposits that form on injectors, exhaust valves and combustion chambers. This cleaning allows the device to more accurately calculate the required mixture rate, which will reduce fuel consumption and increase engine power. In addition, the fuel system components maintain the operating cycle longer. In general, to avoid any problems on your car, you need to periodically flush the injectors. Thanks to flushing, the engine will run quieter and the car will respond more easily to the accelerator pedal.

