I see a lot of records about the repair of generators 2110. This is a real problem, not only does the low voltage prevent the equipment from working fully, but it also kills the battery, especially if it is Calcium and its charge voltage is higher than the standard one in 2110. Noise and “wedge” of generator bearings, and very often rotation noise is due to a broken diode bridge or breakdown of the stator or rotor windings (and this happens, and it has nothing to do with the bearings). Previously it happened often, now less often with capital generators. This is even now lying on the balcony:
I would like to share recommendations for repairs as an auto electrician (which I can voice). I see a lot of mistakes made by citizens here when making repairs. When starting to disassemble, many are faced with the problem of dismembering the front cover-stator-back cover, aluminum-iron-aluminum with corrosion creates a strong “pie”, only soaking in WD 40 and time can help. After disassembly, the first thing you need to do is “ring” all the windings - the stator:
Usually it is rearranged from the horseshoe formation. So don't lose it. When installing a horseshoe, especially a new one, you need to clean the contact area of the main minus, and you can lubricate it with electrical grease. :
Replacing bearings is not a rewarding task. In addition to the fact that the pulley on different generators is screwed on differently (most often it is deformed when removed, and must be replaced with a new one), the individual bearings themselves are almost 98% left-handed, and many are sold pressed into covers (they are different) and the bearings themselves are also different depending on the shaft... in general, it’s still a pain in the ass.
People are also trying to buy a new generator and increase the voltage or power (do not confuse the concepts). Yes, now, according to the new technical regulations, generators are standard 80A or 90A, there are Grands 120A, previously there were 70A. But this doesn't always help. To increase power
10-15% of the generator is often connected to the “middle point” of the stator windings, i.e. our generator has 3 windings, they are connected in the middle by a “star” and is not used for ordinary people:
Another tap is made, and the horseshoe is changed from 6 diodes (3 windings - 6 diodes, standard) to a horseshoe of 8 diodes:
This is how the scheme will turn out.
This gives less voltage drop when all consumers are turned on. To increase the voltage
put an additional diode in the excitation circuit, i.e. "cheat" the generator. The generator windings can withstand an increase in voltage up to 25 V. But we don’t need this. The sold “3-position voltage regulator” is designed in the same way - there is a diode and a switch. This measure allows you to increase the voltage by 10% depending on the selected diode and its reverse current.
How to increase the voltage of a VAZ-2110 generator: increasing power
As you know, additional equipment is often installed on a car, which draws additional voltage from the on-board network. Thus, the voltage indicator on a VAZ-2110 can drop to a critical level of 11 volts. If you also install additional air conditioning or heated seats, this may result in the starter not having enough power to start the engine. How to fix the problem? Make sure that the voltage in the on-board network increases.
Video about increasing the voltage in the on-board network on VAZ cars:
What determines the shelf life of a battery?
Each manufacturer, after manufacturing a battery, sets a warranty period for its operation.
In addition to this parameter, there is an actual period that depends on many factors - timeliness of maintenance, compliance with operating rules, condition of electrical wiring and other points.
Due to the fact that battery maintenance conditions differ, the shelf life of the product also differs.
Car owners who use their car only in the warm season have the longest battery life. It's another matter when you need a car all year round, regardless of the outside temperature.
In such a situation, the battery life is reduced. This is also due to the fact that in the second case the driver can cover more kilometers.
The battery life is also affected by:
- Serviceability and correct operation of the generator and voltage regulator.
- Connecting additional equipment with a large rated current to the vehicle's electrical wiring.
- Operating mode. The batteries that last the least are those in taxis that travel a long distance throughout the year. In addition, such cars operate in frequent engine starting mode, which puts a load on the battery and generator. If the vehicle is actively used, the service life of the power source does not exceed 1.5 years.
Under normal operating conditions, when the car owner regularly checks the battery and carries out maintenance, the battery life is 4-5 years with a total mileage of 60-80 thousand kilometers during this period.
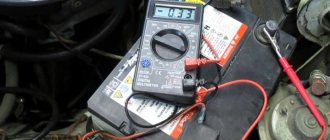
To avoid problems, it is advisable to periodically check the voltage of the generator and battery.
But the mentioned service life is not the highest, because with careful maintenance the battery can last up to eight years.
But you should know that sooner or later the battery will need to be replaced, because from the moment you start using it, the working plates gradually wear out. The more charge and discharge cycles a battery goes through, the faster it breaks down.
Practice shows that the key role is played by the generator, its serviceability and current voltage
That is why this aspect needs to be given key attention
We increase the voltage - all options for solving the problem
So, many motorists may decide that the way out of this situation is to install a high-power generator, but at the same time they will have to replace the battery with a more capacitive one. This is done in order not to “kill” the battery that is installed on the car, since a voltage overload will lead to the destruction of the internal cells. This option is not suitable because it is too expensive.
The second option is to install an additional diode from another diode bridge or marked KD202V. This is much cheaper than changing the generator and battery, but you will have to tinker a little.
To begin with, it is recommended to study automobile electrical circuits and the operation of the generator, as well as the charging circuit.
A few words about its structure
The generator set of this car is a fairly reliable device that can withstand vibration loads and temperature changes in the engine compartment. She is also not afraid of moisture and dirt getting in while driving. Its performance should be stable at any engine speed.
Requirements for the generator:
- The strength of the current generated by the device must be such as to prevent the battery from being discharged, but to be recharged to the required level regardless of the connected consumers;
- Regardless of the engine speed and fluctuations in current consumption, the stability of the on-board voltage must be ensured.
It is an electrical machine that converts rotational motion from the engine crankshaft into constant voltage to recharge the battery. Its body consists of two halves, front and back. The back cover is responsible for attaching a brush assembly with a relay-regulator, a diode bridge, and terminals for connecting consumers of the generated electric current.
Electrical diagrams and indicators
To increase the voltage even more, at least to 14 volts, it is necessary to install a diode in circuit D, the voltage regulator. Any diode with a breakdown voltage of 20V and a current of at least 5A is suitable. The voltage drop is preferably no more than 0.6-0.7V. The 2D219B diode is excellent.
| 2D219A | 15 | 10 | 0.6(10A) | 20 (15V) | KD-11 |
| 2D219B | 20 | 10 | 0.6(10A) | 20 (20V) | KD-11 |
| 2D219V | 15 | 10 | 0.45(10A) | 20 (15V) | KD-11 |
| 2D219G | 20 | 10 | 0.45(10A) | 20 (20V) | KD-11 |
Let's look at the circuit diagrams of diodes:
Visualization challenges
Most people have no problem understanding concepts like pressure, quantity, and flow because they encounter them all the time in their daily lives. For example, it is easy to understand that increasing the flow when watering flowers will increase the amount of water coming out of the watering hose, while increasing the water pressure will cause it to move faster and with more force.
Electrical terms such as "voltage" and "current" are usually difficult to understand because you cannot see or feel the electricity moving through cables and electrical circuits. It is extremely difficult for even a novice electrician to visualize what is happening at the molecular level or even clearly understand what, for example, an electron is. This particle is beyond human sensory capabilities and cannot be seen or touched unless a certain amount of it passes through the human body. Only then will the victim definitely feel them and experience what is commonly called an electric shock.
However, exposed cables and wires appear completely harmless to most people simply because they cannot see the electrons just waiting to take the path of least resistance, which is usually the ground.
Manufacturing and installation of a diode in a VAZ-2114 generator
Now that everything is ready, we install an additional diode, more powerful than the previous one. You will need half a meter of wire 2*0.75mm. We solder the ends to the female and male terminals No. 4. We dress them in cambric, or better yet, in heat shrink. By the way, the old one must be removed from the system. Let's take action:
- Now, solder the following circuit to the diode: mother to the cathode, folder to the anode.
- We insulate the diode. For example, we take a film container.
- We remove the “minus terminal” from the battery.
- We unscrew the “+” wires from the generator, disconnect the “D” wire to the tidy.
- Remove the generator cover.
- Through the slots in the cover, we connect the “mother” to the LV, the “father” to the standard wire.
- We carry out the assembly.
Specifications
Before we begin to describe the process of refining and increasing the power of the VAZ 2109 carburetor engine, it is worth understanding what power units were installed on the vehicle, and also consider the main technical characteristics.
During the production process, the “nine” was equipped with three options for carburetor engines:
21081 (1.1 8V)
| Name | Index |
| Volume | 1.1 liter (1099 cc) |
| Number of cylinders | 4 |
| Number of valves | 8 |
| Fuel | Petrol |
| Injection system | Carburetor |
| Fuel consumption | 6,7 |
| Cylinder diameter | 76 |
| Cylinder operating order | 1-3-4-2 |
2108 (1.3 8V)
| Name | Index |
| Volume | 1.3 liters (1289 cc) |
| Number of cylinders | 4 |
| Number of valves | 8 |
| Fuel | Petrol |
| Injection system | Carburetor |
| Fuel consumption | 7.0 l |
| Cylinder diameter | 76 |
| Cylinder operating order | 1-3-4-2 |
21083 (1.5 8V)
| Name | Index |
| Volume | 1.5 liters (1499 cm3) |
| Number of cylinders | 4 |
| Number of valves | 8 |
| Fuel | Petrol |
| Injection system | Carburetor |
| Fuel consumption | 7.0 l |
| Cylinder diameter | 76 |
| Cylinder operating order | 1-3-4-2 |
Final voltage measurements and results
After the installation was completed and the entire electrical circuit was working, voltage measurements were made at idle speed of the running engine. The results surpassed themselves; the voltage in the entire electrical circuit increased.
Let's consider a table of the results of the measurements obtained:
| Load | Voltage up to | Voltage after |
| without load | 14.2 | 14.45 |
| +dimensions | 13.8 | 14.45 |
| +PTF | 13.7 | 14.4 |
| +neighbor | 13.6 | 14.35 |
| +heater | 13.5 | 14.3 |
| +Fan | 13.4 | 14.2 |
| +far | 13.2 | 14.1 |
| + heating | 13.1 | 14.0 |
| +heater max | 12.9 | 13.95 |
FakeHeader
Comments 5
Great improvement, well done!


