Both lights on the room illuminator do not light up. All other electrical components seem to be working normally. Can you tell me where to start looking for the problem?
There can be several malfunctions: 1. Bulbs have burned out (it’s unlikely that two at once, but it’s possible) 2. Lack of voltage on the wires going to the bulbs (no positive) This happens due to a blown fuse or poor contact But since everything else works, it means it’s not a fuse And because of a break in the wire going to the lamps. 3. Absence of a minus (poor contact (for example due to shaking or rust))
15 years on the forum
Car: VAZ-21113 2000 & Opel Astra H Caravan Cosmo 1.8AT 2009
Added: December 29, 2003 13:21
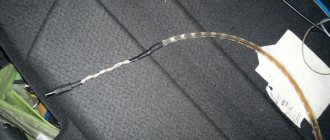
I had a broken wire that goes in the right rubber corrugation between the roof and the rear door. I actually have a barn, but I think the hatch does too. The color seems to be yellow-black, you can see it in the diagram. Perhaps it's the same for you.
13 years on the forum
Car: Mitsubishi L200 New. Quadric Dinli 600. Peugeot 206
Added: December 29, 2003 13:33
And my backlight didn’t work from birth. The old owner didn’t bother with this topic, but I became interested. I checked everything! It turned out there was a connector in the trunk. So I had another connector plugged into this block between “mother” and “father,” but without contacts. just a body! But I couldn’t understand why there was voltage at the connector, the light bulbs were intact, the wires were ringing and the backlight didn’t work!
Well, this is a lyrical digression. To everything said above, I’ll add that you definitely need to check this connector. It is located on the left, below under the casing. The wire is yellow, I think. _________________ Survived by yourself? Survive the other!
Messages 10
1 Topic by drummer04 2015-09-12 14:17:30
- drummer04
- New member
- Inactive
- From: St. Petersburg
- Registration: 2015-01-03
- Messages: 78 Thanks : 5
- Car: VAZ 2110 8 valves (2004)
Topic: Resolved: License plate lights do not light up, fuse is intact
The license plate light bulbs do not light up, I took out the old light bulbs, they were black, I replaced them with new ones, they still do not light up, I checked the fuse, it is working. So I guess there is no mass? Where to look for it?
2 Reply from drummer04 2015-09-12 15:03:06
- drummer04
- New member
- Inactive
- From: St. Petersburg
- Registration: 2015-01-03
- Messages: 78 Thanks : 5
- Car: VAZ 2110 8 valves (2004)
Re: Resolved: License plate lights do not light up, fuse is intact
and looked at fuses f1 and f10
3 Reply from Anton 2015-09-12 15:24:07
- Anton
- Local
- Inactive
- Registration: 2014-02-20
- Messages: 2,207 Thanks : 255
Re: Resolved: License plate lights do not light up, fuse is intact
if you are guilty of mass, try feeding the mass directly
4 Reply from Serg 2015-09-12 20:50:47
- Serg
- Lada2111.rf fan
- Inactive
- Registration: 2013-07-29
- Messages: 830 Thanks : 363
- Car: 2111 dwg 2114 year 2008
Re: Resolved: License plate lights do not light up, fuse is intact
Car control helps a lot, I recommend it
5 Reply from sergo9531 2015-09-12 20:58:15
- sergo9531
- Local
- Inactive
- From: Domodedovo
- Registration: 2014-01-12
- Messages: 578 Thanks : 208
- Auto: 21114
Re: Resolved: License plate lights do not light up, fuse is intact
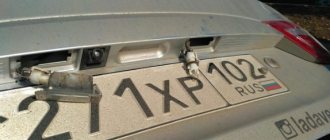
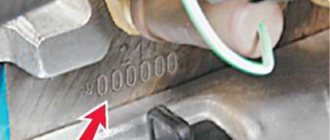
drummer04 , there should be a plug on the right under the trunk trim, once my “dad” flew out there and the number stopped lighting up. Poke it with a tester or control, if there is +12, then the problem is in the trunk (the wire is broken or something else)
Source
The backlight of the VAZ 2112 license plate does not light up
- To the beginning of the forum
- Forum Rules
- Old design
- FAQ
- Search
- Users
Both lights on the room illuminator do not light up. All other electrical components seem to be working normally. Can you tell me where to start looking for the problem?
There can be several malfunctions: 1. Bulbs have burned out (it’s unlikely that two at once, but it’s possible) 2. Lack of voltage on the wires going to the bulbs (no positive) This happens due to a blown fuse or poor contact But since everything else works, it means it’s not a fuse And because of a break in the wire going to the lamps. 3. Absence of a minus (poor contact (for example due to shaking or rust))
And my backlight didn’t work from birth. The old owner didn’t bother with this topic, but I became interested. I checked everything! It turned out there was a connector in the trunk. So I had another connector plugged into this block between “mother” and “father,” but without contacts. just a body! But I couldn’t understand why there was voltage at the connector, the light bulbs were intact, the wires were ringing and the backlight didn’t work!
Well, this is a lyrical digression. To everything said above, I’ll add that you definitely need to check this connector. It is located on the left, below under the casing. The wire is yellow, I think.
Source
Messages 10
1 Topic by drummer04 2015-09-12 14:17:30
- drummer04
- New member
- Inactive
- From: St. Petersburg
- Registration: 2015-01-03
- Messages: 78 Thanks : 5
- Car: VAZ 2110 8 valves (2004)
Topic: Resolved: License plate lights do not light up, fuse is intact
The license plate light bulbs do not light up, I took out the old light bulbs, they were black, I replaced them with new ones, they still do not light up, I checked the fuse, it is working. So I guess there is no mass? Where to look for it?
2 Reply from drummer04 2015-09-12 15:03:06
- drummer04
- New member
- Inactive
- From: St. Petersburg
- Registration: 2015-01-03
- Messages: 78 Thanks : 5
- Car: VAZ 2110 8 valves (2004)
Re: Resolved: License plate lights do not light up, fuse is intact
and looked at fuses f1 and f10
3 Reply from Anton 2015-09-12 15:24:07
- Anton
- Local
- Inactive
- Registration: 2014-02-20
- Messages: 2,207 Thanks : 255
Re: Resolved: License plate lights do not light up, fuse is intact
if you are guilty of mass, try feeding the mass directly
4 Reply from Serg 2015-09-12 20:50:47
- Serg
- Lada2111.rf fan
- Inactive
- Registration: 2013-07-29
- Messages: 830 Thanks : 363
- Car: 2111 dwg 2114 year 2008
Re: Resolved: License plate lights do not light up, fuse is intact
Car control helps a lot, I recommend it
5 Reply from sergo9531 2015-09-12 20:58:15
- sergo9531
- Local
- Inactive
- From: Domodedovo
- Registration: 2014-01-12
- Messages: 578 Thanks : 208
- Auto: 21114
Re: Resolved: License plate lights do not light up, fuse is intact
drummer04 , there should be a plug on the right under the trunk trim, once my “dad” flew out there and the number stopped lighting up. Poke it with a tester or control, if there is +12, then the problem is in the trunk (the wire is broken or something else)
Fuse box diagram
The functional health of electrical equipment directly affects the performance of all, without exception, systems and mechanisms of the VAZ 2110. And diagnosing many faults can begin by checking the integrity of a specific fuse or relay.
On the VAZ 2110, the unit where the named elements are assembled together ensures stable operation of electrical equipment by preventing voltage drops in the network.
The layout diagram of the block includes an area for operating relays and an area for placing fusible links - fuses.
The relay block itself consists of the following positions:
- K 1 – unit for operating vehicle lighting lamps;
- K 2 – device for uninterrupted operation of windshield wipers;
- K 3 – relay device responsible for blinking direction indicators;
- K 4 and K 5 - blocks, which, respectively, are responsible for the low and high beam;
- K 6 and K 8 – additional blocks designed for connection when installing additional equipment;
- K 7 is responsible for heating the rear window.
The area where fuse links are located is marked from 1 to 20, where the protective elements of most circuits in the car are located under the indicated numbers.
For the VAZ 2110, these designations will correspond to the following systems:
- F 1 – side lights, license plate illumination, luggage compartment and glove box, 5A;
- F 2 – low beam on the left side, 7.5 A;
- F 3 – responsible for the operation of the far left headlight, 10 A;
- F 4 – left fog light, 10 A;
- F 5 – ensures the operation of electric windows in cars, 30 A;
- F 6 – for connecting a portable light bulb, 15 A;
- F 7 – fan for blowing the engine, as well as for operating the sound signal, 20 A;
- F 8 – allows you to warm up the rear window, 20 A;
- F 9 – ensures the operation of the recirculation unit, as well as the washing of headlights and windshield; 20 A;
- F 10 – free space;
- F 11 – side lighting on the right side, 5 A;
- F 12 – low beam on the right, 7.5 A;
- F 13, 14 – high beam and fog lamp on the right, respectively, 10 A;
- F 15 – responsible for heating the seats and locking the luggage compartment, 20 A;
- F 16 – responsible for the operation of the emergency system, 10 A;
- F 17 – interior lighting, on-board computer operation, 7.5 A;
- F 18 – operation of the cigarette lighter, glove compartment lighting, 25 A;
- F 19 – combines the circuit for the central locking, brake light, reversing light, generator winding, 10 A;
- F 20 – operation of rear fog lights, 7.5 A.
How to make light at a VAZ
Before we start looking at the various instructions for restoring lighting, one important note. The new light bulb must be removed from the packaging and installed, holding it with your fingers exclusively by the metal part. The glass bulb must not be touched, otherwise the new light will not last long!
However, if it is not possible to grasp the base, if there is no other way to insert the lighting element, then it is better to put rubber gloves on your hands before grasping the glass part.
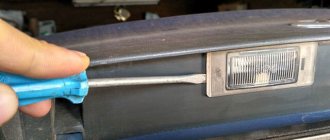
Now let's talk about Ladas. First of all, let's see how to fix the sign lighting on a VAZ 2114. We will only need a flat-head screwdriver. Also read about replacing the windshield washer pump and replacing the rear window of a VAZ 2110.
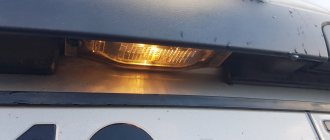
- First of all, turn off the lighting and open the trunk. Using a screwdriver, we pull out the lampshade towards us.
- Disconnect the wiring plug.
- Having pulled out the rubber seal, we replace the lighting element.
- We collect everything on the way back.
As you can see, this is a fairly simple operation. It is much more difficult to do, for example, replacing the backlight of the VAZ 2114 stove controls - there you will have to dismantle the plastic panel.
Next, let's turn to Kalina. To change a burnt-out lamp from Kalina, we will also take a flat-head screwdriver.
- We use a screwdriver to pry the lamp off from one side, and then pry that side out.
- We also snap out the second side.
- Having taken out the lampshade, disconnect the electrical wiring from it.
- We are reinstalling the lighting element.
- We do the assembly in reverse order.
It turns out that this process also does not cause problems. Here, by the way, it would also be much more difficult to replace the extinguished light bulb of Kalina’s instrument lighting. There it is also necessary to first completely dismantle the instrument panel.
Well, let's discuss the procedure on the Priora hatchback. On a sedan, you just need to open the trunk and pull out the dome light. To replace the license plate light on a Priora hatchback, take the same screwdriver.
- By snapping off the pistons, we dismantle the fifth door trim.
- Carefully disconnect the wiring terminal.
- Turning the base 90 degrees, we take out the lighting element.
- After installing the new part, we assemble everything as it was.
Well, obviously, this operation is not much more complicated than the procedures that were given above.
How to make lights on foreign cars
Next we will figure out how the procedure under study is done on popular foreign cars. For example, let’s look at the technology for changing a light bulb in a Hyundai Solaris. For work we will need gloves. Here's what you need to do here.
- Having opened the trunk, we tear off the lid trim in the right place.
- After turning the cartridge clockwise until it stops, remove it.
- We are reinstalling the lighting element.
Although the technology is elementary, to be sure, you can also watch on the Internet any available video on replacing the license plate light bulb on a Hyundai Solaris.
Our next episode is replacing the license plate light bulb on a Nissan Qashqai. This minor repair requires that we have a flat-head screwdriver.
In this case, we do this.
- Using a screwdriver, pry it from the side and remove the light block from the rear door.
- Disconnect the wiring.
- We reinstall the consumable element.
- Let's put everything back together in reverse order.
It should be noted here that replacing light bulbs on a Ford Focus 2 is easy to do using exactly the same instructions.
And here’s how to reinstall the lighting “consumables” for Renault Logan. We only take a screwdriver. What are we doing?
- Use a screwdriver to press the lock on the side, then remove the lighting unit from the rear bumper.
- Having disconnected the plug, turn off the electrical wiring.
- Pressing the clamps, remove the diffuser.
- We are reinstalling the light bulb.
- We carry out the assembly by moving in the opposite direction.
It is clear here that the scenario is much simpler than, say, the procedure for replacing the stove light bulb in the same Renault Logan. In the latter case, you will have to dismantle the facing panel.
But the procedure for replacing the license plate light bulb on a Kia Sid is unlikely to scare any car enthusiasts. On a hatchback, you just need to press the latch on the side with a flat screwdriver, then pull the lamp out.
Main relays and fuses
The main fuses and relays on the VAZ-2110, 21102, 21103, 2112 are located on the left side of the steering wheel, just below. The figure shows the symbols on the fuse mounting block.
Location of relays and fuses in the mounting block
Relay Description:
- K1 – lamp health monitoring relay;
- K2 – windshield wiper relay;
- K3 – relay-interrupter for direction indicators and hazard warning lights;
- K4 – headlight low beam relay;
- K5 – headlight high beam relay;
- K6 – additional relay;
- K7 – relay for turning on the heated rear window;
- K8 – backup relay (not installed on vehicles of the VAZ-2110 family);
F1–F20 – fuses - almost all vehicle circuits are protected by fuses designed for different rated currents. Exceptions are the following circuits: battery charging circuit, generator circuit (except for the field winding), ignition and engine starting. To locate the faulty fuse, use the table of circuits protected by fuses. Before this, it is necessary to find the cause of the blown fuse, eliminate it, and only then install a new fuse.
The table shows the circuits that each fuse protects, but on each model some of them may be missing due to the lack of certain devices (power windows, lock drives, etc.)
Do not replace fuses with jumpers. This can lead to failure of various devices.
Most fuses and auxiliary relays are located in a separate mounting block (Fig. Location of relays and fuses in the mounting block), built into the instrument panel on the left side of the steering column. The conventional numbers of the plugs in the connecting blocks of the mounting block and the colors of the wires connected to them are shown in Fig. The order of conventional numbering of plugs in the connecting blocks of the mounting block and the colors of the wires connected to them. The diagram of the internal connections of the mounting block is shown in Fig. Connection diagram of the mounting block.
Other reasons
Lamps are one of the simple and common reasons for the lack of low beam, but they are far from the only one. I strongly recommend that you also check:
- Headlight fuse - blown or not
- Relay - functioning normally or broken
- Button - works properly, or is stuck
- Wiring - are they oxidized, do they allow current to pass through?
Carefully inspect the entire wire, as well as the terminals for connection to the fuse and relay. If necessary, tighten the nuts and clean the contacts. Also, don’t forget about the button, the wire going to it could have fallen off, or simply come off. In domestic cars, it is the button that needs to be checked first - this is one of the weakest points!
Many car owners are faced with a situation where the low beams are not on. In this case, the distant one turns on normally, and its serviceability is beyond doubt. According to statistics, every third driver is familiar with such a breakdown firsthand. In this case, the first thought that appears in the head is the failure of the optics itself. In reality, the reason may be completely different.
The defect is well known to owners of VAZ cars, who sometimes encounter the problem even after purchasing a new vehicle. In this case, most often the headlight on the right side of the car does not light up. In turn, the head light source on the left suffers from a similar problem to a lesser extent.
Table of circuits protected by fuses on the VAZ 2110
| Fuse number | Current strength, A | Circuits protected by a fuse |
| F1 | 5 | License plate lamps. Instrument lighting lamps. Side light indicator lamp. Trunk light. Left side marker lamps |
| F2 | 7,5 | Left headlight (low beam) |
| F3 | 10 | Left headlight (high beam) |
| F4 | 10 | Right fog lamp |
| F5 | 30 | Door window motors |
| F6 | 15 | portable lamp |
| F7 | 20 | Engine cooling fan electric motor. Sound signal |
| F8 | 20 | Rear window heating element. Relay (contacts) for turning on the heated rear window |
| F9 | 20 | Recirculation valve. Windshield and headlight cleaners and washers. Relay (coil) for turning on the rear window heating |
| F10 | 20 | Spare |
| F11 | 5 | Starboard side marker lamps |
| F12 | 7,5 | Right headlight (low beam) |
| F13 | 10 | Right headlight (high beam). Indicator lamp for turning on the high beam. |
| F14 | 10 | Left fog lamp |
| F15 | 20 | Electrically heated seats. Trunk lock lock |
| F16 | 10 | Relay-breaker for direction indicators and hazard warning lights (in hazard warning mode). Hazard warning lamp |
| F17 | 7,5 | Interior lighting lamp. Individual backlight lamp. Ignition switch illumination lamp. Brake light bulbs. Clock (or trip computer) |
| F18 | 25 | Glove box lighting lamp. Heater controller. Cigarette lighter |
| F19 | 10 | Locking door locks. Relay for monitoring the health of brake light lamps and side lights. Direction indicators with warning lamps. Reversing lamps. Generator excitation winding. On-board control system display unit. Instrument cluster. Clock (or trip computer) |
| F20 | 7,5 | Rear fog lamps |
Debugg
Of the possible malfunctions listed above, the average motorist cannot eliminate all of them. It is unlikely that in the middle of the road you can replace a rotten lampshade with something. Not everyone can repair a damaged wiring harness. Therefore, we will not consider such cases in this article.
Having discovered a malfunction of the backlight, let's start by removing the lampshade. It is fastened either with self-tapping screws, or with plastic latches, or with a “screw + latch” combination. All these methods have both pros and cons - plastic latches are easy to break, but a soured self-tapping screw with rolled-up slots is by no means a gift.
On a number of cars, you can unscrew the lamp socket from the lampshade from the inside of the trunk lid, for example, on a Priora. This is often preferable to trying to press the plastic clips of the backlight from the outside, although it is less convenient.
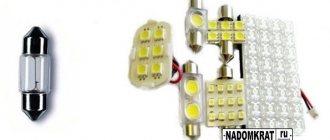
After removing the courtesy light or the backlight bulb socket, first inspect it. A dark bulb or visible damage to the lamp filament is a clear indication for replacement. As a rule, W5W (pictured below) or C5W lamps are used to illuminate the license plate. They do not take up much space in the car, and it is advisable to have them with you just in case.
You can often observe the following situation: a C5W type lamp (cylindrical with end contacts) is installed in the backlight. It may be absolutely fine, but the contacts themselves are oxidized. In this case, it is enough to clean the contacts and bend them slightly to fix the light bulb more securely - sometimes the license plate light does not light up simply because the lamp has jumped out of the spring contacts.
It is worth paying special attention to the rubber seal of the license plate lamp. If it is damaged or loosened during installation, moisture will gradually get inside and lead to corrosion of the contacts inside the lamp. In this case, fixing with self-tapping screws provides better compression of the seal than plastic latches.
Does it make practical sense to replace incandescent lamps with LEDs? In fact, the gain can only be obtained in greater brightness of lighting. As for the resource, most of the LED lamps offered on the market are made of frankly poor quality and without meeting the requirements necessary for the durability of LEDs. In particular, instead of stabilizing the supply current, a simple current-limiting resistor is used, which leads to frequent failure of the diodes due to voltage surges in the on-board network, especially since the characteristics of cheap LEDs can differ markedly even in the same assembly.
Additional fuses and relays (fuel injection system)
Additional fuses and relays are installed behind the side trim of the console, secured with two screws, on the right side of the instrument panel:
Circuits protected by additional fuses (all fuses are 15 A) on the VAZ-2110:
Additional fuses: 1 – ignition module, controller; 2 – canister purge valve, vehicle speed sensor, oxygen (heating) sensor, air flow sensor; 3 – fuel pump relay, fuel pump, injectors.
Additional relays: 4 – electric fan relay; 5 – electric fuel pump relay; 6 – main relay (ignition relay).
There is a fog lamp fuse installed in the niche of the instrument panel behind the mounting block:
The order of conventional numbering of plugs in the connecting blocks of the mounting block and the colors of the wires connected to them:
Connection diagram of the mounting block (the outer number in the designation of the wire tip is the number of the block, and the inner number is the conventional number of the plug):
K1 – lamp health monitoring relay (contact jumpers are shown inside, which are installed instead of the relay); K2 – windshield wiper relay; K3 – relay-interrupter for direction indicators and hazard warning lights; K4 – headlight low beam relay; K5 – headlight high beam relay; K6 – additional relay; K7 – relay for turning on the heated rear window; K8 – backup relay (not installed on vehicles of the VAZ-2110 family).
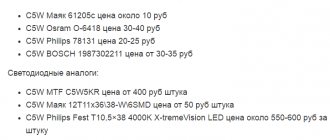
Options and methods for installing LEDs for license plate lighting
Many car owners install additional lighting on their license plates. And for good reason.
Firstly, LED lighting has a long service life and low electrical energy consumption.
And secondly, such lighting is an excellent car tuning, allowing you to make it more aesthetically pleasing for little money.
LED backlight for VAZ 2114 license plate
It is important to know that installing additional lighting is only allowed on the rear license plate!
There are two ways to install LEDs as car license plate illumination.
The first option is to simply replace conventional light bulbs with diode elements.
The second option involves installing additional LED devices.
Of course, you can contact a service station for these services. However, this problem can be solved with your own hands, which will allow you to save a lot of money.
For tuning, diode strip is mainly used.
It can be installed in two ways:
License plate lighting upgrade option
The methods described are the most common in modern practice, but there is another option.
It consists of installing an additional lantern made of organic glass and foil. The wires are attached to the LED strip in the same way as in the first option. Then the tape should be attached to pre-selected plexiglass, 3-4 mm thick. The foil will act as a reflector in this design. The edges should be treated with silicone sealant and the wires should be connected directly or routed to a separate switch.