You probably read it, but you understood it in your own way... “Less losses before the relay” means less losses before the relay, but not before the headlights. I read about your idea to place both relays and fuses under the hood, and take only the control signal from the interior, this was implemented in 05/07 with their mounting block. So, installing a mounting block and under-hood wiring 2107 under the hood may be too radical a measure. I also looked at diagram 07, so there is an “ignition relay”. In our diagram it could be that contact “15” of the ignition switch is the control contact on the relay (86 relay contact), contact “30” of the relay is a branch of the same lock contact, ground (85 relay contact) and “87” relay contact goes to 10th pre, that is, the excitation winding of the generator. Does such a relay make sense?
[quote=»si100884tnk»]Does it make sense to install a separate relay for side lighting or is it enough just for the unit? and gave. light?
When starting the engine, the voltage drops: causes and diagnostics
Voltage drop when starting the engine is a fairly common problem, regardless of the type of power unit, as well as the make, model or class of the car.
The voltage drop often manifests itself in such a way that at the moment the starter begins to rotate, the headlights sharply dim or go out, the dashboard lights lose their brightness, the radio turns off and restarts, etc. A voltage drop can occur both when trying to start a cold internal combustion engine, and when starting an already warmed-up unit. As for the start itself, in some cases the starter actively turns for the first couple of seconds, then a certain “stutter” occurs. At this moment, the voltage drops, while the crankshaft continues to turn, but with great difficulty, but a serviceable engine usually starts.
There can be several reasons for such a malfunction, both obvious and easily removable, and hidden. In this article we will talk about why the voltage drops when starting the engine, as well as how to detect and fix the problem.
How to check the voltage at different points in the car network?
It is best to use the services of a car electrician for this purpose. A specialist, using special instruments, can quickly find out the point where the trouble arose. The voltage at different points of the on-board network may differ, as consumers reduce it. One of the universal measurement methods is to check the voltage with a tester at the battery terminals. There are several recommendations on this matter:
- if the measured voltage is less than 13.5V, we can talk about insufficient network performance; the problem often lies in the generator or connecting parts;
- it is worth measuring the voltage in various modes, such as idle speed, increased speed, ignition state, as well as the inclusion of all present consumers;
- An important point is the quality of the device used, since Chinese compact testers show fairly approximate figures that cannot be taken as a basis for repairs;
- if the measured contacts are oxidized, then the indicators may be different; it is worth cleaning the measurement points a little to obtain normal results in the end;
- If the voltage on the battery is normal, you should go further, measuring the indicators on the headlight bulbs, on the cigarette lighter and other open consumers accessible without disassembly.
However, even if you find the part that caused the problem, it will be extremely difficult to fix the problem without special knowledge and skills. But it can save you time and money at the service station. Very modern cars, when the voltage drops in the network, report an error and strongly recommend that the owner contact service. Some models even stop moving and require immediate intervention from a technician. So even minimal problems in automotive electrical systems should be monitored very carefully.
Voltage drops when low beam is turned on
Unread message [A] » Thu Jun 09, 2011 12:38:30
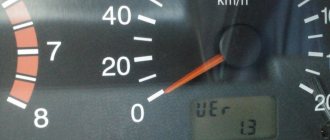
550-600) the voltmeter shows 13.4 V; - turn on the low beam or turn signal - it drops to 12.1 V. The regulator seems to be working, because when I start up, the voltage is 9.5 V, and after driving 200 km it already shows 10.5 V or 11 V. Good or bad - but the battery is charging! While the car is cold, with the low beams on, it stalls. While you're eating, it's like nothing. It’s annoying that the needle on the standard voltmeter lies in the white zone (the one between red and green). And one more thing - I don’t really want to ruin the new battery. I'm not an experienced driver at all. Maybe I’m causing panic in vain and everything is fine with me?
Re: Voltage drop when turning on low beam
Unread message by Gog-ol » Thu Jun 09, 2011 12:43:55
Re: Voltage drop when turning on low beam
Unread message tvman » Thu Jun 09, 2011 12:52:45
550-600) the voltmeter shows 13.4 V; - turn on the low beam or turn signal - it drops to 12.1 V. The regulator seems to be working, because when I start up, the voltage is 9.5 V, and after driving 200 km it already shows 10.5 V or 11 V. Good or bad - but the battery is charging!
Re: Voltage drop when turning on low beam
Unread message tvman » Thu Jun 09, 2011 12:54:48
Re: Voltage drop when turning on low beam
Unread message from Kesfly » Thu Jun 09, 2011 13:09:42
Re: Voltage drop when turning on low beam
Unread message from Kesfly » Thu Jun 09, 2011 13:19:33
Re: Voltage drop when turning on low beam
Unread message [A] » Thu Jun 09, 2011 13:26:33
This is what I'm afraid of.
But isn’t such a jump from 13 V to 12 V anomaly? Is it possible to travel until the fall or is it better not to delay this matter? I don't travel much. We can assume that only on weekends (240 km).
Re: Voltage drop when turning on low beam
Unread message by Randall » Thu Jun 09, 2011 01:33:58 PM
550-600) the voltmeter shows 13.4 V; - turn on the low beam or turn signal - it drops to 12.1 V.
Re: Voltage drop when turning on low beam
550-600) the voltmeter shows 13.4 V; - turn on the low beam or turn signal - it drops to 12.1 V. The regulator seems to be working, because when I start up, the voltage is 9.5 V, and after driving 200 km it already shows 10.5 V or 11 V. Good or bad - but the battery is charging! While the car is cold, with the low beams on, it stalls. While you're eating, it's like nothing. It’s annoying that the needle on the standard voltmeter lies in the white zone (the one between red and green). And one more thing - I don’t really want to ruin the new battery. I'm not an experienced driver at all. Maybe I’m causing panic in vain and everything is fine with me?
How to determine that the network voltage is insufficient?
The easiest way is to get information from the on-board computer. Most often, even inexpensive computers have a function for measuring this parameter. Most devices have a built-in alarm function for problems with the on-board electrical network. For example, if the voltage drops below 12V, a certain signal is triggered and a message is displayed with various content options. The following problems may also occur during the process:
- a decrease in the activity of the instrument panel lighting, as well as various light blocks, including dimensions, brake lights, turn signals, low and high beams, they dim;
- at idle speed the car begins to choke and even stalls, this is due to a lack of voltage, a fatal drop in the entire system occurs, fuel is not supplied;
- the radio tape recorder fails, it can simply turn off and then turn on itself if its connection is configured correctly, this happens when there is a power surge in the lower zones;
- when you turn on the interior blower fan or air conditioner, there is a noticeable effect on the engine, the speed drops, there is an effect on the quality of lighting by the optics;
- Voltage fluctuations are noticeable during warm-up and during normal idling of the engine, this can be seen from the flickering of lights and uneven engine operation, floating speed.
These are the kind of troubles that can make you think about problems in the electrical network. These are only visible problems, but in reality this trouble has a much wider range of influence. The reliability of the fuel pump, the normal functioning of the on-board computer and the absence of errors with it depend on the quality of the voltage in the network. Let's figure out exactly which components can lead to such troubles in your car.
We are looking for problems - the main culprits of the voltage drop
The problem is that your car may have a number of individual problems that lead to a drop in voltage. Therefore, only a specialist can tell the reason one hundred percent after examining the entire electrical circuit and performing high-quality diagnostics. Without inspecting the car, you can only guess the real problems and speak in general terms. However, there is a certain set of blocks and equipment that is responsible for voltage. This is what you should check first:
- battery - if this device is completely discharged, the computer tries to replenish its resources and sends the lion's share of the generated energy to charge and restore it;
- generator - a broken diode bridge can cause a significant drop in network performance, and this will cause problems with the battery in the future;
- voltage regulator (tablet) - installed on the generator and distributes voltage flows from this device; if it breaks, it can put an excessive load on the engine;
- too powerful equipment - for example, you could install a sound amplifier and subwoofer that the on-board electrical system of your car simply did not support;
- a failed consumer of electrical energy - this could be a burnt-out fan, a broken fuel pump, failed headlights, an air conditioner and other components.
Of course, this is not a complete list of possible causes of problems. It is worth remembering the importance of proper operation of the electrical network. In case of malfunctions and constantly low voltage, a variety of troubles are possible, including burning of important parts and simply low reliability of the vehicle as a whole. So it’s not worth driving with such a problem for a long time. You should immediately send the car to a service station or perform independent diagnostics.
Main problems
First, let's list the reasons for the lack of charging of the battery on the VAZ 2106:
- the generator drive belt is worn or weakened;
- faulty wiring or connecting blocks;
- poor contact of the relay-regulator with the body;
- generator malfunction: brush wear;
- the diode bridge is broken;
- stator or rotor windings are damaged;
As we see, there are quite a few reasons. In order to find out why the battery is not charging, you will have to check all of the above probabilities. But first, let’s look at the electrical circuit of the on-board network, which is responsible for recharging the battery.
Low voltage when starting the engine: how to find the cause
Let's start with the fact that the battery is not always the culprit of all troubles, although quite often reduced voltage occurs as a result of problems with the battery. In any case, before you start diagnosing a car regarding electrical parts, you must have a special auto tester (multimeter).
It is important that the device accurately measures certain parameters. As a rule, the functionality of the device should allow you to measure voltage, resistance, and current. At the same time, when troubleshooting voltage-related problems, you also need to take into account the crankshaft speed.
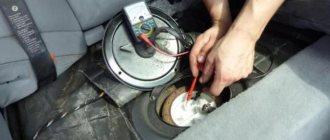
Checking the car battery
So, when diagnosing, you need to start by checking the battery, as well as the car generator. The condition of the battery is assessed by connecting the tester to the battery terminals. Normally, the voltage on the battery, taking into account the absence of load (all consumers are turned off), should be at least 12.6 V. A decrease in this indicator means that there is a partial undercharge or problems have arisen with the battery itself (sulfation of the plates, boiling off of the electrolyte, etc.).
One way or another, a discharged battery will not be able to quickly turn the starter and at the same time maintain the required voltage in the on-board network. As a result, the starter will turn slowly and the engine will be difficult to start. The battery capacity can also be assessed using a load fork. This plug makes it possible to implement resistance when connecting to the battery terminals.
You can also measure the voltage with a voltmeter, turning on the side lights and high beam headlights for the load. Typically, the discharge current under such a load (taking into account the installed halogen incandescent lamps) is about 5–6 A, and the voltage is about 11.5 V. If this is the case, then the battery is working and the problem needs to be looked for further.
Quick starter diagnostics
If we talk about the voltage directly at the moment of starting (when the starter turns), the voltage at the battery terminals should not fall below 9.5 V. In cases where this happens on a working and charged battery, it can be argued that a starter malfunction has occurred. In other words, the starter requires too much electrical energy when operating, which should not normally be the case.
Wiring diagram
The section of the diagram that interests us on the VAZ 2106 is not particularly complicated, and understanding it will not be difficult. To do this, it is enough to have basic knowledge of electrical engineering.
In the figure the numbers indicate:
- 1 – battery;
- 2 – generator;
- 3 – relay regulator;
- 4 – ignition switch;
- 5 – mounting block;
- 6 – battery charging indicator lamp;
- 7 – warning lamp relay.
Let's figure out how this scheme works. After turning on the ignition, +12 V voltage from the battery through fuse F10 of the mounting block is supplied to the relay regulator, which is responsible for stabilizing the output voltage. Next, it goes from the relay to the excitation winding, which is located on the rotor and is powered through the brushes. The second terminal of the winding is connected to the car body, which is the negative wire.
The alternating voltage generated by the generator is rectified by a three-phase diode bridge and supplied to the on-board network. The value of this voltage is in the range of 13.5-14.5 V. If it becomes too high, the relay regulator is activated and reduces the voltage on the field winding. Accordingly, the voltage generated by the generator decreases.
The charging control unit, assembled on a relay and a lamp, is connected to a separate terminal of the generator. As long as there is voltage at this pin, the relay is turned on, and the light bulb connected to the normally closed contacts of this relay is turned off. As soon as the voltage disappears, the generator does not work, the relay releases and the “No battery charging” lamp located on the dashboard lights up.
Important! While the engine is not running, but the ignition is on, the emergency lamp will be on - because the generator is not working. This is fine. If everything is in order, it will go out after the engine starts.
The topic is old, but I’ll try to revive it with my concerns.
I have a 2-liter J20A engine, I bought a new 60Ah battery, drove it for 2 weeks, and decided to monitor the voltage. After a week's parking in the garage, the voltage is 12.7V, the electrolyte density corresponds to 80% of the battery charge. I started it, at warm-up speed it shows 16V, with consumers turned on 15.5V. At the end of the day I measured it again, at idle it shows 15V, with consumers 14.5V. Is this voltage higher than normal? Is the battery overcharging, what will happen to it? They point to the voltage regulator, if it is at fault, approximately how much it might cost to replace it, whether it is hemorrhoidal.
Your voltage is raised by 0.5V. And what changes with temperature is the norm. The generator has a dependence of the output voltage on temperature. Until the gene warms up, the voltage is slightly increased. The Kama Sutra has a graph of this dependence.
was TD01W AT, 1996 was QASHQAI, 2010
Patriot, 2014, green like UAZ
Have you checked/changed the brushes? The point is in them and the cleanliness of the contacts on the anchor on which they slide.
I changed the tablet in the gene in the summer of this year, it cost me work, i.e. soldering and testing costs 1200 rubles.
Overcharging causes the electrolyte to boil off and 16V is already dangerous for the computer. Because of the regulator, the voltage seems to be higher - 17-20V. If it is constantly 1V higher than the norm, maybe the regulator, or maybe there is something wrong with the wiring, connector, grounds and brushes, the regulator thinks that there is low voltage on the battery and adds it.
You can buy a regulator if there is a problem with it, or you can make a remote tablet from Audi-Opels for 300 rubles, the result is about the same, but you need to delve into the circuits and wires, this one has been working for me for two years.
The faulty regulator is unsoldered, and the brushes and the wire from the accessory are brought out. diodes and lamp wire. Further, any options with an external regulator are possible. I tried it with extras. diodes and from the battery, charging from the battery is better - strictly 14.5V after 2000 rpm. But if you regulate from the battery, and not from the add-on. diodes must be connected through the ignition relay, otherwise there will be a small constant discharge through the regulator in parking lots.
Last edited by gorst; 12/27/2009 at 01:57.
By the way, yes, it is very useful before changing the generator, battery, then the engine, then the car itself.
I had this happen (all the automatic transmission floats did not work correctly, the overdrive did not turn on, when the neighbor was turned on, the temperature sharply increased, it went off scale)
It turned out to be a minus on the body soured. Clean the sandpaper, press the bolt harder and everything is gone, or returns to normal.
Guys, I have the same problem as Dronna. The trick in this topic is as explained to me by the electrician D. Vasya, who also has an Escuda! He says that there are different genes on the G16A, on the short ones they are a little less than 5 doors. And what happens is that in some miraculous way, the winding of the genes burned out or simply burned out! Without load, that is, during the day, it charges normally. With the headlights on low beam, it charges for about 10 minutes, then it warms up, charges but less, and when you turn on the wipers, fog lights, heated glass, high beam. It heats up even more and my face gives 5 V charging. And when it’s cold, you can’t hear it, and when you turn off the engine it’s also normal! And when it heats up, it makes sounds “Clack clack clack,” and somewhere after 2000 rpm, and when it gets hot and you turn off the engine, it makes a sound as if a 220 wire is breaking through. I personally heard this with the hood open, so take a look at the winding! You can also hang up the device and turn on the consumers one by one, otherwise one of them may be the cause
Last edited by Fiasko; 12/27/2009 at 06:39.
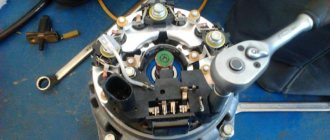
Technical characteristics of the VAZ 2106 generator
Replacing generator brushes on a VAZ 2107 without removing the generator
The “six” comes from the factory with a G-221 generator, which is classified as a synchronous alternating current device. The device is fixed to the engine on the right side, but it can only be adjusted or changed from under the body, since it is difficult to get to the generator from above due to the presence of many hoses, devices and instruments.
The nominal voltage of the G-221 corresponds to the voltage of a typical VAZ battery - 12 volts. The generator rotor rotates to the right (when viewed from the drive side), since this feature is due to the position of the generator relative to the crankshaft.
The maximum current that the VAZ 2106 generator is capable of delivering at a rotor speed of 5000 rpm is 42 amperes. Power indicator - at least 300 watts.
The device weighs 4.3 kilograms and has the following dimensions:
- width - 15 cm;
- height - 15 cm;
- length - 22 cm.
I can’t understand why the voltage sags
#1 [email protected]
- Users
- 76 messages
- Gender: Male
- City: Baranovichi
Hi all. The question is, on the battery without load 14.4V, with the furnace at maximum, rear heating 14.1-14.2. As soon as I turn on the radio, it immediately drops to minus 0.2-0.3V, at a volume of 21 out of 50 it drops to 13.8, without other consumers, the voltage with them is approximately the same. Gena Bosch 90A, new regulator. P.S. There is a subwoofer, BUT it is turned up almost to the minimum and when it is turned off, the radio still eats up to 0.3V, isn’t it crazy? P.S.2 plus radios directly from the battery, control plus with the ignition on, 2.5mm wires on the mag, on the subwoofer the thickness is almost a finger.
- Top
#2 Lobun
- Gender: Male
- City: St. Petersburg.
We identify generator malfunctions
The above-mentioned checks make it possible to quickly identify malfunctions of elements of the on-board power supply network, short circuits and other problems. But if the problem is not in the system itself, diagnostics of the generator will be required. In the vast majority of cases, it reveals one of the following problems:
- generator winding break. It is detected using a voltmeter to measure the voltage at the output. To eliminate a break in the outer winding, it is enough to solder, but an internal break requires a complete replacement of the coil;
- short circuit between turns, detected using an ohmmeter. The generator often cannot charge the battery due to increased resistance of the coils;
- insufficient contact between the rotor rings and brushes. The main causes of this problem are contamination of parts or weakening of springs. In the first case, you can simply clean the surfaces of the brushes or rings, but in the second, you will need to replace worn components;
- a short circuit to the housing, which can be eliminated either by high-quality insulation of the generator or by replacing the failed winding;
- short circuit to the stator housing or positive terminal. “Cureable” by installing new parts;
- stretching of the generator belt, its severe abrasion or wear. In this case, the equipment not only does not work correctly, but also gets very hot, so you can quickly detect the problem;
- short circuit in the phase winding.
Another fairly common problem is the failure of the generator voltage regulator. This device is installed in order to normalize the current generated by the unit and supplied to the on-board network, maintaining it within strictly defined limits. Operating a car with a broken regulator is strictly prohibited, as there is a very high risk of failure of all electrical equipment
Therefore, it is very important to detect the problem in a timely manner and eliminate it.
Charging drops when headlights are turned on.
Well, probably without load/it may sag under load. If everything is reliable, look at the tablet, contacts, brushes.
- Page 1 of 2
- 1
- 2
- Forward
- Log in to reply to this topic
#1 OFFLINE neovaldemar
- City: Ukraine, Kyiv
- Car: W124 1986 (2.6 gas-gasoline)
Good day to all.
124,300 CE 1989 m 103 automatic transmission, high-power battery.
Previously there was a BOSCH 120489328 generator.
A large drawdown appeared (less than 13V) even without load. At one finished service station they condemned the winding (stator) and 2 days ago I changed it to a new model BOSCH 90. 2
I'm picking up the car from the service station after replacing the genes - the guys are talking about a big drawdown when the fogs are turned on.
I have additional fog lights in the bumpers, connected via a relay, with control from the dimensions. All light bulbs (4 fog lights and headlights) Osram Night Breaker Unlimited +110%
In the morning I check the charger.
Without load it’s about 14.3, with load it’s 14.05, although when you turn on the fog lights in the headlights there is a strong drop to 13.3.
Then the problem begins.
When I arrive home in the evening, I notice that the heated seats turn off too early. I'm checking. Drawdown below 13.5 in all modes, incl. and on the generator.
I left the car for about an hour. I'll start it again. The drawdown is present as it was. I forcibly turned off the plus for the fog lights in the bumper. The drawdown has disappeared, more than 14 in the network. I turn on the fogs in the headlights - again below 13.5. I turn off the fogs, only the low beam - there is no drop below 14.1. I turn on the fogs in the headlights - the drawdown is below 13.5.
Then, with the low beam on (without headlight fogs), I turn on the fog lights in the bumper - there is no drop below 14.1.
With fogs in the headlights - below 13.5.
Next, I begin to turn off the right and left fog lights in the headlight one by one. The difference in drawdown decreases significantly, from 13.3 to 13.7, it doesn’t matter whether I turned off the left or right.
In general, I calmed down and concluded that it’s enough not to turn on the fogs in the headlights and everything will be ok.
But this morning the situation repeated itself. In the morning it was even 14.6 online. Under load (without fogs in the headlights) 14.4. With fog lights in the headlights - 13.5.
I turn off the fogs. I'm driving to work in the backlight + fog mode in the bumper. I see the voltage jumping (the radio and the temperature indicator light are flashing). I check - without load 14.4. In all other modes it is below 13.5.
ex TAZ-2103'82, exchange with surcharge for: ex Mercedes-Benz w124 260E'87 gas/petrol and its mother KE-jetronic, sold, ex Mercedes-Benz w124 E200'94 gas/petrol, sold, present. time Mercedes-Benz s124 300СE'89 vin WDB1240501B006981. I'm here: https://www.drive2.ru. rcedes/1034956/
- Top
#2 OFFLINE merchandiser
- City: Russian hinterland
- Car: W124
I described everything in detail - but I didn’t indicate what power the lamps in the headlights and fog lamps were.
Indicate the power of the lamps, then you can calculate whether they will handle 90 amperes or not.
- Top
#3 OFFLINE neovaldemar
- City: Ukraine, Kyiv
- Car: W124 1986 (2.6 gas-gasoline)
I described everything in detail - but I didn’t indicate what power the lamps in the headlights and fog lamps were.
Indicate the power of the lamps, then you can calculate whether they will handle 90 amperes or not.
Electrical faults
Current leakage may be the reason why the speed fluctuates when the headlights are turned on. Here you cannot do without a qualified diagnostic technique. Drawdown may occur during the installation of non-standard alarms, radios, cameras, navigators, and other equipment. In 90% of cases, difficulties are caused precisely by independent modernization of the vehicle. The worst thing in this regard is a deep discharge of the battery. With independent intervention, the battery may one day simply stop working, then the engine will completely refuse to perform tasks. Up to 75 mA, the electrical leakage rate is considered normal. How to identify such a nuisance before visiting a professional service?
- Buy a simple multimeter. It will cost 300 rubles, but the benefits will be tangible.
- The hood opens and the negative battery terminal is unscrewed. It needs to be removed.
- The tester is put into electric current measurement mode. Measurements are carried out using the probes of the device. To do this, they must be placed between the terminal and the battery contact.
It is reasonable to ask the professionals – what to do?
Reduced voltage when driving
- Please log in to reply.
#1 AntonSt
- From: Kyiv
- Car: VAZ 21011
Observed when the headlights, low beam, heater, and wipers are on. The speedometer light flickers. The on-board computer shows a voltage of 11.5 V. If you turn everything off -14.3V.
Generator problem? How to solve it?
Added after 34 seconds Just saw this today.
- Top
- Complaint
#2 A.S. 2101
- From: VAZ 2101
- Car: 1974
- Top
- Complaint
#3 nalsur4
- Top
- Complaint
#4 DVA
- From: Gostomel-Kyiv
- Car: VAZ-21053->Lanos
- Top
- Complaint
#5 AntonSt
- From: Kyiv
- Car: VAZ 21011
- Top
- Complaint
#6 foxxx
- From: Lozovaya
- Car: VAZ 2106
When pressing the gas and squeezing the clutch, the speed of the stove fluctuated.
- Top
- Complaint
#7 djurka
- Top
- Complaint
#8 Professor
So as not to create a new topic. In the evening, with the light on, when you press the stop button, the voltage drops (today I’ll install a voltmeter and measure how much), the backlight of the radio and the backlight of the devices go out. What the hell?
First of all, look at the contacts on the fuses.
- Top
- Complaint
#9 djurka
By the way, yes, after cleaning the contacts
- Top
- Complaint
#10 sobur2000
- Top
- Complaint
#11 nalsur4
- Top
- Complaint
#12 AlexandrB
- Top
- Complaint
#13 AntonSt
- From: Kyiv
- Car: VAZ 21011
Belt tension is normal. European standard fuses. A copper wire is installed to ground. The problem is subtle, but remains. I can hear it from the floating speed of the stove.
I talked about this topic with a colleague. He says you need to install a generator from 2108 with a current of 90A. In a penny - at 45A. But the equipment is standard, designed for this generator.
- Top
- Complaint
#14 Creative4eg
- From: Kyiv
- Car: VAZ 21063i
What does the standard equipment for a 90A generator have to do with it?
Added after 2 minutes I have it set to 80A, everything works. Charging is stable, nothing sags or blinks anywhere. it's the other way around +
Wiring diagram
The section of the diagram that interests us on the VAZ 2106 is not particularly complicated, and understanding it will not be difficult. To do this, it is enough to have basic knowledge of electrical engineering.
Electrical circuit for recharging the battery on a VAZ 2106
In the figure the numbers indicate:
- 1 – battery;
- 2 – generator;
- 3 – relay regulator;
- 4 – ignition switch;
- 5 – mounting block;
- 6 – battery charging indicator lamp;
- 7 – warning lamp relay.
Let's figure out how this scheme works. After turning on the ignition, +12 V voltage from the battery through fuse F10 of the mounting block is supplied to the relay regulator, which is responsible for stabilizing the output voltage. Next, it goes from the relay to the excitation winding, which is located on the rotor and is powered through the brushes. The second terminal of the winding is connected to the car body, which is the negative wire.
The alternating voltage generated by the generator is rectified by a three-phase diode bridge and supplied to the on-board network. The value of this voltage is in the range of 13.5-14.5 V. If it becomes too high, the relay regulator is activated and reduces the voltage on the field winding. Accordingly, the voltage generated by the generator decreases.
The charging control unit, assembled on a relay and a lamp, is connected to a separate terminal of the generator. As long as there is voltage at this pin, the relay is turned on, and the light bulb connected to the normally closed contacts of this relay is turned off. As soon as the voltage disappears, the generator does not work, the relay releases and the “No battery charging” lamp located on the dashboard lights up.
Emergency lamp “No battery charging”
Important! While the engine is not running, but the ignition is on, the emergency lamp will be on - because the generator is not working. This is fine. If everything is in order, it will go out after the engine starts.
Low voltage when starting the engine: how to find the cause
Let's start with the fact that the battery is not always the culprit of all troubles, although quite often reduced voltage occurs as a result of problems with the battery. In any case, before you start diagnosing a car regarding electrical parts, you must have a special auto tester (multimeter).
It is important that the device accurately measures certain parameters. As a rule, the functionality of the device should allow you to measure voltage, resistance, and current. At the same time, when troubleshooting voltage-related problems, you also need to take into account the crankshaft speed.
Checking the car battery
So, when diagnosing, you need to start by checking the battery, as well as the car generator. The condition of the battery is assessed by connecting the tester to the battery terminals. Normally, the voltage on the battery, taking into account the absence of load (all consumers are turned off), should be at least 12.6 V. A decrease in this indicator means that there is a partial undercharge or problems have arisen with the battery itself (sulfation of the plates, boiling off of the electrolyte, etc.).
You can also measure the voltage with a voltmeter, turning on the side lights and high beam headlights for the load. Typically, the discharge current under such a load (taking into account the installed halogen incandescent lamps) is about 5–6 A, and the voltage is about 11.5 V. If this is the case, then the battery is working and the problem needs to be looked for further.
Quick starter diagnostics
If we talk about the voltage directly at the moment of starting (when the starter turns), the voltage at the battery terminals should not fall below 9.5 V. In cases where this happens on a working and charged battery, it can be argued that a starter malfunction has occurred. In other words, the starter requires too much electrical energy when operating, which should not normally be the case.
Let us add that to measure the current you need an ammeter, which is connected to the gap. At the same time, it is highly not recommended to break the circuit in a car; also, not all ammeters are able to work correctly and record high readings that occur when the internal combustion engine is started.
For this reason, it is better to have a special motor tester for such tasks. The main advantage of the device is that the measurement accuracy is quite high, and there is no need to connect the tester to the break, since the device has separate sensors. These sensors are overhead and work even through wire insulation. These elements are capable of effectively recording changes in magnetic field strength when a current of one or another magnitude passes through the wires in the circuit.
Assessing the performance of a car generator
In cases where the battery has been previously checked and charged from the charger, and everything is in order with the starter, but the problem continues to appear, the generator needs diagnostics. The fact is that the generator recharges the battery after the engine starts. If the necessary recharging does not occur, then the battery quickly runs out, rapidly losing charge after just a couple of starts.
Then you can raise the engine speed, after which the charging voltage is also measured. For example, when the engine speed increases to 2 thousand rpm. The normal charge voltage ranges from almost 14 to 14.5 V. Next, the operation of the generator should be assessed under load. To do this, you will need to turn on the headlights again.
The voltage is normal after turning on the lights and dimensions should not be lower than 13.8. If the indicator drops to 13 or lower, then you need to start checking with the generator drive belt. If the alternator belt is loose or slipping, then the cause is obvious. If the belt is well tensioned, problems have arisen in the generator itself or its relay regulator.
As a rule, the relay regulator is one of the most common problematic elements on different cars. You can check the relay regulator in the following way:
- it is necessary to measure the voltage on a running engine;
- after the indicator reaches 14.5 V, the charge should stop;
- if the voltage continues to increase, the relay regulator requires replacement (adjustment is allowed on some cars);
Let us also add that the charging current after the engine has been started ranges from 6 to 10A. Subsequently, when the internal combustion engine is running, the charge normally drops to 0 (provided that additional electricity consumers are turned off).
We diagnose and fix problems
Well, now it’s time to find out why charging disappeared and try to eliminate the reason that caused this problem. But first you need to make sure that there really is no charge. After all, an emergency lamp is not an indicator. Its relay also sometimes breaks. Yes, and the battery may be “depleted”, and charging has nothing to do with it.
To check, we need a voltmeter or tester capable of measuring a DC voltage of at least 20 V. We measure the voltage on the battery with the ignition off. Now we start the engine and set the speed to 2,000. The voltage from what was just measured should rise to 13.5-14.5 V. If its value has not changed, then we have problems.
Fuse
The simplest operation, let's start with it. Remove the cover from the mounting block, which is located under the dashboard to the left of the driver.
We are interested in fuse F10 - it is the top one on the right (the location of the fuses is marked on the covers of the mounting block). We check visually, but better with a tester. If it is faulty, we change it and check the result. Whole? Go ahead.
Alternator drive belt
There are two options here: weak tension and wear. How to check the quality of belt tension? In a good way, you need a dynamometer here, but in a pinch you can get by with a large flat-head screwdriver. We press the belt between the crankshaft and pump pulleys with a force of approximately 10 kg. Its deflection should be 12-17 mm. We do the same in the area between the pump and generator pulleys. In this case, the deflection will be 10-15 mm.
If the belt bends more, it means that it is not tensioned enough. To tighten it, you need to loosen the fixing nut on the generator adjusting bracket.
We tighten the belt, moving the generator using a pry bar, and again tighten the nut properly. Checking the tension. If it is insufficient or excessive, release the nut and repeat the operation.
Important! Excessive belt tension is just as harmful as insufficient belt tension. With strong tension, the bearings of the generator and pump wear out. Therefore, when tightening the belt, you need to know when to stop.
If the inner surface of the alternator pulley is polished to a mirror finish, and the belt itself is deeply recessed into the pulley, then the belt may be very worn and requires replacement.
Wiring to the excitation winding and relay regulator
We fix one probe of the voltmeter (tester) on an area of the body that is free from paint in order to obtain reliable contact with ground. Turn on the ignition and touch contact 67 of the generator with the second probe (see diagram above). There is a gray wire going to it. This pin should have +12V (battery voltage). If there is no voltage, we take a measurement at pin 67 of the relay regulator. The relay itself is located in the engine compartment on the left front wheel arch.
If there is +12 V, then carefully inspect the wire leading from the relay regulator (pin 67) to the generator. We pay special attention to the connecting block - its contacts must be clean, without blackening, signs of burning or dirt.
Brushes
We check the brushes visually. To do this, remove them from their seats and carefully inspect the working part (end). It should be smooth, polished, without signs of burning or chipping. The length of the brushes should not be less than 12 mm.
When checking the wear of the generator brushes, do not forget that one of them must have good contact with the generator body. The output of this brush is pressed against the generator with a screw, which simultaneously secures the brush block. Therefore, after installing the block in place, we check the presence of such a contact using an ohmmeter.
Field winding
Healthy! All these operations, except for measuring the voltage on the battery, can be carried out not with a multimeter, but with a test lamp - a side light bulb with two pieces of wire. It's simpler and more visual.
Diode bridge
Since the generator is three-phase, the rectifier bridge consists of six diodes, which are located in the generator itself on a horseshoe-shaped radiator. It is also a diode current collector. To check the semiconductors, the generator will have to be removed and partially disassembled.
Disassembly involves removing the back cover covering the diode bridge. We remove the cover and disconnect all the wires leading to the windings from the diodes - they are attached to the petals under the nut.
Here we again need a multimeter, but turned on in diode testing mode (not measuring resistance!). We ring each diode first in the forward direction, then in the reverse direction. In the first case, the multimeter will show a resistance of several hundred Ohms, in the second - infinity (very high resistance, the multimeter does not respond to it).
If the diode rings in both directions, then it is “broken.” If it doesn’t ring at all, it’s broken. In both cases, the semiconductor is faulty, but it is tightly pressed into the horseshoe radiator, so the entire rectifier unit will have to be replaced.
Generator power windings
If all of the above actions do not lead to success, then only the generator windings remain. There is either a break or an interturn short circuit. And if a break can still be detected with an ohmmeter by disconnecting the windings from the bridge, then an interturn short circuit cannot be determined without special equipment.
But in any case, in the event of such a malfunction, the generator will produce at least something. Less – yes, but not zero. Not all three windings broke at the same time! Well, if there are problems with the windings, then only replacing the generator will help.
So we have figured out the possible reasons for the lack of charging of the battery on a VAZ 2106. Let's hope that the knowledge gained will help you understand this not entirely simple, but completely solvable problem and make the necessary repairs yourself.
Why does the battery overcharge and what are the consequences?
What to do if the battery charging lamp on a VAZ 2114 does not light up
VAZ 2110 injector battery not charging: causes and solutions
Why does my car battery drain quickly?
The main malfunctions of car batteries - how to find out if the battery is faulty
Domestic “sixes” in practice are cars that have proven themselves to be quite reliable in terms of electrics. However, if problems arise in the electrical part, they must be resolved as quickly as possible. In this article we will tell you what the charging circuit of a VAZ 2106 car is, what malfunctions may occur in its operation and how to eliminate them.
The signal lamp is blinking
Blinking of the battery indicator, as a rule, indicates problems in the brush assembly, as well as the occurrence of a short circuit in the “W” and “-” terminals of the voltage regulator. The brushes, in turn, can “freeze”, not reaching the rotor slip rings at low and medium speeds. You have already read how to fix them in our instructions. However, the reason why charging on the Niva 2121, 2131, 21214 and 4×4 Urban disappeared is not always the above-mentioned components under the hood. In particular, the culprit of weak charging or its complete absence is an unmaintained battery with an insufficient volume of electrolyte or closed banks, loose and oxidized terminals, broken and melted wires. Additional difficulties arise when dirt, dust, traces of fuel and lubricants, etc. accumulate on suspended equipment.
We diagnose and fix problems
Well, now it’s time to find out why charging disappeared and try to eliminate the reason that caused this problem. But first you need to make sure that there really is no charge. After all, an emergency lamp is not an indicator. Its relay also sometimes breaks. Yes, and the battery may be “depleted”, and charging has nothing to do with it.
To check, we need a voltmeter or tester capable of measuring a DC voltage of at least 20 V. We measure the voltage on the battery with the ignition off. Now we start the engine and set the speed to 2,000. The voltage from what was just measured should rise to 13.5-14.5 V. If its value has not changed, then we have problems.
Specialist in repair and maintenance of electrical equipment and industrial electronics.
Important! If the voltage after starting the engine rises above 14.5 V, then this clearly indicates a breakdown of the relay regulator. Of course, it is impossible to operate the car in this condition - the battery will simply boil away, and the on-board systems may fail. The relay needs to be changed urgently.
Fuse
The simplest operation, let's start with it. Remove the cover from the mounting block, which is located under the dashboard to the left of the driver.
We are interested in fuse F10 - it is the top one on the right (the location of the fuses is marked on the covers of the mounting block). We check visually, but better with a tester. If it is faulty, we change it and check the result. Whole? Go ahead.
Alternator drive belt
There are two options here: weak tension and wear. How to check the quality of belt tension? In a good way, you need a dynamometer here, but in a pinch you can get by with a large flat-head screwdriver. We press the belt between the crankshaft and pump pulleys with a force of approximately 10 kg. Its deflection should be 12-17 mm. We do the same in the area between the pump and generator pulleys. In this case, the deflection will be 10-15 mm.
Checking the tension of the generator drive belt
If the belt bends more, it means that it is not tensioned enough. To tighten it, you need to loosen the fixing nut on the generator adjusting bracket.
This nut secures the generator to the adjusting bracket.
We tighten the belt, moving the generator using a pry bar, and again tighten the nut properly. Checking the tension. If it is insufficient or excessive, release the nut and repeat the operation.
Important! Excessive belt tension is just as harmful as insufficient belt tension. With strong tension, the bearings of the generator and pump wear out. Therefore, when tightening the belt, you need to know when to stop.
If the inner surface of the alternator pulley is polished to a mirror finish, and the belt itself is deeply recessed into the pulley, then the belt may be very worn and requires replacement.
Wiring to the excitation winding and relay regulator
We fix one probe of the voltmeter (tester) on an area of the body that is free from paint in order to obtain reliable contact with ground. Turn on the ignition and touch contact 67 of the generator with the second probe (see diagram above). There is a gray wire going to it. This pin should have +12V (battery voltage). If there is no voltage, we take a measurement at pin 67 of the relay regulator. The relay itself is located in the engine compartment on the left front wheel arch.
If there is +12 V, then carefully inspect the wire leading from the relay regulator (pin 67) to the generator. We pay special attention to the connecting block - its contacts must be clean, without blackening, signs of burning or dirt.
If there is no voltage, we take a measurement at pin 15 of the relay. If +12 V is present, the relay is faulty. If not, check for the presence of +12 V on fuse F10. Voltage must be present at both terminals of the fuse. If it is not there, then the reason is either in the ignition switch or in the wiring from the mounting block to this very lock. We find it, we eliminate it.
Important! Additionally, you need to make sure that there is good contact between the relay-regulator and the body. To do this, touch the metal part of the relay body with one probe of the device, and the positive terminal of the battery with the second. The voltmeter should show +12 V.
Brushes
We check the brushes visually. To do this, remove them from their seats and carefully inspect the working part (end). It should be smooth, polished, without signs of burning or chipping. The length of the brushes should not be less than 12 mm.
We remove the brushes and check visually
When checking the wear of the generator brushes, do not forget that one of them must have good contact with the generator body. The output of this brush is pressed against the generator with a screw, which simultaneously secures the brush block. Therefore, after installing the block in place, we check the presence of such a contact using an ohmmeter.
This brush lead must have good contact with the generator housing
Field winding
Disconnect the wire from terminal 67 of the generator. We touch the positive terminal of the battery with one multimeter probe, and contact 67 of the generator with the second. The device should show 12 V. If there is no voltage, then either the rotor winding is broken, or we have not checked the brushes properly.
In the first case, the generator will have to be replaced, in the second, the brushes will have to be checked again, and if possible, replaced. There is another reason for this problem - the wear and tear of the rotor slip rings to which the brushes adhere. To check them, you will have to disassemble the generator.
Healthy! All these operations, except for measuring the voltage on the battery, can be carried out not with a multimeter, but with a test lamp - a side light bulb with two pieces of wire. It's simpler and more visual.
Diode bridge
Since the generator is three-phase, the rectifier bridge consists of six diodes, which are located in the generator itself on a horseshoe-shaped radiator. It is also a diode current collector. To check the semiconductors, the generator will have to be removed and partially disassembled.
Disassembly involves removing the back cover covering the diode bridge. We remove the cover and disconnect all the wires leading to the windings from the diodes - they are attached to the petals under the nut.
Here we again need a multimeter, but turned on in diode testing mode (not measuring resistance!). We ring each diode first in the forward direction, then in the reverse direction. In the first case, the multimeter will show a resistance of several hundred Ohms, in the second - infinity (very high resistance, the multimeter does not respond to it).
If the diode rings in both directions, then it is “broken.” If it doesn’t ring at all, it’s broken. In both cases, the semiconductor is faulty, but it is tightly pressed into the horseshoe radiator, so the entire rectifier unit will have to be replaced.
Specialist in repair and maintenance of electrical equipment and industrial electronics.
Important! When performing testing, you need to keep in mind that for one half of the diodes the anode is the body, and the cathode is made as a separate terminal, for the other half it is the other way around. Although outwardly all semiconductors look the same.
Reason #9. Insufficient cross-section of wires in the battery charging circuit
Occurs after serious and inept repair of car wiring. Insufficient cross-section of wires in the generator-battery circuit is a guarantee of low voltage on the on-board network. In addition, even “native” power wires can have a small cross-section. Over time, the veins gradually break at the bends and at the attachment points, as a result of which the resistance of the chain section increases. Repairing both the first and the second is elementary.
vote
Article rating
Short circuit to the rotor housing
In the event of this malfunction, the entire field winding will be closed and the generator will not be able to operate. Often, short circuits to the frame occur in places where the ends of the winding are connected to the slip rings on the rotor. You can check this using a 5 V lamp. To check, the wire should be connected to one of the slip rings, and the second to the rotor core or its shaft. In the event of a short circuit, the lamp will light up. This generator is faulty. You can insulate the short circuit or replace the winding completely.
Advertisements on NN.RU - Auto
The broken-type towing platform produced in our company has a highly reliable design, which is confirmed by many years of use.
A specialized company for converting trucks into tow trucks invites you to install a tow truck platform on.
Wide selection of hydraulic pumps and hydraulic motors of all series. Axial piston hydraulic motor. Splined shaft, reverse rotation. Analogs - (many. Price: 1,000 rub.
Lengthen Gas 331043, 331063 Valdai-farmer for installation of a body 5.1/6.5 m. The chassis is lengthened by increasing the wheel size.
Adblock detector