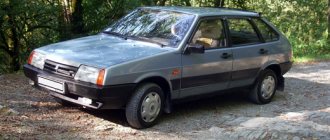
This article is intended for owners of a VAZ 2110 car who do not know how to deal with rattling of the glove compartment, BSK, buttons, etc.
In order to make the interior quieter, you will need an elastic band from an old wiper. Having thoroughly cleaned it of dirt with a dry cloth, we cut the rubber into strips, the width of which is selected depending on the installation of the rubber element on the VAZ 2110 panel.
The entire operation to eliminate rattling of the glove compartment and other panel parts is shown in the photo below in the sequence in which it is best performed:
It is best to glue the elastic on all panel elements using Moment glue. It is convenient to insert the elastic band inside using a flat-head screwdriver.
This method is extremely effective, helps to significantly eliminate rattling of panel and glove compartment parts, and most importantly, it is economical (you will only have to spend money on Moment glue). All additional equipment takes about 10-15 minutes, but you get quite acceptable comfort.
To completely eliminate all squeaks and rattles of the dashboard, you need to use an anti-creak, but to work with it you will have to remove all the panels.
We are all human, and we are all, as a rule, irritated by the same things - extraneous noise, unpleasant creaking and grinding, as well as a hum that “puts pressure on the brain” and makes driving uncomfortable. A creaking sound in the interior of a car is unpleasant and very annoying even for the most reserved motorists, since it is not only a source of irritation, but also an indicator of the car’s serviceability.
Someone will disagree or object, saying that the main thing is the serviceability of the chassis and engine. Of course, this is so, but you must admit that if the interior is full of knocking and grinding, plus half of the interior is on tape or screws, then it’s simply hard to call such a car serviceable. In short, as one of my friends said: “The creaking and knocking doesn’t bother me, but it’s uncomfortable in front of people, so I’ll have to fix it. ".
Unfortunately, the creaking of the dashboard or the entire interior is a “disease” not only of representatives of the domestic automobile industry, although, of course, “ours” creak more often and much earlier than foreign cars. Today we’ll talk about how to eliminate a squeaking dashboard, or rather about methods of elimination.
Installing a dashboard panel from a foreign car on a VAZ 2110
| The interior of the car gets boring over time and you want to update it somehow. More often, a feeling of satisfaction comes after minor changes to the interior, for example, painting plastic, replacing the steering wheel or radio. If you are not satisfied with this tuning, try replacing the VAZ dashboard with a panel from a foreign car. |
There are many topics on the Internet about installing dashboards from foreign cars on VAZ 2101-07, 2109-99 and even Moskvich 2141. As a rule, the panels are borrowed from old BMW models (E36) or Opel Vectra, and they fit Russian cars with virtually no modifications.
Installing a dashboard on a VAZ 2110 from a foreign car will not be easy; you will have to redo it, adjust it, trim it, so many say that it is easier to buy a new car. “The eyes are afraid, but the hands are doing”, here is one good example of such an installation, when a panel from a Volkswagen Passat (B5), which was produced from 1996 to 2005, was installed on the “ten”. The panel was received without covers, a glove compartment, plastic sides, a light control module and other things that had to be purchased later.
It’s worth noting right away that the process of replacing the dashboard itself will take a lot of time.
If you can remove the original 'tens' panel in a working day (instructions), then installing a panel from a foreign car will take several times more time and effort, and this is primarily due to adjustment, local modifications, etc. So, the Volkswagen torpedo underwent a little trimming and adjustment, after which it was in the right place. The next stage is finishing the stove. Here it was decided to use the Finnish dignity. a unit that served as air ducts to the left and right parts of the dashboard.
| Tires Store offers from 239 UAH Save your time and money. Come in!vcene.ua |
The arrangement of the seats in the Passat is somewhat different, so the steering shaft of the VAZ 2110 was not in the center, relative to the instrument cluster. To center the steering wheel, a 3mm plate, welding and a drilling machine were used. After the steering shaft was positioned exactly in the center, it became possible to install the ignition switch and steering column housing.
Now the central control panel. The holes for the buttons, radio and heater control unit do not fit, so they had to be redone. After cutting out the required holes, the panel was covered with leather. Then the buttons, radio, BSK, SAUO and clock were installed in place. Subsequently, the old heater unit was replaced with a Gamma GF412.
Now that the panel is assembled, we move on to the tunnel, which protruded strongly to the side. The easiest way here was to cut it in half and then build it up in the desired direction. Both parts were soldered together with a soldering iron, then the plastic was smoothed with putty, and finally covered with leather.
The new panel conflicts with the door trim of the VAZ 2110. To fix this, it was necessary to give it a new shape using polyurethane foam. Then we attach the frame along the outer surface using finishing putty. Afterwards, we remove the remaining foam from the inside, make a bandage using gauze, another layer of finishing or universal putty, it doesn’t matter. At the end, we apply putty with fiberglass, clean and sand it. Now everything is ready to be covered with some material (leather, velor, carpet, etc.).
Light control is carried out using the native Passat module. Having electrical circuit diagrams at hand, connecting it was not a problem.
Just a few small things left to do, straighten the airbag cover, make a new gearbox cover, etc. As a result, we get a VAZ 2110 panel from a foreign car:
By the way, if you want to replace the 'tens' panel, then it will be easier to install a dashboard from Priora. Do you know examples of installations of panels from a foreign car on a VAZ 2110?
Headlining
To check, you can insert a plastic card into the slot of the panel that is under suspicion, and then take a ride and listen to see if the sound disappears.
To check, you can insert a plastic card into the slot of the panel that is under suspicion, and then take a ride and listen to see if the sound disappears.
It is better to carry out a more painstaking search with an assistant, who, while moving, begins to press different panels of the car with his hands, depriving them of mobility or at least changing the frequency of oscillations. Most often, in this way it is possible to localize vibrations at least to the accuracy of the upholstery part. Next, you can simply try to “polish” the part.
How to get rid of plastic squeaking in the interior of a VAZ 2110, 2111, 2112
STYLE-AUTO Spare parts for foreign and domestic cars in Pervouralsk
Among the many disadvantages of budget cars is the low quality of materials (upholstery, plastic, rubber products, etc.). The unpleasant creaking of plastic, which is found almost everywhere (panel, door cards, etc.), while driving due to vibrations and friction, produces an unpleasant irritating creaking noise, which constantly reminds you that when buying a car you decided to save money...
Car owners come up with everything they can to eliminate the squeaking of plastic panels, some “chemically” do something with their own hands, others put their car in the hands of professionals, others “don’t worry” and just turn up the music louder so as not to hear how the plastic is held together. Today we will talk about whether it is possible to remove the creaking of plastic from inside a car and how to do it correctly and inexpensively.
Almost all automakers use plastic, but it’s different for each one. In expensive cars, plastic can cover up to 80% of the interior surface, and you won’t even hear a hint of a squeak or anything like that. The secret is that this plastic was created taking this feature into account; before going into production, it underwent tests that made it possible to identify the component that contributes to squeaking and exclude it from the composition. Also, for “anti-squeaking” purposes, manufacturers make the surface of plastic parts rough or rubberized, this gives it a more expensive look and makes it pleasant to the touch. There are a lot of options for how to remove the squeaking of plastic in a car, for example: you can lubricate the contact points of the rubbing parts with a special aerosol, you can stick a special tape that has a rough surface, you can cover the part that is prone to squeaking with leather or other material that can eliminate the squeaking. Below we will discuss each of these methods in more detail.
1. Self-adhesives allow you to eliminate the creaking of plastic panels of the car interior, however, the effect is temporary and after a while the problem returns again. In addition, after peeling off the self-adhesive, a sticky trace of glue remains, which is difficult to remove; as a result, dust, dirt and other “inhabitants” of the interior collect on the sticky surface.
2. The second way to remove the creaking of plastic is the so-called “Velcro”, which consists of loops and hooks. This method has proven itself and is widely used by many car enthusiasts; moreover, it is lightweight and reliable. Although this method cannot be called a panacea for squeaking. The fact is that there is a limit on the weight that these “Velcro” can hold. In addition, over time, the loops and hooks become covered with dust and tenacity decreases to almost zero.
3. The most innovative invention today is considered to be the development of an American company, which, in the fight against squeaking plastic, came up with the so-called “fungi” 3M. By fastening together, they do not allow the rubbing panels to rattle and creak. It should be noted that the “fungi” are reusable and can be reused after removing a panel or other part of the interior.
How to eliminate squeaking in the car interior?
To eliminate the creaking of the door trim, you need to treat all points of contact with an “anti-creaking” agent (for example, “Madeline”). This work is very extensive, because creaking occurs not only due to the friction of the upholstery on the metal door, but also due to the friction of the fastening clips on the metal and door cards.
How to eliminate upholstery squeaking on a metal car door?
There are many options, for example, you can stick a thin layer of anti-creaking agent on the edges of the door trim. In the upper part, the strip may be a little thicker so that the velvets do not creak.
It is better to glue the edges perfectly along the edges so that the anti-creak is not visible. Looseness of the clips on the door trim can be removed by gluing an anti-creaking agent to the area for fastening the clip. If creaking in the car interior occurs as a result of friction between the piston and the seat, then you can install rubber washers under them.
Door trim and screws
If the above options do not suit you for one reason or another, you can go another way, which, of course, is not very practical, but the creaking will definitely disappear.
This is done in the following way: 1. Select the places that are least noticeable and into which you can screw the self-tapping screw. Identify the sources of the squeak and try to screw the screws into the least noticeable places. 2. Self-tapping screws should be for metal with a small pitch. 3. After screwing, the screws can be sealed using decorative plugs. 4. The length of the screws should be different, depending on the thickness of the place into which they are screwed. The screws at the bottom should be the shortest, at the top of the upholstery – longer. The self-tapping screw should not be screwed into the metal by more than 5 mm.
https://www.drive2.ru/l/9464003/
next article:
How to fix
You can remove the squeaking of the instrument panel in various ways. In some cases they will help, but in others you will have to try everything. Let's consider the main known methods:
- Use of special aerosols. On sale you can find silicone-based lubricants that are used to lubricate joints and joints. For small squeaks, it will be enough to apply an aerosol without removing the entire dashboard. Such products are easy to apply, are moderately expensive and can maintain their characteristics over a very wide temperature range.
- Use WD fluid. This well-known product helps fight rust and deposits. The fact is that it contains mineral oil - this is what allows you to remove the squeak that occurs when plastic components rub against each other.
- Seals help eliminate unnecessary sounds at the junction of the windshield and dashboard. In the simplest case, you can resort to ordinary household foam rubber. Pieces or strips of suitable length and thickness are cut out of it. You will have to dismantle the dashboard, glue the likely problem areas on all sides and return it to its original place. Silicone grease helps to ensure a strong connection.
- Professional noise and vibration insulation. Such work is usually entrusted to qualified specialists. In this way, it is possible to achieve a high-quality fit of the dashboard to the rest of the body, and extraneous noise often disappears subsequently.
- Madeleine. This is a special noise-reducing material that adheres well to any surface. On the one hand, it is a fabric base, and on the other, an adhesive agent. First, the area to be treated is degreased. A strip of the required length and width is cut out. All that remains is to tear off the protective film and press tightly.
- Seal the dashboard using loops and hooks. Quite an unusual way to improve noise and vibration insulation in the instrument panel. Special technology successfully combats squeaks throughout the cabin. First, two surfaces are glued at the area where they are connected. Then they are connected to each other using the so-called “hook” method.
- Vibroplast. Another option on how to get rid of extraneous sounds in the cabin. It is designed to absorb vibrations and noise and is a self-adhesive polymer film. Easy to apply to any type of surface. The main strengths include tightness and water resistance.
- Gluing problem areas and connecting areas. The main disadvantage of this method is that the seals are not always of high quality and are designed for one-time use. Even minor contamination leads to a deterioration in its adhesive qualities. Additionally, it is recommended to coat the area with water-repellent glue or silicone grease.
Other options include the age of the car and even the conditions under which it was stored. Some of the troubleshooting methods described above will require removing the front panel. Let's see how this can be done step by step;
- As with many types of repairs, it all starts with removing the negative terminal of the battery. This is due to the safety of electrical appliances.
- Loosen the fastening bolts on the glove box, unhook the fasteners and empty the glove compartment.
- Remove the front panel of the car radio. Disconnect the electrical wiring from the back of the tape recorder.
- You can unscrew all the bolts on the top panel of the dashboard. The same is done for the bolts located below and on the sides.
- Now the front part of the dashboard extends, providing access to the rear. You can disconnect the electrical wiring leading to the devices.
- The areas where the dashboard comes into contact with other parts are cleaned of dust and dirt before work to eliminate squeaks begins.
The characteristics of soundproofing materials may vary. Plastic squeaks affect not only domestically produced cars, but also much more expensive foreign cars. You need to try any of the technologies listed above to achieve the desired effect. The most important thing is that before starting repairs, you should find and carefully examine the location of the creaking noise.
rumbles 2110 Autosite
STYLE-AUTO Spare parts for foreign and domestic cars in Pervouralsk
VAZ 2110 are famous for their squeaks and rattles inside the cabin. Noise sources can be any: the panel creaks, the glove box rattles, door cards creak, etc.
VAZ 2110 are famous for their squeaks and rattles inside the cabin. The sources of noise can be any: the panel creaks, the glove box rattles, the door cards creak, etc. In this report, we will look at how you can overcome the squeaks and rattles of the fuse box (BL-Black Box).
You will need: 6 self-tapping screws with large heads A steel rod One pin for fastening the screw Thick window seal (2 cm) The problem that gave rise to thoughts was the breakage of the leg attaching the fuse panel to the dashboard itself
Having studied in our hands the principle of fastening and the operation of the springs, we used cut PVC strips, which lay on top of the remains of the fastenings on the dashboard (it was not possible to fasten one solid one, because the stiffening ribs were in the way). I drilled a pilot hole and tightened it with a self-tapping screw, and so did both strips. These are internal screws.
Then, having also drilled a pilot hole for attaching the legs with springs, we fasten them with self-tapping screws. These are external, and the view is close.
After some time, I noticed that the CV closed well, moved as it should, but stood terribly crooked relative to the torpedo. Looking under the dashboard in the place of the fuse panel legs I found a stray pin with a nut, which was very useful
As you can see in the photo, the hairpin is already at work. The fact is that when you push the torpedo up from below, the fuse panel becomes smooth and beautiful.
I built a leg from a 1 mm rod (additional traction)
We drill a larger hole and twist the self-tapping screw onto the pin to which the self-tapping screws are attracted. The self-tapping screw had to be shortened slightly so that it would not interfere with the fuse panel closing smoothly. Here is a view from the back side:
After assembly I was delighted with the evenness of the lines. The next problem emerged when driving over uneven surfaces. The fuse panel latch button rattles terribly. Now it moves too freely and easily in its shaft. I had to seal the button shaft with anti-squeak cut into strips
The side slides on the button itself, only the top ones, are also covered with anti-creaking.
After assembly there is now silence. Also, for the reliability and rigidity of the structure, I plan to change the cambric rubber bands on the panel, which serve as limiters when it slams, they can simply be replaced with the same ones, but a little longer or better, perhaps I’ll just glue an ordinary thick window rubber seal to the clamps of these rubber bands that are on the dashboard ...
To be sure, you can stick the anti-squeak (modelin): either on the side walls of the black box (in red in the figure) or on the walls of the panel (in green in the figure).
Thus, the fuse box squeaks disappear completely. Any rattling of the black box is excluded. By the way, do you know that a backlight can be installed in the fuse block.
Useful tips → How to protect your car and property from theft?
Useful tips → Winter driving rules
Useful tips → How to get out of a skid correctly
Useful tips → Secret letters in your car
Helpful tips → How to properly drive over a speed bump
What causes creaking and rattling noises?
A car is not a house. It does not stand monolithically, it does not have a strictly defined position, its foundation, read, chassis, is movable. While in motion, the structure constantly “plays,” absorbing loads and returning to its true position. This is clearly demonstrated by a slow ride over uneven surfaces, when the wheels dive into the next hole and the car body twists and bends. Since all interior elements are fixed to the body, they also move relative to each other. At these moments, low-quality and loosely fitting plastic begins to creak, loosely tightened metal elements broadcast a squeak, and thin and large plastic vibrates, that is, it complements the background acoustics with rattling.
The reason may not only be the disgusting quality of the plastic. Sometimes “crickets” arise from constructive miscalculations. For example, the front panel may creak due to an insufficient number of support points, when one of them bears a large load, quickly loosening the connection. And this is a sure path to creaking and rattling.
Another example is hodgepodge. There is nothing to creak in a monolithic panel cast into one single piece. It’s either the panels of old foreign cars or the Zhiguli “rattles”, which consist of two to three dozen elements fixed with self-tapping screws. There's plenty of room to roam here! Or old door cards that can be disassembled down to the screw.
It was possible to hear “crickets” in a prefabricated hodgepodge that did not differ in the quality of materials and approach to their assembly even in a completely new car. This gave impetus to the development of technologies and materials designed to combat extraneous sounds.
Installation of Europanel on VAZ 2110, 2111, 2112
Features of tuning domestic GAZ Volga cars
First, let's define what “installing a Europanel on a VAZ 2110” means. If you look closely, only the panel overlay is actually different, while the bottom of the panel remains the same. It turns out that the dashboard is collapsible and consists of three parts. We are talking about the very top trim, so installing it is not as difficult as replacing the entire car panel.
For those who don't understand:
- Removing the europanel of a VAZ 2110 is the same as dismantling the old panel, there is no difference (see instructions below).
- To replace only the panel trim, it is no longer necessary to remove the panel!
- Euro-1, another name is “Caprice” and has an index of 21104. The distinctive features of this lining are that it has no shelf.
- Euro-2, index 2110L, the cover already has a shelf.
- Euro-3, an overlay without a shelf, but under the instrument panel of a new type (Kalina, Priora), has a climate control unit with 3 knobs and a large emergency stop button.
The euro overlay for the panel consists of:
- The pad itself
- Inserts for buttons (small button insert 2110L-2120031, large 2110L-2120032)
- Air ducts (2114-81080623)
- Instrument panel trim (2110L-5325124)
- Double button for turning on the headlights and low beam
- Button for turning on the rear fog lights (with locking)
- Button for turning on the heated rear window (with locking)
- Pads for buttons - 2 pcs.
- Plugs instead of buttons - 6 pcs.
- Wiring harness for connecting the dual headlight and low beam switches
- Block
- Instrument panel brackets
- You may need to purchase separately various buttons for the VAZ-2114 and pads for them.
Now we move on to installation, and here we can distinguish two methods, each of which has its own advantages and disadvantages:
Installing the Euro trim without removing the panel
- Remove the dashboard.
- Open the glove compartment and unscrew the three screws from the inside (positions 1,2,3 in the diagram). Trying to unscrew the self-tapping screw (pos. 9) from the inside near the windshield is difficult, but doable.
- Pull out the 4 buttons (next to the control unit) and unscrew the screws from the inside (pos. 4.5)
- Unscrew or loosen the fastening by adjusting the backlight (pos.

- Open the fuse box and unscrew 2 screws from the inside (pos. 6 and 7)
- Now the panel overlay is held only by self-tapping screws, positions 10 and 11. They cannot be unscrewed, so carefully break them out or lift the overlay by the right edge and cut them off with a metal file. (Note: the Euro trim will completely cover the top of the panel up to the windshield, so you don’t have to worry about the appearance when you cut or break the screws)
- Remove the old trim.
To install the dashboard in the Euro trim, you can follow one of the following methods:
- Use the brackets from the Euro trim kit.
- Use brackets from the old trim (drill).
Now that the overlay is ready, let's try to install it. Fastening the Europlate in positions 1-7 of the diagram. We secure it on top with 35mm self-tapping screws, which are then hidden under a plastic cover.
The advantage of this method is time. If you have already resorted to dismantling the panel, then you will spend about 3 hours replacing the lining. If this is your first time encountering this type of work, then about 6 hours.
Installing Euro trim with panel removal
Similarly, we cut the euro-overlay around the perimeter, according to the instructions attached to it. We assemble the cover: we install the air duct panels into it and the accessories that came with it. Carefully lay out the wiring harness and secure it to the base of the panel. We glue all joints in the same way with anti-squeak. We attach an additional harness of the Euro pad to the wiring harness and tighten all the wires in the bundles with additional mounting ties. We prepare and connect connectors to additional buttons.
We fix the euro-plate to the panel with dozens of self-tapping screws. The advantage of this method is that you have the opportunity to make noise insulation behind the panel, where a lot of noise from the engine comes from, and also completely rid the panel of squeaks. There is only one drawback - the time it takes is at least 10 hours.
Replace the old panel with Euro-3
- Buy a Euro-3 torpedo assembled with under-torpedo wiring, find wiring diagrams for the old-style and new-style panels and do the docking yourself. Forum thread.
- Buy Euro-3 overlay.
Conclusion
By the way, if you still want to change the panel completely, then try installing a panel from the Priora in the top ten.
| If I decided to replace the VAZ 2110 dashboard, then.. |
Services of Mr. Fetr
Rattles and squeaks appear in the interiors of even the most expensive cars. Our company’s specialists know how to properly and effectively eliminate any sounds that irritate the driver. In the process of work, proven premium imported products from well-known brands such as Mercedes-Benz, Tunap, etc. are used.
We guarantee that the work will be carried out accurately; after our work you will not find any scratches, chips or cracks on the control panel. To eliminate the problem in each specific case, an individual approach is used, taking into account the assembly features and quality of parts in the car.
Mr. Fetr is a reliable partner and a guarantee of silence in the interior of your car.
Do-it-yourself torpedo tuning VAZ 2110 photo, video
Prerequisites for revision
Not all owners of dozens are satisfied with the stock interior, and it is much more pleasant for every person to sit in a beautiful car and therefore you can do the tuning of the VAZ 2110 torpedo with your own hands
This point needs to be given sufficient attention
Tuning a VAZ 2110 torpedo with your own hands
Panel
Tuning a car's dashboard means its modification, improvement, and in a certain sense, modernization.
The VAZ 2110 torpedo can be reupholstered with whatever material the owner likes; there are no limits to your imagination; for example, Alcantara. The process itself is quite labor-intensive and time-consuming, because the dashboard has many different bends and the material has to be sewn together in some places. The biggest difficulty in tuning a tight-fitting torpedo is made by the buttons located on the sides.
Before starting work, the torpedo panel must be removed in order to make a pattern using it, accurately determine the places where the fabric will be sewn, and add approximately one centimeter on each side to sew the parts together. To make a pattern, it is better to use thick Whatman paper.
If sewing a pattern for a torpedo with your own hands turns out poorly, then it is best to contact an experienced tailor.
Dashboard
Each driver arranges the interior of the car according to his own taste preferences, which reflects the character and disposition of the driver, surprising with its versatility.
You can change the appearance of the VAZ 2110 dashboard as follows:
- Using overlays. It is better to use top or side covers, which additionally come with air ducts. For originals, it is acceptable to use wood-look overlays. They will give the VAZ 2110 car more respectability. This pad has a fastening mechanism, air ducts, parts for connecting sensors;
- Removing the panel. Removing the old panel is somewhat difficult, because unscrewing 7 screws is not difficult, but the remaining 2 need to either be broken out or the panel lifted and carefully cut off. However, there is no need to worry, because the new panel will cover everything. After the old instrument panel trim has been removed, it is necessary to prepare it for installation. The remains of the factory material are carefully cut off, and the sides are adjusted during installation. When installing it, you need to use sound insulation so that there are no creaks in the future;
- Working hours. Replacing the instrument panel of a VAZ 2110 involves its complete dismantling. If this process occurs for the first time, it will take about 6 hours, and when this happens for the second time, it will take much less time;
- Change of some elements. Very often, when tuning, only some functional parts are changed, such as the speed and speed sensor console.
Instrument cluster
Removal of the model instrument cluster occurs in the following steps:
- Disconnecting the negative cable terminal from the battery;
- The next step is to use a screwdriver to unscrew the lower screws, as well as the two upper ones on which the cover is attached;
- The switch for external lighting is removed, the wiring harness block is disconnected;
- Next, the wires are disconnected, which turn off the fog light behind the VAZ 2110, as well as the heated rear window;
- Using a screwdriver, unscrew several screws that hold the instrument cluster of the panel;
- The combination is carefully pulled out completely and the wiring harness blocks are disconnected.
After the VAZ 2110 instrument panel combination is carefully removed, you can make a complete change of scales (tuning) and install an LED backlight, then it is installed back in the reverse order.
Extraneous sounds when braking
Creaking, squealing and grinding noises when braking indicate worn or dirty brake pads. If these sounds persist when new pads are installed, then the pads have an uneven surface. To correct this defect, it is recommended to drive a little with the hand brake lightly applied to grind in the brake pads.
If the car is equipped with an automatic transmission, then a grinding noise may occur when the gear selector is moved to position D. The car would move immediately, but the brakes are holding it (the situation when releasing the brake we move away, and the brake pads are still pressed to the disc provokes a squealing brakes).
VAZ 2110 panel, removal, installation of dashboard, sound insulation of VAZ 2110 panel
The VAZ 2110 panel or the “tens” dashboard has become a new word in the interior design of Lada cars. Despite its interesting shape and ergonomic appearance, panel 2110 eventually begins to make a lot of unnecessary sounds when the car is moving. This is especially noticeable on cars with high mileage. Therefore, very often the “tens” torpedo is completely disassembled in order to carry out total sound insulation and eliminate squeaks. Let’s say right away that disassembling the VAZ 2110 panel is not difficult in principle, but it is a very labor-intensive job that requires time and attention. The fact is that to remove the panel you will have to completely unscrew the steering wheel and disconnect a lot of electrical connectors. In order not to damage the electrics, before disassembling the VAZ 2110 dashboard, be sure to disconnect the battery. This is how the “tens” panel looks schematically.
This figure shows in detail, in the smallest detail, all the fasteners of the VAZ 2110 panel.
- 1 – panel
- 2 – side nozzle for ventilation and heating of the cabin
- 3 – instrument panel trim
- 4 – cover fastening screws
- 5 – panel fastening screws
- 6 – box
- 7 – console trim
- 8 – cover
- 9 – instrument panel panel
- 10 – mounting block cover
If you remove the panel completely, then only this should remain, look at the photo -
The red arrows indicate where the nuts and screws are attached, and the two large white arrows indicate the special mounting pins. When installing the panel, it must be installed on them; they serve to center the dashboard relative to the body.
Removal and installation of VAZ 2110 panel
Below are step-by-step instructions for removing the “tens” dashboard.
- Disconnecting the battery
- Remove the steering wheel and steering column switches
- Be sure to remove the top lining of the floor tunnel
- Remove the glove compartment and unscrew the mounting screws
- Remove the headlight hydraulic adjustment handle by pulling it towards you
- Unscrew the hydraulic corrector nut and remove it
- Remove the upper side air duct deflectors by prying them up with a screwdriver
- Under the deflectors we find the panel fastening nuts, unscrew them
- We unscrew the screws from the bottom of the dashboard, next to the hood release lever, at the mounting block, in the niche of the glove box, etc.
- Now you can remove the door seals, remove the lining covering the front pillars
- Disconnect the electrical wiring terminals
- You can remove the panel by holding the steering column adjustment lever in the desired position
The fully unscrewed VAZ 2110 panel is supported by two guide pins (see photo above) with white arrows pointing to them. We assemble the panel in the reverse order.
Soundproofing panel VAZ 2110
To soundproof the “tens” dashboard, they mainly use bitoplast, modelin, sealant and even polyurethane foam. Plastic panels on the disassembled dashboard are glued with bitoplast and modelin, which eliminates squeaks and improves sound insulation. Something like this in the photo below -
Bitoplast is glued with a special glue; when installed in place in the right places, this material is compressed where necessary. It is recommended to paste over the panel naturally from the inside.
Some craftsmen turn the front panel into an impregnable fortress for vibrations and squeaks using ordinary mounting foam. However, it is not recommended to use such a radical method without some experience. As a result, this is what sticks out from under the torpedo -
In addition to soundproofing the VAZ 2110 panel, it is necessary to carry out a similar procedure with the floor, roof, and doors. Such comprehensive sound insulation will ensure maximum acoustic comfort in the cabin.
In conclusion, I would like to say that there are two panels installed on the “ten”, old and new models. Photos of the old version can be found at the beginning of our article. A photo of the new version of the panel is attached below.
The most interesting thing is that a new-style panel or a Europanel for the “ten” can be installed instead of the old-style panel. In principle, they are interchangeable, but it is worth considering that along with the installation of a new panel, you will have to install a new instrument panel assembly, another ACS unit (automatic control system for interior heating) and add an electric heater damper drive. The mounting points of the old and new panels themselves are the same, so there are no problems with installation.
To begin with, about what and why it creaks
The dashboard, “tidy”, as they call it, is the instrument panel, which is located in the cabin under the windshield, directly in front of the driver and passenger seat. The purpose of the instrument panel is, as a rule, purely aesthetic; it hides a large number of wires and components located in the cabin, making it more attractive. Also on the instrument panel there are often various gadgets, a passenger airbag and the electronic instrument panel itself (speedometer, tachometer and other indicators and control lights).
In most cases, dashboards are made of elastic, but not hard materials; initially, this decision had one goal - ensuring safety in the event of an accident. However, with the advent of the Airbag, or more simply put, “airbags,” the instrument panel has become nothing more than just a beautiful shelf, the design of which is carried out by entire creative studios in order to attract the attention of a fastidious buyer. Basically, the “tidy” is made from soft foam compounds based on polyurethane foam or polyolefin, which do not withstand temperature changes and increased vibrations. The latter is very relevant for our roads, which are more like a test track or a washboard, and certainly not a public road.
Shock absorbers (struts)
If you take a classic VAZ 2101 - 2107 car, then either the shock absorber itself (strut) or its mounting location may knock, provided that the bracket is released.
The lower silent block of the shock absorber may also knock.
If the strut is unscrewed at the top or the upper bushings are worn out, this can also lead to knocking noises on bumps.
Pay attention to the spring; if it is broken, knocking noises will be heard due to the coils playing with each other; this is also typical for other car models. As for shock absorbers VAZ 2108/09/10 and above, a slightly different picture emerges here
As for shock absorbers VAZ 2108/09/10 and higher, a slightly different picture emerges here.
If the supports and ball bearings are intact, and the sound comes from the strut area, then it is possible that the shock absorber nut is knocking, especially on bumps.
Those. A small gap may form between the nut, strut and shock absorber, which will lead to knocking.
To solve this problem you need to tighten the nut. To do this, jack up the car and insert a wooden stop between the disc and the side member to prevent the wheel from spinning.
Lift the corrugation and lubricate the threads of the rack with oil (can be worked off).
Take a number 3 gas wrench and use it to tighten the nut. Use a pipe for leverage.
Well, check the rack for leaks; if it is broken, it can also knock.
If two front struts are broken, then during sharp braking the car will nod off, and when accelerating, the front end will lift up.
Other reasons why front brakes stick
The front wheels do not always jam the same way; this can manifest itself in different ways. Both front wheels can “stick” at once, and you simply won’t be able to move. It happens that they seem to be spinning, but with great difficulty, making a creaking sound. This is a dangerous situation, especially if you ignore the problem and continue driving. Only one front wheel can jam, while the other spins freely. Let's look at the possible reasons.
The brake pedal is poorly adjusted or has no free play at all
.
There must be sufficient clearance between the master cylinder piston and the pusher for the pedal to move normally. This is adjustable.
Brake pad tension spring is faulty
.
This does not mean that it is cracked or completely torn, perhaps just stretched. There is such a thing as metal fatigue, and a weakened spring will no longer function normally; it is better to replace it.
Another reason why the front brakes stick is that the vacuum booster is not in order.
.
It can jam for several reasons. The diaphragm may be swollen, or the protective cap or lid seal may be pinched.
Pay attention to the amplifier adjusting bolt. It shouldn't be too tight
It is important that it protrudes slightly above the surface of the master cylinder. There is something wrong with the brake pad friction lining.
There is something wrong with the brake pad friction lining.
.
The problems can be different: the gasket wears out, breaks, or becomes too thin. This usually leads to damage to the pad itself, so in this case it is necessary to change both it and the lining
Important: if you change a worn gasket, then the pair to it should also be replaced, they must be the same in thickness, otherwise the car will be pulled away from the line of movement to the side
The reason that the front brakes are sticking may be a stuck piston in the wheel brake cylinder.
.
This kind of trouble can happen in any car, so you need to be able to deal with it. The reasons for this situation are different: low-quality brake fluid, uneven position of the cylinder body in the caliper, rust and corrosion on the working surfaces of the piston. Disassemble the problematic cylinder, clean all components, rinse with brake fluid, reassemble the system and bleed. Fill with good quality brake fluid.
The cuffs on the wheel cylinder have lost their shape or are swollen
- This is also one of the reasons why the front brakes jam.
The cuffs of the master cylinder or wheel cylinders swell from fluids such as oil, gasoline and others that have entered the brake system. This jams the cylinders, which results in a problem with the brakes. But you just have to replace the cuff, and everything will work out
It is recommended to at least occasionally check the condition of the cuffs, and when disassembling the car (no matter for what reasons), replace them, even if these elements look absolutely intact
Oxidation spots on the guides
.
They need to be cleaned, lubricated, and you will no longer have to think about why the front brakes are sticking.
The compensation hole on the brake master cylinder is dirty
.
This is a labor-intensive process, a large and messy piece of work, but no spare parts will be needed, meaning repair costs will be minimal. It is necessary to clean the hole and bleed the brake hydraulics.
The pistons of the master cylinder and wheel brake cylinders are stuck
.
In this case, only experienced car owners who have already disassembled and reassembled various systems of their car more than once will be able to figure out why the front brakes are jamming. It is better to entrust the diagnostics to specialists: they will find the cause of the malfunction and immediately begin repairs.
It often happens that it is enough to just thoroughly clean and lubricate the necessary parts. Check the hoses to see if they are in order. It often happens that the hose is pinched by the clamp holding it, especially if it is corroded. This can also cause the front brakes to jam. The best thing in this case, of course, is to replace the clamp with a new one. But you can just loosen it slightly and blow out the hose well.
It is perhaps not so easy to immediately determine why the front brakes are jamming. This can happen for many reasons, and if you yourself are not very versed in the operation of car systems, then it is better to entrust the inspection and repair of the car to service station specialists. After all, a properly functioning braking system is the key to both your safety and that of other road users.
The front brakes are sticking. Causes, elimination. Watch the video:
Hiss.
Of course, the hissing may also be due to the fact that there are snakes under the hood of your car (just kidding). But this is from the realm of fantasy. All friends are much simpler.
If you hear a hissing noise under the hood of your car while the engine is running, then the most likely cause is a coolant leak in the cooling system, or the vacuum systems of the car have simply depressurized.
If the hissing is caused by an antifreeze leak, this can lead to engine overheating. Therefore, remember, if you suddenly hear a hissing noise under the hood of your car, then immediately contact a technical center to diagnose the car in order to urgently eliminate this malfunction.
Crunch in the gearbox.
If your car is equipped with a manual transmission and while driving you hear some kind of crunching noise when changing gears, this may be the first symptom of various problems appearing in the car. As a rule, this is primarily due to the fairly high mileage of the car itself and, secondly, to the natural wear and tear of certain gearbox parts.
To begin with, this crunching sound in the gearbox when changing gears can clearly indicate wear and tear on the synchronizers themselves and other components of the gearbox. Synchronizers, as many of us know, play an important role in any gearbox, equalizing the speed of rotation of the shafts and gears in the transmission to subsequently transmit the required torque at a certain speed.
This crunching noise may also indicate clutch wear. Typically, with this malfunction, this crunching noise appears when the clutch pedal is fully depressed while shifting gears. The same thing usually happens with a working clutch, when you do not fully depress the same clutch pedal.
Crackling or crunching.
If your car is front-wheel drive and at low speed you hear some crunching or crackling (especially when you turn the steering wheel all the way when turning), then the probable cause of this crunching or crackling noise in the car is a faulty CV joint.
These rather complex parts of the car transmit torque from the gearbox directly to the wheels. If friends do not change the CV joint in the car in time, then the drive of the car can severely break the mounting sockets in the gearbox, and this is fraught. Therefore, dear motorists, remember, if you hear a crunching or crackling sound in the front suspension of your car, immediately contact a car repair shop to diagnose and eliminate this malfunction.
Also remember, periodically inspect the CV joint boots themselves to identify cracks and damage in the boots. The CV boot protects the drive from dust and sand getting into it, which can severely damage the CV joint.