VAZ 2114 injectors: Do-it-yourself removal and washing
Almost all modern cars are built on injection engines, the VAZ 2114 is no exception.
This type of engine made it possible to increase power and reduce fuel consumption of the vehicle as a whole. As you know, for the injector to work, you need many different parts and sensors involved in the operation of the engine. The fuel in such an engine is supplied under pressure, and then atomized and mixed with air, then enters the combustion chamber in the form of an air-fuel mixture. To spray fuel, fuel injectors are used, which operate under a certain pressure. This article talks about VAZ 2114 fuel injectors, namely their purpose, design, signs of malfunction, methods of cleaning and self-replacement, as well as cost and much more.
What pressure indicators should be in the fuel system?
Normally, the fuel system should have the following measurement indicators:
- at idle: approximately 2.5 atm. If the pressure gauge shows less, the coarse filter probably needs to be cleaned or replaced;
- with the ignition on: at least 2.9-3.0 atm;
- with the vacuum hose removed: 3.3 atm. A reading of 3 atm is also considered acceptable;
- with a pinched drain tube: from 6.9 to 7.0 atm;
- when gasping, the pressure should immediately jump to 3 atm, and then drop to 2.5 atm.
If the required pressure is not in the fuel rail of the VAZ 2114, then we can talk about a system malfunction.
Purpose
VAZ 2114 injectors are designed to spray fuel under pressure and mix it with air to form a fuel mixture. When fuel arrives at the injector, it is closed, as soon as the control unit sends a signal to open a certain injector, it opens, thereby fuel under pressure is sprayed and mixed with air, after which it enters the combustion chamber of the cylinder through the intake valve and is ignited by the spark plug.
What gasoline to use
This question is one of the most pressing for domestic car enthusiasts, because, on the one hand, gasoline prices are constantly rising, and you want to save money. But, on the other hand, the quality of fuel at most gas stations leaves much to be desired, and you don’t want to fill your car with anything.
That is why you should adhere to the basic principle - the 14th gasoline in the passport indicates exactly 95th gasoline, which means that this is what you need to fill it with.
Gasoline for VAZ 2114
As for bad fuel, if possible, you should choose from the nearest gas stations those that have the highest quality gasoline (based on the behavior of the car after refueling), and then refuel only at these stations.
True, you can also notice that many owners of the 2114 fill it exclusively with 92-grade gasoline and, according to them, do not see much of a difference in the operation of the car and in the rate of wear of the components of the gasoline system. Whether to follow these tips or use exclusively suitable fuel is up to everyone to decide for themselves.
Design
The fuel injector of the 14th Lada model is an electromechanical part that acts as a valve and atomizer. In the closed position, the injector is a valve that holds fuel and does not allow it to leak, thereby reducing the pressure in the system, and in the open position it is a sprayer, spraying this fuel into the engine system.
The nozzle has:
- Mesh filter;
- O-rings;
- Electromagnet winding;
- Core (acting as a valve);
- Return spring;
- Power connector;
Fuel supply system
Fuel supply system
Repair and operation manual - Fuel injection system - Fuel supply system
Fuel supply system
Rice. 11.5. Fuel supply system:
1 — fitting plug for monitoring fuel pressure; 2 — injector ramp; 3 — bracket for fastening fuel pipes; 4 — fuel pressure regulator; 5 — electric fuel pump; 6 — fuel filter; 7 — fuel drain line; 8 — fuel supply line; 9 - nozzles.
WARNING
When the engine is running, a pressure of 284-325 kPa (2.9-3.3 kg/cm2) is maintained in the fuel supply system, therefore, before carrying out work related to disconnecting any fuel pipes and hoses, it is necessary to reduce the pressure in the system.
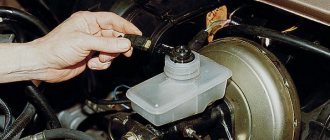
Reducing rail pressure
To reduce system pressure:
1. Brake the car with the parking brake and put the gear in neutral.
2. Fold back the rear seat cushion and fold back the cut-out part of the sound insulation.
3. Unscrew the two fastening screws and remove the hatch cover above the gas tank.
4. Disconnect the connector with the fuel pump wires from the wiring harness by pressing the plastic latch.
5. Start the car's engine and let it run until it stalls due to the production of gasoline in the fuel line. Then turn on the starter for about 3 seconds. After this, you can disconnect the fuel lines. Upon completion of work, do not forget to connect the connector with the fuel pump wires to the wiring harness.
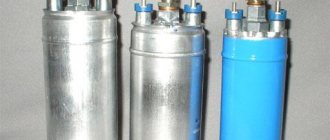
Electric fuel pump
Electric fuel pump 5 (Fig. 11.5) is a two-stage, rotary type, non-removable, installed in the gas tank, which reduces the possibility of vapor locks forming, since fuel is supplied under pressure of more than 284 kPa, and not under the influence of vacuum.
If engine power drops, increased noise is heard or periodic “howls” when the fuel pump operates, then most likely the fuel pump has failed. First, check the pressure in the fuel supply system by connecting a pressure gauge to the fitting on the rail in the engine compartment. If the pressure in the system is less than 250 kPa (2.5 kgf/cm2), replace the fuel filter.
If this does not help, try removing the fuel pump and cleaning the receiver screen. If in this case the pressure does not increase, the fuel pump must be replaced.
To replace the fuel pump, do the following:
1. Reduce the pressure in the supply system.
2. Disconnect the wire from the “-” terminal of the battery.
3. Place the car on a lift.
4. Remove the rear seat (Removing and installing the rear seat).
5. Remove the two screws securing the hatch cover.
6. Bend the clamps and disconnect the connector of the electric fuel pump and fuel level sensor wires.
7. Unscrew the nut securing the fuel supply pipe and move the pipe to the side.
8. Unscrew the fitting of the fuel drain pipe and disconnect the fuel line.
NOTE
Replace cracked or loose o-rings.
9. Disconnect the hoses from the gas tank, unscrew the bolts of the tank clamps, and remove it (Removing, installing and troubleshooting the fuel tank). On new cars (all VAZ 2113, 2114, 2115) there is no need to remove the fuel tank; everything can be done through the large hatch under the rear seat. On older cars, the standard hatch can be expanded using metal scissors. Having done this once, in the future, replacing the fuel pump mesh or the pump itself will be faster and much more convenient.
10. Unscrew the nut of the fuel drain pipe...
11. ...and disconnect the fuel line from the fuel pump.
12. Unscrew the fuel pump mounting nuts...
13. ...and remove the pressure ring.
14. Remove the fuel pump with fuel level sensor from the gas tank.
15. Remove the rubber o-ring of the fuel pump. A cracked ring that has lost its elasticity must be replaced.
16. If the storage cup remains in the gas tank when removing the fuel pump, remove it.
NOTE
Before reinstalling the fuel pump, secure the accumulator to the housing with plastic clips.
17. Install the fuel pump in the reverse order of removal. The arrow on the fuel pump should point towards the rear of the car.
18. Before installing the hatch cover, start the engine and check the tightness of the fuel line connections.
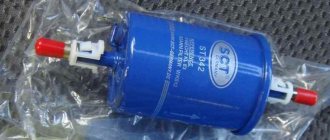
Fuel filter
Fuel filter 6 (see Fig. 11.5) is built into the supply line between the electric fuel pump and the fuel rail and is installed under the body floor behind the fuel tank. The fuel filter is non-separable, has a steel body with a paper filter element.
Replacing the fine fuel filter is regulated - every 30,000 km of vehicle mileage. However, the condition of the fuel filter depends on the quality of the gasoline: the dirtier the gasoline, the faster the fuel filter becomes clogged. Jerking when the car moves, first at high and then at low speeds, most likely indicates a clogged fuel filter.
1. Before replacing the filter, reduce the pressure in the supply system.
2. Disconnect the wire from the “-” terminal of the battery.
3. Loosen the nuts securing the hose ends to the fuel filter.
4. Loosen the fuel filter holder nut.
5. Completely unscrew the nuts and disconnect the hose ends from the fuel filter. Please note that a small amount of fuel will leak out of the fuel filter and hoses.
6. Remove the fuel filter from the holder.
7. Remove the O-rings from the hose ends. Check their condition. Replace rings that are torn or have lost elasticity.
8. Install a new fuel filter on the vehicle in the reverse order of removal. In this case, the arrow on the fuel filter housing should be directed in the direction of fuel flow.
Fuel rail
Fuel rail 2 (see Fig. 11.5) of injectors is a hollow bar with injectors and a fuel pressure regulator installed on it. The injector ramp is secured with two bolts to the intake pipe. On the left side (in Fig. 11.5) on the injector ramp there is a fitting for monitoring the fuel pressure, closed with a screw plug 1.
The fuel rail has to be removed to replace the injectors.
1. Reduce the pressure in the supply system.
2. Disconnect the wire from the “-” terminal of the battery.
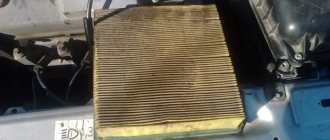
3. Remove the air filter 1 together with the intake pipe hose 2 (Air filter).
4. Disconnect the vacuum hose from the fuel pressure regulator.
5. Disconnect the connector with wires from the idle speed control by pressing the plastic latch.
6. Disconnect the injector harness connector from the wiring harness.
7. Remove the two fuel rail mounting bolts. Please note that flat washers are installed under the bolt heads (it is more convenient to remove the bolts, for example, with tweezers).
8. Disconnect the fuel supply and drain hoses from the fuel pipes.
9. Unscrew the screw securing the fuel pipe holder. Remove the holder. Please note that a spring washer is installed under the head of the screw securing it.
10. Carefully move the fuel rail along the axis of the injectors so that...
11. ... all the injectors have come out of the holes in the engine intake pipe.
WARNING
If any injector remains in the engine intake pipe when removing the fuel rail, replace the O-rings and injector retainer.
12. Carefully remove the fuel rail with injectors from under the receiver so as not to damage the injectors.
13. Install the fuel rail with injectors in the reverse order of removal.
Injectors
Injectors 9 (see Fig. 11.5) are attached to the fuel rail, from which fuel is supplied to them, and with their nozzles they enter the holes of the inlet pipe. In the openings of the fuel rail and inlet pipe, the injectors are sealed with rubber rings. The injector is a solenoid valve. When a voltage pulse is received from the controller to the injector, the solenoid valve opens and fuel is injected into the intake pipe through the atomizer in a finely sprayed jet under pressure into the intake pipe onto the intake valve. Here the fuel evaporates in contact with heated parts and enters the combustion chamber in a vapor state. After the electrical impulse stops, the spring-loaded injector valve shuts off the fuel supply.
Signs of injector failure may include:
— difficult engine starting; — unstable engine operation; — the engine stalls at idle; — increased crankshaft rotation speed at idle; — the engine does not develop full power, insufficient engine response; — jerks and dips in engine operation when the car is moving; — increased fuel consumption; — increased content of CO and CH in the exhaust gases; — glow ignition due to leaking injectors.
1. To check and replace injectors, remove the fuel rail.
2. Connect the injector harness block to the wiring harness, the wire to the “-” terminal of the battery and the fuel supply and drain hoses to the fuel pipes.
3. Lower the nozzles into transparent containers. It is more convenient to hang the containers on the fuel rail. Check the fuel atomization of the injectors. To do this, turn on the starter. The injectors must spray fuel in the correct cone. Each nozzle must have four jets, and...
4. ...the amount of fuel supplied through the injectors should be the same in all four containers (check using a measuring container). If any injector does not meet these conditions, the injector must be replaced.
5. Immediately after turning off the ignition, carefully inspect the injectors. If fuel leakage is noticeable from the nozzle of any injector, the injector is leaking and the injector must be replaced.
6. If the injector does not spray fuel, check that the injector is receiving power. To do this, disconnect the connector with wires from the injector, connect the battery directly to the injector contacts and turn on the ignition. If in this case the injector sprays fuel, then there is a malfunction in the injector electrical circuit.
7. It is recommended to check the resistance of the injector windings. To do this, disconnect the connector with wires from the injector (after first disconnecting the wire from the “-” terminal of the battery) and connect an ohmmeter to the injector contacts. It should show a resistance of 11-15 ohms. Otherwise, the nozzle must be replaced.
8. Pressing the spring clip, disconnect the connector with wires from the injector being replaced.
9. Move the injector lock to the side.
10. Remove the injector from the fuel rail. Remove the remaining faulty injectors in the same way.
11. It is recommended to check the O-rings on all injectors. Replace sealing rings that are cracked or have lost elasticity.
12. Install the injectors in the reverse order of removal. Before installation, lubricate the injector O-rings with gasoline.
13. To replace the clamps that do not hold the injectors well, slide them onto the recess for the fuel rail mounting bolt or onto the edge of the rail.
HELPFUL ADVICE
Contaminated injectors can be washed in a specialized workshop on a special stand.
Fuel pressure control
Fuel pressure regulator 4 (see Fig. 11.5) is installed on the fuel rail and is designed to maintain a constant pressure difference between the air pressure in the intake pipe and the fuel pressure in the rail.
Rice. 11.6. Fuel pressure regulator: 1 - housing; 2 - cover; 3—pipe for vacuum hose; 4 - diaphragm; 5 - valve; A - fuel cavity; B - vacuum cavity
The fuel pressure regulator consists of valve 5 (Fig. 11.6) with diaphragm 4, pressed by a spring to the seat in the regulator body. When the engine is running, the fuel pressure regulator maintains the pressure in the fuel rail of the injectors within the range of 284-325 kPa. The regulator diaphragm is affected by fuel pressure on one side, and pressure (vacuum) in the intake pipe on the other. When the pressure in the intake pipe decreases (the throttle valve closes), the regulator valve opens at lower fuel pressure, passing excess fuel through the return line back into the gas tank. The fuel pressure in the fuel rail decreases. As the pressure in the intake pipe increases (when the throttle valve opens), the regulator valve opens at a higher fuel pressure and the fuel pressure in the rail increases.
Signs of a malfunctioning fuel pressure regulator may include:
— unstable engine operation; — the engine stalls at idle; — increased or decreased crankshaft rotation speed at idle; — the engine does not develop full power, insufficient engine response; — jerks and dips in engine operation when the car is moving; — increased fuel consumption; — increased content of CO and CH in the exhaust gases.
1. Before checking and removing the fuel pressure regulator, reduce the pressure in the power system.
2. Unscrew the fitting plug for monitoring the fuel pressure at the end of the ramp. Please note that there is an O-ring installed in the fitting plug to control the fuel pressure. If the ring is torn or has lost elasticity, replace it or the entire plug.
3. Using the metal protective cap of the tire valve, unscrew the spool (the same as in the tire) from the fitting.
4. Connect a hose with a pressure gauge to the fitting (you can use a tire pressure gauge). Secure the hose to the fitting with a clamp. Start the engine and check the pressure on the pressure gauge. The pressure should be 284-325 kPa (2.9-3.3 kgf/cm2).
5. Disconnect the vacuum hose from the fuel pressure regulator. In this case, the pressure on the pressure gauge should increase by 20-70 kPa (0.2-0.7 kgf/cm2). Otherwise, replace the fuel pressure regulator.
6. Reduce pressure in the supply system. Unscrew the nut securing the fuel pipe to the pressure regulator.
7. Remove the two bolts securing the fuel pressure regulator to the fuel rail.
8. Carefully remove the regulator fitting from the hole in the fuel rail and...
9. ...remove the fuel pressure regulator by disconnecting the regulator from the fuel pipe.
10. Install the fuel pressure regulator on the car in the reverse order, after lubricating the O-rings with gasoline. Replace torn or loose o-rings.
Quote
Symptoms of a problem
Although injectors are a fairly reliable mechanism capable of operating for tens of thousands of kilometers, they can still fail and cause a lot of trouble for the car enthusiast.
Faulty injectors are accompanied by the following symptoms:
- Any of the cylinders is turned off;
- The engine knocks heavily;
- Engine power is lost;
- The engine does not start well;
- Black or white spark plugs;
If such malfunctions appear on your car, most likely the fuel injectors are faulty; they require cleaning or replacement with new ones. In most cases, the problem is solved by cleaning the injectors or replacing the repair kit.
What breaks in injectors
Failures in injectors do occur, but extremely rarely; in most cases, injector malfunctions are not accompanied by their breakdown, most often they simply become clogged, which leads to a decrease in efficiency and, consequently, a decrease in the amount of fuel.
Clogged injectors
When an injector becomes clogged, the fuel to pass through it becomes more difficult and it loses in quantity, and this leads to a lean fuel mixture, which is fraught with a decrease in engine power, overheating of the spark plugs and melting of the insulators, as well as burnout of the valves.
Injector leakage
When the injectors are leaking, it may be because the shut-off valve is not keeping the fuel pressure closed. Leaking injectors are dangerous because they can wash away the oil film from the cylinder walls, thereby reducing engine compression, and fuel can also get into the internal combustion engine oil and reduce its functions to zero.
Cleaning injectors
To clean the injectors yourself, you do not need to have great skills in car repairs; it is enough to have the desire to repair the car yourself and purchase the necessary parts to carry out this work.
For cleaning you will need:
- Carburetor cleaner;
- Syringe;
- Wire 2 m;
- Lamp 12V;
- Non-latching button (wires can be used);
- Lamp (serves as a current-limiting resistor);
- Injector connector;
- O-rings;
After all the parts are prepared, we assemble the washing device. We fill the syringe with up to half of the carburetor cleaner, and insert it into the nozzle with a diameter that fits perfectly.
We assemble a power circuit for opening and closing the nozzle. We connect everything as shown in the diagram.
Flushing
We connect the circuit to the battery and create pressure on the injector by pressing the syringe piston, as soon as pressure appears, press the button and close the circuit for 1-2 seconds, the injector will open, we repeat this procedure several times until the injector sprays fuel evenly.
Analysis of cars selling fuel rail for VAZ (Lada) 2114 in Moscow
- Audirazbor Rating: 5.0
/5 – 4 ratings - Mytishchi district, Dmitrovskoe highway, Gribki settlement, uch. 15A.19
- +7
- Rating: 4.6
/5 – 10 ratings
- Rating: 3.9
/5 – 11 ratings
- Rating: 4.4
/5 – 8 ratings
- Rating: 4.0
/5 – 11 ratings
- Rating: 4.4
/5 – 8 ratings
- Rating: 4.2
/5 – 10 ratings
- Rating: 4.1
/5 – 8 ratings
- Rating: 4.6
/5 – 7 ratings
- Rating: 4.5
/5 – 6 ratings
- Rating: 4.5
/5 – 4 ratings
- Rating: 4.5
/5 – 6 ratings
123…34
Popular companies
- Best Auto Parts 4.4
/5 – 8 ratings - Butyrskaya street, 86Bs7
- +7,,
- 4.1
/5 – 8 ratings
Replacing injectors
Replacement is quite simple; for this you will need to meet two conditions: perform work on a cold engine and relieve the fuel pressure in the system.
To relieve fuel pressure, you need to remove the connector from the fuel pump under the rear seat and start the engine and let it run until it stalls. Then let the engine cool and you can start working.
- We turn off the fuel supply to the fuel frame; if the system has a return line, then turn it off;
- Turn off the power to the injectors by disconnecting the connector;
- We unscrew the two hex bolts that secure the ramp to the intake receiver;
- We take out the ramp;
- We take out the injectors by removing the stopper;
- We assemble in the reverse order;
Be sure to replace the O-rings with new ones before assembly and lubricate them with a small amount of engine oil before installation, this will make it much easier to insert them into the seats.
Source
Methods for checking fuel rail pressure
The procedure for measuring the pressure in the VAZ 2114 ramp is carried out to identify a malfunction in the supply of gasoline to the injectors.
There may be several signs of a fuel system malfunction:
- instability in the operation of the car engine (motor trouble);
- increased volume of carbon monoxide at the outlet;
- unreasonably increased consumption of gasoline (increase to 30-50%);
- failures in the operation of the power unit;
- drop in engine power with a normally operating electronic control unit.
The first thing the car owner needs to do after identifying these malfunctions is to measure the pressure in the ramp.
Before work, you need to prepare the following tools and materials:
- pliers;
- screwdriver;
- sanitary linen;
- fuel or oxygen hose (internal diameter must be at least 8 mm);
- mechanical pressure gauge with a measurement limit of up to 7 atmospheres;
- several clamps;
- container for draining fuel;
- cap for twisting nipples.
Before starting work, you must ensure that the fuel system is tight. If you take measurements in the presence of microcracks or leaks, the results will be unreliable.
- We wrap plumbing flax under the pressure gauge nozzle, screw it into the hose and secure it with a clamp.
- Use your hands or pliers to remove the cap from the fuel rail.
- Using the cap, unscrew the nipple and put on a hose with a pressure gauge. We secure the connection with a clamp.
- We start the engine and record the pressure gauge readings.
- To check the pressure regulator, disconnect the hose leading from the regulator to the intake manifold. In this case, the pressure gauge should show an increase in pressure to 3-3.2 atm. If the pressure readings do not change, there may be a problem with the fuel pump.
- Now you need to measure what maximum pressure the pump develops. Using pliers, the return fuel line is pinched. The new pump should show at least 6 atm. If the pressure gauge registers 5 atm, then the pump is already very worn out, but can still continue to work for some time. The pump is clearly faulty if the reading is less than 4 atm.
- We check the condition of the pipeline. To do this, we find the fuel pump assembly (under the rear seat) and determine the type of connection. A quick-release connection can be purchased in a store for literally pennies. If the connection is threaded, then the entire pipe is purchased and the tip is cut off. We put a hose with a pressure gauge on one end of it, and connect the other to the pump outlet. Now let's check the pressure. If the pressure gauge shows 6 atm, then we simply flush the entire system and replace the fine filter. When replacing the filter, direct the gasoline supply hose into a previously prepared container and turn on the ignition. We carefully inspect the fuel that has spilled into the container, install a new filter and repeat the procedure again. If after the new filter the gasoline is dirty, be sure to wash the injectors.
If after all the checks the problem remains, then a complete diagnosis of other systems (mass air flow sensor, idle speed sensor, cylinder compression and throttle position sensor) is necessary.
How to remove the injector fuel rail
The engine fuel rail is an engine rail with a pressure regulator and four injectors located on it.
It is secured to the engine intake manifold with two bolts. The fuel that entered the ramp flows through the injectors into the intake pipe. There is also a fitting on the ramp with which you can regulate the pressure level in the fuel system. Before replacing, cleaning the injectors or replacing the pressure regulator, you must first remove the fuel rail.
System care
The power supply system of the VAZ 2114 is quite reliable, but at the same time it is a fragile design. When operating it, it is important to ensure that all components are securely connected to each other, that the fuel line pipes are not bent, and that the hoses are not leaking.
In addition, periodically (at least once a year) the fuel sensor located in the tank and connected to the pump should be removed and cleaned.
This is due to the fact that he:
- It is distinguished by great fragility.
- Subject to temperature changes.
- Affected by condensation.
- It actively oxidizes when there is any leak in the system.
As for the rest of the fuel path, caring for it consists of using high-quality fuel, periodic cleaning, timely replacement of filters, as well as washing the injectors, which must be done at least every 30,000 km.
This operation can be performed at almost any car service center, and it can be carried out in two different ways:
- washing with a special cleaner;
- ultrasonic cleaning.
Neither method requires dismantling the injectors or disassembling the fuel system, which is very convenient. At the same time, ultrasonic cleaning is a more radical solution - it can “bring back to life” even injectors that cannot be cleaned with a special liquid.
In conclusion, it is worth noting once again the obvious fact - it is better to carry out timely cleaning and minor repairs of fuel system elements than to subsequently carry out their expensive replacement.
Removal procedure
- First, we relieve the pressure in the fuel system (How to relieve pressure in the fuel line?).
- Turn off the ignition.
- Next, you need to disconnect the negative cable terminal from the car battery.
- Remove the air hose from the receiver.
- Disconnect the vacuum hose from the pressure regulator.
- Using a 17 mm wrench, unscrew the fittings.
- Next we remove the tubes.
- Then you need to disconnect the ramp wire terminals.
- After which you need to remove the clamping bar securing the fuel pipes (for more details, see the article “How to remove the fuel pressure regulator VAZ-2114, 2115, 2113”).
- Unscrew the two screws with which the ramp is attached using a 5 mm hexagon. We pull out all 4 injectors from their sockets, while it is necessary to slightly pull the ramp along the axis.
- We remove the fuel rail from the car.
Remember, everything must be done with extreme caution!
- There is a danger that you may damage the contact groups of the injector connectors or sprayers.
- Everything must be done very sterile.
- Do not allow dirt to get into channels or open pipelines. All holes or fittings must be closed with plugs during operation.
- The fitting must also be held with a second wrench when unscrewing the union nut.
- The ramp can only be cleaned of dirt using a spray cleaner.
Attention! If the injector remains in the engine intake manifold when removing the fuel rail, its retainer or O-rings must be replaced.
After the fuel frame with injectors has already been removed, it is easy to remove the injectors (see the article How to remove injectors?). You can also take a moment and check the operation of the injectors or clean them properly and efficiently (see the article How to install injectors on VAZ 2113, 2114, 2115?).
Source
Disassembly
1. Use a slotted screwdriver to move the injector retainer along the fuel rail.
2. Remove the injector from the fuel rail.
3. Similarly, remove the other three injectors.
Warning! The connections of the injectors to the fuel rail and to the intake manifold are sealed with rubber rings. Any damaged O-rings must be replaced.
4. Remove the spring clamps of the injectors from the fuel rail.
6. 24 mm
Unscrew the nut of the fuel supply pipe and remove the end of the pipe from the fuel rail.
Warning! The connection of the tube with the fuel rail is sealed with a rubber ring installed at the end of the ramp. Any damaged fuel line O-rings must be replaced.
Removing and cleaning VAZ 2114 injectors
Injector performance calculator
Online injector performance calculator
Every car owner of an injection car sooner or later encounters problems in the fuel system and begins to think about cleaning the fuel injectors.
The task of the injector is to maintain the pressure created by the fuel pump and only at the right moment to open for a fraction of a second to allow the required amount of fuel to pass through.
There are a lot of different additives in the fuel, which during engine operation stick to the seat of the injector locking needle. As a result, the injector begins to spray fuel incorrectly or leak fuel when it should be closed. In such cases, it is necessary to clean the injectors or replace them.
The recommended period for cleaning injectors is 25,000 km - 30,000 km . Failure to properly maintain fuel injectors can lead to their complete failure, and then only replacement will be necessary.
Main components and how they work
The entire scheme of the VAZ 2114 fuel system is built on the injection principle, implying complete electronic control over the system’s operation process - starting with fuel supply and ending with the formation of a working mixture and combustion. Because of this, its constituent components are very different from devices characteristic of the carburetor principle.
So, it includes:
- fuel tank;
- pump (gasoline pump);
- pipelines for supplying gasoline;
- fuel filters;
- fuel rail;
- tank filler cap;
- nozzles;
- recycling block.
VAZ 2114 fuel system diagram
They perform the following functions.
Tank - provides storage of fuel reserves.
Pump - located inside the gas tank and serves to pump fuel to the ramp. Thanks to the sensor connected to it, it detects and transmits data on the level of remaining gasoline to the electronic unit.
According to reviews from 2114 owners, the best pump for this car is a fuel pump from Bosch, which is characterized by a long service life and great reliability.
Pipeline system - serves to move fuel to the engine and drain the remaining excess into the tank. It includes a system of metal tubes and flexible hoses, among which are the VAZ 2114 fuel hose, return hose, hose for connecting the adsorber and others.
Filters - serve to purify gasoline from possible impurities and sediments. The service life of the injectors, as well as the quality of the resulting fuel mixture, directly depends on their operation. That is why they should be replaced at least every 10,000 km.
Fuel rail - consists of two chambers separated by a diaphragm. One of them plays the role of a fuel container in which the optimal gasoline pressure is maintained, which changes when the diaphragm bends as a result of air being pumped into the second chamber of the ramp.
The tank lid is designed according to the valve principle and serves to relieve excess pressure.
Injectors are a system of valves with electromagnetic control. They spray gasoline directly into the combustion chamber, forming a working mixture in it.
Recycling unit - serves to absorb fumes generated in the throttle assembly (in accordance with the requirements of the Euro-3 standard). It is a container with activated carbon that adsorbs unnecessary fumes.
How to understand when it is necessary to clean fuel injectors
- Loss of dynamics during car acceleration.
- When you press the gas there are jerks and dips while driving.
- The engine is running rough and unstable.
- Fuel consumption has increased.
- It takes a long time to start the engine with the fuel pump running.
- Black smoke from the exhaust pipe.
There are many instructions and methods for cleaning fuel injectors on the Internet, but we recommend using the most reliable and proven one - cleaning in an ultrasonic stand.