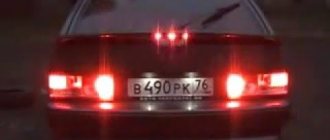
On all cars of the Tenth Family, the power lines for the lights contain many elements. There are lamp health relays, switches and fuses. Therefore, if the brake lights on a VAZ-2112 do not light up, you need to check the entire chain.
But the reason may look simple: sometimes the lamps do not turn on because the socket does not contact ground. Circuits are easy to analyze, but finding the cause of a breakdown is difficult. Let's look into the details.
If the lamps do not light, it is simply replaced.
Why do the brake lights on the VAZ-2112 not light up or work, what should I do?
On all cars of the Tenth Family, the power lines for the lights contain many elements. There are lamp health relays, switches and fuses. Therefore, if the brake lights on a VAZ-2112 do not light up, you need to check the entire chain. But the reason may look simple: sometimes the lamps do not turn on because the socket does not contact ground. Circuits are easy to analyze, but finding the cause of a breakdown is difficult. Let's look into the details.
If one of the lamps does not light, it is simply replaced. See the example in the video - you need a P21 W
Causes of malfunction
The main reasons for this malfunction are:
- defective or burnt out light bulb;
- break in electrical wiring or plug connections;
- fuse blown due to a short circuit or overload in the on-board network;
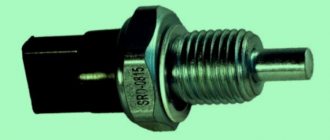
- limit switch malfunction;
- problems with electronic systems or units.
Such malfunctions can usually occur on high-mileage vehicles. However, there are exceptions.
Standard version of the brake light operating diagram
Power is supplied to fuse F17 from the battery, then the current goes to limit switch contact 11, and then, if the limit switch is closed, a circuit is formed with the filament of lamps 7. But note: part of the circuit is relay K1, more precisely, its contacts 5 and 4.
Basic network diagram
If the brake lights do not light up, on the VAZ-2112, as on all Tens, check one fuse. It is called F17 and is located in the mounting block to the left of the driver.
Main mounting block
It is important to know: voltage is always present at one of the fuse terminals. Check it out!
A few words about the “serviceability relay”
The lamp health relay is called K1, and it is the largest in the mounting block. If you remove this relay, then when you press the pedal you can dial the voltage at terminal 5 (but not 4). Look at the diagram again, and it will become clear what we are talking about.
The largest relay in the block
All relay contacts are numbered. Check the voltage at the block terminals:
- 6 – “mass” potential;
- 2 – voltage “+12”, but only after turning on the ignition;
- 5 – “+12” by pressing the pedal;
- 4 – the terminal rings like a ground tap.
If the potential “0” is not generated at terminal “4,” it means that the lamp filaments are burnt out or there is a break in the wiring. Now consider something else: the ground potential has been detected, but the lamps do not light. This is where suspicions of a short circuit arise.
Basic adjustment aspects
In order for the light to illuminate the road efficiently and not blind oncoming drivers, you need to know how to adjust the headlights on a VAZ 2112. First of all, you should prepare the car. A load of about 70 kg or an assistant can be placed on the front seat. You should check the tire pressure, raise the suspension, that is, create approximately the conditions in which the car is operated.
The car must be installed on a horizontal plane 5 meters from a vertical wall or stand, with markings applied for adjustment. Next, the light is turned on and the headlights of the VAZ 2112 are adjusted. During the adjustment, the second one is covered with non-transparent material.
The light from properly adjusted headlights will not blind oncoming drivers.
We turn on the brake lights forcibly
Relay K1 is successfully replaced with a pad with jumpers. In Fig. 1 just shows its diagram. If there is no such platform, you can temporarily close contacts 4-5. First, check everything mentioned above.
Have an observer watch what happens to the lamps. Press the pedal with one touch and release it. If the lamps do not turn on, check that the fuse is working properly. It's burned out, which means you're looking for a short circuit.
How to and how not to check the “0 Volt” potential
Let’s agree right away that we only work with a voltmeter. Voltage “+12” is caused by connecting one probe to ground. The presence of potential “zero” is checked differently: any of the probes is connected to a terminal with positive voltage, and then the second probe is connected to the wire being tested.
How to connect a voltmeter
Consider the error: one probe is connected to ground, the second to the terminal being tested, and vol. Here they conclude that there is a “mass” potential, but this is wrong! If the contact with ground is broken, the device will also show “0”. That is, the number “0” does not contain information.
Circuits protected by additional fuses (all fuses on A) on the VAZ-2110:
Additional fuses: 1 – ignition module, controller; 2 – canister purge valve, vehicle speed sensor, oxygen (heating) sensor, air flow sensor; 3 – fuel pump relay, fuel pump, injectors.
Additional relays: 4 – electric fan relay; 5 – electric fuel pump relay; 6 – main relay (ignition relay).
There is a fog lamp fuse installed in the niche of the instrument panel behind the mounting block:
Wiring test for non-working brake lights (ground test)
Let's look at the basic diagram: the brake lights and the reversing lamps have a common ground pin. If contact with this pin is broken, the reverse lamps will not turn on. Well, brake lights too.
Connector for connecting “internal” lights
On the left side there is a connector through which the wiring goes to the fifth door. The connector has black and red wires. Check the voltages on them. Most often the ground on the black wire does not ring. But maybe the connector itself needs to be cleaned.
Usually, if the ground breaks, another pin is used - the one that is connected to the glass heating coil.
If the “plus” does not come to the red wire, we check the “frog”. It's simple here:
- Disconnect the connector with two wires from the limit switch;
- Using 17mm wrenches, loosen the two nuts: holding the lower nut, rotate the upper one;
Removing the frog brake
By the way, one of the connector terminals receives a voltage of “12 Volts”. Check it!
If all the steps do not lead to results, there is only one thing left: contact a qualified electrician. We wish you success.
Methods for troubleshooting
Troubleshooting is not a complicated process and even novice car enthusiasts can do it (the author of the video is Avtoelektika VC).
First of all, you should check the integrity and condition of the wiring.
Using a multimeter, you need to test the wiring. Damaged or torn sections should be replaced intact or soldered. If there are traces of oxidation processes on the contacts, they need to be cleaned.
If the LEDs burn out, they need to be replaced in pairs. If the breaker fails, it must be replaced with a new one, as it cannot be repaired. Before replacing, turn off the vehicle's power by removing the negative terminal from the battery. Then disconnect the power wires from the breaker. Next, you need to loosen the lock nut and unscrew the main nut securing the switch to the bracket.
Replacing the brake light switch
Before installation, the new frog should be checked for functionality. This can be done using an ohmmeter. We connect the device to the device and measure the resistance. When the contact is closed, the resistance should be zero. If you press the rod, the contacts should open; the resistance in this case tends to infinity.
The brake lights on the VAZ-2112 do not light up or work, why?
On all cars of the Tenth Family, the power lines for the lights contain many elements. There are lamp health relays, switches and fuses. Therefore, if the brake lights on a VAZ-2112 do not light up, you need to check the entire chain. But the reason may look simple: sometimes the lamps do not turn on because the socket does not contact ground. Circuits are easy to analyze, but finding the cause of a breakdown is difficult. Let's look into the details.
If one of the lamps does not light, it is simply replaced. See the example in the video - you need a P21 W
Power is supplied to fuse F17 from the battery, then the current goes to limit switch contact 11, and then, if the limit switch is closed, a circuit is formed with the filament of lamps 7. But note: part of the circuit is relay K1, more precisely, its contacts 5 and 4.
Basic network diagram
If the brake lights do not light up, on the VAZ-2112, as on all Tens, check one fuse. It is called F17 and is located in the mounting block to the left of the driver.
Main mounting block
It is important to know: voltage is always present at one of the fuse terminals. Check it out!
The lamp health relay is called K1, and it is the largest in the mounting block. If you remove this relay, then when you press the pedal you can dial the voltage at terminal 5 (but not 4). Look at the diagram again, and it will become clear what we are talking about.
The largest relay in the block
All relay contacts are numbered. Check the voltage at the block terminals:
- 6 – “mass” potential;
- 2 – voltage “+12”, but only after turning on the ignition;
- 5 – “+12” by pressing the pedal;
- 4 – the terminal rings like a ground tap.
If the potential “0” is not generated at terminal “4,” it means that the lamp filaments are burnt out or there is a break in the wiring. Now consider something else: the ground potential has been detected, but the lamps do not light. This is where suspicions of a short circuit arise.
Relay K1 is successfully replaced with a pad with jumpers. In Fig. 1 just shows its diagram. If there is no such platform, you can temporarily close contacts 4-5. First, check everything mentioned above.
Have an observer watch what happens to the lamps. Press the pedal with one touch and release it. If the lamps do not turn on, check that the fuse is working properly. It's burned out, which means you're looking for a short circuit.
How to and how not to check the “0 Volt” potential
Let’s agree right away that we only work with a voltmeter. Voltage “+12” is caused by connecting one probe to ground. The presence of potential “zero” is checked differently: any of the probes is connected to a terminal with positive voltage, and then the second probe is connected to the wire being tested.
How to connect a voltmeter
Consider the error: one probe is connected to ground, the second to the terminal being tested, and vol. Here they conclude that there is a “mass” potential, but this is wrong! If the contact with ground is broken, the device will also show “0”. That is, the number “0” does not contain information.
Common problems with brake lights
There may be several reasons:
- blown fuse;
- faulty sensor;
- frayed or broken power cord.
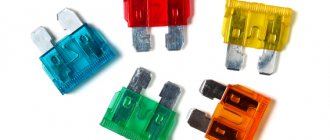
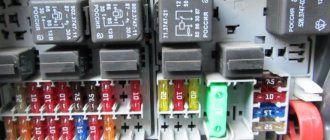
The most common cause is a blown fuse responsible for protecting the signal light circuit. This fuse is located on a block built to the left of the steering column. This capacitor can withstand a current of 7.5 amperes, as evidenced by the inscription on it. It is located in the bottom row, fourth from the right edge.
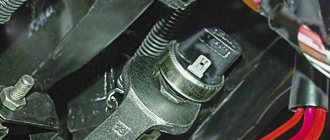
The next troubleshooting point is to check the brake light sensor. To do this, you need to check whether voltage is entering and exiting the sensor. In this case, you need to use a control lamp.
If the lamp does not light up when connected in front of the sensor, then the problem may be in the wires going to the sensor. If the lamp works before the sensor, but not after, then the problem lies in this part. You can also simply disconnect the input and output of the sensor and close it “directly” using a copper wire; if after these manipulations the lights in the brake lights light up, then the reason is precisely in the sensor.
There are two options for the brake lights not working, either the light in one of them does not light up, or all the lights in these lights do not light up. In the first case, the driver will have to check the condition of the brake light lamp to see if its tungsten filament has burned out. If the filament burns out, then replace it with a new light bulb of similar power. And if the light bulb is intact, then we clean the contacts in its socket and slightly pull out the central contact.
In the second case, it will take much longer to find the fault, since the likelihood of all three lamps burning out at the same time is unlikely. First, we check the condition of the fuse that protects this electrical circuit. This can be done very quickly, just turn on the interior lighting. If there is light, then fuse F17 (7.5A) is safe and sound, since it also protects this electrical circuit, and if there is no light, then you will have to open the mounting block and make sure that the fuse has blown.
Considering that the brake lights are located in the rear door, this means that the wiring harness going to them will bend if this door is opened or closed, which over time can lead to wire breaks. To check this assumption, you need to find the connector, which is located on the right behind the interior trim. You will have to disconnect it and use a tester to check the connector, which is popularly called “male,” for a short circuit. You will be interested in two wires: red (+ for brake lights) and black, it goes to ground.
If there is no tester, then you can check the condition of these two wires in another way. To do this, you will need two long wires to connect the positive terminal of the battery to the connector contact where the red wire goes, and the negative terminal of the battery to the contact with the black wire. If it turns out that the brake light lamps do not light up, then you will have to dismantle this wiring harness and then fix the problem. Well, if it turns out that the brake light lamps are on, then you will have to use a tester to check the wires of this female connector to the mounting block block. Also, a possible malfunction may be the brake light switch located above the brake pedal.
Related posts:–>
Wiring test for non-working brake lights (ground test)
Let's look at the basic diagram: the brake lights and the reversing lamps have a common ground pin. If contact with this pin is broken, the reverse lamps will not turn on. Well, brake lights too.
Connector for connecting “internal” lights
On the left side there is a connector through which the wiring goes to the fifth door. The connector has black and red wires. Check the voltages on them. Most often the ground on the black wire does not ring. But maybe the connector itself needs to be cleaned.
Usually, if the ground breaks, another pin is used - the one that is connected to the glass heating coil.
If the “plus” does not come to the red wire, we check the “frog”. It's simple here:
- Disconnect the connector with two wires from the limit switch;
- Using 17mm wrenches, loosen the two nuts: holding the lower nut, rotate the upper one;
Removing the frog brake
By the way, one of the connector terminals receives a voltage of “12 Volts”. Check it!
If all the steps do not lead to results, there is only one thing left: contact a qualified electrician. We wish you success.
Replacing a stop repeater with your own hands
If repairing the repeater is not practical, it should be replaced.
The replacement process consists of the following steps:
- Using a wrench, unscrew the fastenings of the rear part of the stop and remove it.
- Then we connect the positive wire of the lighting fixture to the terminal where the brake light frog is located. To do this, you need to run the wire into the luggage compartment, unscrew the trim on the right side, and connect it to the desired terminal. The disadvantage may be a bolt in the luggage compartment.
- Heat shrink should be applied to the wiring. To prevent the wires from dangling, they need to be secured with insulating tape.
- The final step is to check the device for functionality.
Photo gallery
If a repeater with incandescent lamps is installed on the car, then when connecting a device with LEDs according to the above diagram, the lamp control will not work correctly due to different loads. In this case, you should insert the positive wire into the light bulb control unit and connect it to terminal 54H.
As a brake light, a strip with LEDs can be glued to the upper part along the entire length of the rear window. It needs to be connected to a standard device, and it will work in the same way. It is important to maintain polarity. To make the tape less conspicuous, it can be painted black. Attach the tape using double-sided tape. We check for functionality.
Tell! VAZ 2112, rear brake lights
There was a problem with the rear brake lights on the two-wheeler. At first, the right brake light did not light up periodically, I turned the lights and everything was fine. Now all 3 brake lights do not light up at all, including the additional one on the spoiler. The lamps themselves are fine, because I put this lamp where the previous speed lights up, everything works. What could be the problem?
Are you interested in the storm's opinion?
Storm with Rose and Selena don't distract him.
A man is learning English.
I'm interested in all opinions)
Then write to the girls.
baby123 wrote the day before yesterday at 4:37
Hello My love How are you? I saw your profile today at(avtomarket.ru) and feel like contacting you.I feel we may become matches.( [email protected] ) is my contact. Kindly make a contact if you are interested.so that I can give you my picture for you to know who i am. My name is Celine.I will appreciate it if you give a good responds. Thanks and remain blessed. (Remeber the distance, color or age does not matter but love matters alot in life) Celine
rosesmith wrote yesterday at 15:56
Hello, How are you dear, I'm Rose ,i saw your profile and i became interested in you and will like to know you more. if you can reaply me back to my email address ( ).i will send to you my pictures and tell you more about me. hope we can move from here. i will be.waiting for your mail to my email address above. Regards,Rose
Well, what are you, like non-humans))) write on the ZADOLBALO or TUSOVKA forum.. And best of all, on the RUS CARS forum
The connection in the circuit is sequential. Where the light bulb is inserted (inside the pin, pull it towards you for better contact) There are light bulbs that are more powerful and weaker - install weaker ones.
Clean the contacts in the sockets where the light bulbs are inserted. And look at the antennae..
I decided to write a short instruction on this problem!
1. Check the light bulbs and fuse F17. If they are whole, go to point 2. Otherwise, replace and look. Are they glowing? Great! No? Let's move on to point 2.
2. The “twins” have one problem - the wiring harness that goes to the trunk door. It is usually located in the right corrugation (in the left wire to the rear wiper, I believe there is the same problem, but I got the car without a wiper). Checking this area is quite simple. You will need a multi tester or a 12 volt power supply (preferably both)
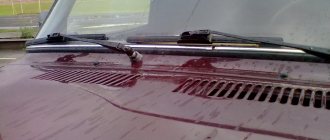
Behind the “skin”, on the right, where the rear right headlight with “turn signal” and “fog light” runs a wire along the iron, you can feel it without removing the fabric. This wire has a male-female connector. Let's disconnect it. “Dad” goes to the lights, and “Mom” is the signal coming back from the mounting block.
First of all, we check for short circuit (preferably with a multi tester) the male connector. There are four contacts “black - minus; red-stop including extra in spoiler; green – reverse; white – trunk opening solenoid. Next, we check each wire for breaks. Again, using a multi tester, one contact to the wire on the male connector, the other to the corresponding wire in the headlight block (black-black, red-red, etc. one by one, check the short circuit with other wires). If everything is in order, then using a 12V power source you can light the lamps. If they don’t light up, the reason is most likely in the circuit boards of the headlight itself, a lot has been written about this (by the way, the spoiler stop still lights up another connection there). If you get tanned, go to step 3. Connect the connector back.
Otherwise, we eliminate the short circuit, most likely it is in the very place where the wires go to the door, you will have to remove the trim, the side trim on the roof pillar, one ceiling cap - the far right one, the trim on the trunk door itself, and pull out the harness until the inspection point appears. Be careful with the rear window heating wire; it will need to be returned. I hooked another wire to this wire and only after that I began to pull it out, returning the harness to its place, pull it by the wire and pull the contact back. I had a break in the “minus” and a short circuit in almost all the wires. He healed and returned the tourniquet to its place; if desired, it can be replaced with a new one (it was in the evening, there was nothing to ride on.). We return the wires, not forgetting to connect the connector. Let's check. Are they glowing? Great! No? Let's move on to point 3.
3. We check the fastening of the black wire of the “mother” to the body - when checked with a multi tester, it should produce a short circuit to the body. The attachment point itself is located in the left niche of the luggage compartment. If everything is in order, read on (otherwise, of course, we will find out the cause and check; in the absence of a “minus”, the reversing lights, solenoid and stop lights will not work, most likely the wiper will not work either). Next we move to the driver's seat. There is a “frog” above the brake pedal. Two wires come to it, one always has 12V “+” (in my opinion it’s white with a red stripe), we check this fact with a tester on the case. Is there tension? Yes! Let's move on to point 4. No, read on...
If there is no voltage on any wire, “it’s rubbish” - a ground break - unlikely, but possible. I can't imagine where it could happen. Purely theoretically, the mass can be taken anywhere. Once the car starts, and only the rear brake lights do not light up, it means there is a mass somewhere close. However, a broken ground wire in a car is a huge source of danger, it must be found... We eliminate the source of the problem. Let's check. Are they glowing? Great! No? Let's move on to point 4.
4. There is voltage on the wires! We check the “frog” itself; the multi tester (on the contacts of the “frog”) should show a short circuit when the brake pedal is pressed. No ? We change the frog (by the way, you can short-circuit the two wires coming to the “frog”, the brake lights should light up). Let's check. Are they glowing? Great! No? Let's move on to point 5.
5. There is one weak link left... Relay for checking the integrity of lamps or as it is called Relay BSK. Most likely, the spiral there burned out, I suppose you can solder another one, but the cost is not high, so I replaced it completely. Let's check. Are they glowing? Great! No? Let's move on to point 6.
6. Here I can assume a break in the lead in the cable to the distribution block. It’s not a pleasant task; you’ll have to open the upholstery and look for it. Or throw a makeshift directly from the “frog” to the connector that we found in point 2.
Good luck to everyone on the roads. And do not get to point 6 of this instruction. Thank you for attention…
Video “Replacing a foot on a Mercedes”
This video demonstrates how to replace a brake light with your own hands using the example of a Mercedes (the author of the video is Ivan Poknya).
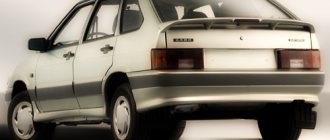
The reasons for replacing rear lights on a VAZ 2110-2112 can be different and the main ones are the following:
- damage due to unsuccessful parking or an accident
This repair procedure is quite simple and you can do everything yourself, having only a few tools on hand, the list of which is given below:
- Phillips blade screwdriver
- Ratchet handle
- 8 mm head
- Extension
Messages 5
1 Topic by pasha123d92 2016-08-07 14:16:32
- pasha123d92
- New member
- Inactive
- Registration: 2016-04-13
- Messages: 14 Thanks : 1
- Car: VAZ 2112
Topic: Brake lights on VAZ 2112 do not light up, but the spoiler lights up
The brake lights on the VAZ 2112 do not light up, the spoiler lights up, the fuses are intact and the turn signals are on, what could be wrong?
2 Reply from Ursadon 2016-08-07 17:19:56
- Ursadon
- Participant
- Inactive
- From: Novosibirsk
- Registration: 2014-02-15
- Messages: 83 Thanks : 25
- Auto: 21120
Re: Brake lights on VAZ 2112 do not light up, but the spoiler lights up
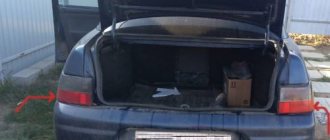
Open the trunk lid, you will see a rubber corrugation between the hinges - all the wiring is there. Most likely there is a frayed wire there.
3 Reply from pasha123d92 2016-08-07 18:31:16
- pasha123d92
- New member
- Inactive
- Registration: 2016-04-13
- Messages: 14 Thanks : 1
- Car: VAZ 2112
Re: Brake lights on VAZ 2112 do not light up, but the spoiler lights up
But how are the trunk lid and stopacs connected, they are not located on the trunk lid? on the trunk lid there is only a spoiler with a stopak that lights up, and reverse lights!
4 Reply from pasha123d92 2016-08-07 19:04:24
- pasha123d92
- New member
- Inactive
- Registration: 2016-04-13
- Messages: 14 Thanks : 1
- Car: VAZ 2112
Re: Brake lights on VAZ 2112 do not light up, but the spoiler lights up
I figured everything out, I thought that the stacks were where the turn signals were, but they are really on the trunk lid, I cleaned the contacts, everything worked) Now another question on the board where the turn signal is, 3 bulbs, 2 large and one small, one large turn signal is small in size, and the second large one is for what, I thought it was stop?
5 Reply from Denis Artyukhov 2016-08-13 23:18:28
- Denis Artyukhov
- Local
- Inactive
- From: Penza
- Registration: 2015-10-21
- Messages: 1,391 Thanks : 279
- Car: VAZ 21124
Re: Brake lights on VAZ 2112 do not light up, but the spoiler lights up
pasha123d92 , rear PTF. That is, when you turn them on, the indicator lights up brighter.
Fuse layout diagram for VAZ 2110, 2111, 2112
The photo shows fuses for VAZ 2110, 2111, 2112
As you can see, each fuse is numbered with a corresponding index.
In the above illustration, the unit is located on the left side of the steering column and is integrated into the instrument panel. Below are the values of the specific fuse in this mounting block. Table of fuse values for VAZ 2110, 2111, 2112.
| Fuse, no. | Current strength, Ampere | Values |
| F1 | 5 | Lamps for illuminating registration numbers, luggage compartment space, the entire left side of the vehicle's side lighting, as well as instrument lighting for dimensions and instruments. |
| F2 | 7,5 | Low beam left headlight |
| F3 | 10 | Left high beam |
| F4 | 10 | Front right fog lamp |
| F5 | 30 | Electric windows in doors |
| F6 | 15 | Cigarette lighter/lamp portable |
| F7 | 20 | Horn, engine radiator fan |
| F8 | 20 | Heated rear window |
| F9 | 20 | Windshield washer and wiper |
| F10 | 20 | Spare |
| F11 | 5 | Side light on the right side of the car |
| F12 | 7,5 | Low beam right headlight |
| F13 | 10 | High beam right headlight |
| F14 | 10 | Front left fog lamp |
| F15 | 20 | Heated seats |
| F16 | 10 | Left and right turn signals, hazard turn signals |
| F17 | 7,5 | Interior light, ignition switch illumination, brake lights, clock and computer illumination |
| F18 | 25 | Illumination of the glove compartment, heating controls, cigarette lighter |
| F19 | 10 | Reversing lamps, indication of instruments, computer, clock, serviceability of brake lights, door locking |
| F20 | 7,5 | Rear fog lights |
First test drive of Lada Vesta
For clarity, the principle of parallel arrangement of some fuses is clear: F1-F3 are responsible for the electrics on the left side of the car, and those located opposite F11-F13 are responsible for the right side of the car. The rest are responsible for other vehicle functions.
This is interesting: How to determine that the strut support bearing is knocking