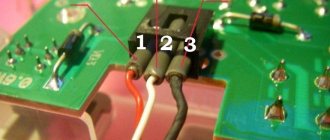
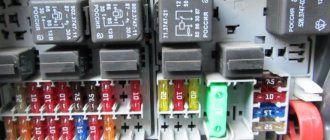
Left: If the turn signals work properly but the hazard warning lights do not turn on, the cause is usually a faulty hazard warning light switch. If you press the switch firmly several times, most often it will start working normally. If this does not happen, then remove the switch (2), squeezing its locking tabs and removing it from the groove, check the contacts of the pin connection (1).
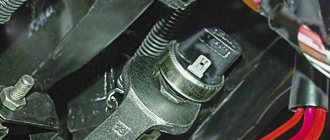
Right: When installing the brake light switch (2), it must be pressed against the pedal support (3) so that the switch pin also presses the switch when the pedal (4) is released. For perfect operation, the pin block (1) must be correctly connected.
Brake lights should be checked as often as possible in the interests of safety.
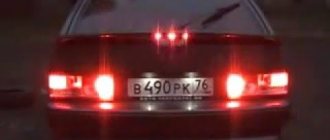
- The garage wall behind your car should give off a red glow when you press the brake pedal.
- When driving, check using your rear view to see if the light from your brake lights is reflected in the headlight reflectors or on the paintwork of the car behind you.
When you press the brake pedal with your foot, the spring in the brake light switch (it is mounted in the brake pedal suspension holder) presses on the control pin. At the same time, the contacts in the switch and the electrical circuit to the brake lights are closed. If the brake pedal is released, the pedal pin presses the control pin to its original position and the brake signal goes off.
Checking the brake light switch
If both brake lights do not light, check as follows to see if the brake light switch is the cause.
Modern AvtoVAZ SUVs use injection power units. If a malfunction is detected in the electrical equipment of the car, you should first check the serviceability of the fuses and relays. Next, we will show where the mounting block is located (fuse box or black box), as well as the location of the elements inside it.
Off-road vehicle for roads - over potholes and potholes
The VAZ 2123, called the Chevrolet Niva, has become widespread in the last decade. The main characteristics of the VAZ 2123 model are all-wheel drive on all wheels of the car, a two-speed transfer case and a controlled differential that can be locked, depending on need.
The car's gasoline engine consists of 4 cylinders with a volume of 1.7 liters. Models released after 2010 are more stylish and modern, but the main essence of the car has not changed - the VAZ 2123 is very practical for the current state of the roads. The car was widely used mainly in rural areas, but it can also often be found in cities.
The interior of the VAZ 2123 is made of high-quality material and is technically very well equipped. The interior lighting circuit consists of many electrical devices located throughout the interior of the vehicle. The instrument panel of the VAZ 2123 is equipped with modern LED lighting, which is practical, regardless of the time of day. The most vulnerable elements in a car's lighting circuit are the electric lamp and door light switches.
Reasons for failure of turn signals and emergency lights
As you know, the circuit of direction indicators and hazard warning lights is tied, since both functions are performed by the same headlights. If for some reason the hazard lights are working, but the turn signals are not, or neither the turns nor the warning lights are on, this can lead to an emergency situation on the road.
For what reasons did these elements stop working:
- Fuse failure is one of the most common problems. If the car is additionally equipped with a relay that is responsible for the operation of these optical elements, then the problem may lie there. Depending on the car model, the relay may be located separately from the main fuse block; use the diagram to find the failed part.
- Short circuit in the system. Because of this, when turning on the turning lights, the emergency lights turn on or the optics do not respond to the driver’s commands at all. To diagnose the problem, you will need a tester, as well as the skills of an electrician.
- Failure of the lighting source. In other words, the light bulb has burned out.
- Open circuit. This problem is relevant for many car owners of older cars. If the wires are laid in a place where there are moving elements, then over time it will fray and lose its insulation, which will generally lead to damage to the electrical circuit.
- Failure of a button or steering column switch. In this case, it is necessary to carry out more thorough diagnostics of the switch, as well as the connection button.
How is lighting arranged in Niva?
The Niva's lighting circuit is looped to the fuse box, which is located inside the car interior under the dashboard on the driver's side. Each of the fuses is responsible for a certain type of lighting device, not only inside the cabin, but also in the exterior lighting of the car. If the lighting of any interior device malfunctions, the first thing you need to do is check the fuses.
The lighting circuit of the VAZ 2123 has a weak link - the interior lighting switches. A breakdown occurs as a result of the car doors not closing tightly enough, or the door switches failing. The switches are located in the door support risers. During their partial breakdown, when the car is moving, the interior light may flash periodically, as poor contact occurs.
To eliminate the causes of the breakdown, first of all, you need to remove the power terminals from the battery. During the work you will need a screwdriver and new switches. They are inexpensive, so it is better to buy with a reserve. To replace, unscrew the fixing bolt and remove the button. Disconnect the contact wire from it, and then attach the new button. Be sure to check that the rubber gasket on the button switch is seated securely. If it is damaged, it is better to replace it, as it prevents moisture from entering the car door pillar.
After replacing all switch elements, make sure that the interior lighting circuit is working properly. If there are any problems, it is worth adjusting the doors, namely, checking whether the plastic button that presses on the switch works correctly - it should be positioned in the center.
Reasons for failure
As a rule, frequent relay breakdowns are explained by the low quality of components, both supplied from the factory and those still alive “cooperatives”. You can only combat this by choosing carefully or having a handful of other replacement parts.
Repair is impractical due to the cheap cost, although there are examples of restoration “for fun.” The only difficulty is access to the place where the Niva turn signal relay is located; changing it is a matter of 2 minutes.
Another reason that can kill the breaker is increased voltage in the on-board network as a result of failure of the generator components and the voltage relay regulator. A short circuit is also possible. In any case, the circuit is examined, starting with a simple one - the state of the fuses.
Lighting and other problems
The lighting scheme of the VAZ 2123 provides for both central and individual lighting. In the central lampshade, the light bulb may periodically fail; less often, the on and off button fails. To make repairs, turn off power to the battery terminals. Using a flat-head screwdriver, pry the plastic inside the passenger compartment; this should be done in such a way as not to damage the trim. Next, if necessary, replace the light bulb.
Nowadays, it is customary to replace standard interior lighting bulbs with LED ones - they shine brighter and at the same time reduce energy consumption, and their service life is much longer than standard ones.
The interior of the VAZ 2123 car is also equipped with individual lighting. It is much more difficult to replace light bulbs in it. To remove them, try not to use screwdrivers or third-party objects, since the entire body and mountings of the individual lighting lamps are made of plastic, and scratches may remain on it. Try to remove them by pressing the special clips in the center.
After this, remove the lampshade by disconnecting the terminals from it. Next, replace the two light bulbs in it. The power of the light bulbs must be chosen the same. After replacement, install everything in reverse order and check operation.
p, blockquote 1,0,0,0,0 —>
p, blockquote 2,0,0,0,0 —>
Problem with turn signals (direction indicators)
Reg.: 01/05/2005 Threads / Messages: 2 / 255 From: Nizhny Novgorod Age: 38 Car: VAZ-21213 1997 hand-built and four more Niva, UAZ 469 on 36 wheels, enduro, and family cars
Reg.: 12/06/2004 Threads / Messages: 627 / 51709
Reg.: 12/06/2004 Threads / Messages: 4024 / 23169 From: Moscow Age: 67 Car: 21214M, 2013
Alexey aka ALER.
Reg.: 01/05/2005 Threads / Messages: 2 / 255 From: Nizhny Novgorod Age: 38 Car: VAZ-21213 1997 hand-built and four more Niva, UAZ 469 on 36 wheels, enduro, and family cars
I didn’t look at the markings, but they look standard. By the way, why are there other small bulbs like these next to the topmost light bulbs (fog lights)?
Added after 1 minute 8 seconds:
Reg.: 12/06/2004 Threads / Messages: 4024 / 23169 From: Moscow Age: 67 Car: 21214M, 2013
Alexey aka ALER.
Reg.: 01/05/2005 Threads / Messages: 2 / 255 From: Nizhny Novgorod Age: 38 Car: VAZ-21213 1997 hand-built and four more Niva, UAZ 469 on 36 wheels, enduro, and family cars
Reg.: 02/17/2005 Threads / Messages: 1 / 75 From: Moscow, South-Western Administrative District Age: 41 Car: Daewoo Matiz 05gv. 0.8l. Eng. ; Tagaz Tager 2.3
Reg.: 12/06/2004 Threads / Messages: 4024 / 23169 From: Moscow Age: 67 Car: 21214M, 2013
Source
Additional relay and fuse box
It is located behind the glove compartment at the feet of the front passenger. To access, unfortunately, you will have to remove the glove box.
p, blockquote 42,0,0,1,0 —>
p, blockquote 43,0,0,0,0 —>
The fuses for the electric fans of the cooling system and the engine control relay (injection system) are located here.
p, blockquote 44,0,0,0,0 —>
Scheme
p, blockquote 45,0,0,0,0 —>
p, blockquote 46,0,0,0,0 —>
Purpose
- Additional relay (turns on the right electric fan through an additional resistor at low rotation speed);
- Fuse (50A) protecting the power circuits of the additional relay and the right electric fan relay;
- Fuel pump (fuel pump) fuse (15A), protecting the power circuits of the electric fuel pump relay;
- Fuse (15A) protecting the constant power supply circuit of the controller;
- Right electric fan relay;
- Left electric fan relay;
- Electric fuel pump relay;
- Main relay;
- Fuse (50A) protecting the left electric fan circuits;
- Fuse (15A) protecting power circuits switched on by the main relay;
- Controller
Problem with turn signals (direction indicators)
Name: Sergey Reg.: 10/06/2011 Messages: 76 From: Belarus, Brest Age: 44 Car: VAZ 2131, 2006, engineer. 1.8
Name: Alexander Reg.: 03/22/2012 Threads / Messages: 1 / 1142 From: Nizhny Novgorod Age: 56 Car: VAZ-21213-1995. There is a VAZ-21214M 2009. and will be.
Name: Sergey Reg.: 10/06/2011 Messages: 76 From: Belarus, Brest Age: 44 Car: VAZ 2131, 2006, engineer. 1.8
Name: Alexander Reg.: 03/22/2012 Threads / Messages: 1 / 1142 From: Nizhny Novgorod Age: 56 Car: VAZ-21213-1995. There is a VAZ-21214M 2009. and will be.
Reg.: 05/15/2015 Messages: 4 From: Ukraine Kyiv Age: 60 Car: VAZ 21011 1980
Name: Sergey Reg.: 10/06/2011 Messages: 76 From: Belarus, Brest Age: 44 Car: VAZ 2131, 2006, engineer. 1.8
Reg.: 05/15/2015 Messages: 4 From: Ukraine Kyiv Age: 60 Car: VAZ 21011 1980
Name: Sergey Reg.: 10/06/2011 Messages: 76 From: Belarus, Brest Age: 44 Car: VAZ 2131, 2006, engineer. 1.8
Reg.: 05/15/2015 Messages: 4 From: Ukraine Kyiv Age: 60 Car: VAZ 21011 1980
Name: Sergey Reg.: 10/06/2011 Messages: 76 From: Belarus, Brest Age: 44 Car: VAZ 2131, 2006, engineer. 1.8
Reg.: 02/26/2010 Messages: 3 From: DPR Age: 35 Car: VAZ 21053
Reg.: 01/01/2012 Messages: 8 From: Buzuluk, Russia Age: 49 Car: VAZ-2131 2011
Reg.: 08.23.2009 Threads / Messages: 2 / 12426 From: Nizhny Novgorod region, Vyksa district Age: 37 Car: VAZ-2121 1985
Reg.: 06/09/2010 Threads / Messages: 13 / 1028 From: region 09, Karachay, Uchkeken, Kislovodsk. Age: 45 Car: VAZ2121-NIVA, USSR, 1981, engineer. Opel Zafira 2.0 turbo.
Source
Cigarette lighter fuse
If the cigarette lighter does not work, then the first thing you should check is the socket itself for the presence of foreign objects and the integrity of the fusible link, which opens the circuit if the reverse mechanism of the cigarette lighter spiral does not work.
p, blockquote 48,0,0,0,0 —>
p, blockquote 49,0,0,0,0 —>
p, blockquote 51,0,0,0,0 —>
In another version, this is the adjacent element (cigarette lighter and sound signal)
p, blockquote 52,0,0,0,0 —>
p, blockquote 53,0,0,0,0 —>
If this does not help, then the question remains with the electrical wiring itself.
p, blockquote 54,0,0,0,0 —>
We have also prepared video material on this article.
p, blockquote 55,0,0,0,0 —>
Features of a non-standard breakdown Everything is simple on the shnivy From the block there is a plus to the frog through the 17th fuse, if after ringing the frog we are convinced that it is working, we go to the wiring that goes directly to the left stop, we ring it from the point of contact of the frog and the rear driver's headlight, (left )". If there is no power and the wire is burnt, then we change it.
Self-diagnosis of car lighting devices
There are several situations in which you can determine that optics need diagnostics:
- The turns do not flash, but light up. Such a malfunction indicates the failure of the relay, in particular, we are talking about its electromagnetic component. The electromagnet itself could close in one of the positions, as a result of which it cannot return to its initial state.
- The turning lights flash very quickly or very slowly. In this case, the problem may lie not only in the relay. In some cases, this type of malfunction occurs when the driver uses inappropriate lighting sources. So when purchasing new light bulbs, you need to make sure that they correspond to the rating set by the car manufacturer.
- The optics don't work at all. That is, the turning light bulbs do not flicker, and the corresponding indicators on the dashboard also do not light up. In addition, there are no characteristic clicks that appear when turning on the turning lights. With such symptoms, there can be many reasons for the problem; we will tell you more about their diagnosis below (the author of the video is the Steel Horse channel).
As for diagnostics, it is performed in several stages:
- First of all, you need to make sure that all sensors and indicators on the device are working. If they do not function, then it is necessary to diagnose the safety devices.
- If all devices are operating in normal mode, then you next need to turn on the light alarm button and diagnose all light sources in the headlights. That is, check the front, rear, and side (if any) lights.
- If the alarm does not function when activated, you need to check the functionality of the relay, and also check the power supply at the terminals. To do this, remove the relay from its mounting location, and then, using a test light, connect one of its contacts to the installation site (to the positive), and the other to the car body or battery. There is no need to turn on the ignition. If there is no power, then most likely the reason lies in a failed safety device, a broken hazard warning button, or a damaged electrical circuit. Also, the essence of the problem may lie in poor contact in the connecting plugs.
- If there is a plus on the contacts, then try shorting the two relay terminals using copper wiring. If all electrical circuits, as well as the connection plugs, are working properly, then all turn signals should light up. In this case, the fault must be looked for in the relay.
- If the lights do not light up after the steps you have performed, then most likely the cause of the malfunction lies in the emergency light control button. However, in practice this happens quite rarely; there is often a short circuit in the circuit. By the way, it is a short circuit that can lead to a breakdown of the relay, therefore, before replacing the failed element, you need to eliminate the short circuit.
- If the emergency signal is functioning, this indicates that the safety devices and relays are working; accordingly, you need to start diagnosing the button itself. First of all, you need to diagnose the positive terminal, as in the case of checking the relay, while the ignition, as well as the hazard warning button, must be activated. If the diagnostics showed that there is no plus, this indicates that the button itself needs to be checked in more detail. Remove it from its seat and check the connection circuit. If there is no power, then you need to look for a break in the wiring from the tidy to the button itself. If there is power, then it will be necessary to short-circuit the terminals at the installation site, the ignition does not turn off, after which the direction indicators must be activated (on either side). When the lighting sources are turned on, the control button must be replaced, but if there is no power, then you need to check the power in the emergency relay. If there is no power, the problem most likely lies in a break in the connecting electrical circuit from the control key to the block with safety devices.
Brake lights do not light up on Chevrolet Niva
F6 15 A - door lock control unit. If one or more doors stop opening, check this fuse. The issue may be in the central locking, control unit, as well as the mechanisms themselves, rods and door locks.
If you have no experience, it is better to contact a car service.
F7 20 A - horn and its relay, cigarette lighter. If the horn does not work, check this fuse, the steering column contacts and the wiring; the contacts may have oxidized and the wiring may have become frayed.
Also check the horn itself, you can replace it with another one, for example, a two-tone one from Volga. If the cigarette lighter does not work, check the wiring and its contacts. The white wire is responsible for the backlight, the red and black wires go to the cigarette lighter contacts. Do not insert non-standard connectors into the cigarette lighter, they may cause a short circuit. If the connector in the cigarette lighter moves to the sides, it is better to use a splitter and insert this connector.
F8 20 A - rear window heating element and relay contacts.
Similar to relay K7. F9 20 A - rear window heating relay winding, additional relay, rear window wiper motor, windshield wiper and washer switch.
F10 20 A - backup fuse. F11 5 A - right side lamps. F12 7.5 A - low beam in the right headlight, gear motors for headlight range control. F13 10 A - high beam in the right headlight. F14 10 A - backup fuse. F15 20 A - backup fuse. Similar to relay K3.
If the brake lights do not work, check this fuse, the lamps themselves, their connectors, usually the problem is bad or oxidized contacts. Also check the operation of the brake light switch located near the brake pedal.
F18 25 A - heater electric motor and its switch. If the stove blows cold air, the problem may be in the hot air damper, the cable to which comes from the regulator under the casing not far from the gas pedal. The coolant level must be within acceptable limits. If the heater doesn't work or blow at all, it could be the heater motor. Also check the heater switch and its contacts.
F19 10 A - the indicator breaker does not light up the brake light on the Chevrolet Niva and the hazard warning lights in the turn mode, the indicator lamp in the light switch, the turn signal lamps, the turn signal lamps on the dashboard, the differential indicator lamp.
F20 7.5 A - reserve. Wiring block diagram: When troubleshooting electrical problems, you may also find the wiring block diagram useful, using which you can easily find the desired contact or determine how to wire a particular fuse.
It is better to check the fuses with a tester, because on the outside they may look intact, but in fact there may be a break inside. When driving, check using your rear view to see if the light from your brake lights is reflected in the headlight reflectors or on the paintwork of the car behind you. Brake light switch When pressed, the brake light on the Chevrolet Niva does not light up on the brake pedal; the spring in the brake light switch, it is mounted in the brake pedal suspension holder, presses on the control pin.
At the same time, the contacts in the switch and the electrical circuit to the brake lights are closed. If the brake pedal is released, the pedal pin presses the control pin to its original position and the brake signal goes off. Checking the brake light switch If both brake lights do not light, check as follows to see if the brake light switch is the cause.
If the brake lights are on, it means the brake light switch is faulty.
Replacing the brake light switch Disconnect the ends of the switch wires. When installing, insert the switch into the holder and make sure that the neck of the switch fits snugly against the brake pedal.
After installing the new switch, connect the wires and check its operation. When you press the brake pedal with your foot, the switch is adjusted automatically.
Standard Chevrolet Niva fuses are designed to protect the vehicle's electronic equipment. The unit is located in a place rare for modern cars - inside the cabin. There is a safety module installed under the glove box. The box is responsible for the secondary circuits of the equipment and is not directly related to the power plant.
The main engine relay is mounted as a separate unit. On Chevrolet Niva 2017-2019 it is in the form of a plastic cube.
Do-it-yourself repair of direction indicators and hazard alarms
If the turns disappear, as well as the car’s emergency signal, then you can try to solve this problem yourself:
- If the safety element and relay break down, the failed parts must be replaced. If the reason lies in a short circuit, then before replacing it is necessary to check all electrical circuits in which it could occur. Only after the cause of the short circuit and power surges has been eliminated, the devices need to be changed.
- If the alarm button fails, then you just need to change it. We have already talked about how to diagnose this part.
- As for electrical circuit diagnostics, it is carried out using a tester. If damaged sections of the wire are identified, they must be replaced. When laying them, make sure that the wiring does not come into contact with moving body elements. It is also recommended to additionally insulate new wires to increase the reliability of the insulation.
- If the reason is the light bulbs, then all burnt out light sources must be replaced. In the front and rear headlights, the lamps are changed by removing the protection from the headlights, disconnecting the power circuit from the lamp, as well as unscrewing the light source from the seat and replacing it with a new one. If the lamps in the side headlights do not work, then, as a rule, to dismantle the lighting sources, the lamp itself must be pryed off with a screwdriver, then disconnect the power cord and remove the device.
- If the reason lies in the steering column switch, then this device needs to be disassembled and checked. As a rule, the cause of switch failure is poor contact or abrasion. In this case, the failed switch is replaced with a new one. As for the contacts (no matter where - on connections or buttons), it is advisable to clean them.
- You should also check all the plugs and connectors, because it is quite possible that the problem is poor contact on them. Acidified contacts must be cleaned with a wire brush or sandpaper. If the contacts are burnt out, they will need to be replaced.
The video below presents an inexpensive option for repairing the steering column switch in a Peugeot car (the author of the video is the EzjikOnline channel).
Where are the fuse box and relays of the Niva Chevrolet
The location of the inserts on cars did not change from 2011 to 2022.
To gain access to the main unit, you should pick the instrument panel in the area of the pedal assembly. Under the dashboard, to the left of the steering wheel. To get to the panel under the tidy, use a Phillips screwdriver to remove the plastic casing, where the panel will be.
The next part is located under the glove compartment. To get to the site you will need to completely dismantle the glove box. The installation location was not chosen by chance. The module cover is protected from mechanical damage and moisture, and breakdowns inside are rare. Repair is not difficult.
In the pre-Restyle version, the main unit was located in the engine compartment and the inserts were located under the hood near the ECU, where the main electronic element of the car was installed.
A detailed location with a description is in the photo below.
Chevrolet Niva fuses with description
The main elements of a car can be divided into two groups based on location. Consequently, their purpose will be different.
The photo shows a fuse panel, relevant for models manufactured after 2009.
For convenience, it is better to present the decoding in the form of a table.
| Number | Circuit Description |
| F1 | License plate lighting, side lights on the left side of the car. |
| F2-4 | The main lighting is low beam, high beam and fog lamps on the left side of the car. In some configurations, fuse No. 4 is a spare socket. |
| F5 | Main power window protection relay |
| F6 | Cigarette lighter power supply. Some motorists connect power cores here instead of an incandescent filament. |
| F7 | Horn connection relay. |
| F8 | Heated rear glass and rear view mirrors. |
| F9 | Interior lighting switch, glove compartment lighting, wiper drive and electrics. Separate outlet for windshield washer system compressor. |
| F10 | Standard control module for electrical accessories and door locking, or spare |
| F11-14 | Exterior car lighting. Low and high beam head optics, fog lights, side lights. The fuses are responsible for the right side of the vehicle. |
| F15 | Standard control system for rear view mirror drives. Fuse for heated seats. The minimum configuration does not include the insert. |
| F16 | Hazard warning light breakers and turn relays |
| F17 | Interior lighting, partial display of the instrument panel, alarm position control, brake signals, additional stop block. |
| F18 | Power heating fan |
| F19 | Starter head relay, instrument panel lighting and indication, turn signal relay system in turn mode. |
| F20 | Rear fog lamps, immobilizer and anti-theft alarm buzzer. |
The car radio and speedometer are connected separately from the main fuses. The drives of the injectors and air conditioning compressor are designed similarly. Depending on the configuration and year of manufacture, the listed components may be connected according to a different scheme.
Also in the VAZ 2123 panel there are spare fuses located in separate sockets.
Additional fuse block
The DBP, also known as the engine control panel, is located under the dashboard at the passenger's feet. To gain access to the unit, you will need to dismantle the glove box. Below it is an auxiliary module. Here the main part is represented by relays, but there are also fuses. Fuse links have markings and areas of responsibility:
- No. 2 – high-power fuse responsible for protecting the power lines of the electrical circuit of the right radiator fan and an additional relay group;
- No. 3 – safety insert for the fuel pump located in the tank;
- No. 4 – the element is responsible for powering the car controller circuit;
- No. 9 – fuse for the right radiator fan;
- No. 10 – insert protecting power lines and circuits switched on by the main relay.
Relay Niva Chevrolet
Two places where protective inserts of electrical circuits are concentrated are presented. The explanation of the automatic circuit switching nodes is as follows.
Replacement method
To carry out operations you will need:
- wrench head set to “10” (preferably with a ratchet mechanism);
- plastic puller or similar device;
- pliers;
- Phillips screwdriver.
Before replacing the Niva turn signal relay begins, disconnect the negative terminal from the battery. Access to the element being replaced is provided by removing the dashboard.
- Take a screwdriver and release the instrument panel from the two self-tapping screws.
- Carefully push the shield towards you, overcoming the resistance of a pair of latches located in the upper part of the part.
- Unscrew the instrument panel with the key “10”.
Mounting blocks for Lada 4×4 2022
The main and additional units are located in the cabin to the left of the steering wheel, under the instrument panel. The blocks contain fuses of the “Cylinder” size, ten and six fuses, respectively. The ratings and purpose of the fuses are indicated in Table 4 “Circuits protected by fuses”:
Fuse block of standard size “Standard”. The block is located on the left side under the upholstery and contains fuses that are designed to protect engine control system devices. The ratings and purpose of the fuses are shown in Table 5:
The fuse and relay box is located on the left side of the steering column under the instrument panel. The block contains two “Standard” size fuses, which are designed to protect the circuits of the electric fuel pump, electric windows and electric mirrors. The ratings and purpose of the fuses are shown in Table 6:
The fuse and relay box is located on the right side of the steering column under the instrument panel. The block contains one “Maxi” size fuse and two “Standard” size fuses, which are designed to protect the circuits of the hydraulic unit of the anti-lock braking system. The ratings and purpose of the fuses are shown in Table 7:
Heater radiator is clogged
There may be several reasons:
The first is improper mixing of antifreeze and antifreeze . For example, in G13 you filled in, say, G11 or even antifreeze, then a sediment may appear that will quickly clog all the thin radiator pipes.
Secondly, they poured water. Water not only causes rusting of metals in the system, but also forms scale on the walls.
Third, they eliminated leaks in the heater radiator or main radiator using all kinds of sealants. On the one hand we heal, on the other we cripple. The passages in the radiator can become clogged with excess of this sealant; the liquid cannot circulate normally in it and, accordingly, heat it up, which means it will not really heat it. True, your engine may show high temperatures, at the limit level (the main thing is not to overheat it). You need to either flush the system, clean the radiator, or simply replace the radiator.
Diagram for switching on the dimensions of the Niva 21213 car |
Scheme for switching on the external lighting (dimensions) of the Niva 21213 car
Elements of the diagram for switching on the dimensions of the Niva 21213 car
1. Side lamps in the front lights of the car. 2.Fuse block. 3.Outdoor lighting switch. 4. Instrument lighting switch. 5. Indicator lamp for turning on the dimensions in the instrument cluster. 6.License plate lights. 7. Side light lamps in the rear lights.
A - to the lighting lamps of the instrument cluster, switches and backlight display.
Notes and additions
More diagrams of the Niva 21213 car
— Connection diagram for low and high beam headlights Niva 21213
— Wires for the rear lights of the Niva 21213 car, diagram
— Connection diagram for generator 9412.3701 for Niva 21214
— Body clearances of the Niva 21213 car, diagram
— Connection diagram for direction indicators Niva 21213
Disassembling the panel
If the shield malfunctions, it will have to be disassembled in any case to determine the cause of the breakdown. How to remove the instrument panel? “Niva-Chevrolet” will not cause problems in this sense.
This is done as follows:
- Use a slotted screwdriver to pry up and remove two plugs. The first is located to the right of the hazard warning button, and the second is in the far right corner of the panel trim.
- We turn out the screws located under the plugs.
- We pull out the right side of the dashboard trim and remove the connectors from the control buttons. Remember (take a photo) which connectors go to which buttons!
- We disengage the left side of the trim, remove the block from the buttons for turning on the headlights and dimensions. We remove and remove the lining.
- Unscrew the two screws securing the dashboard. Disconnect the connectors.
- We remove the panel.
Recommendations
I replaced the ignition switch contact group, now everything works as before!Thanks for the advice!
Also interesting: Interior heater valve VAZ 2121 Niva 2131
The dimensions from the factory work without ignition. I often forget to turn it off, I lock the car, and the lights are on and the lights are on. Of course there is no stove.
And in principle, you shouldn’t turn on the heater fan until you start the engine!
And my dash doesn't light up and the heater fan doesn't work when the ignition is off. How it should be!
The tidy should light up when the lights are turned on.
It doesn't light up for me. Only when the ignition is turned on.FLASH-X3!
Either there is a problem in the lock, or in the button for turning on the dimensions (headlights), there is simply nothing to break.
The heater fan will never run without ignition. Not provided.
The backlight has a power supply system independent of the ignition.
The key in the ignition switch must be turned to marks III and I. If the key is at mark 0, nothing will work. Even the light.
If the key is in the required (III and I) position and nothing works... there may be either problems with the lock or contact group, or the wires are mixed up when connecting, if the lock was turned off.
thanks, do you think it’s the ignition switch? I’m just leaning towards that too...
The heater fan will never run without ignition. Not provided.
The backlight has a power supply system independent of the ignition.
The key in the ignition switch must be turned to marks III and I. If the key is at mark 0, nothing will work. Even the light.
If the key is in the required (III and I) position and nothing works... there may be either problems with the lock or contact group, or the wires are mixed up when connecting, if the lock was turned off.
I have a 21st Niva
It doesn't matter what kind of field. The electrics on all classic vases are similar and unchanged. And the stove motor does not turn on without the ignition.
I understood why I thought it was turned on.
The heater fan will never run without ignition. Not provided.
The backlight has a power supply system independent of the ignition.
The key in the ignition switch must be turned to marks III and I. If the key is at mark 0, nothing will work. Even the light.
If the key is in the required (III and I) position and nothing works... there may be either problems with the lock or contact group, or the wires are mixed up when connecting, if the lock was turned off.
Without a key, I only have stoplights that light up when I press the brake pedal)
My car works halfway without a key.
The heater fan will never run without ignition. Not provided.
The backlight has a power supply system independent of the ignition.
The key in the ignition switch must be turned to marks III and I. If the key is at mark 0, nothing will work. Even the light.
If the key is in the required (III and I) position and nothing works... there may be either problems with the lock or contact group, or the wires are mixed up when connecting, if the lock was turned off.
The problem was solved by replacing the ignition switch contact group!thanks for the advice)
Read news about the new Niva
- Diagram and location of the fuse box Niva VAZ-21213 and 21214
- Purpose of fuses, relays and their replacement Niva VAZ 21213, 21214, 2131 lada 4×4
- Where are the relays located in the field | Niva Repair
- FROST car air conditioners // Online store // Prices // Air conditioners for cars Lada VAZ, VolksWagen Polo, Daewoo Matiz
- How much does it cost to prepare a Niva for off-road use?
- Engine VAZ 21213 Niva
- Installing fog lights on a Chevrolet Niva
- Tuning Niva 21213 with your own hands: interior, engine
