According to the current traffic rules, drivers are required to use side lights when operating a vehicle at night. In parallel with this, the dashboard is illuminated. Breakdowns of this kind may indicate various problems.
Side light diagram.
Included clearance on the VAZ-2110
Repair
As already said, it is prohibited to drive a car in the evening or at night if the side lights are not on, so we will look for the cause and then eliminate it.
If you are sure that the paths through which electricity passes are in good condition, the first thing to do is check to see if the lamps have burned out. And if they need a replacement, do it.
For the head lamp, the replacement procedure is as follows:
- Open the hood;
- We disconnect the battery, or even better, remove it. After all, we are talking about electricity, which is unsafe;
- From the engine compartment, holding the lamp with your hand, disconnect the wires directly going to the light bulb from the block;
- Remove the rubber cover;
- We move the latch to the side, disengaging the spring from the hook;
- We take out the size bulb;
- We replace it with a new one and put everything back together.
When the replacement is made, we check whether the head lamps are on.
Light bulbs in the rear dimensions on a VAZ 2110 are installed as follows:
- We de-energize the car;
- From the trunk (open) side, remove the contact part of the rear light with lamps. To do this, you need to release the latches;
- Remove the headlight bulb and replace it with a new one.
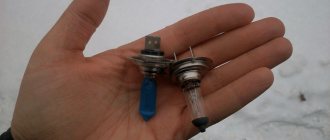
Do not forget that you cannot touch the halogen lamp with your bare hands. Replacement must be done with gloves. The fact is that dark spots will appear where you touch the light bulb. In addition, it has been proven that such a light bulb burns out much faster.
Replacing the turn signal lamp:
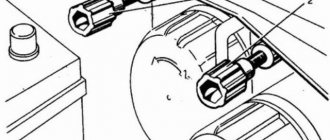
1) In this case, everything is very simple, first of all, you will need to understand where this lamp is located, so that it is more clear to you, see the photo below:
Note! As you already understood, in the photo the arrow indicates only the chamber or, as it is also called, the lamp base, but the lamp itself is not visible, so in order for you to be able to see it and easily remove and change it, grab this base part with your hand and then turn it it clockwise by a small degree, and thereby remove it from there!
2) When the base together with the lamp itself is removed, grab the light bulb with your hand (Indicated by the arrow) and then slightly press on it and turn it counterclockwise and remove this lamp.
Note! When you install a new lamp, make sure that it fits into the grooves, one of them is indicated by an arrow in the photo, and when it fits in there all the way, turn it so that it locks, and after fixing, check that it doesn’t fly out of there!
Important! When you buy a new lamp for either low beam or high beam, be sure to look at the markings that are placed on the base of the bulb, because cars may have bulbs for low beam, for example H1, and for high beam, for example H4, and therefore if If you also install an H1 lamp on the high beam, then both headlight units will shine differently! (Different lamps can only be installed by the previous owner of your car, because from the factory, as mentioned a little earlier, the same H1 bulbs were installed on both the high and low beams)
By the way, before changing the lamp, check the fuse that goes to it; perhaps it has simply blown and because of this the lamp does not work!
Additional video: For more information on how to replace all lamps, see the interesting and instructive video below:
Rear lights on VAZ 2114 do not light up
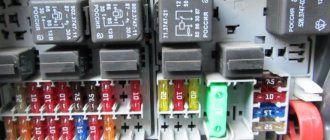
When both side light bulbs on one side of a car, left or right, fail, the reason is always clear. The fact is that the safety block contains one fuse responsible for each side. It is necessary to replace the corresponding fuse and the problem will be eliminated.
At the same time, there is a constant discussion on the Internet on forums about whether the front lights on a VAZ 2114 don’t light up or why the rear lights on a VAZ 2114 don’t light up. Quite a lot of opinions and different experiences are expressed. If we summarize all this, we can draw the following conclusions.
The side lights of the rear hemisphere are located in the rear light block, in which a generally recognized disease is constant oxidation and corrosion of the contact groups. For preventive purposes, it is necessary to constantly monitor this board.
The same is possible on the contacts of the front headlights. Nevertheless, from practice there are cases when, when checking the performance of light bulbs, it turned out that they burned out on both sides at the same time (maybe one by one, but the driver did not notice this in time). At the same time, the amateur master checks everything, just not the light bulbs, claiming that the probability of simultaneous failure of the lamps is absolutely minimal. But auto electricians first check the lamp and contact.
Like all not new cars that have been removed from the production line a long time ago, second-generation Samaras are subject to minor breakdowns over the years, which, among other things, affect lighting devices. For this reason, many drivers are faced with the fact that the rear lights on their VAZ 2114 do not light up, which can lead to dangerous situations on the road if the problem is not solved in time.
Tips for motorists
To figure out why the low and high beam headlights on a VAZ-2110 car do not work, you need to know what you need to pay attention to when trying to fix this problem. These cars are equipped with a headlight unit where the direction indicators are located, as well as two options for high and low beam headlights
These options differ in that in one case there are two single-filament lamps in the headlight unit (separately for the low beam headlights and separately for the high beam), and in the other case there is one, two-filament lamp. Therefore, there are two plugs in the electrical wiring for connecting the corresponding set of headlights.
Also involved in the operation of the electrical circuit of external lighting are: the external lighting switch, which is located in the cabin on the front panel; The headlight switch is located on the steering column; The low beam relay, the high beam relay and 4 fuses are located in the mounting block, and the high beam warning lamp is located on the instrument panel. When the high beams are turned on, all 4 filaments in the exterior lighting lamps should light up.
If one or more threads of the headlight lamps do not light, then, without getting out of the car, check the integrity of the fuses located in the mounting block under numbers F2, F3, F12, F13. Fuse F2 protects the low beam filament in the left headlight, F3 protects the high beam filament in the left headlight, F12 protects the low beam filament in the right headlight, F13 protects the high beam filament in the right headlight and the high beam indicator lamp.
Purpose
The front lights are called head lamps; they are located in the headlight unit in front of the car on both sides. They are the outermost ones in the lighting system, and owe their name to the fact that they show the width of the car to oncoming vehicles.
Various options for side lights and daytime running lights
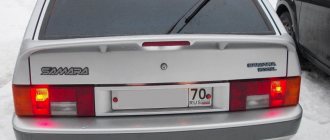
The rear lights are intended for exactly the same mission—so that you can be seen by those driving behind you. This is especially true when overtaking; you don’t want someone to hit your “swallow” without seeing its real size.
Tuned tail lights
Hence the important advice: if it suddenly happens that you need to go at all costs and you discover that the light bulb in the left side light has burned out, replacing it with a new one is impossible due to the lack of one, don’t be lazy and move it from the right side. And we will tell you how to do this.
Both headlights do not work
In the case when two headlights fail at once (and both the high and low beams do not work), the switch responsible for the external lighting is first inspected. It is easy to test the circuit using a test light or a regular tester. One wire is applied to ground, and the other to the 30th terminal. If this is not the problem, then there will be 12 volts on it (even with the ignition off). After turning the key, voltage will also flow to terminal 10. Such diagnostic results allow us to say with complete confidence that the light does not come on precisely because of the switch.
If there is no voltage at the terminals mentioned above, then most likely the wires have broken or the contact has been lost.
Detailed diagrams of important components of the VAZ 2110 car
If you need an exact diagram of any component of your car, then I recommend that you familiarize yourself with these diagrams.
Generator system connection diagram
| 1 – battery | 2 – generator | 3 – mounting block |
| 4 – ignition switch | 5 – battery charge indicator lamp, located in the instrument cluster |
| 1 – battery | 2 – generator | 3 – starter |
| 4 – ignition switch |
Diagram of the ignition system on the VAZ 2110
| 1 – battery | 2 – ignition switch | 3 – ignition relay |
| 4 – spark plugs | 5 – ignition module | 6 – controller |
| 7 – crankshaft position sensor | 8 – master disk | A – matching devices |
Contactless ignition system diagram
| 1 – ignition coil | 2 – ignition distributor sensor | 3 – spark plugs |
| 4 – switch | 5 – ignition switch |
Turning on the rear window wiper and washer
| 1 – washer motor | 2 – mounting block | 3 – ignition switch |
| 4 – rear window wiper and washer switch | 5 – rear window wiper gear motor | K6 – additional relay |
| A – to power supplies | B – the order of conditional numbering of plugs in the gear motor block |
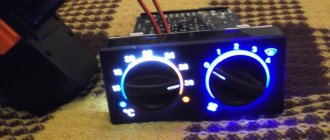
Diagram of the automatic heater control system
| 1 – fan motor | 2 – additional resistor | 3 – controller |
| 4 – mounting block | 5 – ignition switch | 6 – cabin air temperature sensor |
| 7 – recirculation switch | 8 – recirculation valve | 9 – micromotor gearbox for heater damper drive |
| A – to the instrument lighting switch | B – to power supplies |
The rear lights on the VAZ 2110 do not light up, what could be the problem? In this article we will look at the main types of faults in the electrical equipment of this car, and at the same time we will learn how to replace the rear marker lamps of a VAZ 2110.
Replacing the rear light and its elements
Tail light bulbs for VAZ 2110
Replacement of the rear light occurs according to the following scheme:
- disconnect the wire from the negative terminal of the battery;
- Having opened the trunk lid, unscrew the screws that secure the rear trunk trim (2 pcs);
- having pressed the rear upholstery, bend the side upholstery, which will allow access to the rear light connection parts;
- disconnect the flashlight and the block with wires;
- loosen the nuts that hold the rear light and remove the washers;
- remove the lamp from the car;
- release the flashlight body from the holder and lamps by squeezing the claws of the clamp;
- install a new lamp, performing the steps in reverse order;
- tuck the side trim under the seal.
Replacing parking lamps and tail lights
Rear fog lamps in VAZ 2110
When changing a vehicle's headlight bulb, you must perform the following steps:
- remove the lamp together with the socket from the optical element;
- remove the lamp from the socket.
Replacement of light bulbs in the rear lights is carried out according to the following algorithm:
- lamps need to be changed from the luggage compartment side;
- remove the contact part along with the lamps (it is held in the lamp body using latches).
Side turn signals
If the side turn signal lighting malfunctions, do the following:
- move the side turn signal forward, pulling its rear part;
- remove the above part;
- disconnect the lamp socket;
- replace the lamp by sliding the cover;
- If you need to replace the cartridge, you must disconnect the wires.
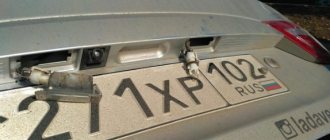
Car license plate light
License plate light bulb VAZ 2110
If the lights that illuminate the car number do not light, the actions should be as follows:
- Unscrew the two self-tapping screws with a Phillips screwdriver and remove the lampshade;
- replace the lamp, first removing the transparent cover from above.
Stop light and reverse
You can remove and install the brake light and reverse light according to the following scheme:
- remove the flashlight board by squeezing the protrusions;
- remove the lamp by pressing down and turning counterclockwise;
- disconnect the wiring connector;
- unscrew the nuts (two outermost and two middle) of the decorative trim using a tool of the appropriate size;
- remove the cover;
- Unscrew the two nuts that secure the lamp and remove it.
Fog lamp
To properly replace the light source in the fog lamp, you do not need to remove it.
So:
- disconnect the negative wire (its terminal) from the battery terminal;
- remove the rubber protective cap from the rim on the back side of the reflector;
- remove the tip of the “negative” wire from the reflector output;
- remove the lamp mounting bracket in the form of a spring, squeezing it with your fingers;
- remove the lamp from the hole located in the reflector;
- disconnect the tip of the “positive” wire from the lamp wire.
You can assemble the lamp by following the reverse procedure.
Replacing the entire fog light
If you need to replace the entire fog light, the steps are as follows:
- disconnect the block of its wires from the harness;
- unscrew the two self-tapping screws securing the cladding using a Phillips screwdriver;
- remove the lining;
- remove the headlight;
- Install the new headlight in reverse order.
Algorithm of actions when replacing a sensor
Changing it is not particularly difficult, but you need to do the following:
- To replace the car, you need to put it in a pit or drive it onto an overpass.
- If there is engine protection, it must be removed.
- You should first prepare some kind of container for the oil, since the moment the sensor is unscrewed, a certain part of the oil will leak out.
- Then you need to unscrew the wires that are connected to the sensor.
- The old sensor must be removed and a new device installed in its place.
- The oil that leaked out during the sensor replacement process must be added to the box.
- Next, the wires are connected. They must first be wiped dry to remove any oil that has got on them.
- Then you should start the car and check for light from the bulbs when reverse is engaged.
Such measures are one of the options for eliminating the problem in which the reverse lights of the VAZ 2110 do not light up.
Installation process
Ready-made kits usually contain an installation diagram for the VAZ 2110. However, you should understand that adjustments may need to be made during the process.
Before starting installation work, you need to make sure there is space for them. If it is not provided for in your model, then you should think about it and decide on it yourself. It is recommended to do this through the front bumper.
The installation procedure is as follows:
- At the very beginning we lay out the wiring for the fog lights. It is laid in the same way as the main wiring - along the wing, through the left side (under the hood).
- After this, you need to supply power to the button, which will need to be placed on the dashboard. According to the standard, power is supplied from the fuse on the right dimensions. However, you can go the other way by connecting power to the light switch. You can take power from the output to the dimensions, but this method should be used last, since the battery may discharge prematurely if you forget to turn off the PTF.
- We connect the plug together with the headlights. If the lights do not light up, then there was some error in the circuit. Each component of the network should be carefully checked. Often the problem is in the relay. To identify it, you need to make sure there is a click; if there is none, the relay should be completely changed.
It is quite simple to check that the headlights are set correctly and are working correctly: drive out onto the road and turn on the headlights.
If the light is directed slightly downward, but illuminates both the road surface and the side of the road equally well, everything is installed correctly.
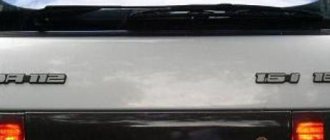
Taillight tuning ideas
How can you improve the rear optics in the Seven:
- Installation of sports optics. This lantern includes four round and two rectangular light elements.
- The next option is to use Skyline headlights. Such devices are equipped with three round light indicators, as well as two rectangular lights and brake lights that are located above them. In this case, the body of the product is made of transparent plastic, which is coated with chrome.
- Installation of so-called eyelashes instead of traditional lights. The main difference between the cilia is their original shape, as well as the presence of diode direction indicators. As practice shows, they burn well even in bright sun.
- Using glass tinting as tuning. You can buy tinted optics that are ready for use, or you can tint them yourself. The tinting procedure itself can be carried out using a film or a special varnish. It should be noted that it is better to install more powerful lighting sources in tinted devices to ensure good visibility of the signals.
- You can also use diode headlights in the classic version. You can also buy such products at an auto store or install LED elements yourself. One of the main reasons why owners of “sevens” choose this option is the speed of operation, as well as good brightness.
Wiring test for non-working brake lights (ground test)
Let's look at the basic diagram: the brake lights and the reversing lamps have a common ground pin. If contact with this pin is broken, the reverse lamps will not turn on. Well, brake lights too.
Connector for connecting “internal” lights
On the left side there is a connector through which the wiring goes to the fifth door. The connector has black and red wires. Check the voltages on them. Most often the ground on the black wire does not ring. But maybe the connector itself needs to be cleaned.
If the “plus” does not come to the red wire, we check the “frog”. It's simple here:
- Disconnect the connector with two wires from the limit switch;
- Using 17mm wrenches, loosen the two nuts: holding the lower nut, rotate the upper one;
Removing the frog brake
By the way, one of the connector terminals receives a voltage of “12 Volts”. Check it!
Brake lamps, how to check their functionality
If the fuses are okay, you need to move on. You should open the luggage compartment and remove the taillights to check the integrity of the brake lamps.
It is advisable to check them by inserting spare lamps, since very often upon visual inspection the lamp may appear to be working. If replacement bulbs are not available, remove suitable bulbs from other locations, such as turn signals, parking lights, etc. After replacement, press the brake pedal and check for the presence of light. It is necessary to carry out replacement and other operations in both headlights, because in some vehicles, when one brake light fails, the second one also stops working.
If the light appears, then the cause of the breakdown was indeed the brake lamps, but if the fault could not be eliminated, we proceed to the next stage - checking the contacts.
Connection diagram
Before we start troubleshooting, let's look at the connection diagram for external lighting devices on the VAZ 2110.
Electrical diagram of external lighting devices on the VAZ 2110
The numbers on the diagram indicate:
1 – front side light lamps; 2 – mounting block; 3 – external lighting switch; 4 – ignition switch; 5 – indicator lamp for external lighting; 6 – tail light lamps; 7 – brake light lamps; 8 – license plate illumination; 9 – dashboard lighting switch; 10 – reverse alarm switch; 11 – brake indicator switch; 12 – on-board control system unit; 13 – reverse indicators; K1 – lamp control relay.
How does this scheme work? After turning on the external light switch 3, the voltage from the battery is supplied to the mounting block 2, then through fuses F1, F11 and the control relay it is supplied to the side lamps. In this case, F1 is responsible for the left side of the car (side), F11 for the right. Relay K1 turns on the warning light on the instrument panel if any of the side light lamps stops lighting.
Causes
The side lights can be turned on either with the ignition off or on. In the event that at least one side light bulb does not light, relay K1, located in the mounting block, will turn on a warning light on the instrument panel to warn the driver about this malfunction.
In this case, the driver, with the side lights on, needs to get out of the car and see which of the four lamps is not on. If all the size lamps are on, then you also need to check the brake light lamps, since relay K1 is also activated for these lamps, and if at least one of them burns out, the warning lamp on the instrument panel will light up. After all, brake lights also ensure traffic safety.
The electrical circuit of the side lights is protected by two fuses. F11 (5A), works on the side lamps on the starboard side, and F1(5A), on the starboard lamps, it also protects:
- license plate lamps;
- instrument panel lighting lamps;
- side light indicator lamp;
- trunk light lamp.
Therefore, if fuse F1 blows, troubleshooting will have to be done in all of the above electrical circuits.
If all the side light lamps do not light up, then first of all you need to check the Ш2 connector block in the mounting block (it is located horizontally), since it is through contact No. 7 of this plug connector that power is supplied to the side light lamps. A possible reason for the dimensions not turning on could be the three-position switch located on the front panel. The serviceability of the switch can be checked by ringing it with a tester and, if necessary, replaced.
The most common lighting problems in the VAZ-2112
All faults that arise are divided into two categories:
- mechanical;
- electric.
During vehicle operation, external lighting devices are exposed to various negative influences. They are often rendered unusable:
- stones flying out from under the wheels of cars driving in front;
- sand;
- branches of bushes, etc.
Thus, the first thing to do if you were unable to turn on the headlights is to check their integrity. The simplest option in this case is to replace the entire unit that has become unusable. Removing it is not difficult. In addition, the headlight can be repaired
It is important to pay attention to restoring its tightness - ignoring this requirement leads to rapid failure of the entire unit, since moisture that gets inside contributes to:
- constant fogging of lenses;
- oxidation of contacts;
- rapid wear of fasteners.
The most common electrical failure is a light bulb burnout - this is usually indicated by the failure of only one of the headlights.
There are no special options here - you will have to change it to a working one. If the lamps are good, then you should suspect the following faults:
- the fuse link has burned out;
- the electromagnetic switching relay has deteriorated;
- one of the circuit contacts has come off (or oxidized);
- there is a break in the wires;
- there is no mass.
Check all devices on the panel with one click!
photo source: https://www.youtube.com/watch?v=l9RND4BD0Eg In the instrument panel of modern cars there are thousands of different electronic components, many lamps, arrows and indicators.
And the malfunction of one of them can lead to the fact that you do not notice certain problems or malfunctions of your car in time, and the consequences may not be the most pleasant. Imagine the situation: the emergency oil pressure warning light on your instrument panel has burned out. Along the way, the oil pump breaks down or the filter fails, which leads to a sharp decrease in oil pressure in the system, but nothing happens on the instrument panel. As a result, the driver finds out about the problem when the engine begins to knock, but such signs are unfortunately already belated.
Or here’s another example: you have a brake fluid leak, but the lamp does not work, and again the instrument cluster will not notify you that the brake fluid has left the reservoir. And when you need to brake sharply, the braking efficiency may not be enough to stop the car quickly, which will lead to even more dire consequences than in the first example.
How to check all the lamps and arrows on your car?
So, in many modern cars there is a rather useful function that can demonstrate to you the operation of all lamps, indicators and arrows on the instrument panel with one press of a button, which is located on the combination at the bottom most often and is intended to reset the daily mileage.
So, with the ignition off, you need to press the mileage reset button and, without releasing it, turn on the ignition:
After this, all the arrows on the instrument panel will begin to rotate throughout the entire operating range, and all the lights should light up at the same time. It is at this moment that you can check and make sure that all sensors, lamps and indicators are working.
Moreover, in addition to testing the arrows and light bulbs, you can view saved errors for some instruments and elements of the car: the brake system, battery, engine, etc.
- We repair it ourselves: replacing the windshield washer reservoir for VAZ 2110-2112
- An unusual reason why the engine constantly stalls. We searched for two days using the entire service!
BMW 5 Series Gran Turismo
Replacing the headlight bulb
Replacing the size lamp in the rear lights of a VAZ 2110 is quite simple. First of all, we dismantle the board with the lamps in the same way as we did when troubleshooting: we bend the upholstery flap, squeeze the two latches and remove the board from the lamp (see above). In this case, the power supply does not need to be disconnected - the length of the wires is quite enough to replace light bulbs. Before us are three lamps - one small and two large. We need the first one.
The side light bulb in the rear light is the smallest
We press it down slightly and, turning it counterclockwise, remove it from the socket. In place of the burnt one, we install a new one, also drowning and turning, but clockwise. Turn on the side light and check the result of the work. If everything is in order, we install the board in place, making sure that both latches work, and close the canopy with the upholstery flap.
Device
The head lamps (front dimensions) are part of the headlight unit. Rear dimensions are part of the rear light of the VAZ 2110, being one of its sections. Nearby there is a rear fog lamp, a taillight, a turn signal, a reflector, a brake signal and a marker.
Fog lights will not only improve the appearance of your car, but will also improve safety. You can read about connecting fog lights here: https://vazweb.ru/desyatka/osveshchenie/kak-podklyuchit-protivotumanki.html
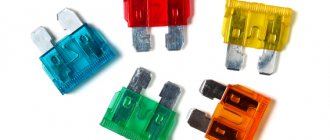
PRICES OF COMPONENTS
There is also a separate section for prices for all the parts that may be needed when repairing this part of the car, because if the side lights on a VAZ 2114 or the fuses have blown, they will still have to be replaced with new ones. In any case, all the components are quite cheap, all we might need:
- Marker lamp;
- Fuse;
- Power button;
- A whole fuse block.
Today, an ordinary white light bulb costs up to 30 rubles; of course, the price depends on the individual pricing policy of a particular seller. Individual fuses can be selected for up to 50 rubles, unless, of course, you want to install a higher quality option. Button, if you look for exactly the same one as the original one, you will have to pay up to 300 rubles. In some situations, more serious problems may arise and you will have to change the entire unit, this is quite an expensive proposition, together with all the wires it will cost up to 1000 rubles.
Common optical problems and how to fix them
Problems with automotive optics can be divided into mechanical and electrical problems.
During operation, automotive optics are subject to mechanical stress. It can be damaged by small and large stones, sand, branches of bushes, etc. The easiest way to eliminate damage is to replace the headlight or flashlight. To do this, you need to know how to remove the headlight on a VAZ 2112. But you can restore the optics with your own hands.
The following mechanical problems are possible:
- cracks and scratches on the glass surface;
- damage to fasteners;
- violation of tightness.
Scratches and cracks can be eliminated by grinding and polishing. Destroyed fasteners are replaced with new ones. If the seal is broken, the optics sweat, so it needs to be restored, as visibility deteriorates and the contacts oxidize. For serious mechanical damage in the form of chips, tools are selected depending on the degree of damage.
Before repairing, you should study the material used to make the optics. Depending on this, you can use cold or conventional welding.
When it comes to electrical problems, the most common cause is burnt out light bulbs. In this case, they need to be replaced.
If the reason is not the light bulbs, then the following malfunctions are possible:
- fuse is blown;
- The switching relay does not work;
- contacts are oxidized or burnt;
- switch is faulty;
- The integrity of the wiring is broken; ground is missing.
Replacing blown fuses
If the brake lights of the VAZ 2112 do not light up, the turn signals do not work, or the light has completely disappeared, you need to sequentially check all the elements that are part of the lighting system, including the fuse box and power supplies.
Fuse blown
An equally common reason why headlights do not light up. The block where all the car fuses are grouped is open, their location is open and the search for what is needed is open. A burnt jumper is in most cases visible to the naked eye. The student will also be able to handle gluing the entire part together, so a trip to the service station may also be unnecessary in this case.
READ Fuse Box VAZ 2104 Old Model
By the way, if fuses blow with unenviable regularity, then there is a breakdown somewhere in the wiring. Either call the entire circuit yourself, or contact a professional electrician. Discrepancies with the wires threaten all sorts of troubles, even fire.
Wire problems:
And in a variety of places. You will need to check all the terminals at the connection to the relay and fuse box. They may spin poorly and fall out; may oxidize and current will not flow. In the first case, it is enough to tighten the clamping nuts, in the second. clean contacts.
You should also check the power button: very often the wire leading to it becomes oxidized or goes away. We can say that in domestic cars, first of all, you should be interested in the button itself, and only then go somewhere deeper.
How to replace side light bulbs on Renault Logan: video and photos
Any modern car has a wide variety of lighting bulbs. Some of them illuminate the interior of the car, while others provide visibility on the road. One of these important types of lamps is the side lighting lamp, thanks to which at night or in conditions of limited visibility you can easily distinguish the dimensions of the car.
Replacing the front light bulb on a Renault Logan
Many Renault Logan owners, when the light bulbs fail, go to a service station to replace them. But the problem can be solved on your own. Changing a parking light bulb is as easy as changing any other bulb. Moreover, if you have an alarm connected to these lights, the bulbs may burn out more often than usual.
Since each such light element has its own expiration date, no one is immune from the fact that one of them fails along the way and will have to be urgently replaced. In this article we will talk in detail about how to change the side light bulb on a Renault Logan.
Front headlight
Block headlight (auto edition)
In Logan, block headlights are installed, and therefore in one design there are low beam and high beam lamps and direction indicators. When replacing any of the lamps, it is not necessary to disconnect the battery. The fog lights are located separately from the headlight unit at the bottom of the bumper; more information about replacing the lamp in them is here.
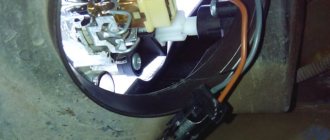
The process of replacing marker lamps in detail
Some owners remove the block lamp completely, but this is a lot of unnecessary steps. My hand can easily fit into the gap, even where the battery is!
- Use the head to remove the headlight unit.
- Then you need to disconnect the negative wire from the headlight.
- Remove the entire front bumper.
- Disconnect the headlight range control cable.
- To move the headlight to the side you need to unscrew three screws.
To replace a side lighting element, no additional equipment is required; the process will not take more than 5 minutes.
- In order to replace the lamp, you need to open the hood and feel on the headlight unit for the side lamp socket, which is located just below the headlight lamp.
- Finding the lamp body by touch is not difficult. We took out the socket and tried to remove the burnt out lamp.
- Next, turn the cartridge to the left and remove it from the headlight housing. The lamp has been removed and we are preparing to install a new parking light lamp.
- To replace the lamp, just pull it. It is only necessary to remove the light bulb from the housing while wearing cotton gloves.
What should you know about car optics?
A modern car has a large number of lighting fixtures.
All of them are combined into a single lighting system that performs the following functions:
- illuminates the road and side of the road;
- signals the driver's intentions;
- informs about the dimensions of the car;
- illuminates the interior, engine compartment, luggage compartment, etc.
All devices are divided into external and internal lighting. The external ones include front headlights, turn signals, side lights, rear lights, license plate lights, fog lights on the VAZ 2112. The headlights on the VAZ 2112 are a block that contains several lighting devices: low and high beam lamps, side lights, DRL.
Turning and side lights are signaling lights. The former warn about the driver’s intentions to perform a particular maneuver, the latter inform about the vehicle’s dimensions. They are built into the front headlight and rear lights. A special feature of signaling devices is that they shine yellow and synchronously.
Requirements for installing daytime running lights on cars have appeared recently. They have an intense light, their function is to improve the visibility of the car when driving in the daytime. In their absence, this function is performed by low beam or PTF. Fog lights on the VAZ 2112 are designed for driving during bad weather when visibility is poor. They are installed in pairs at the front. The back may be missing.
The rear lights of the VAZ 2112, like the headlights, are block headlights. These include the exterior light, turn lights and side lights.
Tail lights VAZ 2111
The rear optics include a brake light, a luggage compartment light and a license plate light.
Interior lighting consists of: interior lights, engine compartment lights, door lights, trunk lights, glove compartment lights, and dashboard lights.
Features of choice
Automotive optics is constantly evolving and at this stage the following types can be named:
Halogen lamps resemble conventional incandescent lamps in their design: a glass bulb contains electrodes with a tungsten filament. Due to the high heating temperature, halogen lamps quickly fail as the tungsten filament burns out. The main advantage of these lamps is their low cost.
Xenon lamps shine much brighter than halogen lamps. At the same time, they do not have a filament, so they are not afraid of shocks and vibrations. Xenon is durable and economical. The disadvantage is that both bulbs have to be changed, since during operation the brightness decreases, so the light of the lamps will be different. In addition, xenon optics require the installation of an ignition unit.
LED optics have bright light, economical energy consumption, long service life, and do not heat up. Another advantage is the ability to install LEDs of different colors. The disadvantage is low efficiency. For high-quality lighting you need a large number of LEDs (video author - Pro Sport).
Laser optics uses laser LEDs, which are characterized by high power and small size; their light is very bright. The disadvantage of laser lighting elements is the complexity of control.
When choosing optics, you should be guided by the following factors:
When choosing lamps, you need to take into account the parameters (base type, markings, etc.) that are indicated in the instruction manual. You cannot install xenon on a VAZ 2112 in halogen optics
When installing xenon, it is necessary to change the optics to the appropriate lens. You should pay attention to the manufacturer and buy lighting fixtures from well-known companies. The seller should ask for a certificate stating that the product can be used in European countries.
Lighting must meet the requirements.