Countersinking saddles
When repairing the cylinder head yourself, be prepared for the most monotonous and lengthy process - countersinking. A lot depends on its quality:
- tight fit of the valve to the seat;
- compression ratio in the combustion chamber.
The seat grinding work is carried out with a special tool - a roller cutter (less often - a countersink). With its help, a not quite finished seat can be given the desired shape so that the valve fits more tightly. Start work with a countersink at 60 degrees.
As soon as metal removal has begun in a circle, change the nozzle - take a countersink with a cone angle of 120 degrees. Work with it until a clear round edge appears. The final stage of countersinking is done with a 90-degree cone - it should go through the working chamfer of no more than 1.5 mm. Further grinding of the valve will increase it to the required value.
see also
Comments 46
no, there won’t be any of these on 8 valves, hydraulics. hydraulics on 8 current valves on Nivas
Nexia 1.5 8 valves with hydraulics! Lanos 1.5!
No, it doesn't exist. But you can do it yourself, hydraulic compensators are suitable for Volga 406 engines, the task is simple, raise the camshaft by 10 millimeters.
there are no such motors, and the west will have the same rattling weak motor
I saw the topic and decided to ask the experts. If the VAZ system with hydraulic compensators is not reliable. Something gets stuck there, etc. Is it possible to pick up hydraulic compensators from a foreign car, from the same Opel Cadet of 80+ years. Where are compensators located but they work effectively. And yes, I don’t know much about this. Explain it as it is))
with the slightest difference in the hydraulic compensators, it may be that the valves are clamped and the hydraulics are clicking, it will be as if a diesel engine is running, not a gasoline internal combustion engine, as a result there is no traction due to the compression of the valves, and the engine will not run smoothly, which means the heart may stop)
I saw the topic and decided to ask the experts. If the VAZ system with hydraulic compensators is not reliable. Something gets stuck there, etc. Is it possible to pick up hydraulic compensators from a foreign car, from the same Opel Cadet of 80+ years. Where are compensators located but they work effectively. And yes, I don’t know much about this. Explain it as it is))
Why is it not effective? Firstly, everything works great, and secondly, there are a great many manufacturers of spare parts.
But I don’t know why it’s not effective. I didn't have such a car)). I just hear this from everyone. This is how we formed our opinion. If normal actually works, then so much the better))
No, and it’s practically impossible to install, it won’t fit from a VAG, at the factory level it’s easier for them to install a motor from Renault or a 16kl AUTORskiy than to remake the entire head
But for me, hydraulics are a minus... it’s easier to adjust the gap than to deal with hanging hydraulics. Especially if OURS do it...
Unfortunately, the reality is that VAZ hydraulic compensators work better than INA. I was convinced of this from personal experience.
source
Tools and materials
Before starting work, you need to find a room for the replacement and check the availability of the necessary tools and equipment.
The minimum set of tools and spare parts is as follows:
- new cylinder head gasket;
- 10 bolts for cylinder head with size M12 (article 026707, for motor 11183) and M10 (article 256632, for engine 11186);
- gasket for the junction of the catalytic converter and resonator housings;
- torque wrench up to 100 Nm;
- a set of hex keys and sockets (at least sizes 10, 13, 17 and 19);
- pliers;
- screwdrivers with different types of blades;
- rags for wiping;
- container for draining coolant.
It is not recommended to use old cylinder head bolts.
Oil, antifreeze, brake and other fluids Lada Vesta
Products from the Dustershop77 range on the topic of the article:
| Name | Manufacturer | Price | Availability | Add to cart |
| 110265505R | Oil drain plug gasket (1.6 K4M, 2.0 F4R, diesel K9K) original 110265505R | Original | 250 / 200 rub. Discount: 150 rub. | >10 |
| DC448 | Antifreeze liquid 5l. (anti-freeze washer) winter -25C | 250 / 200 rub. Discount: 150 rub. | >10 | |
| DC353-7711428132 | Antifreeze Glaceol RX Type D 1l. Renault Original 7711428132 | Original | 1200 / 999 rub. Discount: 800 rub. | 7 |
| DC466-32149 | Oil drain plug gasket (1.6 K4M, 2.0 F4R, diesel K9K) ASAM 32149 analogue 110265505R | Analogue | 100 / 80 rub. Discount: 50 rub. | >10 |
| DC921-7700500168 | Spark plug two-pin (engine 1.6, 2.0) Renault 7700500168 / 7700103533 / 224013682R / 7700115827 | Original | 500 / 400 rub. Discount: 300 rub. | 6 |
| DC358-5w30-5L-D | Engine oil 5W30 Evolution Full-tech FE 5l. for diesel engines | Original | 5000 / 4500 rub. Discount: 3900 rub. | 2 |
| DC355-75w80-1L | Transmission oil ELF TRANSELF NFJ 75W80 1l. for manual transmission | Original | 1500 / 1100 rub. Discount: 950 rub. | 6 |
| DC356-5w30-1L | Motor oil ELF 5W30 Evolution 900SXR 1l. synthetic | Original | 1500 / 1000 rub. Discount: 800 rub. | 5 |
| DC352-7711575504 | Brake fluid DOT4 volume 0.5 l. Original Renault 7711575504 | Original | 1000 / 800 rub. Discount: 700 rub. | 5 |
| DC366-224011561r | Spark plug for H4M/HR16DE 1.6 114 HP engine. gasoline 224011561r original | Original | 1200 / 700 rub. Discount: 500 rub. | 8 |
| DC365-152085758r | Oil filter for engine H4M/HR16DE 1.6 114 hp. gasoline original | Original | 1000 / 700 rub. Discount: 600 rub. | 4 |
| DC369-V144-165460509R | Air filter for engine H4M/HR16DE 1.6 114 hp. gasoline 165460509R original | Original | 1300 / 1100 rub. Discount: 900 rub. | 6 |
| DC354-459460A | Automatic transmission/power steering oil ELF RENAULTMATIC D2 1l. | Original | 1500 / 1200 rub. Discount: 1000 rub. | 7 |
| DC1015 | Engine oil ELF Evolution SXR 5w40 (4 liters) | Original | 3000 / 2900 rub. Discount: 2600 rub. | 2 |
| DC362-PFB401 | Brake fluid DOT 4 TRW (1 liter) | Analogue | 1000 / 600 rub. Discount: 500 rub. | 6 |
| DC513 | Distilled water 1l | 150 / 100 rub. Discount: 80 rub. | 5 | |
| DC393 | Drive belt 1.6 H4M/HR16DE (WITH COND.) (DAYCO analogue 117203168R) | Analogue | 1500 / 1000 rub. Discount: 800 rub. | 2 |
| DC1565 | Engine oil Renault-Castrol GTX RN-SPEC 5w30 RN720 5l (replacement for ELF FULL-TECH FE) for diesel engines | Original | 4000 / 3500 rub. Discount: 3200 rub. | 1 |
| DC613-194734 | ELFMatic G3 for power steering 1 l | Original | 1500 / 500 rub. Discount: 400 rub. | 9 |
| DC514 | Distilled water 3l | 350 / 250 rub. Discount: 200 rub. | 3 | |
| DC1544-5w30-4L | Motor oil ELF 5W30 Evolution 900SXR synthetic (4 l.) | Original | 2800 / 2500 rub. Discount: 2200 rub. | >10 |
| DC417-6PK1200 | Alternator belt 1.6 petrol H4M/HR16DE without air conditioning. DAYCO 6PK1200 (117208408R) | Analogue | 9000 / 600 rub. Discount: 500 rub. | 1 |
| DC1598 | CoolStream NRC antifreeze ready (yellow) RENAULT/NISSAN/VAZ 1l. | 1000 / 700 rub. Discount: 400 rub. | 2 | |
| V101-NF6433C | Cabin filter Lada Vesta / X Rey Nevsky Filter NF6433C (carbon) | Analogue | 300 / 250 rub. Discount: 250 rub. | 2 |
| V155-21080101106200 | Original oil drain plug gasket (VAZ-21129/21179) | Original | 20 / 15 rub. Discount: 10 rub. | >10 |
| DC1148 | Anti Rain LAVR, with dirt-repellent effect, 185 ml | 500 / 350 rub. Discount: 250 rub. | 2 | |
| DC1563 | Engine oil Renault-Castrol GTX RN-SPEC 5w30 RN700 5l (replacement for ELF SXR) | Original | 2600 / 2300 rub. Discount: 2100 rub. | 2 |
| DC1348 | Anti-gravel transparent Hi-Gear 311g. | Original | 1200 / 1100 rub. Discount: 1000 rub. | 3 |
| DC1146 | Grease WD-40 200ml with tube | Original | 450 / 350 rub. Discount: 250 rub. | 1 |
| DC359-10w40-5L | Engine oil ELF 10W40 Evolution 700STI 5l. semi-synthetic | Original | 1900 Discount: 1900 rub. | 1 |
| DC1133 | Grease WD-40 420ml with tube | Original | 700 / 550 rub. Discount: 500 rub. | 2 |
| DC1175-411040092 | Lubricant Litol-24 100g | 400 / 150 rub. Discount: 100 rub. | 2 | |
| DC1318-614500 | Antifreeze Sintec G12 red 5l. | Analogue | 1200 / 1000 rub. Discount: 800 rub. | 3 |
| V151-911736 | Air filter TSN (VAZ-21129/21179) | Analogue | 350 / 250 rub. Discount: 200 rub. | 1 |
| DC1124 | MOTRIO ultra 5W-40 oil, 5 liters | Original | 2300 / 2000 rub. Discount: 1800 rub. | 1 |
| DC1317-613500 | Antifreeze Sintec G12 red 1l. | Analogue | 500 / 350 rub. Discount: 250 rub. | 1 |
| DC1599 | CoolStream NRC antifreeze ready (yellow) RENAULT/NISSAN/VAZ 5l. | 2000 / 1500 rub. Discount: 1200 rub. | 1 | |
| DC1569 | Automatic transmission/power steering oil Transmax Dex III Multivehicle 1l (replacement for ELF RENAULTMATIC D2-D3) | Original | 1000 / 800 rub. Discount: 600 rub. | 8 |
| DC1579 | Engine oil SINTEC 5w30 4l (synthetic approval Renault RN700) | Original | 1500 / 1400 rub. Discount: 1100 rub. | 3 |
| V156-21120101106100 | Original oil drain plug (VAZ-21129/21179) | Original | 200 / 100 rub. Discount: 50 rub. | >10 |
| DC1123 | Oil MOTRIO ultra 5W-30, 5 liters | Original | 2500 / 2000 rub. Discount: 1800 rub. | 2 |
| DC1142 | Lock defroster Hi-Gear 75ml | 400 / 300 rub. Discount: 200 rub. | 1 | |
| DC1150 | WD-40 lubricant 100ml with tube | Original | 350 / 300 rub. Discount: 250 rub. | 2 |
| DC1562 | Engine oil Renault-Castrol GTX RN-SPEC 5w40 RN710 1l (replacement for ELF SXR) | Original | 1100 / 800 rub. Discount: 600 rub. | 9 |
| DC1129 | Lock defroster LAVR 75ml | 400 / 300 rub. Discount: 200 rub. | 2 | |
| V157 | Engine oil LADA ULTRA 5W-40 synthetic original 1l. | Original | 800 / 700 rub. Discount: 600 rub. | 1 |
| V159 | Engine oil LADA ULTRA 5W-40 synthetic original 4l. | Original | 1900 / 1700 rub. Discount: 1500 rub. | 1 |
| DC1605-EA711 | Air filter for engine H4M/HR16DE 1.6 114 hp. gasoline analogue 165460509R | Analogue | 800 / 600 rub. Discount: 400 rub. | 4 |
| V143-21080101200582 | Oil filter Lada Vesta original 21080101200582 (VAZ-21129/21179) | Original | 500 / 300 rub. Discount: 250 rub. | 2 |
| V144-165460509R | Air filter original 165460509R (VAZ-21129/21179) | Original | 1300 / 1100 rub. Discount: 900 rub. | 2 |
| V145-8450006996 | Generator belt roller assembly original 8450006996 (VAZ-21129/21179) | Original | 2200 / 2100 rub. Discount: 1900 rub. | 1 |
| V147-21110370701086 | Spark plugs (4 pieces included) original A17DVRM (VAZ-21129/21179) | Original | 600 / 400 rub. Discount: 400 rub. | 4 |
| V153-FO014 | Oil filter FORTECH (VAZ-21129/21179) | Analogue | 350 / 250 rub. Discount: 250 rub. | 2 |
| DC1557-8450033130 | Air filter original 8450033130 (Vesta new model) | Analogue | 1200 / 1000 rub. Discount: 800 rub. | 4 |
| V158 | Motor oil LADA PROFESSIONAL 5W-40 semi-synthetic original 1l. | Original | 600 / 500 rub. Discount: 500 rub. | 1 |
| DC1567-75W80 | Transmission oil Castrol Syntrans V FE 75w-80 1l. for manual transmission (replacement for ELF TRANSELF NFJ 75W80) | Original | 1500 / 1200 rub. Discount: 1000 rub. | 3 |
| DC1564 | Engine oil Renault-Castrol GTX RN-SPEC 5w30 RN700 1l (replacement for ELF SXR) | Original | 1100 / 900 rub. Discount: 700 rub. | 1 |
| DC1566 | Engine oil Renault-Castrol GTX RN-SPEC 5w30 RN720 1l (replacement for ELF FULL-TECH FE) for diesel engines | Original | 1200 / 1000 rub. Discount: 800 rub. | 1 |
| DC1580 | Engine oil SINTEC 5w30 1l (synthetic approval Renault RN700) | Original | 900 / 700 rub. Discount: 550 rub. | 2 |
| V142-8450006328 | Auxiliary drive belt (generator) VAZ-21129/21179 | Original | 1500 / 1300 rub. Discount: 1300 rub. | 1 |
| V146-272773151R | Cabin filter original 272773151R | Original | 1100 / 800 rub. Discount: 800 rub. | 1 |
| V148-21126100604086 | Original timing belt kit (VAZ-21129/21179) | Original | 4300 / 4200 rub. Discount: 4200 rub. | 1 |
| V150-K20TT | Spark plug DENSO 1pc. (VAZ-21129/21179) | Analogue | 250 / 200 rub. Discount: 200 rub. | 4 |
| V152-97888 | Cabin filter TSN (VAZ-21129/21179) | Analogue | 350 / 250 rub. Discount: 250 rub. | 1 |
| V153-CT1137K1 | Timing belt kit CONTITECH (VAZ-21129/21179) | Analogue | 3400 / 3100 rub. Discount: 3100 rub. | 1 |
| DC1811-226755893R | Fuel filter 226755893r original Renault/Lada vibration damper | Original | 1100 / 700 rub. Discount: 500 rub. | 1 |
| DC1877 | Pallet plug Vesta, X-Ray, 2101-2115 22mm | Analogue | 70 / 50 rub. Discount: 30 rub. | 3 |
| DC053 | Engine oil ELF Evolution SXR 5w40 (5 liters) | Original | 4000 / 3500 rub. Discount: 3300 rub. | 0 |
| DC692-5W40-1L | Motor oil ELF 5W40 EVOLUTION 900SXR 1L. synthetic | Original | 1500 / 900 rub. Discount: 800 rub. | 0 |
| DC1561 | Engine oil Renault-Castrol GTX RN-SPEC 5w40 RN710 5l (replacement for ELF SXR) | Original | 2500 / 2200 rub. Discount: 2000 rub. | 0 |
| DC357-5w30-5L | Motor oil ELF 5W30 Evolution 900SXR 5l. synthetic | Original | 4500 / 3800 rub. Discount: 3200 rub. | 0 |
Step by step instructions (16 valves)
Removing the head for replacement on such motors has its own characteristics that must be taken into account during disassembly and reassembly. The engine design is much more complex than the 8-valve version and requires careful assembly and subsequent adjustment of the valve timing.
How to remove the head from a 1.4-liter 16-valve engine with an injector, model VAZ 11194:
- By analogy with an 8-valve engine, it is necessary to drain the fuel from the line, remove the battery, decorative casing, and air filter. And also drain the coolant and disconnect all sensor connectors.
- Remove the breather pipe and vacuum booster hose.
- Disconnect the hoses from the throttle body and the throttle position sensor.
- Remove the ignition coils.
- Disconnect the wiring harnesses and fluid supply pipes from the windshield washer reservoir. Remove the tank itself.
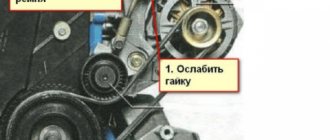
- Loosen the tension on the accessory drive belt and remove it.
- Remove the camshaft drive belt guard and fuel rail. The injectors are removed using a scheme similar to the 8-valve engine.
- Move the generator towards the radiator and remove the oil level dipstick guide.
- Remove the receiver mount to the block head.
- Unscrew the lower timing belt cover.
- Unscrew the fastenings of the timing belt tension rollers and the crankshaft pulley and remove them together with the belt.
- Remove the camshaft gears.
- Unscrew the 15 bolts and remove the camshaft cover.
- Unscrew the 20 bolts that secure the camshaft supports.
- Remove the shafts.
- Remove the hydraulic compensators.
- Unscrew the attachment points of the neutralizer to the head.
- Disconnect all hoses from the thermostat.
- Unscrew the 10 head mounting bolts (according to the diagram).
- Remove the head and replace the gasket.
- Reassemble, taking into account the recommendations for the 8-valve engine.
The procedure for removing the head The procedure for tightening the bolts
general information
Hydraulic compensators (or hydraulic pushers) are devices that help eliminate gaps in the drive using oil pressure and at the same time transmitting camshaft force to the valves. This device also helps improve the dynamic characteristics of the car and reduce fuel consumption.
Hydraulic compensators consist of a housing, a check valve, a plunger spring and a plunger pair. The device has the shape of a cylinder and is located next to the camshaft and valves.
Diagram of operation of the hydraulic pusher in the valve mechanism of the VAZ-21126 engine: 1 – valve; 2 – check valve spring; 3 – check valve; 4 – cylinder head; 5 – camshaft cam; 6 – pusher; 7 – plunger; 8 – plunger spring; 9 – sleeve; 10 – check valve body; A, B – hydraulic pusher cavities; B – oil channel.
As you know, timing elements can heat up and expand due to exposure to heat, resulting in a change in the gaps between them. Adjusting the valve clearance with your own hands is a rather complex procedure, and therefore elements requiring adjustment (like levers and washers) have been replaced by hydraulic compensators that can automatically determine the clearance without any additional settings.
The approximate cost of this device most often varies from 1500 to 3500 rubles. (for example, a hydraulic pusher for a Lada Priora costs approximately 2200-2300 rubles).
Step by step instructions (8 valves)
After preparing the tools, you can begin replacing. The gasket replacement procedure is quite lengthy and takes about 8-9 hours even for experienced craftsmen.
Below is an approximate sequence of actions when replacing the cylinder head gasket of a Kalina with a 1.6-liter 8-valve engine:
- Place the car over the inspection hole.
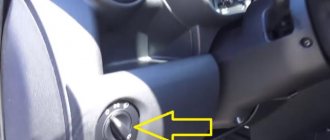
- Remove the fuse box cover located on the center console and remove the fuel pump fuse.
- Start the engine and drain fuel from the ramp. Turn off the engine.
- Disconnect the battery and remove it from the vehicle.
- Replace the fuse and cover.
- Unfasten the decorative plastic casing from the motor. To do this, you need to pull it up and pull off the rubber caps from the studs. Inspect these caps; damaged parts should be replaced.
- Remove the three bolts securing the upper part of the camshaft drive belt housing.
- Separate the cover and manually turn the engine crankshaft to TDC (top dead center) in the first cylinder. The guideline will be the coincidence of the notch on the camshaft gear with the notch on the rear of the housing.
- Remove the plug located on the clutch housing and check the location of the mark on the flywheel and housing. The marks must match.
- Secure the engine flywheel with a screwdriver through the hole in the crankcase and unscrew the camshaft gear.
- Remove the timing belt drive.
- Remove the ignition coil attached to the bracket with four screws.
- Remove the engine sump protective shield. Drain the coolant from the cylinder block. To do this, you need to open the expansion tank cap and unscrew the screw plug on the side of the crankcase. Pour the liquid into a prepared container.
- Disconnect the lines from the thermostat and throttle valve assembly.
- Separate the air duct from the throttle body and remove the air filter housing.
- Step by step disconnect the electrical wiring connectors for the idle speed (IAC), throttle position (TPS), fluid temperature and oil pressure sensors.
- Disconnect the ground wire from the engine.
- Disconnect the injector connectors.
- Remove the fitting and separate the fuel supply pipe from the ramp.
- Remove the two bolts securing the ramp to the intake manifold housing.
- Carefully move the ramp along the axis of the injectors and remove them from their seats on the manifold.
- Remove the brake booster hose attached to the throttle body fitting.
- Unfasten the intake pipe spacer mounted on the nuts.
- Remove the lambda probe connectors on the catalytic converter.
- Unscrew the receiving pipe going to the muffler from the flange of the gas neutralizer.
- Remove the neutralizer support bracket.
- Loosen the head bolts according to the diagram and unscrew them completely. When removing bolts, they must be removed along with washers.
- Remove the head from the engine.
- Remove the old gasket.
- It is advisable to send the removed head for surface milling, since it may have microcracks that arose when the engine was running with a broken gasket.
- After checking, you can put the head back, having first checked the presence and completeness of installation of the guide bushings.
- Thoroughly wipe the mating surfaces of the block and head from oil and coolant. Clean the bolt wells from liquids.
- Carefully wash the cylinders with gasoline to remove deposits.
- Place a new gasket on the block, centering it along the guide bushings. The channel for the passage of oil through the gasket is located between the third and fourth cylinders - it is important not to miss this moment.
- When reinstalling the head, it is necessary to set the position of the shafts corresponding to TDC in the first cylinder (according to the marks).
- Tighten the bolts according to the scheme in several passes - initial tightening with a force of 20 Nm, tightening with a torque of 70–85 Nm, the first turn by 90 degrees and the second turn by another 90 degrees. When installing the head, use only new bolts and lubricate them with a thin layer of engine oil, which will facilitate tightening.
- Reinstall all removed parts.
- During assembly, it is recommended to check and adjust the valve clearances, as well as check the tension of the drive belt and the correct timing of the gas distribution mechanism.
- Turn the assembled engine over by hand several times and re-check the timing timing.
- Start the engine, make sure there are no leaks or extraneous sounds. Warm it up, visually monitoring its condition.
- Remove the coolant pipes from the throttle body assembly. Release the air from them, gradually increasing engine speed. Put the tubes back on and add fluid to the tank to the normal level.
New Lada: Forum: Pump - Lada Kalina 2
Sequence of loosening the fastening bolts Sequence of tightening the bolts
Video from the channel Sdelaj Sam! Pljus interesting! Demonstrates basic methods for identifying faults and replacing worn parts.
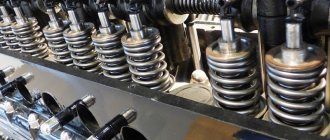
Camshaft location
Modern cars most often use a mechanism with an overhead camshaft, which has reduced the metal consumption of the structure and, as a result, increased reliability.
Since metal expands when heated, and the valves are constantly in a high-temperature zone, to prevent it from being pressed in, as a result of which it does not fit tightly into the seat, a thermal gap is provided between the valve stem and the camshaft cam.
In this case, the thermal gap has a certain value to ensure the maximum possible opening of the valve, eliminating its tightening.
Previously, on engines with an overhead camshaft, the thermal clearance was adjusted by placing shims of a certain thickness between the valve stem and the camshaft cam.
The disadvantage of using these washers was the need to periodically check the gap and adjust it by selecting washers.
Nowadays, to ensure thermal clearance, hydraulic compensators are increasingly being used, popularly known as hydraulic compensators, the use of which eliminated the need to adjust the gap, and all because the gap is adjusted by oil pressure.
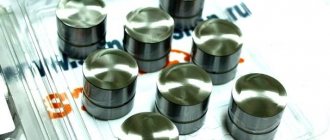
Hydraulic compensators, like shims, are located between the valve stem and the camshaft cam.
Externally, the hydraulics look like a small piston, so the head has seats for them.
Photo gallery
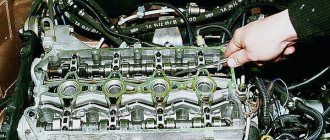
The photo below shows some stages of replacing the gasket on an 8-valve VAZ engine.
Engine with the valve cover removed Unscrewing the exhaust pipe from the converter Internal part of the engine cylinders with a damaged gasket The gasket itself Place where the gasket was punched Cylinders washed with gasoline Head removed from the engine Carbon deposits on valves and combustion chambers
The photo below shows some of the stages of disassembling a 1.4 liter engine.
Removing the washer reservoir Removing the rail with injectors Dipstick guide Timing drive removed Camshaft gears removed Removing the camshaft supports Internal parts of the cylinders 16-valve head
Checking hydraulic compensators
The verification process should begin with an inspection of the spring, after which the size of the gaps between the valves and guide bushings is measured. If necessary, the increased gaps are eliminated, after which:
- The crankshaft is turned so that the knocking valve opens slightly;
- Next, you should turn the spring a little, and the valve will turn along with it;
- After this, the engine is started, and if the knocking repeats, the first and second of the above-described manipulations are repeated again.
The incessant knocking of valves directly indicates a breakdown of the hydraulic compensator.
Price issue
Changing the head gasket yourself will be quite inexpensive, since its cost ranges from 220 (for 8-valve engines) to 550 rubles (for 16-valve engines). In addition to it, you will need a gasket between the exhaust pipe and the catalyst, which costs no more than 100 rubles, and 10 new head bolts, costing 40–50 rubles each.
Performing such work at a service station depends on the territorial location and ranges from 4 thousand rubles in small cities (Tula, Bryansk) and up to 10 thousand rubles in large cities (Moscow, St. Petersburg).
Have you ever had to change the cylinder head gaskets on your car yourself?
Consequences of the knocking sound
It is interesting that the breakdown of hydraulic compensators does not lead to any damage to other mechanisms of the power plant.
For knocking hydraulic compensators, the thermal clearance is simply disrupted, which only leads to a decrease in the power and throttle response of the power plant and an increase in fuel consumption.
But a knocking sound may indicate a malfunction in the lubrication system, so it is important to find out why they are knocking and fix the problem.
As for the use of SOHC and DOHC gas distribution systems on cars, the only difference is in the number of installed hydraulic compensators.
Thus, modern cars, including domestic ones, for example, VAZ 2112 and Lada Priora, already use a DOHC gas distribution system, with 4 valves per cylinder, and therefore with 4 hydraulic valves, the total number of which is 16.
The reasons for the knocking sound for all cars, including those mentioned, are the same.
The presence of such a number of hydraulic valves only makes it more difficult to identify a knocking hydraulic compensator if only one or several of the total number is knocking.
Stages
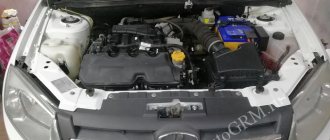
Power point
- The first step is to remove the casing of the 8 cl power unit.
- The number one cylinder piston should be set to the top dead center position.
- De-energize the system by disconnecting the negative battery cable.
- Drain the coolant.
- Disconnect and set aside the air filter element.
- Disconnect the heating hoses, other pipes and connectors.
- Don't forget to disconnect all the wires from the spark plugs.
- Next, remove the cylinder head cover.
- Remove the camshaft drive cover located in front.
- Insert a screwdriver into the hole in the pulley hub to prevent the camshaft from turning, and loosen the bolt securing the timing pulley.
- Next you need to remove the timing belt.
- Completely unscrew the bolt that secures the camshaft pulley.
- Remove the pulley.
- Next, you need to remove the camshaft drive cover, which is located at the rear.
- Remove the remaining pipes and wires.
- After disconnecting all the wires and pipes, you need to loosen the bolts that secure the cylinder head of the viburnum 8 class. This is done strictly according to the scheme.
New Lada: Suspension kits | SS20-SHOP.RUBe sure to strictly adhere to this diagram when loosening the bolts
- Next, you need to completely unscrew the cylinder head mounting bolts.
- They are removed along with the washers.
- We remove the cylinder head.
- It is worth knowing that during long-term operation, the bolts with which the cylinder head is secured increase in length. Therefore, it is better not to save money, but to install new ones.
- Before installing new bolts, they must be lubricated with oil.
- We remove the Kalina cylinder head gasket.
- The place where it was installed must be cleaned. This is done not mechanically, but using a special liquid. If you use a file or a wire brush, there is a high risk of scratching the surfaces. As a consequence, loss of tightness with all the ensuing consequences.
The surface was polished with an abrasive tool. Scratches are noticeable. Install a new gasket.New part installed
- We install the cylinder head. Make sure the crankshaft and camshaft are at top dead center. This is a very important condition.
- We insert bolts into all holes and tighten them in a certain sequence:
Diagram for tightening the bolts. - First, we walk around the first circle and pull, applying a force of 20 N•m (2 kgf•m);
- Then we go around the second circle and pull, applying a force of 69.4-85.7 N•m (7.1-8.7 kgf•m);
- Next, use a wrench to turn the bolts 90 degrees;
- We go through it again and turn it 90 degrees again.
- Next, you need to connect all the removed wires and pipes. Many car enthusiasts, performing this work for the first time, mark the parts or take photos.
At this point, the replacement of the cylinder head gasket on Kalina with an 8-cl unit is completed. The process cannot be called simple, but requires special care and accuracy. If, after reading the material and viewing the photo gallery, you still have questions, watch the video material.
What to do if hydraulic lifters are knocking?
First of all, you need to determine which hydraulic compensator is knocking. For mechanics, determining which hydraulic compensator has failed is usually not difficult. Yes, you can do it yourself. It's simple.
To do this you need to remove the valve cover. You will also need a device called a phonendoscope.
A phonendoscope is a device with a long needle at the end and headphones.
If this device is not at hand, you can try using a stethoscope. I think you already understand the point, you need to listen to where the knocking is strongest, this way you can determine which hydraulic compensator is acting up.
If you find a faulty hydraulic compensator, you can try to eliminate the knocking by cleaning. To do this, you need to disassemble it and wash it in diesel fuel or kerosene. In some cases, this helps eliminate knocking. If not, then unfortunately you will have to change it. Their cost is not that high and it is better to do it as quickly as possible, because otherwise the consequences can be dire.
Reviews
| № | Positive |
| 1. | Victor: the valve mechanism works properly, there are no complaints. At 55,000 km the valve began to knock, so I contacted the workshop. It turned out that the fastening nut had become loose. |
| 2. | Vasily: I don’t know of any problems with the engine and its mechanisms, I regularly carry out technical inspections and fill in high-quality oil. |
| 3. | Sergey: at 65,000 km I replaced two pushers, the service life is good. The remaining hydraulic compensators are normal, the master said they were in good working order. |
| 4. | Vladlen: I’ve heard a number of negative reviews about the quality of the pushers, I can’t confirm, the machine works like a watch. I believe that careful handling of equipment and high-octane fuel are the key to long-term operation. |
| 5. | Vladimir: at 70,000 km I replaced a set of pushers. I think that the resource is more than sufficient. I carried out the work myself, the replacement procedure is not complicated. |
| Negative | |
| 1. | Slavik: my pushers went off at 35,000 km. The reason is the quality of workmanship and the fineness of adjustment. It is obvious that the technology is broken. Under warranty, they replaced a set of new ones. |
| 2. | Gennady: after 40,000 km, I replaced the set of pushers. Initially they knocked on “cold”, then constantly. The workshop said that there was a manufacturing defect. |
| 3. | Ivan: replaced two pushers in a year. What kind of workmanship can we talk about? I leave my negative review. |
What is the problem
A hydraulic compensator is an engine mechanism that regulates the operation of valves. This small part saves fuel, reduces engine sounds, extends the life of other parts, and increases engine power. The device is complexly designed; when dirt gets into the engine cylinder, it becomes clogged, and cheap, low-quality oil disables it.
The malfunction of hydraulic compensators can be determined by the following criteria:
- Engine knocking that does not decrease when the car warms up.
- Reduced power.
Replacement of this mechanism occurs, most often, when the car has a hundred-kilometer mileage. This condition guarantees wear of the part, which may be exceeded.
Causes of the problem:
- Use of low quality spare parts.
- Particles formed by abrasive devices getting into the hydraulic compensator.
- Clogging of channels when using low-quality oil or filter failure.
- Incorrect oil filling.
Conclusion
The hydraulic compensators on the Grant (16 valves) are its weak point. The manufacturer knows about the defect. We hope that the problem will be resolved soon.
However, not everything depends on the manufacturer. Owners do not follow vehicle maintenance rules. By violating factory instructions, you expose parts to premature wear.
High-octane fuel, high-quality motor oil, and a non-aggressive driving style are the main factors that increase the service life of parts.
Causes of knocking hydraulic compensators
The appearance of extraneous noise during engine operation can be caused by violation of the timing gaps. Most car owners in this case try to adjust the valves, however, this procedure does not always help. Very often the cause of knocking is a worn hydraulic compensator. It should also be remembered that any unprofessional interventions can worsen the current situation.
As a rule, the occurrence of extraneous knocking is not a sudden phenomenon; it is characterized by a gradual and increasing development. Therefore, if you notice the knocking of hydraulic compensators on your car, you should not give in to panic - for a certain time the car will function quite properly, but you should not delay the repair.
Possible reasons for knocking hydraulic compensators on Lada cars are:
- Engine knocking that occurs when it starts. If extraneous noise disappears just a few moments after starting the power unit, there is no reason to worry - everything is fine.
- Extraneous noise from the hydraulic compensator is observed both on a warm and cold engine, but disappears when the speed increases. In this case, the check valve ball is worn out, and therefore the hydraulic pusher will need to be replaced. In addition, the knocking can be caused by a clogged hydraulic compensator mechanism, then cleaning its elements will help get rid of the noise.
- The knocking noise is only noticeable when the engine is warm. Such a knock indicates an increase in the gaps between the hydraulic pusher sleeve and the plunger; to fix the problem, the hydraulic compensator will need to be replaced.
- A knocking sound in the engine is observed at high speeds. In this case, the cause of the problem may be an excessive amount of engine oil, or, conversely, a lack of oil. The knocking noise is eliminated when the engine oil level is brought to normal. In addition, such a knock may indicate damage to the oil receiver, which in this situation will have to be replaced.
- There is a constant knocking sound from the valves. The reason for this is most often the gap between the camshaft cam and the pusher. You can get rid of extraneous noise and knocking by cleaning or by replacing faulty parts with new ones.
Also, knocking may occur if there is carbon deposits in the system; in such a situation, removing and washing the contaminated elements will help.
But the most important link in ensuring the full operation of the hydraulic compensator is the oil, and therefore its quality and timely replacement are of great importance. It is recommended to change the lubricant either strictly on time, or even a little earlier than this, which will maximize the life of the valve mechanism. Another reason for premature timing wear is an aggressive driving style, which entails a significant increase in loads on all vehicle systems.
Self-adjustment method for valves
- In the engine compartment we remove attachments, decorative plates, and air ducts.
- Unscrew the valve cover.
- Jack up one side of the wheel and turn it until the shaft elbow is in the uppermost part.
- Use a metal feeler gauge to measure the valve clearance. Tighten and loosen the control nut as necessary.
By analogy, we complete the work in the remaining cylinders.