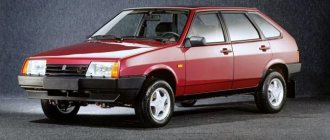
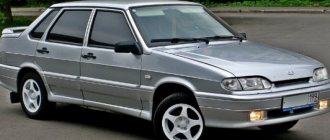
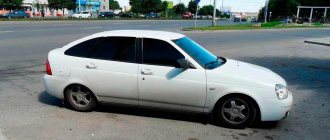
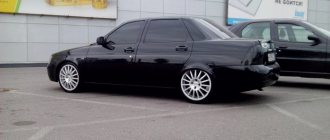
Lada Priora is a good car in its price category. Has good qualities. This is what attracts young people who get their license and, for the sake of experience, are resigned to any car, as long as they have something to drive.
This makes this vehicle model quite popular. It’s not for nothing that teenagers are wondering how to draw a Priora. After all, some people are still at school sitting in class, forgetting about the teacher, and thinking about the desired car, about the early coming of age. At such moments, during boring lessons, you can occupy yourself with thoughts about the car, and in order for it to appear in reality as quickly as possible, you need to reflect your dreams on paper. Therefore, it will be useful to learn how to draw a Lada Priora with a pencil.
How to draw Lada Priora step by step
Stage 1
Despite the smoothness of the lines, we will start working on the image with straight lines that form the silhouette of the car body. The location of the car in the picture is a 3/4 turn. This good angle makes it possible to examine the details without losing the integrity of the image.
Stage 2
Having received the basis for the drawing, we move on to a more clear outline of the outline: we draw the hood, wheel arches, the bottom of the bumper, a smooth transition of the rear pillar. This smoothness is a new feature compared to the “ten”. We apply the radiator grille, headlights, entire bumper, side and front windows, mirror, wheels.
Stage 3
We mark all the small parts: windshield wipers, wheels, lights.
Stage 4
We remove the lines of the draft base from the sketch, check all the contours, make them clearer.
Stage 5
We make the drawing in color. Giving the image volume, we lighten the convex parts of the car body.
Wheels
We are finishing the wheels, the arches for which already exist. In the arches we draw two semicircles, one, which is smaller, inside the other. And another circle in the center. Literally two lines help to achieve volume in the tires.
Since the car is depicted in motion, we add some touches on the wheels.
How to draw a Priora without cool, fashionable wheels? This is impossible! Circles of different diameters will allow you to achieve the desired effect. It is not necessary to make them stamped; you can draw regular disks or any others.
At the final stage, remove all the extra lines that were there at the beginning, and outline the main ones more brightly.
If you only have a pencil at hand, then the work is ready, but if you have colored pencils, pens or paints, it is better to add color to the drawing.
Now you know how to draw a Lada Priora car step by step. Having learned how to depict the rear view, begin to study the front. See more photos and draw.
We recommend watching:
How to draw Priora with a pencil
Let's make a pencil drawing of the priors in profile. Let's show off her swift silhouette and clear lines.
Using a hard pencil leaving thin lines, we draw the area on the sheet where the drawing will be in the form of a rectangle consisting of 4 squares. Divide each square in half with a horizontal line. Based on this drawing, it will be easier for us to maintain the proportions of the car.
Let's start drawing the lines of the body, showing the doors, roof, front and rear bumpers.
Having removed the thin contours of our auxiliary markings with an eraser, we add wheels, door handles, thresholds to the drawing, making all the lines clear using a soft pencil.
Outline and front part
The first step is to create a sketch. Using light pressure from the pencil onto the paper, draw two parallel, slightly inclined lines and one at the bottom. Two curves pass through them on the left side, and on the right there are similar curves below. Between the latter there is another segment (similar to the letter “n”).
Now we proceed to a detailed analysis of the front wing. We make one of the contours clearer. We finish drawing the front, door handle and wheel arch. The lines should be smooth and curved so that the image does not look flat.
We add clarity to the middle side part of the front. Add lines at the bottom showing that the car is in motion.
The picture is becoming more and more like the real thing. We are drawing the details of the car. Draw the front mirror, but you can't do it with a simple rectangle, as the picture will turn out flat. Sketch out the shape of a parallelogram, proceed from it, drawing out the mount to the car and the sides; on the left side they should be larger.
How to draw Priora BPAN
We will draw a car with a lowered suspension, Priora BPAN, focusing on the rear of the car. We draw the already familiar silhouette without auxiliary lines, using a hard pencil.
Focusing on the low ground clearance, we draw in the details and carry out the drawing in a spectacular black and white color combination.
We invite you to look at the drawings of Priora BPAN, made by different authors. Perhaps you will take note of someone's artistic discovery.
Drawing Priora Hatchback
Now let's depict a Priora with a different body type - a hatchback, with a shortened rear overhang. The model is slightly shorter than the sedan and, almost imperceptibly to the eye, taller.
The lines of the front part are familiar to us; we pay attention to the sides of the body, which, as experts say, look especially impressive. Slowly, carefully draw all the lines first with a hard pencil, then highlight them with a soft one. Only after the pencil sketch is perfected do we move on to adding color.
When drawing a Priora hatchback with pencil or gouache, we try to convey its passionate, sporty character in the image.
How to draw a fire truck
Modern fire engines are significantly different from those that first appeared in 1904. The old cars could accommodate 10 people and practically nothing of fire equipment. But modern models are so spacious that they have plenty of fire extinguishing equipment built into them.
- We draw three parallel horizontal lines, which we divide in half with one vertical line. For a fire truck, you need to make four auxiliary lines
- In one part we draw the cabin, starting from the upper part, and then drawing the lower part, which is almost half protruding.
- Along the bottom edge we make a recess for the wheels.
- We depict the body in the form of a rectangle, with recesses for wheels along the lower edge. The height of the body is half the height of the cabin. We start the drawing with the cabin and body outlines
- Draw the wheels.
- We mark the two right doors of the cabin.
- We finish drawing the stairs on the body. For the wheels, don’t forget about drawing the rims; you can use a ruler to depict the stairs
- We add headlights, as well as a wound fire hose, which is attached to the side. We complete the drawing with a fire hose and the inscription 01
- The drawing is ready, you can color it if you wish. The car can be painted with a simple pencil, but if you use paints, felt-tip pens or colored pencils, the main shades will be red and white
The next way to draw a special equipment car will be interesting even for those guys who are not very good at drawing.
- Draw a rectangle and divide it vertically in half. The basis of this machine will be a rectangle divided vertically in half
- On the left side we draw the cabin, draw double lines for drawing windows, draw handles. On the left side we draw a cabin with double lines of windows
- We make windows on the body. To do this, we make the lower border just above the bottom of the cabin windows. Draw the windows on the body
- Add a rolled up fire hose and a tank on top. Add the tank and a rolled up fire hose to the body
- We finish drawing the wheels, make the lines double. Draw the wheels
- We install a flashing light on the roof of the cabin. We complete the flashing light and inventory details
- We complete the design details of the special equipment vehicle (for example, fire extinguishing tools that are attached to the outer wall of the lower rectangle).
- We remove the contour lines, and draw the main ones with a soft pencil or felt-tip pen. The car can be painted or left in the version with outlined contours
Useful Tricks
What to do if you really want to make a drawing, but you don’t have enough skills?
You can use some tips that will allow you to find a compromise between desires and capabilities.
- Use a ready-made diagram, that is, coloring. In fact, this is in no way a compromise on oneself creatively, but rather a thoughtful and careful approach to working with what is not a professional (or even semi-professional) skill.
Step-by-step instruction. how to draw Priora:
- To begin with, it is worth having a visual example of this model with you, something from which we will copy.
- Now we draw the frame of our drawing. First, we draw the main outline, and then we draw vertical, oblique and horizontal lines, starting from our visual image.
- Then we shape the hood, draw a line for the side windows along the top and draw the wheel arches. After this, draw the front bumper from below.
- Now we draw the side windows, side rear view mirror, windshield and headlights. Now we need to draw the “face” of our Priora.
- Next we need to draw the shape of the wheels visible to us. Then we finish drawing the rear view mirror, on the right, the side skirt, the front bumper trim, and the lines of the side doors.
- Now we need to detail our car, draw the headlights, rims, handles, wipers and other little things. Once all such details are drawn, it will be possible to erase the extra lines that we drew when drawing the frame.
- Well, the Lada Priora is ready and now you know how to draw the Lada Priora.
Wheels
We are finishing the wheels, the arches for which already exist. In the arches we draw two semicircles, one, which is smaller, inside the other. And another circle in the center. Literally two lines help to achieve volume in the tires.
Since the car is depicted in motion, we add some touches on the wheels.
How to draw a Priora without cool, fashionable wheels? This is impossible! Circles of different diameters will allow you to achieve the desired effect. It is not necessary to make them stamped; you can draw regular disks or any others.
At the final stage, remove all the extra lines that were there at the beginning, and outline the main ones more brightly.
If you only have a pencil at hand, then the work is ready, but if you have colored pencils, pens or paints, it is better to add color to the drawing.
Now you know how to draw a Lada Priora car step by step. Having learned how to depict the rear view, begin to study the front. See more photos and draw.
Drawing a police car
Depicting a police car is a tricky business. To simplify the drawing process, it is recommended to start with auxiliary elements. In addition, for this drawing we will need a compass.
- In the center of the sheet we draw two rectangles connected to each other by a common horizontal line. We will draw within the boundaries of this figure. We begin the drawing with two rectangles
- The top rectangle is the car body. We show its shape with an arc. We show the shape of the body with an arc
- Add the front part of the car - the hood. Finish the hood line
- Using a soft smooth line we connect the body and the hood. We erase the auxiliary lines of the rectangle in this area. We connect the body and hood with a smooth line
- Let's give it shape. We draw the holes for the wheels, and turn the line separating the rectangles into a line that “separates” the top from the bottom of the car. Slightly tilt the line of the front part and draw the recesses for the wheels
- Add a line for the trunk, rear suspension, as well as a line separating the windshield from the car body, and two vertical lines for the front door. Add a line for the trunk and front door, and also separate the hood from the windshield
- Use an eraser to erase all unnecessary lines, leaving only the outline of the machine itself. Remove the auxiliary lines
- Using a compass, we draw wheels. We draw wheels using a compass.
- Draw the lines of the window frames, using a ruler if necessary. To depict windows, use a ruler if necessary
- We supplement the wheels with circles for the rims. We draw contours and color them if desired.
Drawing and back
Now the stage of drawing the rear wing with the door begins. We start with the arch of the future wheel, drawing it according to the same principle as the arch of the front one. We outline the straight line that we still have from the first stage. We schematically show the lines of the bumper.
Here it becomes clear that the algorithm for how to draw a Priora is simple. If at first everything somehow didn’t fit, you had to erase and redraw, but with the roof everything is much easier. We sketch the roof lines and mark the windows.
Let's start creating the trunk and body. Draw the existing lines and add some elements. Make the headlights LED, which means that there is an oval and a circle inside the shape. Draw a place for the license plate; it should look like a parallelogram with the edges rounded at the bottom.
Now we complement the lower part of the rear bumper with additional lines and details.
Drawing a racing car step by step
You can hardly find a car lover who would be indifferent to racing cars. Speed, mobility and beauty are what make race cars so popular. However, drawing this masterpiece of the auto industry is not so easy.
- The basic rule for depicting a racing car is to first convey on paper the most simplified sketch possible. In this case, we start by drawing an elongated body. We start the drawing with auxiliary lines
- To add volume, we add the upper part - the driver's and passenger seats. Along the outer edge, based on a line drawn parallel to the outer edge, we build the interior frame. To add volume, we draw the roof lines and the interior frame
- Let's start with the bottom part. Draw the bottom line, making recesses for the wheels. Draw the recesses for the wheels, round off the line of the rear bumper
- Due to the fact that the car is located at an angle, we make the wheels oval. Due to the fact that the car is located at an angle, the wheels should not be round
- We make the lower part of the car curved. To give the correct shape, we round off the front part of the body
- Let's move on to the top. Add a side mirror and soften the initial lines with soft strokes. Soften the top lines, finish drawing the side mirror
- Add two lines to the side and rear of the car. Add lines to the side and rear
- We erase the extra lines and work out the details. We start with the front lines, add the headlights. Remove the extra lines, draw the headlights
- Draw a line at the bottom, as well as a rectangle for the number. We finish drawing the license plate, detailing the lines of the car
- Add several lines to the car windows, as well as a door line. We complete the picture by drawing the doors and parts of the front of the car
Outline and front part
The first step is to create a sketch. Using light pressure from the pencil onto the paper, draw two parallel, slightly inclined lines and one at the bottom. Two curves pass through them on the left side, and on the right there are similar curves below. Between the latter there is another segment (similar to the letter “n”).
Now we proceed to a detailed analysis of the front wing. We make one of the contours clearer. We finish drawing the front, door handle and wheel arch. The lines should be smooth and curved so that the image does not look flat.
We add clarity to the middle side part of the front. Add lines at the bottom showing that the car is in motion.
The picture is becoming more and more like the real thing. We are drawing the details of the car. Draw the front mirror, but you can't do it with a simple rectangle, as the picture will turn out flat. Sketch out the shape of a parallelogram, proceed from it, drawing out the mount to the car and the sides; on the left side they should be larger.
Lowered priors for drawing. Drawing Priora
Lada Priora belongs to the family of domestic passenger cars; the manufacturer is AvtoVAZ OJSC. In April 2007, sales of this model began. A little later, they began to produce this model with a hatchback body. And in 2009, production of this model began in a station wagon modification.
In the future, it is planned to change the appearance of the front bumper, the exterior mirrors with side turn indicators will be replaced, and additional options will be added. They also recently began producing this model with an automatic transmission.
In addition, on the basis of the Lada Priora, it is planned to create electric vehicles, which will appear in small quantities in the near future. Lada Priora makes it clear to the consumer that domestic cars can be presentable, just like foreign cars.
Step-by-step instruction. How to draw Priora:
- To begin with, it is worth having a visual example of this model with you, something from which we will copy.
- Now we draw the frame of our drawing. First, we draw the main outline, and then we draw vertical, oblique and horizontal lines, starting from our visual image.
- Then we shape the hood, draw a line for the side windows along the top and draw the wheel arches. After this, draw the front bumper from below.
- Now we draw the side windows, side rear view mirror, windshield and headlights. Now we need to draw the “face” of our Priora.
- Next we need to draw the shape of the wheels visible to us. Then we finish drawing the rear view mirror, on the right, the side skirt, the front bumper trim, and the lines of the side doors.
- Now we need to detail our car, draw the headlights, rims, handles, wipers and other little things. Once all such details are drawn, it will be possible to erase the extra lines that we drew when drawing the frame.
- Well, the Lada Priora is ready and now you know how to draw the Lada Priora.
But there is another option for drawing Priora with a pencil. It's not as detailed, but it's clear and accessible. Let's look at it too:
- First, draw the body of the car and the front wheels.
- Then we finish drawing the rear wheels, headlights and other small details, such as rear view windows, door lines, handles and so on.
- Outlines the car with a thicker line.
- We apply a shadow and write Lada Priora in place of the numbers.
These two simple methods will help you learn how to draw a Priora with a pencil. Now you can try to draw this model of a domestic car yourself and, most likely, you will do great.
Even in ancient times, people got tired of walking on their own two feet and began to tame various large animals for riding. It all started with an ordinary donkey and an extraordinary horse, but after the wheel came from deep space and man tamed it, everything changed. The horses were used for sausage, and the wheels were taken in pairs and, together with boards of various configurations, carts were created. Today we will move much further and learn how to draw a Lada Priora. Lada Priora is a non-working transformer produced by VAZ, with a half-life of no more than one year. Most often it moves on four wheels, if it moves at all. At first, the Lada was conceived as a Soviet radio operator-spy, introduced into the German rear, but due to small government orders it had to be melted down into a car, so it looks very bad. Most often, to save kinetic energy, of the possible four doors, only the driver's door opens, and the hood is equipped with an automatic mechanism that opens only after an engine breakdown. The external resemblance of the Lada to automobile transport is so strong that an honest Russian person does not think twice about buying it, and the chemical compounds released in the cabin make him love the Lada and encourage it in every possible way. What can you do with Lada:
- You can turn the vehicle into a monoblock with one door at the back. This way you will save on door handles, side windows and strengthen the body;
- If you are a bachelor, you can remove all the seats except the driver's. This way you will increase the space inside the car and be able to transport 3 times more weight in the cabin, or one whole live cow;
- By removing the roof, you can easily turn your Priora into a bathtub on wheels;
- With the help of an invisible cord, you can move even without gasoline if you tie the car to another vehicle;
- In the film Transformers, Lada and other VAZ products were not used due to the uncertainty of whether this device belongs to vehicles;
- In American films, Priora will never explode unless there is a bear in a hat with earflaps inside it.
And now you yourself will try to draw this car with a pencil.
Engine
The design of the engine, which is based on a cast iron cylinder block, is quite reliable. Recently, all the engines that are installed on Grants have become non-plug-in, that is, if the timing belt breaks, the pistons do not meet the valves. This allows owners to save a tidy sum that they could otherwise spend on repairs. But it does not eliminate the main problem - low-quality components. Our editorial team has undergone long-term testing of three cars: Lada Granta, Kalina and the platform-compatible Datsun mi-DO. In each car, the timing belt broke before it reached the deadline for its replacement according to the regulations.
When repairing one of the engines whose timing belt had broken, it turned out that an excess amount of oil was getting into the combustion chamber. But the mileage is not that great, only 70,000 km. The issue is most likely due to the unstable quality of components. It is impossible to establish the exact cause, because deviations in dimensions, the quality of materials, and even poor-quality parts of the intake system that let in too much dust could cause harm.
When repairing one of the engines whose timing belt had broken, it turned out that an excess amount of oil was getting into the combustion chamber. But the mileage is not that great, only 70,000 km. The issue is most likely due to the unstable quality of components. It is impossible to establish the exact cause, because deviations in dimensions, the quality of materials, and even poor-quality parts of the intake system that let in too much dust could cause harm.
Problematic parts also include the thermostat and ignition coils. The latter sometimes have to be changed several times with a mileage of up to 100,000 km. Other malfunctions characteristic of Grant engines, although they occur quite often, do not have any serious consequences: unstable engine operation (speeds fluctuate) at idle, increased (in some copies) vibration during operation.
How to draw Lada Priora with a pencil step by step
Step one. Draw the car body and front wheels.
Step two. Add headlights, rear wheels and other details.
Step three. Outline everything with a thicker line.
Step four. Shade and write Lada Priora instead of numbers.
A few more interesting lessons on similar topics.
Probably every car enthusiast knows such cars as “kopek” and “chisel”. They received these rare names among the people. In fact, cars were sold under the trade name “Zhiguli”, produced by AvtoVAZ OJSC. Since consumers often associated this name with the word "gigolo", manufacturers decided to change it. We opted for the Lada. Today, Lada cars are sold not only in the domestic but also in the international market. Modern car models look different: improved, beautiful. In 2015, the official logo is being rebranded. It is made more voluminous. The brand logo is undergoing its fourth design change.
Video lessons
The domestic car Lada Priora is a very popular car, according to young people, and is not inferior to foreign cars of the same price segment.
Fans of Lada Priora literally live by this car, travel to meetings with owners of similar cars and exchange tuning tips. Questions constantly arise about how to draw a Priora bpan on landing with a pencil step by step and how to do it easily or whether you need to have artistic skills to complete the drawing. This is not at all necessary; as it turns out, you can make a beautiful picture with your own hands without special preparation. The instructions offered by the group “how to draw a car” will help you with this, here it is.
Source
