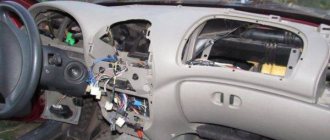
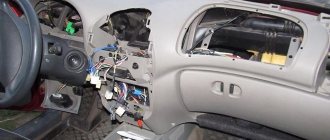
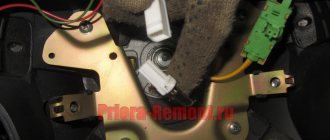
| If you decide to soundproof the engine shield, or tuning the panel (re-tighten or paint), then carefully study the instructions on how to remove and install the Lada Kalina panel with your own hands . |
Depending on the year of manufacture of the car, it may be possible to remove the Kalina panel with or without a heater. In this article, dismantling a dashboard without a stove:
How to remove the dashboard and instrument cluster on a VAZ 1117-1119 Kalina car
VAZ 1117 "Kalina" is one of the most popular cars from the domestic manufacturer - AvtoVAZ. In principle, there is nothing surprising in the popularity of the Kalina, because this particular model has become a kind of symbol of the new vector of development of the Russian automobile industry.
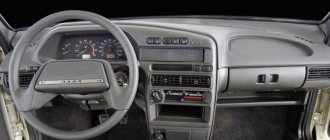
But today we will leave aside the production directions of AvtoVAZ and the popularity of the Lada Kalina. Let's talk about the process of removing the instrument cluster from this car, as well as the dashboard (dashboard). As for the need to carry out such measures, everything is simple: firstly, dismantling may be necessary to repair certain faults, and secondly, to modernize standard parts, that is, for tuning. By the way, you can read about tuning the VAZ2117 dashboard here.
Removing the instrument cluster Lada Kalina
Work on removing the instrument panel is carried out in the following sequence:
conclusions
After reading the information given in the article, it will be easier for you to navigate behind the wheel and control the operation of the Lada Kalina car systems.
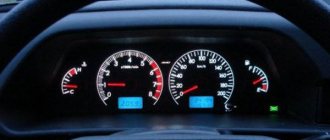
The instrument panel serves to inform the driver about all important processes occurring in his car. It is by using the scales, indicators, symbols and lamps located on this device that the person sitting behind the wheel is able to monitor the performance of components and systems. For the shield to function correctly as a single system, it requires regular diagnostics. It consists not only of scanning by connecting electronic reading devices to the computer, but also by visually monitoring the performance of all specified components of the dashboard (lamps, etc.).
So that the owner of the Lada Kalina, namely the instrument panel of this model we will talk about today, can easily navigate this complex device, the manufacturer kindly agreed to complete the car with the appropriate instructions. It is enough to familiarize yourself with its postulates and all the secrets of the dashboard will be revealed to you, then the instrument panel will not seem like something incredibly complicated.
The manufacturer did his best when developing the design of such a thing as the instrument panel on the Lada Kalina car. It is unlikely that you will be able to find owners dissatisfied with the “interface” of the device. The dashboard is painfully informative and primitive in terms of perceiving symbols and managing some of them.
How to remove the instrument panel on Kalina yourself?
How to remove the panel on Kalina? This question is asked by almost all car enthusiasts who have purchased a new or used AvtoVAZ car. Lada Kalina is an almost legendary car; there are a lot of jokes and stories about it. Of course, listening to all this is quite exciting, but when you yourself are faced with one of the comic problems, it’s no longer funny.
Kalina has many different flaws, and one of them is the dashboard. At the factory, its installation is carried out manually, which can later cause squeaks, unpleasant noise and other annoying sounds during a trip. They check exclusively the gaps, and rarely pay attention to the quality of the torpedo connection.
Because of this, many owners try to remove the panel themselves to eliminate the source of the noise. But this is not so easy to do either. Removing the instrument panel is carried out in several stages, and everything should be disconnected extremely carefully.
Replacing LEDs
Having disassembled the instrument panel unit, you will notice that the illumination of two scales and the display is provided by flat LEDs. They, in turn, can be replaced with parts of the same standard size. But remember one rule: the switching polarity cannot be violated. On a planar diode, polarity is indicated by the presence of a “bevel” on one side.
There is an example when standard elements were replaced with blue light diodes:
The next video will show how you can further improve the tidy by simply replacing the LEDs.
The operating voltage of one diode is 3-3.5 Volts. Do not install elements designed for other voltages. It is not recommended to use LEDs that are too powerful and consume significant current.
How to remove the panel on Kalina 2 (VAZ 2192, 2194)
h3 >Removing the Kalina 2 dashboard Required: Disconnect the negative terminal from the battery. For Kalina 2 vehicles with air conditioning, unload the refrigerant from the air conditioning system in accordance with the operating instructions for the service equipment. Prepare a 8-point, 10-point, 13-point, 21-point socket, a Phillips and a flat-head screwdriver.
Unscrew the two bolts (No. 2) securing the thermostatic valve (No. 1) of the air conditioner using a 10" socket.
Unscrew the nut (No. 7) securing the heater using a '10' wrench. Loosen the clamps (No. 4 and No. 6) using the '8' socket. Disconnect the outlet (No. 3) and inlet (No. 5) hoses from the heater radiator. Remove the cabin filter.
Remove the four screws (No. 1) securing the heating and air conditioning system air intake using a Phillips screwdriver.
Remove Kalina's beard 2. Unscrew the bolt (No. 1) securing the parking brake lever, remove the bracket (No. 2) of the handbrake limit switch using a 13-inch socket.
Unscrew the two bolts (No. 2) from the right and left sides that secure the pillar (No. 1) of the instrument panel cross member to the floor tunnel, using a 13-inch socket. Unscrew the nut (No. 3) of the ground wire of the instrument panel harness using a 10mm socket. Under the front seats, unscrew the nut securing the air duct (No. 4) for heating the interior using a 10mm socket. Remove the air duct.
Remove the steering column
Torpedo Kalina or Granta FL
The following are instructions for cars with such a dashboard:
- instrument panel trim (21925-5325182)
- central air ducts (or intermediate air duct housing for the monitor for Lada Kalina 2) (2195-8104209/08)
- solar radiation sensor (21920-8121300)
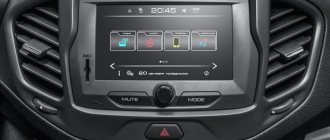
- multimedia display (article 21920-7900100, make sure you have an interface cable)
- multimedia equipment (21920-7900200 or navigation 21920-7900300)
- Remove the instrument cluster, glove compartment, center trim and air ducts (move back a couple of fasteners from above).
- Install the air ducts, modifying the fastenings in place (for example, use furniture corners).
As a result, the air ducts should go down a little:
- Install the screen and multimedia system on standard mounts.
- Connect the display to the multimedia unit.
- Attach the solar radiation sensor to the frame.
- Install the center console.
Sound insulation of Kalina panel/dashboard
| The disease of Russian cars is rattling, crickets and squeaks, and the LADA Kalina panel is no exception; it is also made of inexpensive plastic, like the rest of the interior elements. Let's figure out how to soundproof Kalina's instrument panel without removing or dismantling it. |
If you decide to make soundproofing for Kalina yourself, then you will have to buy:
- Anti-creak (modelin).
- Vibrating material (for example, STP).
- Plastic clamps.
- Hot-melt gun and hot glue.
- Bitoplast or splen, optional.
Instrument panel Kalina, sound insulation without removal
There is no need to remove the dashboard assembly, but you will have to remove the attached elements. As a result, you should see something like this:
Soundproofing Lada Kalina dashboard
When I picked up the car from the cabin, I heard some noises from the dashboard, so I already knew what I needed to do. I waited until the noise became unbearable and decided to soundproof the front panel of the Lada Kalina with my own hands.
What you will need:1. Madeleine is a whole topic! Can be used everywhere - universal anti-creak!2. Thermal gun with rods.3. Straight arms - as always.4. Lots of time and patience!
Do-it-yourself soundproofing of Lada Kalina dashboard:
1. Disassemble the panel. We have already published a guide on the site on how to remove a torpedo on a Lada Kalina.
2. He took off his beard and tidy. I removed unnecessary parts from the panel.
3. We remember where all the wires came from. I filled all the connectors on the wire side with hot glue from a gun so as not to make noise.
4. Removed the shelf from the panel. That's how it was for me before Shumka.
5. Looked inside from the tidy side. There's a lot of dust.
6. So I finally removed the panel!
7. Dust, fear and horror when looking at the photo!
8. I wish I could put everything back in place and have no extra screws left! Dreams Dreams…
9. Now the panel is pulled off. I glued the panel itself from the inside with madeline (anti-creaking agent) in the right places in the beard area. STP didn’t bother gluing it - it didn’t bother him at all...
10. I taped the air ducts at the junction points.
11. I taped the wires with Madeleine.
Removing and installing the panel (dashboard) of Kalina with heater
Depending on the year of manufacture of the car, it may be possible to remove the Kalina panel with or without a heater. In this article, dismantling a dashboard with a stove:
Required tools: Phillips and flat head screwdrivers, 8 socket, 10 high socket, 13 socket. Disconnect the negative terminal of the battery. Drain the Kalina coolant.
From the bottom of the car, loosen the clamps ("8" socket) and disconnect the hoses from the heater radiator pipes passing through the front panel. Unscrew the nut securing the heater to the front panel using the high "10" socket. Remove the Kalina cabin filter. Unscrew the 4 screws securing the filter housing using a Phillips screwdriver.
Unscrew the nuts securing the Kalina steering column and lower it to the floor. Remove the central tunnel.
Disconnect the wire ends from the brake light switch. Disconnect the 7 connectors with the wires behind the fuse block. Unscrew the bolts securing the console brackets to the floor tunnel on both sides, using a socket “13”. Unscrew the nuts securing the air ducts for the rear passengers under the front seats, using a socket “ on 10".
Remove the pillar covers by snapping off the plastic clips.
Remove the end cap from the left and right sides of the instrument panel using a flathead screwdriver. Unscrew 2 bolts securing the instrument panel on both sides, with a “13” head. Unscrew the self-tapping screws of the right and left fastenings of the front trim of the instrument panel using a Phillips screwdriver. Remove the front trim of the instrument panel, overcoming the resistance of 7 spring holders. Location of the holders for the Kalina panel trim. Unscrew the 7 instrument panel nuts in front of the windshield using a 10mm socket. Unscrew the 2 bolts securing the instrument panel cross member to the pedal bracket using a 13 socket. Unscrew the third bolt securing the instrument panel crossmember to the pedal bracket.
Kalina Torpedo (rear view):
1 — heater fan electric motor; 2 — heater fan casing; 3 — air recirculation damper; 4— air ducts; 5 — heater casing; 6 — inlet pipe of the heater radiator; 7 — heater radiator outlet pipe
Unscrew the 2 nuts (under the windshield) securing the instrument panel cross member to the body using a 13mm socket. Remove the end of the “mass” wire from the stud. Disconnect the wiring block from the Kalina ECU.
Move the rear passenger air ducts towards the rear of the car, disconnecting them from the heater. Move the Kalina instrument panel away from the front panel and disconnect the block from the wires behind the heater. Remove the dashboard assembly with the heater from the passenger compartment.
Installation of the dashboard is carried out in the reverse order. When installing, make sure that the heater radiator pipes fit into the hole in the front panel. We pour coolant into the cooling system and bring it to normal. See also, removing the Kalina panel without a heater.
| If you decide to soundproof the engine shield, or tuning the panel (re-tighten or paint), then carefully study the instructions on how to remove and install the Lada Kalina panel with your own hands. |
Disassembling the panel
To dismantle the instrument panel in Kalina, you should arm yourself with a set of high-quality screwdrivers and patience. To work you will need:
- crosshead screwdriver;
- slotted screwdriver;
- 10mm wrench with round head;
- marker or tape to indicate disconnected wires.
Disassembly begins from the sides. How to remove a torpedo? The sequence is:
- The first step is to disconnect the rubber seal that prevents the panel from being removed. Using a flat-head screwdriver, bend it to make room for dismantling.
- Next you need to remove the plastic casing with three clips. It is located on the front pillar of the cover. Again, a flat-head screwdriver will come in handy, which can be used to pry off the socket.
- The next step is to detach the trims in front of the glass. You can unscrew them using a Phillips screwdriver by unscrewing the fasteners on both sides.
- After this you will be able to remove the black trim under the glass. It is secured with iron clips and screws, so there is no need to rush. Slowly pull towards you until it comes loose. It may happen that the clips get stuck under the panel or some of them will be missing altogether.
- We unscrew all the screws that are nearby and remove the covers from the side air ducts.
After removing all the side and side elements, you can begin to dismantle the central part.
New Lada: LADA Kalina. Engine management system diagram 1.6i (EURO II)
Operation algorithm
Started:
Note that the overlay is attached using iron buttons;
They are located on both sides of the emergency system key;
Let us note right away that it is easier to remove the panel through the passenger door. As for the method of draining the coolant and removing the stove, everything is done almost the same, except with some nuances. After the sound insulation has been carried out, we install the panel in place. Don't forget to first pass the block with wires for the switch. We also insert the glove compartment light in advance, using the appropriate holes. Thus, the operation can be considered complete. Having learned how to remove a torpedo on Kalina, you can safely take on this work, even without the help of an assistant. On the other hand, an extra pair of hands certainly won't hurt.
Replacement with panel removal
For these works you will need a certain set of tools:
If this is your first time doing this, try not to lose all the screws and screws - you will have to unscrew quite a lot of them. It is also important to remember where each one is.
First of all, the antifreeze should be completely drained. To do this, place the machine on a pit and, after twisting the plug, collect the liquid in a bucket.
Then remove the screws that secure the radiator. After this, release the gas pedal from the nuts holding it in place. Remove the torpedo casing and then the controller.
Replacing dashboard light bulbs Lada Kalina video instructions
Lada Priora Hatchback Black Bunny Logbook Wheels R15 Kalina 2cross on Priora. Part 2
Hi all. Today we will replace the dashboard light bulbs on the Lada Kalina. On Kalina, the light bulbs in the dashboard are not reliable. We decided to write detailed instructions for replacing them to save you money on repairs.
We will need:
- short flat and shaped screwdriver
- long flat and figured screwdriver
Step-by-step replacement of dashboard lamps Lada Kalina
1. Lower the tongue and move the steering wheel down.
2. Unscrew the two marked screws for a shaped screwdriver.
3. After unscrewing the screws, pull the dashboard frame towards you by hand; it is latched.
4. Lower the panel frame with the top edge towards the steering wheel and pull it out.
The clips on the frame are practically disposable; before disassembling it is better to immediately buy new ones.
5. Unscrew the two screws on the sides of the instrument panel. Take a long flathead screwdriver.
6. After unscrewing the screws, lower the top edge of the dashboard down and turn it slightly to the right.
7. Use a screwdriver to pry off the clamp of the dashboard power connector.
After hooking it up, use your fingers to lift the latch slightly up and move the ear of the latch to the other side. I advise you to watch this on video so as not to break it.
8. After you move your ear away, the connector will come free. We remove the connector.
9. Remove the dashboard from the landing site.
10. Engineers have thought out how to replace lamps without unscrewing the back cover of the instrument panel.
11. Change the necessary lamps. In order to pull out the light bulb, you need to grab it by the body, turn it to the left and pull it out towards you. Next, remove the old one from the case and install the new one. Well, all that remains is to install the housing with the new lamp into the panel. To do this, insert and turn to the right.
I would like to note that the lamp that illuminates the liquid crystal display is not removable; it is soldered into the panel.
12. After replacing the lamps, insert the panel into place and connect the power connector. After installing the connector, lower the latch.
13. Raise the dashboard and get into the grooves. The grooves are located on the sides of the bottom of the dashboard housing.
After installation in the grooves, tighten the two fastening screws on the sides.
15. After checking, we continue assembly. If you have intact clips, you are lucky; if not, we change them. You can see the replacement of clips in the video.
16. Insert the panel frame and snap it into place. We insert it as we removed it.
17. Tighten the two screws at the top and the job is complete.
We also recommend:
car dashboard skills
If you are tormented by squeaks while driving and you are thinking about disassembling the front panel of a Lada car, Kalina, the following instructions will come in handy.
To dismantle the torpedo you will need the following tools:
- short Phillips with screwdriver handle;
- slotted (minus) screwdriver with a short handle;
- tubular wrench 10;
- marker.
In addition, you will need a little patience and accuracy when performing the work.
Algorithm of actions when disassembling and removing a torpedo.
First you need to bend the rubber seals of the front doors from the A-pillars. After this, you need to remove the plastic lining of the front struts. Each of them is held on by 3 clips. slotted Use a screwdriver as a lever. Next, you need to unscrew the screws securing the upper front (as you move) panel trim. There are 2 of them: one on the right, the other on the left, both are located near the racks
After this, you need to remove the upper front carefully, pulling the cover towards you. It is not secured with self-tapping screws; it is held in place by clips at the front.
When removing, try not to lose the panel. Then you need to unscrew all the screws and remove the trim on the side air ducts.
You can now begin dismantling the center console.
- You must first remove the ashtray. To do this, just pull it all the way back (unscrew it as you go) and use 4 self-tapping screws that secure it to the then.
- you need to pry the console with a screwdriver and pull out the plugs located to the right and left of the emergency button.
- To signal this, you need to unscrew the 2 screws located under the plugs located and securing the center console. Now.
- From below you should carefully pull out the console and disconnect all the wiring from it, having previously marked with a marker what is attached where. If you don’t have a marker, you can take a picture with your phone of which wires go where.
- After dismantling the center console, you need to unscrew 2 bolts and 5 screws and remove the steering column casing.
- Then you need to unscrew self-tapping screw 2 and dismantle the outer cover of the combination Next.
- instruments, you need to unscrew all the fastenings of the instrument panel from above using a 10mm wrench.
- After this, you need to tear off the lock washers on which the heater air duct is seated, unscrew the remaining screws securing the instrument panel, and remove it by pulling it towards you.
Removing the console
Now we need to start sequentially disassembling the panel in Kalina into parts. How to disassemble the panel?
- Remove the ashtray: pull it towards you as far as it will go and unscrew the 4 screws that secure it.
- After this you can get to two plugs. They are located on the sides of the emergency lights. Use a flathead screwdriver to pry it off and set it aside.
- We unscrew the screws that are located under the plugs. These fasteners from below hold the console.
- After the two screws are removed, pull the console (shield) towards you, but slowly so as not to break the wiring. We disconnect the wiring, first marking the wires so as not to confuse which is which later.
- Now unscrew the steering wheel cover. It is held in place by 2 bolts, for which a 10mm wrench is useful, and 5 self-tapping screws.
- Next, disconnect the instrument panel cover. There are only 2 screws here.
- The top panel is secured with nuts. There must be at least 7 of them.
As you can see, the stove air duct is tightly fixed.
What to do? You will have to rip off 2 lock washers and unscrew the remaining screws, which, in fact, secure the panel in place. Only self-tapping screws are enough for fastening. Next, you can try to remove the steering wheel. If it doesn’t work out, you’ll have to work a little harder and find the remaining fasteners. In any case, we look for all the hidden screws and unscrew them to the last. Pull the panel towards you. If it gives in, it means everything is unscrewed. If somewhere it doesn’t want to come away, we arm ourselves with a screwdriver and unscrew the hidden fasteners. After that, it can be disconnected. New Lada: Clutch of Lada Grant, Kalina, Priora and its possible malfunctions » Lada.Online - all the most interesting and useful about LADA cars That's all the instructions on how to remove the instrument panel in Lada Kalina.
Tuning the instrument panel is one of the main reasons why a torpedo and its adjacent parts are disassembled. Lada Kalina is not distinguished by its bright design and interesting design. What can you do about it? Install panel lighting.
This solution will help improve the visibility of indicators. In addition, the perception of the interior will change. You can also change the panel to another one or repaint its parts. Such tuning of the instrument panel is a radical measure, but absolutely justified. The plastic the panel is made of is simply terrible.
Dismantling the panel is a painstaking task, but the hardest thing is to then put it all together so that the panel does not creak.
You need to fit the parts well and tightly, then no sounds will occur. If you first mark the wiring, then connecting all devices should not be difficult.
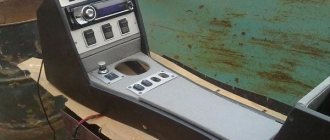
How to remove the center console in a luxury package
Let's say it was decided to dismantle the panels located on the center console. You can see that there are two of them. One is the front panel of the air conditioner, the second protects the radio and contains air duct grilles in its design. These two parts are not connected to each other. However, it will not be possible to remove the radio panel unless you first remove the climate control panel. Below it are metric screws (A, B) that secure the media center shield from below.
Central console of Kalina-2, Luxury package
The question arises, why are we even talking about how to dismantle the center console, since after this the car can be removed from warranty? Usually the shield is removed to install additional equipment (for example, a rear view camera). But connecting any equipment, the use of which has not been agreed upon with the dealer, will void the vehicle warranty. If you haven't changed your mind yet, continue reading.
The climate control shield is held in place by 4 clips, which are located on the bottom and top sides of the part closer to the corners. Having disconnected even two clips (1, 2 or 3, 4), you can try to pull the panel towards you to dismantle it. But if you have no experience working with such a mount, it is better not to try - you may scratch the outer surface of the shield. In fact, all you need to do is use a flathead screwdriver (some people use a thin-bladed knife and a screwdriver).
To dismantle the climate control panel, you do not need to first remove the control knobs located on it, if we are talking about the “Lux” package. The same applies to the “Norma with climate control” package. In all other versions, a stove control unit is used, the design of which does not allow removing the shield without first dismantling the handles. Be careful.
If the climate control panel is removed, all that remains is to unscrew two bolts and just as carefully remove the media center panel. Additionally, this part is secured with nine clips:
- Two clips are located at the level of the border of the air duct grille;
- Three clips on each side board are located at equal distances;
- Three more clips can be found on the top side (the windows they fit into are circled in the photo).
Based on the information listed above, you can try to dismantle it yourself, but it is still better to entrust this work to a specialist. It is advisable not to use a hammer, chisel, or grinder when performing any actions, as shown in this video. However, here we are talking about the “Norma” configuration, which we will talk about further.
