As a rule, the cause of low beam malfunction on a VAZ 2110 is burnt out light bulbs. However, sometimes the lack of lighting is due to the failure of other components. Below we will look at how to replace lamps, as well as the most common reasons why the low beam does not light up and how to eliminate them.
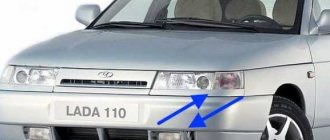
Low beam of a VAZ 2110 car
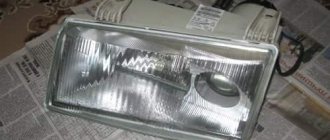
Replacing lamps
Choice
The process of replacing lamps on a VAZ 2110 is extremely simple. However, before you begin this operation, you must purchase new lighting elements.
This vehicle is factory equipped with H7 standard halogen bulbs. Today there is a large selection of lamps on sale, not only halogen, but also other types - xenon and LED.
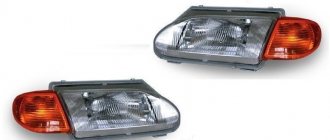
The photo shows a H7 standard halogen lamp
Their features, advantages and disadvantages have been discussed many times on car enthusiast forums, so below we provide only a comparative table with the main characteristics of these lamps:
The most optimal color temperature of the light flux is in the range of 4300 – 5000 K.
It must be said that in addition to the data from the table, when choosing, you should also take into account the penetrating ability of the light flux. Halogen lamps are the leaders in this parameter - they illuminate the road much better in rain, fog or snow.
In addition, installing xenon or LEDs in the fog lights of the VAZ 2110 will require electrical intervention, in particular the installation of additional equipment (ignition units). Therefore, it will not be possible to perform their high-quality and safe installation with your own hands.
Experts recommend changing light bulbs in pairs so that both headlights shine equally.
In addition, their service life is approximately the same, so if one of them burns out, the second one will soon fail.
Each car owner must choose for himself which light for the VAZ 2110 will be better based on his own financial capabilities, weather conditions of the car, etc.
How to replace the lamp
Instructions for replacing light bulbs look like this:
- First of all, you need to open the hood and disconnect the terminal from the battery.
- Then you need to remove the plug located closer to the wing.
- Next, you need to unfasten the spring clip, which presses the light bulb to the headlight housing.
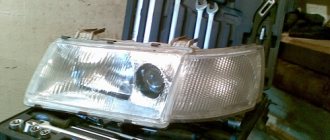
Disconnecting the block from the contacts
- After this, you should carefully disconnect the block from the contacts and remove the light bulb itself, since nothing else interferes with it.
- Now you need to insert new light bulbs in the same position in which the old ones were located, connect the block to the contacts and secure everything with a bracket.
- At the end of the work, you should install the plug in place.
When replacing lamps, it is important not to touch the glass with your fingers.
Otherwise, grease stains will remain on the surface, which will lead to overheating and failure of the lighting element.
The lamp replacement is now complete. As a rule, this operation takes several minutes even for beginners.
Many car owners are interested in how to improve headlights?
The easiest way is to disassemble the headlights, wash them, replace the glass if necessary and adjust the light beams.
As a rule, these simple procedures give good results.
Wiring
Let's go further along the chain. You need to find out if there is voltage at the headlight unit. To do this, you need to measure the voltage at the lamp plug. If there is voltage, but the lamp does not light, then:
If there is no voltage, then you need to look for where the break is!
Having problems with the wires
To eliminate this malfunction, you will have to check all the blocks through which the relay and fuse box are connected. It is possible that there is a poor-quality connection, as well as oxidation of the contacts, which leads to an increase in the current flowing in these places and their heating. To eliminate such malfunctions, it is enough to tighten all the pad fastenings, having first thoroughly cleaned all contacts using sandpaper or a needle file.
It would also be useful to check the button with which the headlights are turned on, since its contacts are also subject to oxidation and they may also have a poor-quality connection. Practical experience suggests that it is from this button that you should start troubleshooting, and only after making sure that it is fully operational, continue searching for the reason why the low beam does not work.
Repair
If the fuses are intact, but the lighting still does not turn on, you need to find the cause of the malfunction. To do this, you will need a test lamp, or even better, a multimeter.
Head lighting diagram for VAZ 2110
It must be said that repairing the low beam on a VAZ 2110 is not difficult - you just need to ring the circuit and find a break in order to fix it.
Below is the optimal procedure:
- Since the low beam relay on the VAZ 2110 is often the cause of a low beam malfunction, you can start checking with it. Using the device, you need to determine whether voltage is supplied to it and whether it is at the output. If there is no voltage at the output, then the relay needs to be replaced.
- If there is no voltage supplied to the relay and there is no voltage at the fuse terminals, then you should check the VAZ wiring from the switch to the fuses, as well as the switch itself.
- If there is voltage at the output of the relay, you need to check whether it is supplied to the lamp connector. Often the cause of the malfunction is burnt or oxidized contacts. If the low and high beams disappear at once, then the ground wire in the headlight may have come loose.
The cause of relay malfunction is often oxidized contacts, which simply need to be cleaned.
Thus, by checking all the main components along the circuit, you will definitely find the cause of the malfunction. The low beam diagram for the VAZ 2110, which is shown above, will help to simplify this work.
Low beam adjustment diagram
Problems with the backlight of the VAZ-2110 dashboard: causes and repairs
It’s probably no secret to anyone that the reliability of VAZ “ten” leaves much to be desired. Often, the owners of these cars have to deal with certain malfunctions. One of these problems is the lack of dashboard lighting. It is clear that the breakdown should be corrected as soon as possible. After all, going somewhere at night will be quite problematic - few people will like to move, essentially, blindly, without seeing either the current speed or other, no less important indicators.
Adjustment
Once a year, the low beam on the VAZ 2110 should be adjusted. This procedure is necessary in order to increase the lighting efficiency and also to prevent dazzling oncoming drivers.
Below we will take a closer look at how to adjust the low beam headlights:
- You need to find a flat area with a wall that will serve as a screen.
- The car should be placed at a distance of five meters from the screen. A passenger must sit in front. You can also put a load weighing 75 kilograms in the car.
- On the screen you need to draw a horizontal line at 600 mm, as well as a second line 75 mm below the first.
- Then you need to draw three vertical lines - the two outer lines should correspond to the centers of the headlights, and the middle one should be located in the middle between them.
- The headlight hydraulic adjustment handle should be moved to the position corresponding to the minimum load.
- One of the headlights must be covered with cardboard or a sheet of plywood.
Content
- Lamp burned out
- Fuse blown
- Non-standard reasons
The easiest way, without a doubt, is to entrust everything to the reliable hands of a trusted auto electrician, but it is not too difficult to cope with some problems on your own - if you have the smallest amount of free time and a primitive acquaintance with the basics of electrical circuits.
The low beam of the headlights does not light up, but the high beam is on - this phenomenon can be due to several reasons. And most of them are quite easy to fix. Moreover, this can happen to your car at a completely inopportune moment: on the highway, for example, when you need to switch to low beam so as not to blind oncoming drivers with headlights. Let's try to deal with all the flaws one by one, and consider: what might be the most common options for repairing and troubleshooting such an important segment as low-beam lighting.
Conclusion
The low beam headlights on a VAZ 2110 may stop shining for various reasons, however, in any case, the fault can always be found and fixed by yourself. At the same time, we should not forget about adjusting the direction of the light beams, on which the effectiveness of the head lighting largely depends.
You can get additional useful information on this topic from the video in this article.
The bottom line. The car is not mine. The trouble is that the low beam began to mope. I moved the terminal on the light bulb, everything was fine. As a result, the wiring came off from the terminal of one of the headlights (before the wire fell off, the low beam on the headlight died completely). We decided to change the headlight wiring (that which is unwound in the headlight itself). They replaced it. But the near one on the right, as it was not there, is still not there. If you don’t shake the left one, everything is fine (if you move the chip a little, the lamp goes out, you move the light bulb with the chip to the right, it lights up). The far one is both on, both dimensions. Where to dig. Bosch headlights, as I googled. MB minus which rotted somewhere, or is the fuse a crap?
Comments 21
I encountered such a problem. I changed the headlight connector several times. Then I just gave up, soldered every wire in the chip itself and everything became normal. Even with new connectors, the wires barely stay in place. Solder them and everything will be fine)
Try swapping the lamps and checking. Yesterday I also shoveled the entire headlight, it turned out the problem was in the lamp. The spiral looked intact, but it was moping, you knocked it - it worked, turned it off/on - it didn’t light up again... I changed the lamps - everything became normal.
the jumper from the main chip to the light bulb burned out for you, I have the same story right now with the left headlight
which jumper? is the one located in the headlight, or the one that is connected to the headlight?
in the headlight itself, it comes from the main connector,
changed the entire harness
“Both distant, both dimensions” - what problems could there be with the minus then?!)) ...he’s the only one there
Is it (minus) like all vases on the body? and is the same for both near and far
Yes. The entire headlight has 1 minus and 3 pluses (low, high, dimensions)
How did you change all the wiring? I couldn't figure out the wiring in the headlight. I changed the chip on the near one by soldering the wires.
savagely, I cut off the distant wire from the main one and then twisted it
How did you change all the wiring? I couldn't figure out the wiring in the headlight. I changed the chip on the near one by soldering the wires.
Wiring is for sale. You remove the headlight, ideally you take out the reflector, but you can do it without removing it, the healthy part is simply on the latches, you bend them, take out the wiring, and install a new one.
headlight wiring?
Yes. It costs 200-250 rubles.
How to remove the main chip?
It is on latches/hooks around the perimeter inside the headlight. I, unknowingly, barbarically broke it) I thought there were 2 of them, but it turned out there were 4 of them. And you pull all this stuff out.
If in your mind you need to completely disassemble the headlight = then I won’t bother. And that's how it works
Well, I didn't understand.
Right now I’m going to install new headlights, I cut off these chips and installed the usual “mother” terminals in heat shrink.
If in your mind you need to completely disassemble the headlight = then I won’t bother. And that's how it works
In 2 hours in the summer I removed the headlights, washed them, dried them, changed the wiring and installed them. And this is for fun)
Summer, time, adjustment later.
bad contact. Yes, both plus and minus can mope.
Lighting and light signaling are one of your guarantees of safe driving on the road. Malfunctions usually occur in this system for several reasons: weakening of contact connections, leading to periodic losses of current in their circuit, oxidation of these connections, as a result of which the passing current through this circuit increases, causing the fuse to blow. Failure of the lighting lamp. Malfunctions with lighting are divided into cases of complete failure of the light, or short-term unstable operation. Let's look at all these reasons in this article and find out how to eliminate them.
Malfunctions that arise may be in the nature of a complete failure of the headlights or their periodic inoperability; there may be cases when your light will burn dimmer than usual and intermittently. High beam is usually adjusted for night driving on the highway, in contrast to the fact that low beam is often used during the day, in combination with fog lights. The easiest way to troubleshoot a complete failure of the VAZ 2110 light. In this case, there is a specific breakdown or malfunction that you can simply methodically identify and eliminate. In the case of periodic failures, and at the time of elimination, when everything is working, this malfunction is much more difficult to determine, since it can hide anywhere.
Before searching for the reason for the failure of the low beam or high beam headlights, you should understand the mechanism of operation and the principle of operation, which is as follows:
Power from the battery is supplied to the ignition switch - then power goes to the side light switch - from which it goes to the light switch located on the steering column - then control goes from it to the corresponding relay in the fuse box, the steering switch turns on a certain relay, supplying voltage to his contacts.
Thus, if the lighting fails, you need to understand and find out in which part of the circuit the circuit break or voltage loss occurred. Or determine that the malfunction lies in the failure of the lighting lamps. On this car, the low and high beam are divided into two lamps in each headlight.
- Headlight unit
- Fuse box
- Light switch
- Side light switch
- Ignition switch
- Dashboard
- K4 - Low beam headlight relay
- K5 - High beam headlight relay
- F12 - Right headlight fuses, low beam
- F13 - Right headlight high beam fuses
- F3 - Left high beam headlight fuses, high beam CL
- F13 - Right high beam headlight fuses
Other reasons
Lamps are one of the simple and common reasons for the lack of low beam, but they are far from the only one. I strongly recommend that you also check:
- Headlight fuse - blown or not
- Relay - functioning normally or broken
- Button - works properly, or is stuck
- Wiring - are they oxidized, do they allow current to pass through?
Carefully inspect the entire wire, as well as the terminals for connection to the fuse and relay. If necessary, tighten the nuts and clean the contacts. Also, don’t forget about the button, the wire going to it could have fallen off, or simply come off. In domestic cars, it is the button that needs to be checked first - this is one of the weakest points!
Replacing lamps
Choice
The process of replacing lamps on a VAZ 2110 is extremely simple. However, before you begin this operation, you must purchase new lighting elements.
This vehicle is factory equipped with H7 standard halogen bulbs. Today there is a large selection of lamps on sale, not only halogen, but also other types - xenon and LED.
Their features, advantages and disadvantages have been discussed many times on car enthusiast forums, so below we provide only a comparative table with the main characteristics of these lamps:
| LED | Xenon | Halogen | |
| Brightness | Up to 2000 lm | Up to 3300 | Until 1550 |
| Durability | 50,000 hours | 3000 hours | 1500 hours |
| Colorful temperature | 4300-8500 K | 4300-8500 K | 3300 K |
| Lamp price | From 10 USD | From 30-40 USD | From 20-30 USD |
Note! The most optimal color temperature of the light flux is in the range of 4300 – 5000 K.
It must be said that in addition to the data from the table, when choosing, you should also take into account the penetrating ability of the light flux. Halogen lamps are the leaders in this parameter - they illuminate the road much better in rain, fog or snow.
In addition, installing xenon or LEDs in the fog lights of the VAZ 2110 will require electrical intervention, in particular the installation of additional equipment (ignition units). Therefore, it will not be possible to perform their high-quality and safe installation with your own hands.
Note! Experts recommend changing light bulbs in pairs so that both headlights shine equally. In addition, their service life is approximately the same, so if one of them burns out, the second one will soon fail.
Each car owner must choose for himself which light for the VAZ 2110 will be better based on his own financial capabilities, weather conditions of the car, etc.
How to replace the lamp
Instructions for replacing light bulbs look like this:
- First of all, you need to open the hood and disconnect the terminal from the battery.
- Then you need to remove the plug located closer to the wing.
- Next, you need to unfasten the spring clip, which presses the light bulb to the headlight housing.
- After this, you should carefully disconnect the block from the contacts and remove the light bulb itself, since nothing else interferes with it.
- Now you need to insert new light bulbs in the same position in which the old ones were located, connect the block to the contacts and secure everything with a bracket.
- At the end of the work, you should install the plug in place.
Note! When replacing lamps, it is important not to touch the glass with your fingers. Otherwise, grease stains will remain on the surface, which will lead to overheating and failure of the lighting element.
The lamp replacement is now complete. As a rule, this operation takes several minutes even for beginners.
Advice! Many car owners are interested in how to improve headlights? The easiest way is to disassemble the headlights, wash them, replace the glass if necessary and adjust the light beams. As a rule, these simple procedures give good results.
PRICES OF COMPONENTS
There is also a separate section for prices for all the parts that may be needed when repairing this part of the car, because if the side lights on a VAZ 2114 or the fuses have blown, they will still have to be replaced with new ones. In any case, all the components are quite cheap, all we might need:
- Marker lamp;
- Fuse;
- Power button;
- A whole fuse block.
Today, an ordinary white light bulb costs up to 30 rubles; of course, the price depends on the individual pricing policy of a particular seller. Individual fuses can be selected for up to 50 rubles, unless, of course, you want to install a higher quality option. Button, if you look for exactly the same one as the original one, you will have to pay up to 300 rubles. In some situations, more serious problems may arise and you will have to change the entire unit, this is quite an expensive proposition, together with all the wires it will cost up to 1000 rubles.
Based on this, we can say that you need to carefully monitor your car and try to avoid any serious malfunctions; if something breaks, fix it right away, don’t start it.
Article 2: How to correctly replace the fine fuel filter on a VAZ 2114
Replacing fuses
If after replacing the bulbs the lighting still does not work, you should check the fuses. The mounting block is located on the left side of the steering wheel.
Fuse F2 is responsible for low beam lighting in the left headlight unit, and F12 in the right one. It must be said that a fuse malfunction cannot always be detected visually. Therefore, it is better to install new fuses.
What to do if one low beam headlight does not light up
However, you should not blame exclusively domestic, so much-maligned, manufacturers: optics can sooner or later start to act up on any car. And here the point is no longer about the reliability of this or that brand, but rather about the deterioration or fatigue of some parts.Repair
If the fuses are intact, but the lighting still does not turn on, you need to find the cause of the malfunction. To do this, you will need a test lamp, or even better, a multimeter.
It must be said that repairing the low beam on a VAZ 2110 is not difficult - you just need to ring the circuit and find a break in order to fix it.
Below is the optimal procedure:
- Since the low beam relay on the VAZ 2110 is often the cause of a low beam malfunction, you can start checking with it. Using the device, you need to determine whether voltage is supplied to it and whether it is at the output. If there is no voltage at the output, then the relay needs to be replaced.
- If there is no voltage supplied to the relay and there is no voltage at the fuse terminals, then you should check the VAZ wiring from the switch to the fuses, as well as the switch itself.
- If there is voltage at the output of the relay, you need to check whether it is supplied to the lamp connector. Often the cause of the malfunction is burnt or oxidized contacts. If the low and high beams disappear at once, then the ground wire in the headlight may have come loose.
Note! The cause of relay malfunction is often oxidized contacts, which simply need to be cleaned.
Thus, by checking all the main components along the circuit, you will definitely find the cause of the malfunction. The low beam diagram for the VAZ 2110, which is shown above, will help to simplify this work.
VAZ 2110 injector 8 valves no light
- To the beginning of the forum
- Forum Rules
- Old design
- FAQ
- Search
- Users
Adzhay
I don't remember exactly, but they are not far from each headlight. You can follow the wires from the headlight connector and you will come to a terminal screwed directly to the body. You need to unscrew it, clean it on both sides, and clean the area around the stud on the body.
The easiest way for a person who has little understanding of wiring is to check using a “control”. This is a light bulb with 2 wires. You screw one to the “-” of the battery, and the second to the circuit wire that needs to be checked. If the light is on, then + comes.
Adzhay
Even the giblets of the headlights can float the brain.
Tell me how it started because miracles don’t happen. A lot of things don’t break so easily at once.
Adzhay
I think I guessed what it is.
Adjustment
Once a year, the low beam on the VAZ 2110 should be adjusted. This procedure is necessary in order to increase the lighting efficiency and also to prevent dazzling oncoming drivers.
Below we will take a closer look at how to adjust the low beam headlights:
- You need to find a flat area with a wall that will serve as a screen.
- The car should be placed at a distance of five meters from the screen. A passenger must sit in front. You can also put a load weighing 75 kilograms in the car.
- On the screen you need to draw a horizontal line at 600 mm, as well as a second line 75 mm below the first.
- Then you need to draw three vertical lines - the two outer lines should correspond to the centers of the headlights, and the middle one should be located in the middle between them.
- The headlight hydraulic adjustment handle should be moved to the position corresponding to the minimum load.
- One of the headlights must be covered with cardboard or a sheet of plywood.
- Then the light beam is adjusted according to the diagram. Adjustment is carried out with screws with plastic heads, which are located on the back side of the headlights. They rotate the optical element around the horizontal and vertical axis.
- Next, you need to adjust the second headlight in the same way.
Here, in fact, is all the information on how to adjust the low beam headlights.
General information
Modern models of the Volzhsky Automobile Plant are equipped with many devices, including many lighting ones. All of them are connected to a single electrical circuit of the car, but they perform different functions.
So external lights and signals serve for:
- road lighting at night;
- determining dimensions;
- demonstrating to other road users the car enthusiast’s intentions.
In addition, there are also light bulbs in:
- salon;
- trunk;
- engine compartment.
External devices include:
- side and signal lights;
- block headlights;
- rear lights;
- fog lights;
- number plate illumination.
The headlights have a special adjustment device - a corrector. With its help, the driver, without leaving the cabin, can direct the light up or down depending on the need.
Conclusion
The low beam headlights on a VAZ 2110 may stop shining for various reasons, however, in any case, the fault can always be found and fixed by yourself. At the same time, we should not forget about adjusting the direction of the light beams, on which the effectiveness of the head lighting largely depends.
You can get additional useful information on this topic from the video in this article.
When the headlights on any car simply do not work, this is an ordinary case. The cause could be the light switch, fuses, or other common things. The “ten” has a feature, without knowing which you can check everything you can to the point of stupor, but still not find the fault.
Usually everything looks like this: the headlights or side lights of the “ten” do not work, and randomly, for example, the left side headlight does not work, the side lights on the right front and left rear do not work. The fuses are intact and many owners of the “ten” are very surprised. It's no wonder if you don't know one secret.
This secret is located in the fuse box, which on the VAZ-2110 even looks like a black box. Once you open it, you will see fuses and relays, with one relay being larger than all the others. It is called a lamp monitoring relay and ensures that the lamps in the headlights and side lights are intact. When a light bulb burns out in the indicated places, the relay sends a signal to the display unit of the on-board control system, the pictogram lights up in it and a typical decimal “ding-ding” is heard.
Inside this relay there are four spirals - these are resistors and the point is that one of these spirals can burn out. This happens, of course, for a reason, but as a result of a short circuit, but the main “trick” is that the resistors of this relay burn out faster than the fuses in the block! That is, absolutely all the fuses are intact, everything is great, but some light bulbs do not work. What is also confusing is that the failure occurs according to an illogical pattern (which may not work, described above), which is why many people think about a bad “ground” in some connection.
If you know about this feature of the “tens”, then identifying a burnt-out relay is a couple of trifles. It can be freely pulled out of the block and disassembled. To disassemble this relay, you need to carefully pry off the bottom cover with a screwdriver, from which the contacts come out, and remove it. Resistors will be visible immediately, and a burnt one even more so. Then it is better, of course, to buy a new relay, but it is not a fact that it will not burn out the first time you turn on the headlights - most likely there is a short circuit in the network.
Therefore, to diagnose a short circuit, it is better to make sure that the fuses are reliable.
, use a soldering iron to fuse a wire onto the burnt resistor to restore it and put the relay in place.
If the fuse does not blow, there is a chance that the relay has simply died due to, for example, old age. If the fuse also fails, you need to look for a short circuit
.
Additional block
There is an additional block in the central panel, the location of which can be seen in the photo. It contains three fuses with the same power of 15A:
- The first is responsible for the controller and ignition module in the VAZ 2110.
- The second takes over the protection of the mass flow sensor (mass flow meter), purge valve, heating and speed sensor.
- The third is responsible for the injectors and fuel pump.
- The fourth number indicates an electric fan.
- Under the fifth is an electric fuel pump.
- The last relay relates to the ignition of the VAZ 2110.
The headlights blink at idle or while driving. We fix the problem ourselves.
Many car owners are faced with the problem of headlights, dashboard and other electrical devices flickering at idle. Not everyone immediately tries to fix the problem, because in essence it does not affect the driving performance of the car. But in winter, the malfunction can manifest itself more significantly, and even when driving, the lighting equipment does not function correctly. Today I will talk about the dangers of flickering headlights at idle, and how to fix the problem.
In the vast majority of cases, the blinking of car optics is associated with poor-quality functioning of the generator.
However, this element consists of a number of nodes, so determining the exact problem with the “naked eye” is problematic. You can immediately change the entire generator, but this approach will result in significant expenses and does not guarantee that the problem will be eliminated. That is why you should check various faults one by one, one of them will be confirmed.
First you need to inspect the drive belt
. If it wears out or begins to tear, it will slip on the rollers, causing part of the transferred charge to be lost. Often an old drive belt makes a whistling sound; mechanical defects can be detected by inspection. Such a product is inexpensive, and you can replace it yourself on an overpass or lift.
If the car was purchased on the secondary market, it is recommended to check the light bulbs installed in it.
Some car owners install enhanced lighting equipment to improve lighting. As a result, the generator cannot cope with the load, which is why we get flickering headlights. By analogy, additional elements of the audio system, lighting, etc. overload the network.
Next you will have to test the electrical circuit for damaged areas
.
The problem may be a defective wire insulation, a blown fuse or other elements. In addition, as part of the procedure, it will be possible to understand whether the blinking of the headlights is due to a network overload or, conversely, to a lack of voltage.
In the case where the problem lies in the generator, the first attention should be paid to the voltage regulator. It is inexpensive and easy to change, but this element is often the cause of malfunction. If replacing it does not help, it makes sense to replace the diode bridge
If replacing it does not help, it makes sense to replace the diode bridge.
One way or another, you shouldn’t put off eliminating flicker in lighting technology until the future.
.
Such a problem indicates that all electrical systems are not working properly, which will cause the light bulbs to wear out faster and create an increased load on the battery and other components.
If you do not want to spend large sums on repairs in the future, take care of eliminating the defect in advance.
Source
Backlight zones
The illumination zones of the car interior vary depending on the make, model and configuration of the car.
However, most often the following areas are illuminated with lamps:
- middle zone. The light from it spreads throughout the upper part of the car interior. It almost completely illuminates the space;
- legroom. So that the driver can see the location of the pedals in the dark;
- glove compartment So that in the dark you can find the necessary things or documents in it;
- makeup mirror. It is very popular among female drivers who are going to touch up their makeup in a dark car;
- door handles. So that you can find them in complete darkness, and not fumble with your hand along the upholstery in search of a hidden “hook”;
- trunk. So that even in the dark all the objects transported in it are visible;
- Interior lighting also includes warning lights that are installed on the rear window and doors of the car.
On-board control system
In terms of the number of instrument scales, the “ten” is inferior to the already mentioned “three”, but it is ahead in the number of alarms. And instead of placing them all in the instrument cluster, some of them were brought to a dedicated area on the center console. There were indicators for faulty lamps of side lights and brake lights, unfastened driver's seat belt, worn brake pads, low level of coolant and washer fluid, low level of engine oil and open doors, and not one for all four, as is usually the case, but individually on every door. Subsequent models no longer had such richness. It’s a pity, because many would not refuse these alarms.
The VAZ-2110 family, together with the Priora, was produced for 23 years. And since the car was so popular with people, there is no doubt that they will not forget to celebrate the next anniversaries either.
vote
Article rating
Instrument panel device
What to do if the tidy stops working? How to diagnose and repair the shield, how to disassemble the device correctly? To begin with, we recommend that you familiarize yourself with the features of the device.
This unit includes the following components:
- Tachometer or speed sensor. With its help, the control unit reads the number of crankshaft revolutions.
- Speedometer or speed sensor. Everyone knows what it is needed for - to demonstrate the speed of the car.
- , allowing you to determine the remaining displacement of gasoline in the gas tank.
- Antifreeze temperature sensor, which is also an internal combustion engine temperature controller. Thanks to it, the driver can know when the engine has warmed up to operating temperature and when the power unit is overheating.
- The device also includes indicators indicating whether electrical equipment is turned on or not working. A total of twelve indicator lights should be used.
- To enable the driver to use the instrument at night, the dashboard is equipped with backlight bulbs.
- The devices are equipped with an econometer - a fuel economy sensor that shows in which driving mode gas savings will be optimal. The same panels also use electrical circuit voltage sensors, according to which it is possible to detect the voltage level in the electrical network - undercharge or overdischarge.
- There is also an additional, backup connector in the device. Indicators of additional equipment that were not installed by the manufacturer are connected to it. For example, these could be airbags, fog lights, etc.
- On the back of the device there are connectors for connecting wiring.
To prevent you from confusing the pads during repairs or diagnostics, each of them is marked with a specific color.
For example, the red block, in accordance with the diagram, is marked as X2, and the white block is marked as X1. Domestic “Tens” can be equipped with different devices, in this case it all depends on the configuration and year of manufacture of the car.
The VAZ 2110 can use old or new devices:
- A distinctive feature of the old-style tidy is the installation of all sensors and indicators symmetrically.
- As for the new type of devices, the coolant temperature controllers, as well as the fuel level controllers, began to be located with a slight shift to the right. In addition, the new devices no longer use a voltage controller in the car network, as well as an econometer.
Troubleshooting methods
What are the troubleshooting options:
- If there is no backlight, you need to check the fuse and replace it if it is blown. All failed light bulbs must be replaced.
- If the sensors are not working, you should check the integrity of the wiring with a multimeter or other tester to check the wiring. Damaged sections of wires also need to be replaced.
- If the car interior is humid, over time this can lead to oxidation of the shield contacts. If such a malfunction occurs, the contacts must be cleaned or replaced.
- If the problem lies precisely in the inoperability of the instrument cluster, then it is better to entrust the repair to specialists. It is possible that in the process you will have to resolder some elements, so if you do not have experience in carrying out such events, then contact an electrician (the video was shot by Alexey Lipatov).
Instructions for dismantling the tidy
So, how to remove and disassemble the device for its subsequent repair or replacement:
To begin, you will need to use a Phillips screwdriver to unscrew the two self-tapping screws located on the top trim. After this, you also need to unscrew two more bolts, they are located on the bottom of the lining. Then you need to carefully detach the cover and put it aside. Next, the connectors with wiring from the buttons located on the sides of the device are disconnected. This will allow you to move the trim to the side. Only after these steps can you unscrew the two bolts that secure the tidy to the center console
They are located at the ends. Then you need to carefully slide the combination back, parallel to disconnecting it from the metal plates installed on top. For complete dismantling, you also need to disconnect the two connectors with the wiring on the back of the panel. Having done this, you can remove the device from the mounting location and begin repairing or replacing it. The assembly procedure is carried out in reverse order.
Sixteen valve engine
It was on this family that the VAZ-2112 engine debuted, becoming the first of the legendary “gears,” as people say. It’s not hard to guess that it was standard for the hatchback of the same name. The engine with a volume of 1.5 liters developed 93 liters. With. and, unlike the “low-level” eight-valve engine, preferred higher revs. The VAZ-21124 engine then “grew” from it, which, with an increase in volume by 100 “cubes,” lost 4 liters. With. power, but became more torquey at low speeds. In addition, it received individual ignition coils and one of the people’s favorite features - “stickless” pistons.
Well, as a result of the next update, along with the transformation of the “ten” into the “Priora”, the VAZ-21126 engine appeared. And, perhaps, this particular engine is still one of the most beloved, because its 98 “horses” were more than enough for the rather light Priora.
SPL-Club Kirov
Below we will look at how you can quickly solve the problem and which options are the most promising.
Video: What to do if the low beam headlights in a VAZ 2106 do not work
If the video doesn't show, refresh the page or click here
Lamp burned out
If the low beam does not light up, the first thing the car owner will assume is that the filament is damaged. This is possible, because structurally the car headlight contains two spirals, each of which performs its own task. If one thread burns out, the second one continues to work normally. This is a feature of halogen lamps that provides additional reliability and safety.
To replace the lamp, proceed as follows:
- Open the luggage compartment of the car.
- Remove the protective housing from both sides of the headlight.
- Discard the power wires.
- Remove the spring fasteners.
- Remove the burnt out light bulb and install a new one.
- Return all previously dismantled components using the reverse algorithm.
When performing work, consider a number of rules:
- Wipe the flask before installation using a soft rag soaked in alcohol. If you place a light bulb with greasy or dirty fingerprints on the surface, the product will quickly burn out.
- Do not touch the flask with your hands (even if they are clean). Otherwise, marks remain on the lamp, reducing the life of the product. To avoid problems, it is recommended to wear cotton gloves. As a last resort, place the light bulb holding it through a clean rag or napkin.
Video: Low beam headlight does not light up. Replacing a light bulb on a VAZ 2110, 2111, 2112
If the video doesn't show, refresh the page or click here
Fuse blown
In a situation where the headlight does not light, you should make sure that the fuse through which the circuit of interest is powered is working. If it burns out, the low beam may also not work. To resolve the problem, do the following:
- Open the block where all the fuses that supply various parts of the on-board network are located.
- Find the required fusible insert. To do this, use the diagram of your car. Most often, a blown fuse can be detected visually.
- Install a serviceable melting insert in place of the failed part.
If a blown fuse is a frequent problem, replacing it alone will not solve the problem. The cause of the malfunction is most likely in the power wiring. To determine the location of the damage, use a multimeter, with which you need to ring the main parts and accurately diagnose the location of the damage. If you cannot determine the malfunction, contact a specialist at a service station. There is no point in delaying the problem for two reasons:
- If the low beams are not on, the likelihood of an accident increases when driving in the dark.
- A short circuit in the circuit can cause a fire in the wiring.
Problems with power cables
If the cause of the malfunction lies in the wires, check the entire chain through which voltage is supplied to the fuse box, relay and directly to the vehicle's head light source. The reason that the headlight does not light may be oxidation or weakening of the contact group on one of the pads. As a result, the current increases in problem areas of the circuit, and this leads to overheating. To restore normal contact, stretch the wire fastenings to the blocks, having previously processed the contact connections, using a needle file or sandpaper.
Be sure to check the button that activates the low beam. We cannot ignore the possibility of oxidation or poor-quality wiring of contacts directly in the switch itself. Moreover, if the low beam is not on, you should start diagnosing and searching for the cause of the problem with this button. After that, you can move on to checking other circuits.
Video: The left low beam headlight on a VAZ 2110 does not light up, a simple reason
If the video doesn't show, refresh the page or click here
Other reasons
Now let's look at alternative versions of why the headlight, or more precisely, the low beam, does not light up. If the above checks did not produce results and the problem could not be repaired, it is worth remembering the latest events. Perhaps in the near future, some alterations were made to the design of the machine or repair work was carried out. It is possible that during such activities the power circuit was damaged.
If the low beam on one or two car headlights does not light up, this is a reason to start looking for the cause of the malfunction and fixing the problem. If the recommendations discussed above did not help restore functionality, you should contact specialists at a service station. Otherwise, you will waste time, and you may not be able to find out the cause of the breakdown.
The methods discussed above will be effective if the high beam does not work, and the second spiral, responsible for the low beam, copes with its responsibilities. The reasons for this problem are usually similar. Added to the list is the possibility of failure of the switch installed near the steering wheel. By the way, due to the incorrect operation of this unit, the low beam may not work either. If you find that the headlight does not light due to this lever, replace the faulty part.
Selection and purchaseCar design Repair practiceOperationAccessoriesCasco
Many car owners are faced with a situation where the low beams are not on. In this case, the distant one turns on normally, and its serviceability is beyond doubt. According to statistics, every third driver is familiar with such a breakdown firsthand. In this case, the first thought that appears in the head is the failure of the optics itself. In reality, the reason may be completely different.
The defect is well known to owners of VAZ cars, who sometimes encounter the problem even after purchasing a new vehicle. In this case, most often the headlight on the right side of the car does not light up. In turn, the head light source on the left suffers from a similar problem to a lesser extent.
But it would be dishonest to say that the breakdown is typical only for domestic cars. Foreign cars of various manufacturers are also susceptible to this “disease”.
We repair the light fixture without disassembling it
You can snap the ball into place without removing the glass, through the holes of the light bulbs on the back side of the illuminator:
- We drill a hole exactly opposite the latch at the top of the headlight;
- Insert a screwdriver into the hole;
- Attach the collet to the corrector ball;
- We seal the hole we drilled;
- We attach a hinged loop from a furniture cabinet (hinges 5-6 centimeters long, with mounting holes and a cutout on top on which it is attached) to each broken corrector unit;
- We insert the canopy into the slot of the adjustment screw;
- We move the screw so that the slot is in a narrow place of the canopy;
- Holding the canopy, unscrew the screw until it stops with force. This is how the canopy is fixed, which needs to be placed in a horizontal position;
- Using an electric drill, using a 3 mm drill, we make a hole in the base of the light where there is a hole on the canopy;
- We screw a shortened screw into the hole so that it does not reach the high beam reflector. This slot secures the adjustment screw securely; it can be broken again.
Ideas for tuning and modifying the shield
As for tuning, you have several options for improving the shield:
- The easiest option is to put a new trim on top of the tidy. This method is the easiest to implement, but it will improve the external part of the tidy, because you just glue the trim on top. If the existing trim is worn out and has damage, it can be re-sheathed.
- New scales can be installed on the sensors - speedometer, tachometer, fuel and antifreeze. You can purchase such overlays either in a store or download them from the Internet. If you want the scales to be original, you can make them yourself using a graphic editor. Tuning is more complicated, since you will need to not only dismantle the device itself, but also partially disassemble it and disconnect the arrows from the indicators. Moreover, subsequently the arrows themselves must be installed correctly, otherwise the sensors may not work correctly.
- You can also install an instrument panel from a Lada Priora car in the “Ten”. In general, these devices are suitable for installation in the “Ten”, but depending on the design features of the car, it may be necessary to redo some connectors. If you decide to connect an electronic device, you may have to additionally reflash the control unit.
- One of the most effective and simple improvement options is to install LED lamps in a combination. To do this, you will need to remove the standard lighting sources and simply install LEDs instead. To make the tidy shine more brightly, you can install an LED strip instead of light bulbs, in which case it will have to be soldered to the combination. If the lamp burns out, it will be enough to replace it. In the case of tape, everything is more complicated - it will have to be desoldered and soldered again, although it usually has a long service life.
- Additionally, when installing diode light sources, instrument scales can be painted with fluorescent paint. You can also paint the controller arrows. The essence of this tuning is that by combining LED lighting with the coloring of the hands and scales, you can achieve a fairly colorful and effective result. Especially if you combine the colors correctly. For example, white and blue LED lighting combines perfectly with bright green or red instrument scales.
Description for 2nd generation
Fuse and relay blocks under the hood
Main block with fuses and relays
General scheme
Designation
Circuit breakers
- F1 20A Engine control computer - power supply to the electrical control unit for the two-speed fan group
- F2 15A sound alarm
- F3 10A front and rear windshield washers
- F4 20A Headlight washers
- F5 15A + battery Fuel heating system DV6 - fuel pump TU5JP4
- F6 10A + after contact computer and dual ABS/ESP relay - steering angle sensor - gyrometer stability control acceleration meter - power steering pump mechanism
- F7 10A contact brake sensor - clutch pedal limit switch
- F8 25A starter winding
- F9 10A after contact protection blocking module 3 relays - headlight range control motor
- F10 30A ignition coil control TU5JP4 - injector control TU5JP4 - power supply to the solenoid valve of the DV6 injection pump
- F11 40A enable blower fan relay
- F12 30A control of low and high speed front wiper
- F13 40A after contact power supply SM (intelligent service module)
- F14 30A exhaust gas temperature recovery pump control
- F15 10A right high beam headlight
- F16 10A left high beam headlight
- F17 15A left low beam headlight
- F18 15A right low beam headlight
- F19 15A Reservoir cleaning solenoid valve TU5JP4 - oxygen sensors at the inlet and outlet TU5JP4 - solenoid valve for the turbocharging air heating system 1-2 DV6
- F20 10A sensor for the presence of liquid in the fuel DV6 - solenoid valve for regulating the pressure in the turbocharger DV6 - solenoid valve for regulating the temperature at the outlet F21 5A air flow meter DV6 - power supply for the electric control unit for the two-speed group of the electric fan maxi fuse module (PSF1)
Relay
- R1 main relay of the engine management computer
- R2 engine control computer power circuit relay
- R3 air supply relay
- R4 windshield wiper relay
- R5 front wiper low speed relay - front wiper high speed relay
- R6 distributor relay + after contact
- R7 air conditioning fan relay
- R8 starter relay
- R9 front windshield washer relay
- R10 rear windshield washer relay
- R11 headlight washer relay
- R12 horn relay
Battery cover block
You can see its location in this video, and at the same time learn how to change the battery on a Peugeot Partner.
Scheme
Circuit designation
- Charge status module - 5A
- Diagnostic connector - 15A
- Brake pedal switch resistance - 15A
- —
- Power steering electric pump group power supply - 80A
- Pre-post-heat control module - 70A
- Protection blocking module 3 relays - 100A
- —
- —
- Simple motor protection relay - 30A
Blocks in the Peugeot Partner interior
Main blocks under the panel on the left
General scheme
Description of fuses
- 15A - Rear window wiper
- —
- 5A - Airbag
- 10A - Air conditioning, diagnostic connector, rear view mirror, headlight control
- 30A — Window lifters
- 30A - Locks
- 5A - Rear courtesy lamp, front courtesy lamp, sunroof
- 20A - Car radio, CD changer, display, tire pressure monitoring unit, security alarm and siren
- 30A - 12 V sockets front and rear
- 15A - Upper part of the steering column
- 15A - Low current circuit of the ignition switch
- 15A - Rain and light sensor, airbag
- 5A - Instrument panel
- 15A - Parktronic, air conditioning control panel, hands-free system
- 30A - Power supply for locking system
- —
- 40A - Heated rear window and mirrors
Relay description
- R1 - Front power window relay
- R2 - Rear window wiper relay
- R3 - Accessory relay + ACC
- R4 - Door lock relay
- R5 - Rear door super lock relay
- R6 - Front door super lock relay
- R7 - Computer wake up relay
- R8 - Heated rear window relay
Block diagram 2
Decoding elements
- —
- 20A - Heated seats
- —
- 15A - Relay for folding rear view mirrors
- 15A - Socket relay for connecting the refrigerator compartment
Additional block
If the vehicle is equipped with the appropriate systems, an additional fuse block is installed on it for the hitch and trailer, as well as other body modifications and cab platforms. It is located behind the restrictive partition on the right.
General scheme
Here are located:
- 15A - ignition switch relay, optional generator
- 15A - Trailer power supply 12V
- 15A - Constant power supply circuit for transformers
- 40A - Hazard lights
Flashlight for individual illumination
One of the interior lighting elements is a flashlight for individual illumination. It shines with a direct beam. For one person, its lighting is quite enough. Sometimes it becomes necessary to clean, repair or replace it. To access it you need:
- Turn the outer ring of the fastening clockwise. Using a special screwdriver, with maximum care, the body of the flashlight is pryed off and the latter is removed from its place.
- To completely disconnect this mechanism, it is necessary to disconnect the wire block from the mechanism.
- The lamp is fixed using special clamps, which are somewhat reminiscent of the action of a spring. By slightly moving them apart, the light bulb and its socket can be freely removed from the flashlight.
- The lamp is removed from the socket by simple turns counterclockwise.
- The lamp and the flashlight itself are installed in their original place using the same steps, but they must be performed in the reverse order.