Lighting control modules MUS 50.3769, 521.3769, 522.3769, 58.3769, 582.3769 are designed for switching electrical control circuits for external lighting, front and rear fog lights, adjusting the level of illumination of controls and instruments, and controlling the angle of the light beam of automobile headlights.
Lighting control module MUS 50.3769 for Lada Granta, VAZ-2190, Lada Kalina FL, VAZ-2192, VAZ-2194, characteristics, contact assignments.
The lighting control module MUS 50.3769 is connected to the electrical equipment system of Lada Granta and Lada Kalina FL using block 1118-3724500.
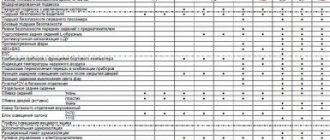
Main characteristics of the lighting control module MUS 50.3769 for Lada Granta, VAZ-2190, Lada Kalina FL, VAZ-2192, VAZ-2194.
Rated voltage, V: 12 Rated load: - Inductive: 110 mH; 0.5 A contact 56, 50 mH; 0.25 A contact 1 - Lamp: 10 A contact 58 and contact 3, 5 A contact 4, 2.5 A contact 2 Color of the viewing surface: black Color of symbols: white Color of symbol illumination: light green Dimensions, mm: 70x110x64 Weight, no more, kg: 0.2
Numbering and assignment of contacts of the lighting control module MUS 50.3769 for Lada Granta, VAZ-2190, Lada Kalina FL, VAZ-2192, VAZ-2194.
G - not used. 56b - not used. 58b - not used. 31 - Mass. Xz - +12 Volts from terminal “15” of the ignition switch. 56 - to low beam lamps. 1 - Ground (signal for turning on side lights from the central body electronics unit) (only for MUS 50.3769-01). 2 - to the rear fog lights. 3 - to the front fog lights (only for MUS 50.3769-01, -02). 4 - to daytime running lights. 58 - to side lamps and instrument lighting sources. 30 - +12 Volts from terminal “30” of the ignition switch.
Lighting control modules MUS 521.3769, 522.3769 for Lada Priora, VAZ-2170, characteristics, contact assignments.
Connection of lighting control modules MUS 521.3769, 522.3769 to the Lada Priora electrical equipment system is carried out using block 1118-3724500.
Main characteristics of lighting control modules MUS 521.3769, 522.3769 for Lada Priora, VAZ-2170.
Rated voltage, V: 12 Rated load: - Active: 2 mA contact G - Capacitive, not less than 0.1 µF: 1-16 mA contact 2 (PTF), 1-40 mA contact 2 (ZPTF), 1-16 mA pin 4 (“+” brightness), 1-40 mA pin 4 (“-” brightness), load is switched to pin 31 - Lamp: 10 A pin 56 and pin 58 Viewing surface color: black Symbol color: white Symbol backlight color: light green Indicator backlight color: ZPTF - yellow, PTF - light green Dimensions, mm: 155x73x60 Weight, no more, kg: 0.25
Numbering and assignment of contacts for lighting control modules MUS 521.3769, 522.3769 for Lada Priora, VAZ-2170.
G, 56b - to the gearmotor of the headlight range control. 58b - from sources of illumination of controls and instruments. 31 - Mass. Xz - +12 Volts from terminal “15” of the ignition switch. 56 - to the low/high beam headlight switch. 1 - from the rear fog lights. 2 - to the controller (turning on the rear/front fog lights). 3 - from the front fog lights (only for MUS 522.3769). 4 - to the controller (adjusting the backlight level of devices). 58 - to side lamps. 30 - +12 Volts from terminal “30” of the ignition switch.
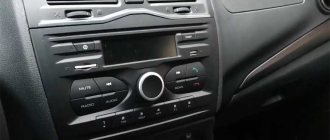
Lada Granta [ON STYLE] › Logbook › Closer to “Lux” - Installing PTF via MUS
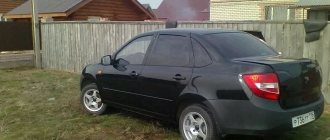
Hello. I have long wanted to install PTF
on my Lada Granta, because the car looks much more beautiful with them + when driving at night they are very helpful in terms of lighting.
I didn’t save a lot of money and of course I went to “Avtostolitsa 63” and saw 2 types of PTF there, this and “ Avtosvet
”, after reading reviews about them, I realized that it was better not to take “Luch” (and it is much cheaper than Avtosvet), so I decided to take a more expensive one so as not to have problems later.
I decided to connect everything like in the Lada Grant “ Lux”
“, so the connection was through the ICC, so of course it’s much more complicated, but still I tried to do it and everything worked out great!
[So, to install fog lights I needed:]
-PTF -Installation kit for connection (2-3 wires from the kit were needed, the rest can be thrown away) -Lira type terminals (which are included in the kit do not fit, you need a smaller one) Important:
but this is on the Lada 2022, perhaps on others there is a different safety block, an old one - Covers with a cutout for the headlights (+ I also had a hole for adjustment)
Important:
I didn’t cut the plugs myself, I just ordered ready-made ones. -MUS (light control module) -Corrugation 4-5 meters (bought separately, because it was not included in the set) -Sealant (black) -Screws (6 pieces) -And of course a wrench and a screwdriver
-The installation began, of course, with removing the bumper [you can see how to remove the bumper here - link]. -Removed the plugs from the bumper -Installed the new, cut out trims in the regular place (everything fit in without any problems) -Installed the PTF in the regular places (all the fasteners fit + the hole with the adjusting bolt lined up perfectly) -I sealed all the cracks with sealant so that dirt wouldn’t get in there - I ran the wire to the lights (I installed the minus through the standard place) -The wires went through the standard place (namely under the left fender liner) -Replaced the MUS (since in the standard one I did not have a button to turn on the PTF) Important: I installed the wire from the relay to the 3rd contact MUS (this contact is responsible for turning our headlights on/off) -The kit included fuse holders, but I did it the same as at the factory, so I connected everything through the fuse block (where, by the way, Lyra terminals are required), unfortunately I don’t remember exactly what fuse locations , sort of like F16 - F17, but you can definitely look at it on your lid. -I connected everything according to the diagram taken from the Internet, I also attached it to my entry.
You can see a little more detail in the pictures that are attached to the post, and if you don’t understand something, ask in the comments, I’ll try to explain it to you in more detail.
The PTF indication on the instrument brush does not work, because there is no LED there. Having bought a connector with wires for the instrument cluster, I wired and connected everything, all that remains is to solder the LED and 3 resistors, which I will do a little later.
Source
Where can I install PTF
In the design of the modern Granta, the installation locations are precisely worked out: under the license plate, on the sides. Some bumpers even have recesses there . In any case, for proper installation, the front bumper of the car will have to be removed.
But before that, you should go shopping and find the necessary parts. Today's market offers both bumpers with recesses and bumpers with headlights already installed. The choice, as always, remains with the owner.
Most Lada Granta cars do not have fog lights, but there are recesses in the bumper for do-it-yourself installation
Lada Granta Margo › Logbook › Installing an automatic light switch sensor
I wanted to add some other automation to the car so that it would be so convenient and pleasant. I was thinking, I’ll install a light sensor for myself. On Emex I ordered a car light relay produced by Kaluga Energomash 719.3777-15 designed “for automatically turning on/off the side lights and low beam of a car when the external illumination changes below/above a threshold level.”
The relay comes with a small instruction manual.
For ease of work, I sketched out a connection diagram for myself.
I started installing and thinking, but it’s possible to reduce the number of connections to the standard wiring, because in fact, some connections can be powered from one point, and already in the process the circuit has changed
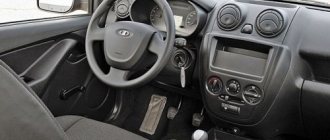
Since I was not going to change the MUS to the version with the auto light position, I connected the relay through the Priora “Auto light” button. All the same, it was necessary to occupy the free plug on the climate control unit with something.
The relay was placed behind the climate control unit on a bracket.
The wires from the relay are not long, so they need to be extended to connect them to the fuse box area. No twists, just new additional harnesses with connectors. However, the sensor perfectly reaches the left drain, even with a small margin.
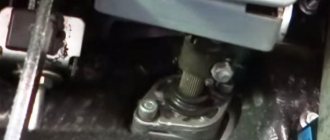
The only place where it was necessary to make an insert was the green wire of the MUS - a signal to the Central Bank for Power Supply to turn on the low beam (or the low beam relay winding as it is called in the instructions).
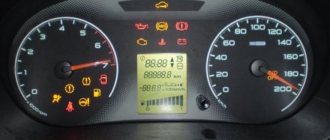
Detailed diagram of the VAZ Grant (dashboard)
The vehicle is supplied to the market with a 32-pin instrument panel as standard. The standard pinout of the Grant shield has only 26 pins involved. Residual connectors are provided for the possibility of adding equipment or custom modifications:
- 1 – to the low oil pressure sensor in the engine crankcase;
- 2 – to the handbrake indication switch;
- 3 – intended for service needs when diagnosing the instrument panel;
- 4 – to external lighting switches;
- 5/6 – similar for right and left turn signals, respectively;
- 7/8 – CAN L/H;
- 9 – indication of seat belt position;
- 10 – contact of the Reset button of the steering column lever;
- 11 – response of the brake fluid reservoir sensor;
- 12/13 – on the head optics, high/low beam position;
- 14/15 – foglight terminals front/rear, respectively;
- 16/18 – receiving immobilizer antenna signal;
- 17 – ground wire of the instrument panel;
- 19/21 – to terminal No. 30/15;
- 20 – for the drive of the electric power steering unit;
- 22 – for door closing sensors;
- 23/24 – MK buttons for forward and reverse, respectively;
- 25 – for an environmental thermometer;
- 26 – gas tank float indication.