Before the cold weather sets in, almost every domestic car owner thinks about preparing the car for the winter season. The list of such work often includes improving the car’s heating system. The stove on the VAZ-2110 works well, but every owner will note that it could be better.
The main disadvantage of the VAZ heating system is insufficient efficiency at idle speed. Installing an additional pump can correct the situation. We will tell you how to do this in this article.
The improvement method under consideration involves installing another pump in the cooling system of the internal combustion engine.
How to install an additional pump on a VAZ-2110: video instructions
Before the cold weather sets in, almost every domestic car owner thinks about preparing the car for the winter season.
The list of such work often includes improving the car’s heating system. The stove on the VAZ-2110 works well, but every owner will note that it could be better. The main disadvantage of the VAZ heating system is insufficient efficiency at idle speed. Installing an additional pump can correct the situation. We will tell you how to do this in this article. The improvement method under consideration involves installing another pump in the cooling system of the internal combustion engine.
Replacement
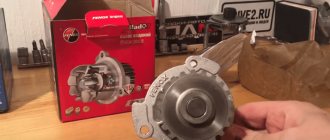
Having purchased a new coolant pump, you can begin the replacement procedure.
The VAZ 2110 works in conjunction with 8 valve and 16 valve power units. Despite there being a certain difference between them, the pump replacement procedure is identical.
Dismantling works
The instructions below are relevant for dozens with two types of motors.
- Place the car on a level area above a hole or on an overpass.
- Lift the hood, remove the negative terminal from the battery, which will turn off the power to the car.
- Unscrew the cap of the coolant expansion tank. This will relieve excess pressure in the system.
- Now get down under the car.
- Place a clean container with a volume of at least 5 liters under the cylinder block.
- Unscrew the coolant drain plug using a 13mm wrench, which will allow you to drain the coolant. Be careful, unlike oil, you need to drain the coolant when the engine is cool.
- When all the coolant is out, screw the plug back into place.
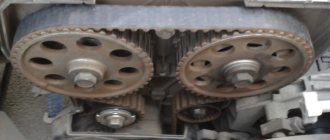
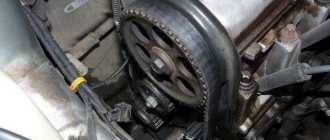
- Using a 10mm wrench, unscrew the three mounting bolts that hold the timing case in place.
- Remove the casing.
- Place the crankshaft at TDC of the first cylinder - top dead center. To do this, you need to turn off the gear and turn the special bolt that holds the generator pulley to 19 with a key. Turn until the marks on the camshaft gear align with the mark on the rear timing case.
- Make sure that the marks on the flywheel and clutch housing match. To do this, you will have to remove the plug on the crankcase. It is made of rubber and is located to the right of the cylinder block.
- Lock the crankshaft in this position. You can use a simple slotted screwdriver that fits into the teeth of the flywheel.
- Slightly loosen the tension roller locking nut using a 17mm wrench.
- Turn the roller using a special wrench in a counterclockwise direction. This way you can loosen the tension level of the timing belt.
- Now you can quite easily dismantle the tension roller and belt.
- The next step is to remove the five mounting bolts that hold the lower timing case in place. These include 3 bolts that hold the pump. You will need a socket wrench or a 10mm socket.
- The casing can then be removed.
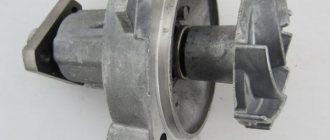
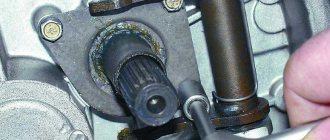
- The VAZ 2110 provides for installation of a pump using three hexagon bolts. Once you unscrew them, you can simply carefully remove the pump by tapping on the body.
- If that doesn't work, then use a flathead screwdriver to pry up the coolant pump housing, which will allow you to remove the pump.
- Remove traces of the old gasket that should remain on the surfaces of the seats.
Cooling system and its features
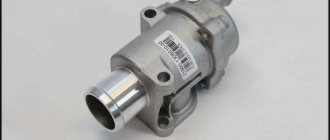
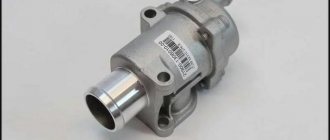
From thermostat 29 to tap 21 there is a “supply hose”. We are not interested in him! The pump is inserted into hose 19. It is connected to the pump supply pipe (part 20).
Everything here is trivial
If we look from under the bottom, we will see two hoses near the partition. We need the one that is fixed closer to the right wheel. And now, instead of hose 19, an assembly is installed: the same hose “21083-8101010-01”, an electric pump, hose “2101-8101204” (to pipe 20). That's all, actually.
Each hose is attached to the nozzles with two clamps. The article number of one clamp is “2108-1300080-10”.
Purchase parts in advance:
- BOSCH pump 0 392 020 034 or pump 32.3780-01 for Gazelle with 18 mm pipes (important);
- Electrical parts;
- All hoses and clamps;
- The BOSCH pump requires VAZ fasteners: a intake pipe clamp, as well as a bracket for this clamp (all from LADA-2101).
The pump from the Gazelle will have to be modified: the body is disassembled, degreased, the rubber gasket is lubricated with sealant...
GAZ pump after modification
When assembling, use screws with nuts instead of standard self-tapping screws (see photo).
By installing an additional pump on the VAZ-2114, you don’t even have to connect it. Everything will work as before. The main thing is that the pump does not leak, and we have already indicated the solution.
What can be improved
- A diode is connected in parallel with the relay winding in the “back to front” direction, thereby extending the service life of the button;
- Connecting to the battery directly is bad. It’s better to find another point with a “plus”;
What we got
- The engine drive of the faucet is used on many cars, including the VAZ-2114, and it is this (the engine itself) that must turn on the additional pump. If anyone can implement something like this, it would be nice to leave your answer in the comments. By the way, a regular limit switch will not help here.
Basic moments
It is necessary to try and install the pump correctly on the vase, since excess pressure in the stove radiator can cause cracks and ruptures in the pipes.
In some cases, it is necessary to replace the thermostat and install a new one in place of the old one, which has a higher opening temperature. The need for such manipulations can be explained by the fact that with a high antifreeze circulation rate, the engine cools strongly, but heats up very slowly. This causes its accelerated wear. The thermostat opening temperature set at the factory is 80-85 degrees. But some experts recommend setting the temperature to 90-95 degrees.
How to install an additional pump
Installation of an additional pump on a VAZ stove can be done in the engine compartment or under the interior panel. The first option is preferable, since in this case the sound of the pump does not enter the interior, and there is also no risk of flooding the interior with antifreeze if it leaks. Depending on the installation location, the unit can be mounted at the mounting location of the standard engine compartment sound insulation or on additional brackets.
The installation of an additional water pump on the VAZ-2110 and other models of the domestic automobile industry is carried out on the heater supply pipe. In this way, it is possible to achieve a more active injection of coolant into the “furnace” radiator and increase heat transfer.
Note: increased pressure in the cooling system can lead to failure of poorly secured pipes or breakdown of the radiator. Therefore, before installing additional equipment, it is recommended to conduct a complete diagnostics of the CO.
Before installing an additional pump, the antifreeze is drained. After this, the pipe at the intended installation site is cut in half using a sharp blade, and the resulting ends are put on the pump outlets. It is important to ensure that the arrow drawn on one of the outlets, indicating the direction of fluid circulation, is directed towards the radiator. The pipes placed on the outlets are secured with clamps. It is better to use Norma brand screw clamps, since products from lesser-known brands often have sharp edges and cut the pipe.
Installation instructions
Direct installation work can begin when the auxiliary pump, fastening and additional elements that are required according to the diagram have been purchased. The procedure for adding another pump to the factory system will be approximately as follows:
First, a single structure is assembled, which includes a pair of hoses and a new pump. Particular attention should be paid to reliable fastening of the hoses and fittings. The following work will be carried out on the car
It is put on the handbrake and the terminals are removed from the battery. Now you need to find the hoses leading from the existing stove and carefully disconnect them. The assembled structure will be connected to this place. To mount the pump itself, you should find a specific place. The output from the thermostat should be connected to the top pipe, and this will be the input. We attach a side pipe to the stove, which will act as an outlet. Once the entire system is assembled, you can pour coolant into it and observe the tightness (no leaks, stains, etc.)
p.) Now we supply power to the pump and check the functionality of the complete system. Don’t forget that to do this you need to connect the terminals to the battery. These are the main stages of the process of how to install an additional pump to the heater on a Gazelle.
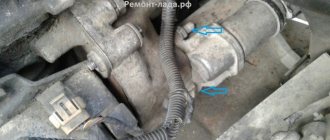
To avoid losing coolant from the system, it should be drained through the lower hose of the expansion tank. To do this, you need to remove the hose and place a suitable container under the tank (for example, any plastic canister). Antifreeze or other coolant from the hose will also be poured here. After this has been done, you can remove the supply pipe - you can find it on the side of the power unit.
During dismantling, we must not forget that the coolant is under pressure in the system and may be hot for a certain time after the engine is stopped. It is better to prepare the drain container in advance and make sure that the motor has cooled down sufficiently. Many people sequentially flush the cooling and heating system before connecting new equipment to it.
For washing, you can use a regular mixture of warm water and citric acid, which effectively removes deposits. The solution is poured from above, directly from the container, and the pump must be connected to a 12 Volt power source. Next, it will pass through the hoses through the system radiator. After the radiator, the remaining dirty antifreeze along with deposits will be drained into a bucket through another hose. The cycle must be completed several times.
Let's sum it up
Taking into account the above information, it becomes clear that an electric pump for a stove is a fairly simple and convenient solution that allows you to increase comfort and safety when operating a car.
In practice, after installing such a pump, it is possible to warm up the interior faster, which is important when making short trips over short distances or while driving fast on the highway in winter. The glass warms up faster and sweats less during a trip, it is easier and faster to remove snow and ice from them, etc.
As for the choice of the pump itself and its installation, the additional GAZelle pump is in demand, primarily due to its low cost. At the same time, we are not talking about quality.
In turn, the more expensive analogue from the German company BOSCH is noticeably better in quality than the domestic solution. Among the main advantages, car enthusiasts highlight ease of installation, absence of noise during operation, better sealing, etc.
Finally, we note that an additional pump in a VAZ 2109, 2114 or on a budget foreign car can significantly increase the level of comfort, save on warming up the car, etc. If the installation is done correctly and the pump is working properly, the interior will heat up faster compared to the standard heating system.
The only thing is that you should periodically check the tightness of the cooling system, since even standard elements can leak. If we are talking about additional non-standard elements, in this case the connection points require separate control.
Expected results
After installing and connecting all the necessary elements, it is necessary to conduct a road test, during which the pump must run continuously for at least an hour. In this case, it is necessary to carefully inspect all points of its connection with the cooling system to eliminate leaks.
After inspection, check the moving machine. It may happen that a unit that is working properly at idle will fail when the pressure in the pipelines increases.
If everything is done correctly, the heater begins to supply warmer air and the engine cools down effectively even under heavy loads.
Domestic cars in winter in Russia are not very comfortable. And Gazelle is no exception to this rule. Drivers mainly complain about the heat supply to the cabin. Simply put, this car is quite cold in winter and the heater does not create a comfortable temperature in the cabin. To solve this problem, there is an additional pump for the Gazelle stove.
Checking the functionality of the water pump
Self-diagnosis of the pump is quite simple and will take no more than 10 minutes. The verification procedure is as follows:
- The engine warms up to operating temperature (91˚C for VAZ 2110).
- For safety reasons, a thick glove is worn on the right hand.
- The coolant supply from the radiator is cut off. To do this, squeeze the pipe by hand. If the pump is working properly, you will feel the antifreeze pressure inside the hose. If the pipe compresses easily, then the pump is faulty.
All actions should be carried out with extreme caution, since the coolant gets very hot, and you can get burns from the surface of the motor or pipes.
Stories from our readers
“Fucking basin. "
Hi all! My name is Mikhail, now I’ll tell you a story about how I managed to exchange my two-wheeler for a 2010 Camry. It all started with the fact that I began to be wildly irritated by the breakdowns of the two-wheeler, it seemed like nothing serious was broken, but damn it, there were so many little things that really started to irritate me. This is where the idea arose that it was time to change the car to a foreign car. The choice fell on the melting Camry of the tenth years.
Yes, I had matured morally, but financially I just couldn’t handle it. I’ll say right away that I am against loans and taking a car, especially not a new one, on credit is unreasonable. My salary is 24k a month, so collecting 600-700 thousand is almost impossible for me. I started looking for different ways to make money on the Internet. You can’t imagine how many scams there are, what I haven’t tried: sports betting, network marketing, and even the volcano casino, where I successfully lost about 10 thousand ((The only direction in which it seemed to me that I could make money was currency trading on the stock exchange, they call it Forex. But when I started delving into it, I realized that it was very difficult for me. I continued to dig further and came across binary options. The essence is the same as in Forex, but it’s much easier to understand. I started reading forums, studying trading strategies. I tried it on a demo account, then opened a real account. To be honest, I didn’t manage to start earning money right away, until I understood all the mechanics of options, I lost about 3,000 rubles, but as it turned out, it was a precious experience. Now I earn 5-7 thousand rubles a day. I managed to get the car buy after half a year, but in my opinion this is a good result, and it’s not about the car, my life has changed, I naturally quit my job, I have more free time for myself and my family. You’ll laugh, but I work directly on the phone)) If If you want to change your life like me, then here’s what I advise you to do right now: 1. Register on the site 2. Practice on a Demo account (it’s free). 3. As soon as you get something on the Demo account, top up your REAL ACCOUNT and go to REAL MONEY! I also advise you to download the application to your phone, it’s much more convenient to work from your phone. Download here.
Choosing an additional pump for the VAZ 2110
Most often, at VAZ, an electric pump from Gazelle is chosen as an additional pump, but you can use a pump from other manufacturers (for example, Bosch).
The Gazelle pump is a conventional centrifugal pump. The flow is thrown away by the blades from the center to the periphery, due to which a vacuum appears at the inlet, and, accordingly, the force of pumping the liquid. It does not know how to pump air (the gaps between the impeller and the housing are large).
Gazelle pumps are also different (for example, old and new). The new pump, unlike the old one, vibrates much less and generally makes itself felt less in an unpleasant way.
According to unverified data, but the source is most knowledgeable: They began installing a new seal, bourgeois, on pumps from Elara, in order to eliminate leaks. Last season there were no complaints about the leakage. Of course this will not affect the noise. They also increased the flow area of the fittings on their pumps, which increased productivity.
Installing an additional pump on a VAZ 2109
In this article we will learn how to install an additional pump on a car like a real auto electrician. The VAZ 2109 is a car that allows you to constantly modernize and improve something, however, like all models of this family. Let us present to the reader two algorithms on how to mount a pump from Gazelle and from Bosh.
Installing a Gazelle pump
As mentioned above, this is the most common option for installing an additional pump. Tools and materials:
- The Gazelle pump is standard. Costs about 1000 Russian rubles.
- Relay with normally open contacts. Standard relays from the starter or ignition will do, where you just need to bridge the necessary contacts.
- Some reinforced hose.
- 2 liters of coolant (regular antifreeze).
- Medium-sized clamps in the amount of 5 pieces.
- We wait until the coolant in the system cools down. The antifreeze is drained from the tank into some clean container if its reuse is intended. If you intend to use new antifreeze, then you can drain it for recycling.
- On top of the pump we see 4 screws. They will need to be unscrewed to get to the rubber seal of the impeller. We lubricate this gasket with a sealing compound.
- We assemble the pump, but instead of standard self-tapping screws we install long thin bolts, on the advice of an auto electrician. The VAZ 2109, by the way, is a car in which the Gazelle pump is quite successfully installed.
Advice. Some motorists who are installing an electric pump for the first time are wondering: where is it better to install the pump, in the gap in the heater supply pipe or in the outlet pipe? In fact, there is no difference in this, as long as the pump is installed downstream of the coolant flow.
- We attach the electric pump.
Auto electrics for VAZ 2109 – electric pump
Note. You can mount the additional pump on the VAZ 2109 directly to the stud of the washer reservoir or to the stud near the battery. In addition, some craftsmen advise installing it on the factory Shumka mount, which, as you know, is located on the engine shield. It is most rational to place it near the battery, which is what we will do.
- Unclench the iron clamp.
- We install the pump with a horizontal pipe towards the block.
Now you need to think about how to establish a connection. It is most practical to transfer the connection to the recirculation button. If not, then you can put it on the SAUO unit or on heated mirrors.
- Two wires are disconnected from the recirculation valve: with a white-blue stripe and a yellow-blue stripe.
Note. Let us remind you that the recirculation valve is located on the engine compartment panel, and two thin hoses go to it.
- We connect the blue-white wire to one terminal of the relay.
- Yellow-blue to the second relay terminal.
- We connect the third terminal of the relay to the wire of the electric pump.
Necessary materials
Before you begin installing an additional pump on a vase, you must purchase all the necessary materials. The list of required materials includes:
- electric pump from a Gazelle car. This part will act as a pump;
- a relay with slightly open contacts (an ideal option would be a relay from a VAZ 2108);
- reinforced hose, at least 1 meter long;
- hose clamps (at least 5 pieces);
In order to prepare a VAZ car for installation, it is necessary to drain the antifreeze from the radiator and cylinder block.
Pump installation
To install an additional pump on a VAZ 2110, you need to crimp the pipe coming out of the stove. This will help prevent antifreeze from leaking. However, experts believe that it is best to completely drain the antifreeze from the system. When the work space is cleared, you need to take the pipe and cut out a part from it that will correspond in length to the length of the pump. At the same time, the length of the fittings themselves should not be taken into account, since they will fit into the pipes.
If, for certain reasons, the outer diameter of the fittings does not coincide with the inner diameter of the nozzles, you will have to use adapters or select a pump of the appropriate diameter for installation. The second option is often more practical, since each adapter represents a potential leak point.
In order to increase the level of efficiency of the device, it is necessary to remove four screws from the part and remove the upper housing. The internal gasket of the pump must be carefully treated with sealant and the entire part must be reassembled. But re-fastening the housing is best done using long bolts and nuts. This way you can provide the future pump with greater tightness.
Installation location
The driver of a VAZ 2110 car can choose where exactly to install the pump independently. But when choosing a location, one basic requirement must be met - the pump must be connected to exactly the hose that leads to the stove radiator. If you connect the pump to the wrong hose, it can be seriously damaged. There are enough studs under the hood of the VAZ 2110 to install a pump and therefore there will be no problems with its placement. Next, you need to turn on the additional pump. Power will be supplied from the recirculation valve.
The connection diagram consists of several stages:
- The white and white-yellow wires must be disconnected from the recirculation valve. The first wire is connected to the relay contact number 85, and the second is number 30. Contacts 30 and 86 are connected using a jumper;
- pin 87 is connected to the pump wire. To check the operation of the pump, you need to connect the ground. If the ground rotates, then all connections are made correctly.
Connecting the pump
When connecting the pump, be sure to set the switch. If the device operates in forced mode without the ability to turn off, in the summer it will be unbearably hot inside the car. An O-ring must be installed around the perimeter of the switch, which will hide the place of its contact with the body. The negative wire will be connected directly to the pump, past the switch, and the positive wire will go through it. Thanks to this device, an additional pump for the VAZ 2110 can be connected only as needed.
It is worth noting that installing an additional pump is not always advisable. This is due to the fact that often the reasons for inadequate heating of the interior are malfunctions in the stove or a poor-quality thermostat. It is for this reason that before deciding to install a pump, it is necessary to carefully check the entire antifreeze circulation system.
