Hello everyone dear friends and readers
I haven’t written anything for a long time, I didn’t have time, but I finally got around to doing what I’ve been wanting to do for a long time, namely, paint the torpedo in “Ultramarine” color. I took the paint and primer at work)))) as usual, I take everything. Well, what can I tell you about painting: we disassemble the panel, first clean all the parts that need to be painted, then degrease, prime and apply the paint layer by layer, I didn’t need varnish since this paint is not covered with varnish. The painting did not take place in one day. I painted my beard on the balcony because the weather initially did not allow me to do this due to the cold weather, a week later, that is, today I painted everything else - the upper and lower glove box, plus the soap dishes for the door handles. I am very pleased with the result, the paint applied perfectly, when you open the door and the sun enters the interior, everything glitters and shimmers, it’s a pity that it’s hard to see on the camera. Now the next thing is to improve the acoustics, but that's a completely different story)))))
Good luck to everyone))) and the implementation of your plans))))) don’t forget to evaluate)))
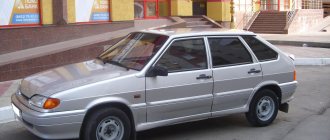
The front panel of the car interior is always in full view of the driver and passengers. Therefore, her appearance is very important. There are several ways to restore a damaged torpedo - for example, by painting it yourself. There are other methods, but they are more complex and therefore are practiced much less frequently.
Preparation
Many craftsmen recommend removing the dashboard before painting. When disassembling, disconnect the negative terminal of the battery, put the car on the handbrake, and unscrew the screws. Next comes disconnecting the wires, removing decorative parts and the steering wheel. The panel is carefully processed, the pattern must match the material of the torpedo. Wash off with soapy water. Then degrease with acetone or another substance. Then the plastic is sanded with fine sandpaper and treated with a special primer for plastic. Then degrease again.
Painting with liquid rubber
Before starting work, it is necessary to dismantle the front panel or seal the unpainted areas with tape. The technique of painting with liquid rubber has not been thoroughly studied, and reviews from drivers are contradictory. Some complain that the gloss quickly disappears, others say that such a coating is unreliable, it is easy to scratch and peel off. Still others complain that when they try to paint again, it is impossible to remove this rubber in some places. Liquid chewing gum is sold in cans, usually 400 milliliters, priced from 600 to 800 rubles. The application of a layer of rubber is carried out in 3-4 stages, leaving each layer to harden beforehand.
Rubber paint has a number of advantages and disadvantages:
- The surface is pleasant to the touch. Slightly rough: the rubber surface has a positive effect on a person when touched.
- No reflection of the sun.
- The paint dries quickly.
- Moisture resistant.
- Without smell.
- No seams or bubbles.
- There are no cracks from folding the panel.
Liquid vinyl treatment
Liquid vinyl is a modern product that is successfully used for painting automotive parts. A thin layer of this coating decorates and protects many suitable surfaces. This is a high-tech product of excellent quality. Treatment with liquid vinyl will increase the panel's resistance to sunlight, ice, frost and other harmful substances. The beauty of this stuff is that it comes off easily after prolonged use. And this circumstance does not reduce his strength qualities.
Painting with liquid vinyl is a simple and understandable procedure for everyone. The finished part will be matte and clean. Liquid vinyl is usually sold in cans. Before use, you need to shake it, preferably for at least a minute. The paint and solvent must mix perfectly. Do not touch the liquid vinyl until it is completely dry. Otherwise there will be divorces.
The process takes place in several stages. Entry level - collector. They try to make it translucent. This allows the paint to adhere to subsequent layers. The first layer will dry for about 30 minutes, this time must be maintained. The number of layers applied is up to you. The more there are, the stronger the coating will be. The recommended quantity is five. Distance from container to torpedo: 7 - 9 centimeters. If you did not disassemble the dash and glue the unpainted parts, remove the tape and protective material immediately after painting while the vinyl cures. Vinyl drying time is 3.5 hours. All this time it is necessary to protect the drying surface from dust and other bodies.
Padding
Painting with any composition begins with a primer. This will improve adhesion and even out the surface a little. At this stage, a primer is used, packaged in pressurized cans.
To treat one torpedo in two or three layers, one standard-sized cylinder will be sufficient. The primer is applied in accordance with the manufacturer's instructions on the label or from a distance of 25 centimeters in an even thin layer.
Each layer is dried before applying the next one. In addition, you need to carefully inspect the surface in good lighting for defects. Stains are removed immediately using napkins, and missed areas are re-checked.
Painting of domestic models
The technique for painting the dashboard of a VAZ car is no different from other cars. The surface is first cleaned of dust and dirt, and then treated with soft sandpaper. Before degreasing, soil treatment is required. The main thing when spraying is to prevent stains from appearing. This is controlled and achieved by maintaining the correct distance. Before starting the process, shake the can. Plastic is painted in three or four layers. The intervals between visits are from 12 to 25 minutes. Then the panel must dry for more than 10 hours. Then paint is applied. The number of layers is at your discretion (3 or 4). The downtime between calls does not exceed 15 minutes. After complete drying, the panel is put on again.
Order of Operations
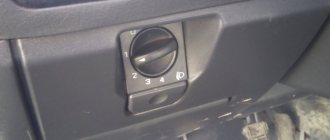
Remove the radio cover using a screwdriver, carefully threading the tool under the socket. First we pull it out from the bottom, then the top part of the lining. The electrical wires leading to the cigarette lighter must be disconnected. Now we find the screws on the dashboard and unscrew them. Remove the handles from the damper sliders and the heater switch by pulling them towards you.
- Now you need to remove the dashboard panel, it is held not only by screws, but also by other fasteners, so first you will have to loosen it a little.
- Now you need to disconnect the wiring from the panel: from the clock, from the alarm, from the headlights and other devices.
On the back surface we find cartridges. It's easier to unscrew them with small pliers. Release the cartridge by turning it counterclockwise. Half a turn is enough. We do the same with the rest of the cartridges - they are all designed the same. We check the lamps with a tester and determine which ones are faulty. Or we change the entire combination, for example, to LEDs. We screw in the light bulbs tightly, remembering that they operate under conditions of vibration and shaking. We install all the cartridges in place. We use pliers again. Turn half clockwise until it stops. Now we connect the panel to the instrument connectors and check the functionality of all the light bulbs: from the ignition to the hazard warning lights. If everything works correctly, we fix the panel and perform the installation in the reverse order, before installing the radio cover.
For the procedure for replacing light bulbs in the dashboard of VAZ 2113, 2114 and 2115, watch this video.
Adviсe
When choosing paint, you should think carefully. So changing the tone will be problematic. Matte black paint is often used. A lightweight car can be improved by painting the dashboard white with a light green, purple or blue tint. These are the most popular options. It is not recommended to experiment with flashy colors. It will look provocative and interfere with driving. The dye has a description that must be strictly adhered to.
It is recommended to start working with small and ordinary parts. This way you can practice. It is advisable to paint the less visible parts first. And then let's move on to the center console and climate control panel. 60 and 80 grit sandpaper are suitable for sanding. And after the primer has dried, use No. sandpaper. 80 and item 90. The process can be repeated to obtain an ideal surface.
Price
The pricing policy for painting car panels is formed according to a number of indicators. The cost of painting, the complexity of the work, possible repairs during painting work, and the responsibility when painting luxury cars are taken into account. In monetary terms, everything starts from 1500 rubles and above. If there is competition, there is not much difference: a provincial city or a metropolitan car service center.
Hello everyone, dear friends and readers
I haven’t written anything for a long time, I didn’t have time, and finally I was able to do what I’ve wanted for a long time, namely, paint the torpedo in the “Oltremare” color. I took paint and primer to work)))) as usual I take everything. Well, what can I tell you about painting: we disassemble the panel, first clean all the parts to be painted, then degrease, prime and apply paint layer by layer, I didn’t need paint, since this paint is not covered with paint. In fact, the picture was not painted in one day. I dyed my beard on the balcony because the weather at first did not allow it due to the cold, after a week, that is, today I dyed everything else - this is the upper and lower balcony, plus soap dishes and door handles. I’m very pleased with the result, the paint was perfect, when you open the door and the sun comes into the interior, everything sparkles and shines, it’s a pity that it’s hard to see on camera. Now it’s time to improve the acoustics, but that’s a completely different story)))))
Good luck to everyone))) and the implementation of your plans))))) don’t forget to rate)))
Messages 1 to 20 of 25
1 Topic by Pavel 2009-03-31 10:17:54
Subject: Torpedo Ink
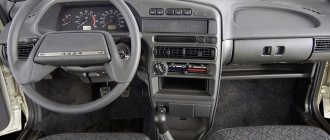
The panels in the interior (Europanel) are gray, the roofing felts have faded, or they were the same. Lots of scratches. It doesn't look great. I want to somehow blacken it out once and for all, or at least for a long time).
A friend uses a shoe sponge, it doesn’t look bad, but the panel becomes greasy and doesn’t last long. They say bumper ink helps, but there will be a smell. The market recommended ink for plastic “Black Chrome” from the company Cherepashka (250 rubles).
2 Reply from CKB774 2009-04-01 04:16:45
Re: Ink for Torpedo
I am also interested in this question.
3 Reply from Pavel 2009-04-01 06:28:48 (2009-04-01 07:08:22 edited by Pavel)
Re: Ink for Torpedo
“Black Chrome” from “Turtle Wax” is a unique, color-enriched preparation intended for all black elements of the car’s exterior trim, including rubber, plastic trim, only with hard, plastic ones. As a result, the view in the cabin becomes completely flawed.
People solve this issue in different ways. Some paint it, some glue it a la carbon, and the third option is to just buy a new pad and mask.
This is how the panel burns out. Photo from the Internet
The same problem did not pass me by. When the car was 4 years old, the panel was already completely faded and ugly. It was decided to paint it. To do this, I completely removed the entire panel (how hemorrhoidal it was) and painted it. It took a lot of time and effort to disassemble/assemble. And I promised myself that I would not remove the panel again, except in extreme cases.
Two years later, the paint has peeled off in many places, new scratches have appeared, and in general, glossy paint generally looks ugly. At night, the tidy is strongly reflected in the mask, which is inconvenient. I decided to repaint it to give my interior a normal look.
This is what the panel looks like before painting
It was decided to paint the panel without removing it, only with partial disassembly. To make it work well and not peel off the paint, you need to use a primer (the first time I painted it without a primer) and only matte enamel. And one more thing, a standard 400 ml can of paint will not be enough, take either two or a larger can. Please take into account my previous mistakes.
For painting I needed:
• Spray can of black matte paint 600 ml; • The primer in the cylinder is gray; • Sandpaper with grit 240 and 400; • Masking tape; • Avon catalog for 2009, for sealing unpainted areas:);
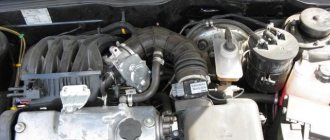
It's time to disassemble the panel. You only need to remove the side covers (which are located in the legs) and the panel mask. You don’t have to remove the dashboard, just cover it with a rag. In the photo I took mine to replace burnt out light bulbs.
The panel is disassembled to this state
Now I started sealing it with tape and magazine. Again, advice: do not glue when the car is standing in the sun, the masking tape will peel off after a few minutes.
After 30 minutes the following picture was obtained
I simply covered the steering wheel, the dashboard area and other unpainted areas with rags. The photo shows that there are no seats, big changes are coming here, there will be a separate topic about this soon.
Now the process itself: first we sand with 240-grit sandpaper, after 400-grit, when the old paint and scratches are removed, you need to wipe with a damp cloth and degrease.
Now the primer is applied, two small layers with an interval of 5-10 minutes. When the primer has dried, according to my observations, 2-3 hours is enough, you can paint. Painted in 3 layers, with an interval of 10-15 minutes.
With the panel installed, it is difficult to paint in places where the windshield is close; you simply cannot get there. Otherwise, without any particular difficulties. The panel mask is removed and is also painted at this time, there are no problems with it.
The next morning I returned to the salon to reassemble the panel. It looks simply gorgeous, like a new panel.
The camera, of course, won’t convey the whole view, but you can’t complain in person. You can also see that even matte paint gives sufficient shine. Gloss would be too much.
During the assembly process, I taped the panel joints with Madeleine so that nothing would rattle or rattle.
As a result, I want to say that to paint a faded panel it is not at all necessary to remove it. I didn’t notice any difference in paint when the panel was removed and installed.
Source
Tuning the instrument panel of VAZ 2114
Today, many car enthusiasts are interested in tuning the VAZ 2114 panel, this is due to its design, which is ideal for this activity.
In general, if we are talking about the 2114 model, it should be noted that this is one of the last well-designed and executed models of the “family” of VAZ cars. For the most part, do-it-yourself VAZ 2114 tuning in general and interior improvement in particular is just a matter of replacing seat covers.
However, this is a deep misunderstanding; there are many items in the cabin that could be beautifully updated. Throughout the history of the VAZ 2114 brand, it was believed that interior tuning is a complex of large-scale and multi-level work, consisting of many different actions to improve various elements and, of course, among other things, the instrument panel.
Selection of paints and varnishes
It is important to know how to paint a car dashboard with your own hands. Paint and varnish should not only please the car enthusiast in color, but also meet certain requirements:
- intended for spraying onto plastic surfaces;
- match the previous coating;
- varnish – be two-component, fixing.
Upon contact with certain components of paints, certain types of plastic can oxidize and cause the release of toxic substances. It is worth seeking help from specialists to avoid such troubles.
Comprehensive modernization of the VAZ-2114 instrument panel: first steps
Most often, a set of works to modify the dashboard of a VAZ 2114 is an important and necessary task, but, at the same time, interesting and serious. The main task is to choose the right parts and arrange them beautifully. It is always better to think through any actions related to various updates in advance.
Consequently, this will avoid unnecessary mistakes and misunderstandings. The right decision would be to draw up a work plan that you will follow and thanks to which you will not make mistakes, and the whole process will give you complete pleasure.
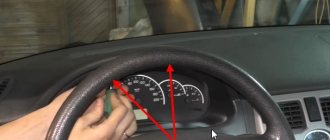
Special pads
To modify the VAZ-2114 instrument panel, special overlays are used that have stylized images of the speedometer and tachometer. You can purchase such pads at literally any auto parts store. With this VAZ-2114 torpedo tuning, you can change the color of the backlight using built-in light filters and transparent elements. However, you need to attach such overlays correctly, because the result may be uneven illumination, for example, it is dim on the right and bright on the left, or the factory light bulbs will not have enough power to break through your additional built-in overlays.
Tuning the dashboard can be performed in the following sequence:
- First you need to disassemble the “device” of the car. Every motorist should know how to remove the dashboard of a VAZ 2114. There is nothing complicated here, everything is quite clear, and the process itself does not require special skills or knowledge.
- Then it is necessary to complete the finalization of elements and details. There can always be many nuances here. They depend on what you want to change and improve in your car. Everything must be very carefully thought out.
- Finally, you need to install the converted and updated "panel" into place.
Torpedo restoration options
We can briefly consider the available methods for restoring a car dashboard. These include the following methods:
- paint with acrylic enamel and varnish;
- matte enamel painting;
- paint with a rubber-containing compound;
- pasting with vinyl film;
- finishing with leather or its substitute.
As mentioned above, the easiest and cheapest way to return a decent appearance to a torpedo with your own hands is painting and applying a layer of varnish. Some people prefer matte enamels, since deep gloss can cause glare from the sun and interfere with driving. It all depends on the shape of the torpedo and the taste of the owner of the car. In most cases, preference is given to a glossy surface.
How to easily update the “tidy” of a VAZ 2114
Improving the 2114 dashboard is actually not as complicated a process as it might seem at first glance. Purchasing such a “device” is quite simple. You should consider what options owners can use to update their VAZ 2114 wardrobe (examples in photos and videos).
1. AMC. This model has several features.
- To begin with, it is worth noting that you can order its design yourself;
- This panel is equipped with a built-in oil indicator, which is not available in the classic version. Its appearance is associated with the very persistent requests of many car enthusiasts to install this “component” as standard.
- This dashboard looks more interesting due to the color scheme with chrome trim.
2. PRO-SPORT. This “neatness” is made in the form of an overlay on the dashboard of the presented model. The updated design of this device gives them an impressive and completely new look. There are two options for its execution: with a light and dark substrate. The backlight of the VAZ 2114 panel has a special brightness adjustment, but there is only one color - blue. The stairs are glued after installing the insert. This will give this element of the car an original look.
3. AMS-2. The highlight was the speedometer, which was moved from left to center. The white dials give a sporty look to the entire panel. This allows you to quickly read the necessary information from it. The backlight has been redesigned and LEDs have been used, making it easy to read information at night. It is recommended that the installation be carried out by qualified specialists, since during its installation a significant “redevelopment” of the classic model is planned.
4. STORM STREET. The main feature of this model is the color combination. Nothing has changed in the classic arrangement of instruments,
the emphasis was on the color scheme. The “appearance” of the instrument panel has undergone some changes, but its style harmoniously fits into the existing interior. It is worth noting that another feature of this model is its backlight. During the day it lights up with red symbols. In the dark, you can safely change not only the brightness, but also the color.
5. "North Wind". This model is distinguished by its appearance. The developers have proven that even with a standard arrangement of instruments, the entire panel looks dynamic and bright. The sporty characteristics are clearly visible on it. The highlight color depends on the shadow of the input scales.
Impressions and experience of use
Over more than two years of operation, neither flocked nor painted surfaces have lost their appearance. True, the flock has turned a little yellow and has rubbed off from dirty hands. It can be washed, rubbed with a brush - it holds firmly, so there are no problems with this, there is no need to be afraid. Once it was dirty at a service station, but it was washed off with a stiff brush, carpet cleaner and soap, and then rinsed generously with water. Looking now at the photo of standard VAZ-2108 interiors, you understand that you don’t want to be in that grayness - a light, contrasting interior sets a different mood.
Tuning for your pleasure
The main thing in the process of modernizing any car is efficiency. Every owner wants his car to be original and at the same time feel comfortable. Oddly enough, one of the favorite parts of tuning enthusiasts is the dashboard. It can be modified in different ways and, thus, distinguish your own car from a huge number of similar cars.
At the initial stage, it is necessary to prepare the material for work. Replacing a VAZ 2114 panel or its original modernization requires dismantling the standard panel. You will only need to remove the protective glass of the speedometer. It's important not to break it. After removing the protective glass, you need to “uninstall” the pointer arrows.
It is important to be careful as the arrows are very fragile. After that, take out the standard card. Then you need to change the backlight bulbs. The standard ones were green, the purchased ones were blue. We replace standard light bulbs with purchased ones, then check how they work. Next, install a new card.
All this will look very impressive. Finally, we install the arrows and protective glass. If you customize your car like this, it will look very cool.
Torpedo dismantling
Painting begins with dismantling the torpedo. If this procedure is being done for the first time, then it would be a good idea to first read the instruction manual for the specific model. This is necessary in order to find out the locations of fasteners, which in most cases are carefully masked. There were many cases when, due to one fastening, a torpedo was dismantled by force, resulting in irreparable damage.
When the location of the fasteners has been studied, the steering wheel and all switches on the panel are dismantled, if their design allows it. Next, the instrument panel is removed and disconnected from the wiring. After removing all the plugs hiding the panel fastenings, they are turned out and neatly folded with marks. When everything is ready, the torpedo is removed from the latches and removed from the cabin through the front passenger door.
When dismantling the panel, it is very important to mark the removed fasteners so that there are no unnecessary parts later. Some people practice taking step-by-step photographs of the dismantling process, so that in case of hiccups there are basic clues.
You need to be especially careful with the plugs and branded torpedo mounts, since if they are lost or damaged, they can be very difficult to get.
419c7cu-960.jpg
To begin with, the question arises: what is this for? The old panel is done, to put it mildly, quickly: the steering wheel covers some of the instruments, and the “neatness” itself is reflected on the windshield at night, turning the road into a computer search.
Plastic, or rather its quality, does not stand up to criticism. After several hundred kilometers, the entire cabin is filled with an obsessive creaking and terrible roar. Later, the glove compartment begins to open. Poor ventilation, the car is cold in winter. However, all these problems are solvable. However, is it worth buying a car and immediately thinking about repairing it?
Europanel is something else. Looks modern and fashionable. The material is softer and richer. Obviously it's less noisy. Ventilation is also good.
Home assembly makes its presence felt everywhere. The air control levers move tightly and do not reach the edges of the slots. There are other little things: somewhere there is a large space, something else falls, the glove compartment sometimes opens on its own. But in terms of quantity and frequency, it is completely incomparable to the old version.
In addition, several drawers for small items warm the soul. Europanel is a modern and original solution to many problems associated with “ordering” domestic cars.
Criteria for the technical condition of the body
The thickness of the paint serves as a criterion for checking any car, including the VAZ-2114, for its accident history and the quality of the repairs carried out after this.
Data may vary on different machines. But on average the coating thickness is in the range of 80–120 microns
When carrying out measurements, it is important to identify not so much the true value of the parameter as their scatter depending on the measuring point. Practice shows that:
- if there are places where the thickness of the paint is twice the nominal value, it means that chips and small scratches have been repaired;
- the presence of deviations of 200–300 microns indicates repair using putty;
- readings of 400-500 microns and above indicate poor quality of work without preliminary straightening.
Complex repairs and painting done with your own hands without the use of special equipment will most likely lead to the last case described. Therefore, such a car will be difficult to sell at a good price in the future. It’s one thing to paint headlights or bumpers, which can be easily changed if necessary, and another thing to paint the doors, hood or roof of the cabin. It’s difficult to do without good equipment here. Few people will care about the thickness of the paint on the restored bumper, but the supporting metal structures will be checked by the potential owner very carefully, since the durability of the VAZ-2114 being purchased will depend on them.