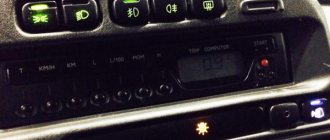
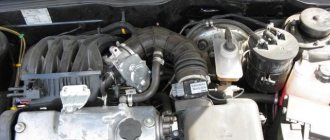
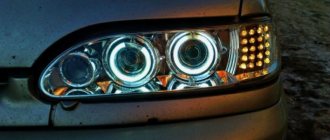
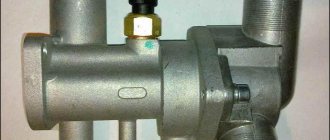
The headlight hydraulic corrector is used to change the angle of the headlight beam. The fact is that depending on the load of the car, the direction of the headlights changes and it may happen that it is not directed at the road surface, but directly into the eyes of the driver of oncoming traffic, which creates a dangerous situation when driving. The headlight hydraulic corrector for the VAZ 2114 consists of a main cylinder, which is located on a panel board, and working cylinders, they are located directly on the headlight housing and are connected to the main cylinder by connecting tubes. Inside the cylinders and tubes there is a special composition that is resistant to low temperatures. This liquid does not come into contact with air at all. It is worth noting that the hydraulic corrector is an integral mechanism; it cannot be disassembled and, in the event of a breakdown, cannot be repaired. During operation of the VAZ 2114, jamming of the pistons in the cylinders or leakage of fluid from the tubes or cylinders may occur. So when a car’s hydraulic leveler fails, it makes sense to replace it with a more modern electromechanical headlight leveler.
The electrical manifold kit includes the headlight leveler, several O-ring actuators, and a wiring harness. Let's begin installing the equipment in the interior of the VAZ 2114. First, you need to dismantle the dashboard light switch handle and the hydraulic corrector handle, if available. We take a thin flat screwdriver and pry up the lining with the corrector scale, thereby removing it. Then, using a Phillips screwdriver, unscrew the self-tapping screw securing the light guide for the corrector scale backlight and remove this light guide. We take the 21 socket and unscrew the nut securing the main cylinder of the corrector, to do this we press on its rod and press it into the hole that is on the instrument panel of the VAZ 2114. Open the hood of the car and disconnect the working cylinders of the corrector from the headlight housing, press on the latch and turn the working cylinder the cylinder counterclockwise, thereby freeing it from the fastening, now it can be pulled out from the body. Using side cutters, we cut through the tubes and remove the right cylinder. Using the same actions, we release the left cylinder from its mounting.
To make it more convenient to work, it is recommended to disconnect the battery terminals. We lay the wiring harness blocks of the electric headlight range control of the VAZ 2114 through the seal. We lay the wiring of the corrector along the standard wires of the car. We install the electric corrector into the hole in the headlight housing and connect it to the right and left headlights. Now we go into the car interior and connect the negative wire of the electrical corrector to ground, and connect the supply wire to the wire that supplies voltage to the low beam filament. We connect the electrical corrector wiring harness block to the regulator, and assemble the regulator itself in the reverse order of removal. So, we installed an electric headlight range control on a VAZ 2114 car with our own hands.
- Causes and troubleshooting of headlight hydrocorrector on Lada Samara
- How does the VAZ 2114 headlight range control work?
- When a part needs to be replaced or repaired
- Causes of corrector breakdowns and ways to eliminate them on the VAZ 2114
- Replacing the headlight hydraulic corrector on a VAZ 2114
- How to choose a hydraulic corrector
- Removing the hydraulic corrector
- Installing a new part
Maintenance and operation of the product
The design of the headlight hydraulic corrector is non-separable; in the event of a malfunction, it can be replaced entirely. The main thing is to remove it completely, and not cut it off, to make it easier to install a new device.
If the angle of the headlights increases, you can try to adjust the mechanism. What should be done?
- When the car is loaded, the headlights need to be turned down so that the light beam is directed at the roadway.
- If the vehicle load is minimal and the rear part of the frame is in a raised state, the headlights should be projected upward.
If the unit does not resume proper operation, then you need to check the presence of liquid in the cylinders and tubes. To do this, the products are removed and the working stroke of the rods is measured; it should be about 7 mm.
This is how the manufacturers intended that most of the time the hydraulic corrector is under pressure, as a result of which the working cylinder rod is retracted and the optics rotate downward.
OPERATING PRINCIPLE
When the driver decides that the headlights need to be adjusted, he turns a special knob inside the car to do this. It controls the pressure in the corrector piping system. Accordingly, when you need the headlights to go down, everything happens as follows:
- The handle turns down;
The switch in the cabin looks like this
- The pressure in the system drops;
- The operating rod enters the housing;
- The headlight goes down.
Based on this, we can say that most of the time high pressure is maintained in the working mechanisms; this is necessary to maintain the horizontal position of the headlight.
In winter, or during the transition period, when the temperatures outside and in the engine compartment are very different from each other, pipelines and rubber seals can delaminate, and working fluid can leak out. In this case, the headlight range control will most likely fail, and the working cylinders will jam and require complete replacement.
In terms of calibrating the device, the instructions from any domestic hydrocorrector will do. This is due to the fact that structurally they are all made very similar and you can figure out any of them yourself.
Causes of mechanism malfunction
The cause of product failure may be liquid leakage from the cylinder or tubes, which causes disturbances in the structure of the seals. Poor quality rubber causes loss of working fluid, which leads to jamming of the unit pistons in one position. Accordingly, the angle of illumination of the headlights changes, which is simply impossible to eliminate without replacing the entire mechanism.
If an electronic corrector is installed on the machine, then very often the system sensor begins to act up due to the destruction of the mounting bracket of the unit. Sometimes there may be a problem with the contact connection.
The correct operation of the headlight range control directly depends on the safety of motorists and pedestrians. That's why you need a headlight hydrocorrector, serviceable and fully functional!
Design and principle of operation of the headlight range control
It is worth noting that the operating principle of different types of headlight range control units is approximately the same. At the same time, a distinction is made between automatic and manual settings. In the latter version, the position of the headlights is adjusted using a special regulator installed inside the car, and with the help of its rotation, the driver independently changes the angle of the optics. In the first case, the electronics automatically configure everything itself, depending on the landing of the car.
Manual headlight range control
This headlight range control is installed on many budget cars, so it is familiar to a large number of car enthusiasts. As the name suggests, the corrector is activated directly by the driver. To do this, as a rule, you just need to turn the wheel, or as it is also called, the rotary switch. The electromechanical drive of the headlight range control is most often used, so we will consider it.
The adjustment wheel usually has digital or graphic markings that indicate the position of the headlights. Adjustments are made by the driver as necessary, depending on the vehicle’s load and changes in its tilt in the longitudinal direction relative to the center of gravity.
Simply put, if three people sat in the back seat, and you had to put four bags of potatoes for your mother-in-law in the trunk, then obviously the back of the car will lower and the front will rise, causing the headlights to shine too high and blind oncoming drivers.
To prevent this from happening, you need to turn the wheel so that the beam of light goes down.
Turning the knob gives the corresponding command to the gear motor, which is needed to turn the headlight to a certain angle. In fact, a gear motor is nothing more than a worm gear, which is necessary to convert the rotational movement of the electric motor (located inside the gear motor) into the translational movement of the rod, which directly acts on the headlight, changing its angle.
Structurally, the headlight is hinged at the top, and the rod with a ball end (resting against a spherical latch) holds the lower edge of the headlight. And it is the back and forth movement of the lower part of the headlight, with the upper attachment point remaining unchanged, that gives the necessary change in the angle of inclination.
A manual headlight leveler is very simple, very reliable and, most importantly, a useful device, but it has one very significant drawback: most drivers forget to use it and blind their colleagues, despite the fact that they have the opportunity not to do so.
Automatic headlight leveling system
Automatic headlight leveling is a more advanced technology because it does not require any action from the driver. The cut-off line is adjusted automatically based on sensor readings.
Automatic headlight leveling can be installed on vehicles equipped with either halogen or xenon headlights. For xenon, this is even necessary, since this type of headlight emits light of very high intensity, and in the absence of auto-corrector, it can pose a serious threat to traffic safety.
As for the design of the headlight auto-corrector, the following elements can be distinguished:
- Control block;
- sensors that measure the vehicle's ground clearance at various points;
- device that adjusts the headlights (actuator).
Typically, the system uses two or three sensors that measure ground clearance. Either one sensor or a pair can be installed at the front. And one sensor is located at the back.
Early systems used potentiometric sensors, but they were not reliable enough, so they have now been replaced by non-contact angle sensors.
The operating principle of these sensors is based on the Hall effect. The mechanism of operation of the sensor is quite simple.
Structurally, the sensor consists of a rotor (moving part), with permanent magnets built into it, and a stator (fixed part), which, in fact, is a Hall sensor.
The sensor is attached to the bottom and is connected to the suspension using a rod. The change in suspension travel is transmitted through the rod to the rotor, which rotates, causing a change in the magnetic flux, which is detected by the Hall sensor.
The magnitude of the change in the magnetic flux is subsequently recalculated by the control unit into the required angle of rotation of the headlights, and the corresponding signal is sent to the actuator. In its work, the control unit takes into account not only the angle of inclination of the vehicle, but also the speed, as well as the nature of the vehicle’s movement.
Debugg
How to change range control on a VAZ 2114? To remove it, you need to disconnect the clamps from the wire fastening clamps; before doing this, it is recommended to remove the terminals from the battery. Further:
- Remove the cylinder (regulator) handle by pulling it slightly towards you.
- Unscrew the cylinder nut on the panel.
- Remove the lever trim.
- Remove the mechanism from under the panel.
- Remove the corrector cylinders from the housings by pressing their latches.
- Next, you need to remove the mounting hoses with clamps on the car body.
- Push the rubber seal into the middle of the cabin and place two more cylinders with tubes there.
Connecting the electrical corrector BUK02-01 to a VAZ-2110
Installation of the BUK02-01 autocorrector on a VAZ-2110 (2111) car is carried out without modifications to standard places. In this case, you must first change the length and adjust the stroke of the rod depending on the specific model:
- VAZ-2110: stroke 2.0 with length 34.0.
- VAZ-2111: stroke 3.63 with length 34.0.
The stroke of the BUK02-01 rod is 7.0 with an offset of 38.8. Therefore, you will have to cut off the rod and reduce its stroke.
To cut the length of the rod, connect power to the drive so that the rod extends to its maximum stroke. First, we cut off part of the rod, then grind it off with a 9 mm file. After this, we glue the sawn-off part back with superglue.
The headlight electric corrector is adjusted in the “0” position, which meets the technical inspection requirements. Each division of the switch allows you to shift the axis of the light flux by 0.06 m, provided that the adjustment stand is installed at a distance of 1.2 m from the car headlights.
Which hydraulic corrector should you choose?
Often, instead of a standard unit, car enthusiasts prefer a more practical and efficient electric corrector, which is not provided by the manufacturer, but easily fits into the socket of the old mechanism. Its difference lies in the electric motors that ensure the functioning of the product drive. This corrector is mounted in the same way as a regular one.
The electrical device for the VAZ 2114 headlight hydraulic corrector is installed as follows:
- the negative terminal is removed from the battery;
- the main cylinder is turned counterclockwise and dismantled;
- the sealing retainer and ring are changed;
- installs the corrector in place of the master cylinder;
- the lever of the device is removed in the car interior;
- the positive terminal of the electrical corrector is connected to the socket of block No. 20 and fixed under the instrument panel on one of the body studs;
- instead of pipelines, wiring is laid;
- the device is connected to the actuator;
- the terminal is connected to the battery;
- The functionality of the unit is checked.
Hydrocorrector of headlights for VAZ 2114 with electric drive
This is how to replace the headlight hydraulic corrector on a VAZ 2114 with an electric drive !
DEVELOPING THE CORRECTOR WITH YOUR OWN HANDS
During scheduled maintenance, you may also need to adjust the VAZ 2114 headlights yourself. Most often this happens when the hydraulic corrector stops working properly, but does not fail completely.
The most common reason for such partial failure is the lack of normal engagement of the lever and rod in the working cylinder. Under normal conditions, the end of the rod should be engaged with a lever, the other end of which rests on another rod. The latter acts on the headlight itself, moving it in the desired direction. Simply put, this mechanism resembles a kind of swing, the fulcrum of which is on the adjusting bolt.
Adjusting VAZ headlights with your own hands consists of checking the position of this bolt. If it was screwed all the way, then the end of the lever on one side or the other could simply pop out. Also, the bolt must be set so that it can be lowered and raised with minimal effort for the driver.
What else can be done to more effectively illuminate the road when a car is moving?
In other words, how to improve the headlights on a VAZ 2114? What should be done?
- Replace existing lamps with improved ones that have a larger light output angle. You can install xenon.
- If the car's reflective surface peels off from the metal body, then it would be correct to install a new headlight instead of the old, non-functional one.
- Regular cleaning of headlight covers from dirt; protective film can be used as a preventative measure.
- If black deposits appear on the headlight bulb, the quality of lighting decreases. Therefore, you need to replace the lamp in time.
- If condensation gets inside the lamp, the level of efficiency of road lighting decreases. To avoid an accident, the correct solution would be to replace the defective headlight.
Dear motorists, check the quality of functioning of car headlights in a timely manner and place increased demands on the operation of these units. Eliminate all possible causes and remember that traffic safety guarantees peace and order to all road users.
What does the automatic headlight leveling system consist of and how does it work?
The autocorrector system can install from one to three ride height sensors; they are placed in front and behind the body. In addition, the system uses a non-contact rotation angle sensor, the operating principle of which is based on the Hall effect. The sensors are attached to the body and connected to the suspension using special rods. The sensor itself consists of a moving rotor with permanent magnets and a stationary stator in the form of a Hall sensor.
The position of the body in relation to the suspension is recognized thanks to sensors and a rod that changes its position by turning the rotor, which in turn changes the magnetic flux. This flow is taken into account by the Hall sensor, after which the headlights are adjusted taking into account the specified algorithms. Cheaper automatic headlight leveling systems use only one sensor - ultrasonic. The only sensor is mounted in the rear of the body according to the principle described above. The signal that comes from the sensors is received by the ECU (electronic control unit) of the automatic headlight leveling. The control unit is guided by certain algorithms that take into account information about the current speed of the vehicle, as well as the state of the sensors. After this, the ECU issues a command regarding the angle at which the headlights need to be raised or lowered.
Such a simple and at the same time useful system allows you to always keep the headlights in the correct position, eliminating the possibility of dazzling other road users. More perfect and advanced in terms of traffic safety and automatic headlight adjustment is the adaptive lighting system, which allows you to adjust the light beam not only in the vertical, but also in the horizontal direction, but that, as they say, is a completely different story...
I have everything, I hope everything is clear to you? Thank you for your attention, and see you again at Fara Info
Design
Structurally, the headlight hydrocorrector is a set of the following components.
| Component | Characteristic |
| Master cylinder | It is mounted on the dashboard |
| Actuator cylinders | They are located on the headlight unit and ensure their turning |
| Connecting pipeline | Its fixation is carried out with clamps |
| Working fluid | They have increased resistance to low air temperatures |
The operating principle of the device is based on the following: the corrector maintains the required pressure. If the driver switches to low beam, the pressure in the system decreases, and the rod turns the headlights down using a piston. If the liquid has leaked, it becomes impossible to adjust the direction of the light.
Electric headlight corrector VAZ 2114: purpose and installation
Headlight correctors in a car perform a very important function. When the speed of movement and loading of the vehicle changes, the position of the body changes, the cut-off line shifts, and it must provide better visibility and at the same time not dazzle drivers of vehicles moving towards the meeting.
As a result, in the absence of a corrector, even if your lighting devices are configured according to all requirements, you either interfere with oncoming cars, or there is not enough light for you, because the headlights shine down onto the road.
Therefore, since 1999 in Europe, the presence of a corrector has been an indispensable option for all cars, without exception.

