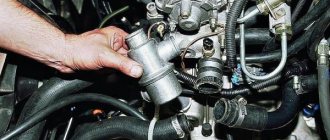
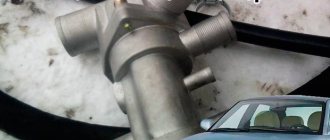
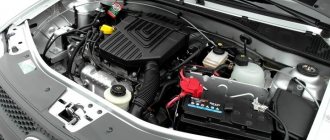
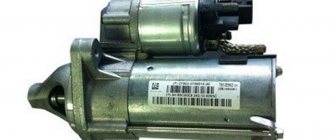
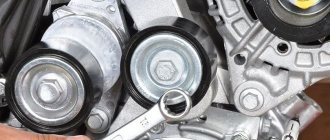
Lada Largus. Removing and checking the engine thermostat 1.6 (16V)
We replace the thermostat when the engine's thermal conditions are violated, when the engine either overheats or does not heat up enough.
When checking the thermostat on a car after starting a cold engine, the lower hose leading from the radiator should remain cold for some time, and then (after the coolant temperature reaches 89 ° C) quickly heat up, which indicates the start of coolant circulation in a large circle.
To dismantle the thermostat, drain the coolant (see “Replacing engine coolant 1.6 (16V)”, page 34).
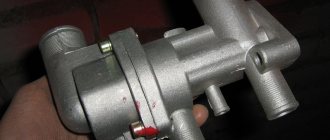
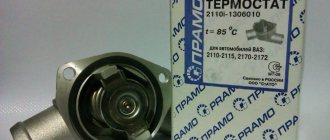
. what does the number “89” on the thermostat flange indicate?
At a temperature of 95±2 °C, the valve must open completely - the stroke of the rod is at least 8 mm.
Install the thermostat in reverse order.
We pour coolant into the cooling system and bring the liquid level in the tank to normal (see “Replacing engine coolant 1.6 (16V)”, p. 34).
Video on the topic “Lada Largus. Removing and checking the engine thermostat 1.6 (16V)"
Lada Largus engine does not warm up, is the thermostat faulty?
causes? Solution to the problem! Replacing the thermostat on Renault Logan how to change the thermostat on Renault Logan Source
How to change the thermostat on Lada cars with an 8 or 16 valve engine
September 29, 2022 Lada.Online 26,281
If the car engine overheats or the antifreeze temperature does not reach operating temperature, the thermostat may be a possible cause of these malfunctions. There is no difference when replacing the thermostat on Lada cars (Granta, Kalina, Priora, Vesta, Largus, Niva or XRAY) with 8 and 16 valve engines, all actions are performed in the same way.
You will need: drain the coolant, prepare a flathead screwdriver, a Phillips screwdriver, a set of wrenches and silicone sealant.
Procedure:
- Remove the engine air filter housing by disconnecting the hose and the connector with the MAF wires.
- Loosen all thermostat hose clamps (their number may vary depending on the thermostat model).
- Remove the thermostat assembly by unscrewing the two screws securing it and removing the ground connector and the connector with wires from the temperature sensor.
The thermostat is installed in the reverse order, after first cleaning the seat from dirt and applying sealant. The whole process is also shown in the video:
Replacing the thermostat on Lada Vesta:
Let us remind you that it is better to check it before installing the thermostat. If this is not the problem, check the cooling system according to the diagram.
Keywords: cooling system Lada Kalina | cooling system for Lada Granta | cooling system for Lada Priora | cooling system for Lada Vesta | cooling system for Lada Largus | 4x4 cooling system | cooling system lada xray | Niva cooling system | universal article
Share on social networks:
Found an error? Select it and press Ctrl Enter..
Guests cannot leave comments in the news, please log in.
Replacing the Lada Largus thermostat (VAZ Largus)
The need to remove the thermostat may arise to replace it if the engine temperature is unstable: overheating or insufficient heating. To check the thermostat on a car, start the cold engine and touch the lower (outlet) radiator hose with your hand - it should be cold. Once the coolant temperature reaches 90-95 °C, the hose should begin to heat up quickly, indicating that fluid has begun to circulate through the large cooling system circuit. If this does not happen, remove the thermostat and replace it. Since thermostats for different types of engines (16 and 8 valves are different), removal and replacement operations for the K4M and K7M engines are given separately, in different paragraphs.
Unscrew the thermostat box and drain the antifreeze
The thermostat box mounting bolts must be slightly loosened.
We loosen the bolts in the following order: Loosen the bottom bolt by two or three turns. Rear bolt one turn. The middle bolt is one or two turns.
This is necessary so that a gap is formed at the bottom and closer to the front. This way the antifreeze will flow exactly into the container we have placed. And you need to make sure that it flows exactly there, and not somewhere past.
After you have drained about one liter of antifreeze. It is necessary to loosen the bolts a little more and insert a flat-head screwdriver into the slot and carefully move the thermostat sensor itself.
Be careful not to tear the thermostat seal.
In total, you will end up with approximately three liters of antifreeze. You need to carry out the procedure of filtering it.
To do this, insert a funnel into the second bottle and place gauze folded in several layers on top. After these manipulations, drain through it.
Operations for removing (replacing) the Lada Largus thermostat on the K7M engine
To replace the K7M engine thermostat, perform the following operations.
1. Drain the coolant.2. Remove the three thermostat cover bolts...
4. ...and remove the thermostat from it.
5. Remove the O-ring from the thermostat and inspect it. Replace a heavily compressed, hardened or torn ring.
6. Install the O-ring on the new thermostat.7. Install the parts in the reverse order of removal.8. Fill with coolant and remove any air pockets from the cooling system
Extraordinary maintenance-6 with replacement of thermostat and antifreeze!
Extraordinary maintenance-6. Switch to LukOil ArmorTech 5W30 oil with replacement of the thermostat and antifreeze. So 7000 km flew by. And before winter I decided to do an extraordinary maintenance 6 again with a switch to 5W30 oil. Also at this point I began to notice that the thermostat was not working correctly. It periodically began to not open completely. And after looking at the “Murzilka” it’s time to change the antifreeze in the system. A set of consumables was purchased for maintenance.
1. Oil LukOil ArmorTech 5W30 A5B5 ; 2. Air filter SIBTEK AF115 ; 3. Oil filter PurfLux LS932 ; 4. Sealing washer for the pan plug SASIC 1640540 . On and then as if by “knurled”... I remove the protection by unscrewing 6 bolts:
I drain the oil into the bathtub by unscrewing the drain plug:
I immediately change the O-ring on the plug. So as not to return later...
I unscrew the oil filter using a puller:
I also use it to install a new oil filter:
I fill in the oil:
All oil leaks in the area of the oil filter, block and pan were removed using the same “Brake Disc Cleaner” from 3Ton.
Operations for removing (replacing) the Lada Largus thermostat on the K4M engine
To replace the K4M engine thermostat, perform the following operations.
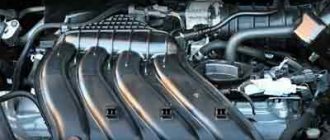
1. Drain the coolant.2. Remove the intake silencer
3. Remove the three thermostat mounting bolts (the third bolt is not shown in the photo, it is located at the bottom right)
4. ...and remove the cover from the water distributor.
5. Remove the thermostat from the cover.
6. Remove the O-ring from the thermostat. Replace a heavily compressed, hardened or torn ring.
7. Install the O-ring on the new thermostat.8. Install the thermostat in the reverse order of removal.9. Fill with coolant and remove any air pockets from the cooling system
Spare parts catalog Lada Largus
- Body Mudguard with side member Body
- Body
- Mudguard with spar
- Front body elements 3 Lower front elements 2
- Front door frame
- Inner side frame
Replacing the thermostat LADA Largus
Replacing the LADA Largus thermostat Prices for repairing Renault Largus, replacing the timing belt, oil, engine, Renault Largus piston 1 is installed in. » Razdatka Niva Device Repair and maintenance of Lada cars ☎ Finding a car service center in Moscow is easy on the Vse-Аvtoservisy portal Malfunctions in the operation of any car air conditioner are not uncommon.ru lada. Send a request for auto repair real reviews from Largus owners (lada largus) engine, pulley, terminal wire, block head, 2111, VAZ 2110 buy a thermostat for an Electra electric stove, novovyatka Beko Hansa Gorenie. Source on Granta, three types of engines will be installed: engine 11183 (1.6 l. Tags: Priore central locking actuator, noise when closing /8 v/80. Replacement of standard car lamps LEDs auto repair 2101-2107 2108-21099 16 valve foreign cars SUVs ; 1: gaskets.
Thermostat - removal and installation
Place the vehicle on a two-post lift, apply the parking brake, turn off the ignition and disconnect the ground cable from the battery.
.
Remove the engine crankcase protection
Drain the engine cooling system (see above).
For cars with K4M engine
Remove the intake silencer.
Remove the clamps and disconnect hoses 1, 2 and 4, Figures 13-14, from the thermostat housing.
1 — supply hose to the radiator of the engine cooling system; 2 — expansion tank hose; 3 — hose holder; 4 — interior heater hose; 5 - coolant temperature sensor
Disconnect the wiring harness connector and remove the coolant temperature sensor (18mm wrench)
Disconnect the hoses from the holder 3.
Unscrew nine bolts 1, Figure 13-15, fastenings and remove thermostat housing 2 (head 8, extension).
For cars with K7M engine
Remove the air intake pipe of the air filter.
Remove the clamps and disconnect hoses 1 and 2, Figure 13-16, from the thermostat 3 (elastic clamp remover Mot. 1202 or Mot. 1448).
1 — expansion tank hose; 2 - supply hose to the radiator of the engine cooling system; 3 - thermostat
Unscrew bolts 1, Figure 13-17, securing the thermostat housing (head 8, extension).
Remove thermostat 2 with gasket.
The thermostat gasket needs to be replaced.
1 — fastening bolt; 2 - thermostat housing
1 — thermostat housing mounting bolt; 2 - thermostat
For vehicles with K4M engine Install a new thermostat housing gasket. Install housing 2, Figure 13-15, of the thermostat.
Install and tighten, without tightening, the thermostat housing mounting bolts.
Tighten the bolts 1. 9 securing the thermostat housing in the order indicated in Figure 13-18 to the required torque in two stages.
Replacing the coolant temperature sensor, checking operation
Links to pictures with the location of the sensors and their catalog numbers depending on the engine model: For the K7M engine For the K4M engine For the VAZ-11189, 21129 engine The
sensor is a thermistor with a negative temperature coefficient: the electrical resistance of the sensor decreases with increasing temperature. The ECU processes the sensor signal and sets the optimal enrichment of the working mixture when the engine warms up.
DTOZH
If the coolant temperature sensor or its circuits are damaged, the radiator fan constantly runs not only while the engine is running, but also continues to run after the ignition is turned off.
When removing the sensor, you must first drain some of the coolant from the engine (to the level of the hole for the sensor, see here). When replacing the sensor (if there is a new one), you can, without draining the liquid, unscrew the sensor and, plugging the hole with your finger, quickly screw in the new sensor. Fluid loss will be negligible.
The connection between the sensor and the seat is sealed with an aluminum or copper washer.
On K4M engine
The K4M engine coolant temperature sensor is installed in the thermostat housing.
Remove the air path resonator (see here).
Release the ECU wiring connector lock and disconnect it from the sensor.
Using a 21 key, unscrew the sensor from the hole in the thermostat housing
Installation is carried out in reverse order
On K7M engine
The K7M engine coolant temperature sensor is installed at the rear end of the cylinder head.
Replacement is carried out on a cold engine.
Release the ECM wiring connector lock and disconnect it from the sensor.
Using a 21 key, unscrew the sensor
and remove it from the hole in the cylinder head
Installation is in the reverse order.
Checking the sensor circuit
On K4M and k7M engines, the check is performed in the same way.
The terminals of the sensor wiring harness block “A”, “B1” and “B2” are marked on its body. By connecting the tester probes to terminal “B2” of the sensor wiring connector and to the engine ground, with the ignition on, we measure the sensor supply voltage.
The device should detect a voltage of 4.8–5.2 V.
If there is no voltage, disconnect (with the ignition off) the wiring connector from the ECU (see here) and use a tester to check the serviceability (open and short to ground) of the circuit (“+” sensor power supply) between terminal “B2” of the sensor wiring connector and terminal “ 13" ECU. If the circuit is OK, the ECU is faulty.
By connecting the tester probes to terminal “B1” of the sensor wiring connector and to the engine ground, we check the sensor ground circuit.
If the circuit is working properly, the resistance should be less than 1 ohm. If “infinity” is detected, there is a break in the circuit between terminal “B1” of the sensor wiring connector and terminal “73” of the ECU.
To check the sensor, disconnect the wiring connector from it. Using a tester, we measure the resistance between terminals B1 and B2 of the sensor for two values of coolant temperature - an unheated and a warm engine.
We compare the obtained values with the control ones in the table below. If the measured resistance values do not match, the sensor is replaced.
| Control values of DTOZ resistance at different coolant temperatures | |
| Coolant temperature, °C | Resistance, Ohm |
| 120 | 871±20 |
| 110 | 114±3 |
| 80 | 280±90 |
| 50 | 810±38 |
| 25 | 2250±112 |
| -10 | 12460±1121 |
| -40 | 75780±6970 |
On VAZ engines (shown on 21129)
On VAZ engines, the coolant temperature sensor is screwed into the thermostat housing on the left side of the cylinder head (in the direction of travel).
(intake noise muffler removed) 1 — DTOZH; 2 — thermostat; 3 - engine
Remove the intake silencer.
Release the lock and disconnect the wiring connector from the sensor
Using a 19mm key, unscrew the temperature sensor and remove it from the thermostat housing.
Checking the sensor circuit
You can check the sensor circuit without removing the sensor itself; just disconnect the connector from it.
Connect the negative probe of the tester (in engine free mode.
Turning on the ignition, use a voltmeter to measure the voltage at terminal “1” of the wiring connector (the designation of the terminals is marked on the wiring harness block).
The voltage at the terminal must be at least 12 V. If the voltage does not flow to the block or it is less than 12 V, it means that the battery is discharged, the power circuit is faulty, or the ECU is faulty.
After completing the voltage measurement, turn off the ignition!
Sensor check
Connect the tester (in ohmmeter mode) to the sensor terminals.
To connect a multimeter, pieces of polyvinyl chloride tube can be placed on the sensor terminals. Insert the probes of the device into them. This must be done carefully, since the sensor leads are very thin.
We fill a suitable container with boiling water, immerse the working part of the sensor in water and record the readings of the device at a temperature of about 100 °C. As the water cools, we measure the resistance of the sensor at temperatures of 90, 80, 70, 60, 50, 45, 40, 35, 30, 25 and 20 °C.
If conditions permit, readings can be taken at a lower temperature. The resistance of a working sensor should be close to the data indicated in the table:
| Coolant temperature, °C | Sensor resistance. Ohm |
| 100 | 177 |
| 90 | 241 |
| 80 | 332 |
| 70 | 467 |
| 60 | 667 |
| 50 | 973 |
| 45 | 1188 |
| 40 | 1459 |
| 35 | 1802 |
| 30 | 2238 |
| 25 | 2796 |
| 20 | 3520 |
| 15 | 4450 |
| 10 | 5670 |
| 5 | 7280 |
| 9420 |
Replacing the thermostat for Renault Logan 8 and 16 valves
To replace the thermostat, we will need a standard set of tools, a new thermostat, possibly sealant and several 5-liter containers for draining antifreeze.
Replacement of the thermostat is carried out only when the engine has completely cooled down!
Replacing the thermostat on an 8-valve engine and a 16-valve engine is no different, except that on 16-valve engines, regardless of volume, the thermostat is located in a less convenient place to work.
Location of the thermostat on a 16-valve engine
Another difference during the replacement process is the preparation of free space. On eight-valve engines, it is enough to remove the air duct pipe, and on 16-valve engines, you will also have to remove the intake system resonator. Neither one nor the other will cause problems.
If the car is equipped with a hydraulic booster, unscrew the power steering reservoir and, without disconnecting it from the system, move it to the side.
After dismantling the pipe, unscrew the screws securing the thermostat housing cover in this order, having previously placed a container under the module to drain the antifreeze:
The procedure for unscrewing the thermostat housing cover screws
At the same time, we release the bolts unevenly to direct the flow of liquid into the container: bolt 1 by 3 turns, bolt 2 by 2 turns, bolt 1 by 1 turn. Now pour the antifreeze into the container, helping with a flat screwdriver:
We wait until all the liquid has drained.
In total, about 3-3.5 liters of antifreeze should drain. Now all that remains is to completely unscrew the thermostat housing cover, remove it and check the condition of the seal. Perhaps it will still be useful. We install the new thermostat with a spring to the engine, install the seal and tighten the mounting screws.
Tighten carefully, trying not to deform the body. After this, we put the hose on the valve fitting to bleed the air, and lower the other end of the hose into the expansion tank. This way we won’t spill a single drop of antifreeze and are guaranteed to bleed air from the system.
Now all that remains is to pour antifreeze into the expansion tank, warm up the engine and monitor the fluid level. After warming up, add the required amount of liquid to normal.
Thermostat
when you get tired of the cooling engine... it probably started in the winter, but everything was reduced by low temperatures.
Maybe we don’t live in the north, the Volgograd region is still not the Krasnodar region. There are frosts down to minus 40 in winter, not often, but still... so there you go. I began to notice that while driving the engine heats up very slowly, or even “cools down”, i.e. from four working “sticks” the temperature drops to two! but now it’s still summer, even though it’s September 3rd today, the temperature during the day is 23-25, at night 10-15. A car cannot suddenly cool down at a speed of 120 km/h in 5th gear with 4000 rpm when you have been driving for several hours. and my commute to work is 10 km, and at that time the engine did not heat up to 4 sticks. something is wrong(((after searching our forum, the rest of the Internet with video instructions on YouTube, I ordered a thermostat. Choosing a thermostat was not easy. The original Renault costs about 1200. but the question is, why is this needed if it refuses. There is a video on YouTube on choosing a thermostat for Logan, so they said, they say there are budget ones, there are better ones, but more expensive, and then there is the original. The original is good, enough for a year or two (!). A year or two? What are you saying? and then the phrase - on such machines - this is a consumable. The last phrase saddened me, but among our colleagues many have already changed. The choice fell on the Vernet company, France, since this company is the only one of all that produces only thermostats and temperature sensors. Nothing more. The history of the company begins in 1927 Well, they should know everything about thermostats!? Let's see. So the emex price is 447 rubles. In the existential it's about 500, the autodoc is as much as 1200 and kopecks. I was thinking about a budget option like Luzar, but there are a lot of negative reviews on the Internet about this office, although there are others I had no complaints about the cars. In general, I bought what I bought. Gasket included:
The cartridge itself is quite small:
So off to the garage! The first rule is that it is very advisable to cool the car, it is boring to work with hot antifreeze, and the exhaust manifold is nearby and takes a long time to cool down. all this increased the time of dancing with a tambourine and smoking breaks. antifreeze drain. According to the book, you need to disconnect the lower pipe from the radiator and dance under the bottom with a basin, catching antifreeze with dirt, which is washed off from the engine. There are no drain or fill plugs on the radiator. I looked at the drain method on YouTube and improved it:
In general, we use pliers to disconnect the clamp of the upper bypass pipe on the expansion tank, remove the pipe and direct it into a suitable vessel. in my case there was a 3-liter beer bottle - this is the required volume (there is about 5 liters of antifreeze in total, but you don’t need to drain it all) and there is always such goodness in bulk, especially in the garage. my partner holds the bottle and directs the pipe, and I applied pressure to the freed nipple on the expansion tank from the autocompressor. antifreeze flowed merrily into the bottle. important! There is no need to tightly insert the compressor nipple into the expansion tank, just hold it with your hands. The coolant already flows well, and the air pressure can be adjusted or stopped abruptly. In total, about 2.7 liters were drained:
Next, we dismantle the resonator, tie up the air intake, and remove the eye-bracket next to the probe:
Yes. antifreeze is clean, without sediments or suspensions. then sex with unscrewing three bolts of the thermostat housing. in my case, the matter was complicated by a hot fuel rail cap; I had to put a glove on my left hand. The top two bolts can be unscrewed without problems, but the bottom one is very inconvenient, it is better to use a small ratchet. and voila:
Next, take out the diseased element and insert a new one. photo of the original:
Thomson company. I didn’t find it on sale. probably only available as original Renault. The assembly process is reversed. Filling with antifreeze using a bleed valve. when the antifreeze no longer leaves, we place a silicone tube on this valve, preferably with thick walls, the other end of which is lowered into the expansion tank. your partner holds the end of the tube so it doesn’t fall out of the tank, and you start the engine. antifreeze from the bypass valve, along with air, begins to spit into the reservoir. Be careful, the coolant heats up and the pipe becomes hot! Next, add the remaining antifreeze into the tank, it appears somewhere at the level of the bypass pipe, screw on the tank cap, then remove the tube from the valve and quickly screw on the cap. wipe off any spilled coolant. the loss of antifreeze amounted to 100-150 ml, and this was the residue in the pipes when the thermostat was turned up and there was a little splash when it was filled. Then we make a trip so that the thermostat opens completely, and the coolant level in the reservoir returns to normal. if necessary, bring it to the level, naturally. and a postscript. Naturally, for the purity of the experiment, I connected an Elm 327. The thermostat began to open at 76-78 degrees. and according to the passport it should start opening at 89, and full opening at 99. That’s why the engine did not warm up as expected. good luck everyone! Well, finally I connected the ECU with Elm and it became possible to check the operations performed in named values. The experiment was carried out at idle speed, the car generally did not move. I started the engine and the temperature began to gradually rise. 50,60...80...I periodically check the upper pipe with my hand - it is within normal access. The temperature reached 97, the pipe began to warm up, and the thermostat apparently opened completely, as it should be at 99 degrees. The temperature began to drop - the pump mixed coolant from a large circle, the temperature dropped to 82 degrees, which is understandable, the thermostat is not a switch, the system is inert, it will not close immediately, but from 82 degrees it began to rise again, i.e. The thermostat closed the big circle again. That's it, end of the experiment, I'm happy with how the thermostat works. And from driving experience: I left work, started the engine, warmed it up for three minutes and drove off. The long-awaited 4 sticks caught fire after three kilometers of travel, the stove is frying, the car is moving. And even though it’s not so cold here today—about plus 5—I got the long-awaited effect. Good luck to everyone. 04/03/2018. It so happened that today marks 2 years 6 months since the date of writing this bortovik, i.e. with replacing the thermostat. Today, I tested its work. One problem was that my Elm327 (already the second in a row) constantly lost connection and picked up, so the data came in steps, which was frustrating and made it difficult to experiment. So. Initial conditions. Day April 03, 2018. Outside air temperature is +7.8 degrees, wind is 5-7 m/s (data from the weather station at work), the wind direction is “backward” of the car. The coolant temperature at the beginning of the experiment was 21 degrees (it had not cooled down completely since 8 am). I take the tablet, plug it into the Elm connector, connect everything together, start the engine and the stopwatch. To create a load on the engine and speed up warming up, I do “all inclusive”, turning on PTFs, DS, rear PTFs, heated seats, heated rear window and mirrors (or maybe I forgot about them... but I was planning to). time 2 minutes, temperature 44 degrees, creeping up; 2 min 40 sec, T=51 degrees, “2 sticks” lit up; 6 min 30 sec, T=70 degrees; 8 min 55 sec T=82 degrees and “4 sticks”; hereinafter in the text the time was recorded when Elm came to life and updated the data. 11 min 10 sec, T=88 degrees, the big circle is still closed; 12 min 20 sec T=93 degrees; the pipe begins to heat up; 13 min 40 sec T=96 degrees (in reality the peak should be 97-98 and then a sharp decline, but Elm did not allow us to see a continuous graph); 13 min 57 sec, T=81 degrees - the thermostat opened and let in a flow of cold coolant; 14 min 49 sec, T=83 degrees - the thermostat is closed, the coolant replaced by the first opening begins to warm up; 15 min 17 sec, T=87 degrees; 16 minutes 38 seconds - stop burning gasoline!)))) end of the experiment. The thermostat went to the second cycle and so on until the coolant temperature in the small and large circles was completely equalized. Yes. The additional insulation under the hood was removed, and after the experiment I removed the insulation from the bottom of the muzzle. conclusion: after 2.5 years of daily (with rare exceptions) operation, the thermostat operates normally in the specified temperature range. no replacement required. I sympathize with everyone who was unlucky with Vernet and who bought it after reading this on-board report. If so, sorry. Perhaps there was a fake or a defect, but most likely the former. I have no complaints about this thermos. I check it periodically, before that there was a check in November-December 17th, before that maybe in January-February 17th, everything is as always in winter, when it’s cold))) good luck to everyone.
How to check the Renault Logan thermostat, signs of malfunction
There is no need to remind you that the task of any thermostat, regardless of its design and characteristics, is to direct coolant through a small circle, bypassing the cooling radiator, for quick warm-up, and after the engine warms up to operating temperature, pass antifreeze through a large circuit, including the radiator. Since the characteristics of thermostats may be different, the opening time of the thermostat valve is also different.
Analogue of the Gates factory thermostat
The Renault Logan factory thermostat works (should work) at a temperature of 89 degrees, which for some regions is not enough to fully warm up the engine. In this case, it is recommended to install a “hotter” thermostat, which opens at a temperature of 95-97 degrees, ensuring more complete warming up of the engine.
Factory replacement schedule
According to the service book issued by AvtoVAZ, the timing belt should be changed every 50,000 km. In this case, adjustments should be made every 0 km.
But since the Largus is equipped with a Renault engine, these data do not coincide with those written in the Renault service manual.
So, who to believe in this case? It is worth referring to the factory manual, which is published in French for the K4M engine that is installed on Largus.
Thermostat on Logan does not work, symptoms
There are not many signs of a thermostat malfunction, but each of them will eloquently tell about the problems of the cooling system:
- The engine takes a long time to warm up in cold weather, the heater is cold and blows cold air. In this case, the thermostat valve could be stuck in the open position and constantly circulate antifreeze in a large circle. It is clear that in cold weather and with a radiator, the liquid will take a very long time to warm up, which is undesirable. This is bad not only because it is cold in the cabin, but also because the oil does not warm up to operating temperature and does not do its job as expected. As a result, we have increased wear of the piston, liners, camshaft and, in general, reduce engine life.
- Engine overheating. If the engine begins to overheat without heavy loads, the thermostat is most likely to blame. Of course, you can find a thousand other reasons for overheating - a clogged radiator, poor circulation, failure of the temperature sensor, late activation of the radiator cooling fan, drop in antifreeze level, tired pump. But all this can be easily checked without any dismantling. But to check the thermostat you will have to remove it.
- The thermostat valve works intermittently and is unstable - it either sticks or opens normally. The worst situation is when there are no stable signs of a malfunction. This also includes those cases when the valve is stuck in an intermediate position.
Checking the Renault Logan thermostat
To check the operation of the Logan thermostat, you can follow two paths - remove it from the engine, or not remove it. Most often they prefer the second option as the fastest, but not the most accurate. The first option involves dismantling the thermostat, visual inspection, heating the element in a kettle or pan of water with constant temperature measurement. This is how you can accurately determine at what temperature the valve opens.
As a rule, it is easier to do. There is no need to drain the antifreeze and remove the housing. It is enough to start a cold engine and monitor the temperature of the upper radiator outlet pipe. In this case, the lower pipe will warm up quite quickly. The top one should remain cold until the engine reaches an operating temperature of 86-89 degrees.
Source
