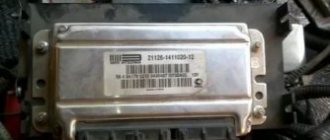
Currently, control units of the ME17.9.7 BOSCH and M74 brands from Itelma are used in cars of the Granta, Kalina-2 and Priora families.”
In 100% of cases, Priori has a BOSCH controller programmed to control the dashboard via a CAN bus. The M74, which is now installed in Grant cars (version 11186-1411020-12), has the same property.
If we talk about the configuration with engine 21127, then behind the glove compartment of Kalina-2 there is a control unit called “M74”. It should be noted that the ME17.9.7 and M74 units are built on different hardware platforms. In this regard, the software they contain is different and incompatible, although it performs the same functions. Simply replacing the controller by installing a BOSCH unit instead of M74 (M74CAN) will not work. Improvement will be required not only at the software level.
Itelm also has its own new developments. For example, the M75 block, which was first released in 2012. When using the ME17.9 block, the Priora 21126 engine complies with the Euro-4 standard. It is assumed that after installing another ECU, the engine can enter the Euro-5 category. For these purposes, the M75 was developed. In addition, this device is completely interchangeable with BOSCH ME17.9.7.
The history of ECU units produced by NPP Itelma goes back more than 14 years. Early versions were designed for Euro 2 compliant engines, and any controller produced today controls a Euro 4 or higher compliant engine.
Lada Kalina was equipped with an electronic control unit without hesitation, since it can easily be flooded and your brain will explode. The designers did not think that our people could put glasses of drinks next to the ECU and thereby endanger it. But many motorists use the method of moving the unit to a safer place.
Video transmission electronic control unit (ECU)
The video contains a plot and recommendations for moving the Lada Kalina electronic control unit to a safe place where it will not be accessible to accidental contact with liquids.
Location
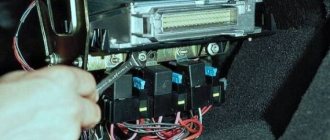
The ECU on the Lada Kalina is located under the center console of the car. You can see it by removing the side cover of the front passenger's footwell air duct. The block is attached to a bolted connection and securely fixed in its place. The connectors of the unit are also tightly inserted into their place and secured with a special lock, which prevents the connector from spontaneously disconnecting from the ECU.
It is quite difficult to call this location of the engine control unit successful, since it is located exactly under the heater radiator and if there are leaks in the heater radiator, the coolant gets directly onto the engine block, which causes irreversible consequences and, of course, a breakdown or short circuit.
In some cases, there is a coolant leak at the ECU, it can be repaired, but most often it is necessary to replace the unit.
Dismantling and installation of the block
Most drivers who searched for a location mainly used the glove compartment as a new location for the part. There are 2 mounting options: under the glove compartment or inside the bend of this compartment. In the first case, you will need a corner and several screws.
The procedure for obtaining the ECU:
- Armed with a Phillips screwdriver, you need to remove the panel from the front passenger seat.
- Remove the driver's side plastic panel. The block itself should now be visible.
- To remove the part, you will need to unscrew the mounting screws. Using the same screwdriver, unscrew the fasteners.
- After unscrewing the fasteners, you need to pull out the part. Pull it towards you; if it doesn’t give in, you need to move the block a little from side to side and try again. You can push it from the other side.
After the block has been removed, you can begin installing it in a new location.
Now it’s time to move on to the new installation location. The first option is quite simple:
- You will need to make a hole in the left wall of the glove compartment for a self-tapping screw.
- To mount the ECU you will need a self-tapping screw and a corner. The corner is attached to the part and secured with a bolt, screw or self-tapping screw through the glove compartment.
- On the other hand, it does not need to be secured, since it rests against the wall. The option is quite good and can be completed without unnecessary alterations within 40-50 minutes.
The second option is to store it in the glove compartment. Not the most convenient placement, but still usable. There is a small space under the glove compartment, the entire ECU can fit there.
Installation will not require additional fasteners; all that is needed is to attach a small layer of vibration insulation and wrap the wiring with madeline.
After this, the block can be placed in a secluded corner away. You can reach this place only with a strong desire and on purpose, so the block is out of danger.
What kind of ECUs are there on Kalina?
Below is a table with engine controllers that were installed on the Lada Kalina.
| Manufacturer | Model | vendor code | Engine | Throttle |
| BOSCH | 7.9.7 | 21114-1411020-40 | 1.6l, 8 cl. | Mechanical |
| BOSCH | 7.9.7 | 1183-1411020-20 | 1.6l, 8 cl. | Mechanical |
| ITELMA | January 7.2 | 11183-1411020-22 | 1.6l, 8 cl. | Mechanical |
| BOSCH | 7.9.7 | 11194-1411020-10 | 1.6l, 16 cl. | Electric |
| Avtel | January 7.2 | 11183-1411020-21 | 1.6l, 8 cl. | Electric |
| Elvar | January | 11183-1411020-52 | 1.6l, 8 cl. | Electric |
| Avtel | January M73 | 21114-1411020-41 | 1.6l, 8 cl. | Mechanical |
| ITELMA | ITELMA | 21126-1411020-08 | 1.6l, 16 cl. | Electric |
Let's sum it up
If symptoms appear, the owner of LADA Kalina should contact service as soon as possible, because the cost of repairs can be significantly reduced. It is advisable to independently carry out the procedures we have indicated if the owner of LADA Kalina has a sufficient level of experience in dealing with automotive electronic devices. To do this, at a minimum, you need to know where the ECU is located, as well as how to remove the ECU. However, a 100% positive outcome of the event should not be expected. In case of failure, we recommend contacting the service specialists.
Why doesn't the ECU work?
Quite often problems occur that the engine control unit stops working; to find out the reason for the failure of the ECU, you need to inspect it:
- Check to see if the connector has come loose from the unit; this happens quite often after installing a radio, or replacing a heater radiator, etc.
- Check for ground on the block. Sometimes it happens that after some work, a person forgets to fasten the mass necessary for the operation of the unit.
- Check for signs of coolant leakage on the engine block.
If such problems are not found, it is necessary to dismantle the engine block and troubleshoot, repair or replace it.
Checking the circuit
Before checking the circuit, prepare a multimeter in advance and set it up to work. Next, open the hood and disconnect power from the idle air control. Then you need to set the voltmeter operating mode on the multimeter. The black probe needs to be connected to the ground of the car, and the red one is connected one by one to all the terminals on the block.
Using the help of a second person, start the engine and watch the multimeter readings. The parameters must be within 12 volts. If the multimeter shows a value that is significantly lower than expected, the cause must be sought in the battery, and when the voltage is completely absent, the cause must be sought in the wiring or in the engine control unit
If during verification it turns out that the circuit is working properly, you can focus on the sensor
Replacing the ECU
Replacing the engine controller on Kalina is quite simple according to the instructions presented below.
- Remove the negative terminal from the battery;
- Unscrew the cover of the side air duct of the front passenger's feet;
- Disconnect the connectors from the controller;
- Unscrew the screw securing the ECU on the left;
- We take out the controller by pulling it towards ourselves, as if on a sled;
- Unscrew the controller from the pad;
- Installation is carried out in the reverse order;
Source
Self-check functionality
In most cases, when problems arise with the TPS, the “check engine” error is displayed. By connecting a diagnostic device, you can identify its code and causes of the error. It happens that for some reason the “check” does not light up, in which case you cannot do without using a multimeter for diagnostics.
The first step is to make sure that power is supplied to the sensor itself. To do this, you need to disconnect the chip with wires from the device and measure the contacts with the ignition on. If power is supplied, then the device itself is inspected.
Visual inspection of the sensor. In this case, we are talking about checking the internal components of the product. Most often, the slider loses contact with the resistive layer.
As mentioned above, if the causes of malfunctions in the sensor are identified, it must be replaced.
Where is the controller on Kalina
Currently, in cars of the Granta, Kalina-2, Priora families, control units of the ME17.9.7 BOSCH and M74 brands are used.
In 100% of cases, Prioras have a BOSCH controller programmed to control the dashboard via the CAN bus. The M74, which is now installed in Grant cars (version 11186-1411020-12), has the same property.
Speaking of the configuration with the 21127 engine, behind the glove compartment of the Kalina-2 you can find a control unit called “M74”. It should be noted that the ME17.9.7 and M74 blocks are built on different hardware platforms. In this connection, the software in them is different and incompatible, although it performs the same functions. Simply replacing the controller by installing a BOSCH unit instead of M74 (M74CAN) will not work. Improvement will be required not only at the “software” level.
Itelm also has new developments of its own. For example, the M75 block, which was first released in 2012. Using the ME17.9 block, the Priora 21126 engine complies with the Euro-4 standard. It is assumed that after installing another ECU, the engine can go into the Euro-5 category. For these purposes, the M75 was developed. Moreover, this device is completely interchangeable with BOSCH ME17.9.7.
The history of ECU units produced by NPP Itelma goes back more than 14 years. The first options were intended for engines that meet Euro-2 standards, and any controller produced today controls a motor that meets the requirements of Euro-4 and higher.
Welcome! Controller - popularly it is simply called the brain, but scientifically it is briefly called the ECU, that is, the Electronic Engine Control Unit, it performs all electronic functions in the car, starting from instrument readings (Thanks to it, you understand how many revolutions it gives to the engine at one time or another, and you also understand the speed, it is only with the help of it that it is recognized, but also the sensor itself, which transmits this information to the controller) and ending with the very operation of the engine, and therefore if it fails, then all the instruments first of all stop giving readings to you and the car also won’t start, but by changing it to a new one, the car will come back to life again and will drive as if nothing had happened, but it’s best to change it to exactly the same one as it was before, it’s just that all the controllers are configured for certain sensors and for certain engines, but still, if you want, you can install a different model, but you need to make sure that the connector for the wire block in it is exactly the same as on the old one and it is desirable that it has the same dimensions, in addition, you will either have to calibrate it online, or upload a ready-made program (at your discretion and according to your financial capabilities), people also call calibration firmware so that you immediately understand what we are talking about.
Note! To carry out the work of replacing the controller on a car, you will need to stock up on: Screwdrivers, or to be more precise, you will need a Phillips screwdriver with which you will need to unscrew the screw securing the right facing, as well as a wrench you will need with which you can remove the minus terminal from the battery!
Summary:
Where is the controller (ECU) located? On all cars it is installed differently and even on Kalina cars, depending on the year of manufacture, it can be in different places, for example on Kalina 2 (We are not considering those in this article) it is located under the carpet and, unlike the first Kalina, completely in another place, on the first Kalinas, unfortunately, the controller is so poorly located that when the stove faucet fails (When it starts to leak), it begins to flood, in connection with this, all its electronics quickly perish and therefore, in a very short time, the controller becomes unusable and must be replaced, for clarity, where it is located on the first Kalinas, you can see in the photo below, the arrow indicates the right facing of the floor tunnel and if you remove it, you will see the controller before your eyes.
Note! Let us give you some advice: when buying your first Kalina, we recommend that the first thing you do is take care of the controller, namely, move it from one place to another, otherwise if the stove faucet starts to flood it, then you will have to look for money somewhere for a new one, and a new controller costs a lot money and therefore you need to take care of the one you have so that you don’t have to replace it with a new one (In this article we will also touch on the topic of transferring this part, so read everything carefully)!
When do you need to change the controller (ECU)? In fact, it’s not so easy to come across a broken controller, because they actually live almost their entire life while the car itself is driving, but it can still either burn out or, due to an unfortunate location, be completely filled with water, coolant, etc. ., maybe, like with the first Kalinas, this happens (on them the controller is located very poorly from the factory), the symptoms of its failure are the loss of communication with the ECU (That is, you connect to it and the computer simply does not see it), as well as incorrect operation of the engine, incorrect operation includes engine tripping, misfires in the ignition system, incorrect operation of fuel injectors (They can either pour and fill the engine in connection with this, or they simply turn off and will not work) and the car may not start, but after these symptoms appear on the ECU, you should think about it last, especially if you have moved it to a place where there is no moisture, just as we have already said, these control units are eternal and almost never fail.
Note! The best way to understand whether the control unit is working or has failed is to install exactly the same unit from a known-good car; unfortunately, it is very difficult to determine its condition simply by looking at it; in addition, the unit can even communicate and show that it is in the car does not have any errors, although it will not start the car itself, or it will, but the car will not work correctly and will not develop its full potential and power!
Chip tuning of the multimedia system
If we talk about the firmware of all electronic systems of the Lada Kalina, then we should not forget about multimedia, which can also be subject to tuning. The Lada Kalina MMC firmware is updated to change the appearance of the menu and expand its capabilities. It differs from working with an engine in that it can be done independently at home.
In this case, you will need an SDHC memory card and special software on your computer, which must be transferred to this flash drive in unzipped form. Then, following the instructions for flashing the MMC (usually they come with the program), perform all the necessary steps in sequence.
What can be obtained as a result of modernization:
- faster responses to commands when pressing buttons, and with touch screens - clearer hits;
- installation of a Bluetooth communication system, which makes it possible to play music not only using a USB port;
- improved performance of USB storage devices—fast search and high-quality playback of recordings;
- embedding a navigation system, if one is not included in the kit. MMS Lada Kalina is adapted for navigation installation.
It is important that all changes made by software settings to the operation of the engine and MMC microcircuits can be easily canceled. To cancel engine firmware during operation, specialists save all initial parameters in a special reserve
If necessary, if the client is not satisfied with the result of the modernization, everything can be returned to its place in the same short time.
Quality assurance
The operation of the Lada Kalina engine is controlled by an on-board computer, which, in accordance with sensor readings, selects the optimal mode depending on what program is included in it. The program itself is developed by the manufacturer. In the case of Kalina, the third version of the firmware has now been released, which significantly added dynamics and reduced engine power losses during operation of the air conditioner.
However, connoisseurs prefer Lada Kalina firmware from third-party software manufacturers, the so-called Lada Kalina engine firmware. At the same time, it becomes possible to significantly improve the characteristics of the car without physically replacing parts and at the same time invest at a minimum cost.
The main difference between the tuning firmware is an increase in vehicle dynamics at low speeds, while reducing fuel consumption. This is especially noticeable when driving on the highway. In addition, chip tuning of Lada Kalina 8 valves optimizes engine performance at high speeds.
| ECU type | Engine capacity | Power before/after | Torque before/after | Price, rub. |
| January 7.2 | 1.6 8V | 82/90 | 120/136 | 3000 |
| January 7.2+ | 1.6 8V | 82/90 | 120/136 | 3000 |
| Bosch M7.9.7 | 1.6 8V | 82/90 | 120/136 | 3000 |
| Bosch M7.9.7+ | 1.6 8V | 82/90 | 120/136 | 3000 |
| M73 | 1.6 8V | 82/90 | 120/136 | 3000 |
| M74 | 1.6 8V | 82/90 | 120/136 | 5000 |
| M73 | 1.4 16V | 89/98 | 127/144 | 4000 |
Once the Kalina 1.6 8kl firmware is installed on your car, you will be able to experience the following improvements:
- The car instantly responds to pressing the gas pedal and feels more confident at low speeds.
- The speed can be easily accelerated by jumping through gears, for example, 1-3-5 gears.
- Driving around the city can be easily done in 3rd or 4th gear.
- On the highway, fifth gear becomes relevant at not too high speeds (80 mph).
- A working air conditioner practically does not reduce engine power.
- Engine idling becomes smoother and quieter.
Today, the most current firmware can be considered chip tuning Lada Kalina 1.4 and chip tuning Lada Kalina 1.6 8kl, which most fully optimize engine performance. It is worth noting that Kalina 2 firmware will not solve all the problems of the car, especially if it is no longer new. But still, for a fairly small amount you can revive the engine of your steel friend, breathing new life into it and thoroughly adding agility.
How to replace and transfer the controller (ECU) to a VAZ 1117-VAZ 1119?
Note! When the ECU is removed, inspect it; there should be no cracks; if necessary, disassemble it by removing the cover from it (there you will need to unscrew the side screws) and when the cover is removed and the board itself is in front of your eyes, then the first thing inspect it and there should be no moisture on it and it should be in normal condition and there shouldn’t be anything torn from it either!
Removal: 1) First, turn off the power to the entire on-board network, otherwise if water gets on the controller or on the wire block when you disconnect it, it will immediately disable it, or the wires will burn out, but even without water the wires can close , so still protect yourself by removing the minus terminal from the battery for this (For how to do this, read “in this article” in paragraph 1), then from the side of the passenger seat, or to be more precise, in the place where passengers put their feet climb up and there will be a side lining of the floor tunnel on the side, it is fastened with one screw, you unscrew it and then remove the lining as shown in the small photo in the example of the left lining.
2) As soon as the right facing is removed, look for the control unit at the very bottom, it is attached with one screw to the heater body (This screw is indicated by an arrow in photo 1), you unscrew this screw and then remove the controller along the guides when it is removed , disconnect the block of wires from it, to do this, pull out the lock that secures the block to the control unit (see photo 2) and after that the block can be disconnected from the controller and thus you will have it completely removed.
Installation: The new controller is installed in the reverse order of removal, but there are some nuances during installation, firstly, the immobilizer (This only applies to the new control unit, so if you don’t change it, you don’t need to do anything) unless you have it disabled you will have to retrain (For information on how to do this, read the article: “Training the immobilizer on a VAZ”), and secondly, if you are going to install the controller in the same place (Which we do not advise you to do), then make sure that the controller brackets fit in ( The brackets are indicated by red arrows; in the photo, by the way, the heater has been removed from the car for clarity) exactly into the guides of the heater housing.
Additional video: Be sure to check out the video below, it tells you why you need to move the control unit from its regular place, and also shows where it can be secured and how all this is done.
Greetings, dear friends and readers of our site. In today’s article I would like to talk to you about the ECU controllers for Lada Kalina 1 and 2. Well, if you look into the very structure of this post, we will talk about where the ECU controller is located, how to dismantle it yourself, and of course interchangeability controllers.
The procedure for checking the short circuit
So, there are signs of a malfunction, you should check it.
First of all, the coil must be dismantled. For this you will need:
- prepare a ten-point socket wrench;
- disconnect the terminals on the battery;
- open the protective casing covering the motor;
- press the locking device out of the plastic, disconnect the wiring from the coil terminal;
- remove the fastening bolt;
- pull out the ignition coil.
An inspection is now underway. It should not show any cracks, melts or leaks on the caps and body parts. Only slight smokedness is allowed. Electrics can be checked in several ways. Having installed a working spark plug, we check the device for the presence of a “spark” on the car body. If there is no spark from the coil, then it is quite possible that the short circuit has lost its functionality. In such a situation, you should check the gap in the spark plugs. All work should be performed with rubberized gloves to completely prevent contact of the body or tool with the car body or engine. The fact is that the coil is capable of generating voltage in the range of 20 - 40 kV. Another option is to remove the coil and install it on a good cylinder on another car to perform a drive test. If the short circuit is faulty, it will immediately appear. The third method is instrumental.
The main reasons why the ignition coil breaks are considered to be high temperatures or overheating, which contribute to the formation of cracks. There is a high probability of short circuit failure due to the accumulation of moisture or the formation of corrosion, frequent switching on of the ignition without subsequent starting of the engine, prolonged overloads when an unsuccessful attempt to start the engine.
Where is the ECU controller located on the Lada Kalina
So, the Kalina engine control unit is located at the very bottom of the console, between the floor and the heating radiator. It is accessible from the passenger's feet.
To do this, you need to remove the plastic cover, which is attached with one screw. We unscrew it and move the lining forward along the direction of the car, after which it should completely disengage. We remove the cover to the side. Below it we see the following picture.
Location of the ECU controller on Lada Kalina
Diagnostic options for LADA VESTA electronic control units
The Lada Vesta uses a CAN-type interface, through which signals are transmitted between vehicle systems. Problems are diagnosed using an ELM327 scanner using the OBD2 protocol. List of special functions:
- Rebooting the engine control unit, resetting cruise control, speed limits.
- Training of an automatic transmission during operation. Resetting settings.
- Adaptation of steering sensor, acceleration.
- Reset instrument panel adjustments, multimedia.
- Removing protection, initializing VIN.
- Resetting the adaptation of the power steering, speed sensor, steering angle.
- Download and install one of the scanning programs.
- Carry out diagnostics of the control unit according to the adapter instructions.
- Receive and decipher codes.
- Perform adjustments or repairs to eliminate malfunctions of the device.
- Check again for errors.
Photo source: https://www.drive2.ru/l/551830318525449864/
The scanner is capable of monitoring vehicle modes and parameters while driving via OBD2.
Why the ECU on the Lada Kalina does not work - the main reasons
One of the most common problems that Lada Kalina owners encounter is ECU failure. Let's look at the main reasons for controller failure:
- Failure due to a short circuit in the on-board network. Here, you can get by with little effort and solder the main resistors, or it will lead to complete combustion of the element.
- If liquid gets on the unit panel, which will lead to complete failure. Usually the ECU is filled with antifreeze.
- Illegal actions of third parties that will lead to ECU failure.
- Other reasons not previously stated.
All these reasons will serve as a reason for diagnosing and dismantling the car control unit.
All engine sensors 21116, 21126, 21127
Each sensor is equipped with a connector fixed to its body:
The second contact of the sensor is the housing itself
The smooth operation of the engine is ensured by a set of elements:
The air flow sensor (AFS) is part of the intake system. Not used on engines 21127. The part is designated as 11180-1130010;
Two throttle position sensors - variable resistors, built into the throttle pipe;
The antifreeze temperature sensor is a thermistor with a screw fastening, screwed into the thermostat housing. Catalog number – 21120-3851010;
The knock sensor is a piezoelectric element with two leads, mounted on the cylinder block body. Catalog number – 21120-3855020;
Two oxygen sensors (OS), diagnostic and control, are equipped with a screw mount and are screwed into the exhaust pipe housing. 21074-3850010 is the designation of each module;
The speed sensor is an electronic module, mounted on the top of the gearbox housing. Catalog designation – 21700-3843010;
The crankshaft position sensor (CPS) is an electronic module mounted on the oil pump housing. Designated as 21120-3847010;
The phase sensor is an electronic module designated 21120-3706040. 21116 is not used in the engine design;
Oil pressure sensor - has a screw mount, designated as 11180-3829010.
The element indicated under number “9” will be installed at different points depending on the configuration (see photo). The third figure shows where sensor “8” is attached:
The design of the resonant intake system uses a separate sensor that measures air temperature and pressure. The element is designated as 21800-1413010:
Engine air pressure and temperature sensor 21127
The design of the throttle valve modules was not considered. The bug has been corrected below.
For different Kalina-2 engines, their own module, unique in design, is suitable, containing an electrically driven throttle valve:
21126-1148010 – the element is intended for internal combustion engine 21126;
21127-1148010 – part of the engine 21127 design;
21116-1148010 – part of the intake tract of the 8-valve engine (21116).
The module body is made of light alloys and is equipped with a connector to which the contacts of the sensors and the electric motor are connected.
Engine throttle assembly 21126
If necessary, it is better to replace the module as an assembly rather than try to repair it.
How to remove the ECU on a Lada Kalina - step-by-step instructions
In order to remove the ECU unit on a Lada Kalina, you must perform the following procedure:
- First you need to unscrew 2 screws, the location of the first is shown by the arrow. The second is at the same level on the engine side. Before doing this, you must remember to remove the terminal from the battery. After unscrewing the screws, do you need to pull the block towards the passenger door? and he must leave from there along the guides. Sometimes it happens that the wires rest against the carpet. Then they need to be corrected.
- In order to remove the connector and disconnect the unit from the wires, you first need to: pull the connector lock to the side. The latch is a bracket. I think you can easily find it on the connector.
Sensor selection
You need to purchase a new speed sensor to avoid problems. Visually, the sensor intended for the Priora is almost no different from the Kalina element, and many sellers claim that one model can easily be replaced by another model. Sensors that look similar have completely different fillings, and after installing an inappropriate element, frequent malfunctions in the operation of the ECU and incorrect readings on the speedometer will occur. Therefore, before purchasing, you need to carefully study the old part, rewrite the catalog number and purchase exactly the same model.
https://www.youtube.com/watch?v=7drLW_Qlgj4
The ECU on Kalina is filled with antifreeze - what to do?
After the block filled with antifreeze has been removed, its initial inspection should be carried out. For these purposes, it is necessary to remove 4 screws using a star screwdriver. Then you should slowly remove the control board for a visual inspection. The most common failure is the burnout of the ignition coil output switch. In this case, repair will not help.
As a result of such a malfunction, the Lada Kalina starts working on only 2 cylinders, and sometimes refuses to start at all. You can cope with a similar problem in a stationary workshop. There they will remove the damaged element, wash and dry it. The second most common problem is board burnout. It is not difficult to detect such a defect: the characteristic blackening of the board will leave no doubt.
Is it possible to repair the ECU in this case? The answer to this question can only be given by a service center, but experience shows that repairs will not help here. A complete replacement is required. It happens that sometimes the brain circuitry is slightly damaged. If this happens, then the car owner can get off easy. To restore the car to working order, you will need some minor repairs:
- wipe the block with a dry cloth;
- rinse with WD-40 several times and blow it out with a compressor;
- rinse several times in alcohol and blow again with a compressor;
- dry well, otherwise the Lada Kalina will not move;
- drying takes at least 1-2 hours.
Troubleshooting
If the engine suddenly starts to “trouble”, then the first thing you should pay attention to is the appearance of the ignition coil. A sign that the part has overheated and eventually burned out are signs of deformation on its body, cracks and irregularities on the plastic surface
To check the ignition coil, you need to use a multimeter, switching the device to resistance testing mode. After this, the contacts of the multimeter must be simultaneously applied to the first and third contacts of the part and thus find out its resistance. If the coil is working properly, then the device should show a value of about 0.5 Ohm with a small tolerance.
The next step in diagnosing the ignition coil is to check the secondary wiring of this part. To perform this procedure, you need to touch the spring located inside the ignition coil cap with a red probe. The black probe must be connected to the second contact. If the device readings are far from the value of 340 kOhm, then things are not very good in this case - it looks like the coil has burned out.
If the multimeter readings are normal, then most likely the ignition coil is working, and the only thing that needs to be done is simply to strengthen its insulation. To do this, you will need a special heat-shrinkable tube (every driver should have it in stock), which must be heated and placed on the reel. This procedure will help cope with the problem of possible current leakage on the Priora.
