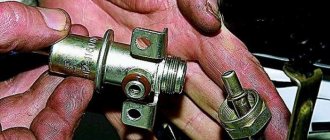
If on the first modifications of VAZ engines with distributed injection the fuel pressure regulator was located in the engine compartment on the ramp, now the designers of the Lada Kalina 8 valve placed it inside the tank. Now this important element of the system is located in a single fuel module along with a pump and filters for fine and coarse cleaning; this is the entire fuel system.
This solution creates certain difficulties in terms of diagnosis and replacement, since partial disassembly of the tank will be required during the operation. Despite this, even the owner of a Lada Kalina, who does not have enviable experience, is able to identify and eliminate the malfunction.
Checking the fuel pressure in the engine supply structure
The basic indicators for determining the suitability of the engine power supply design are the fuel pressure in the fuel rail of the Lada Kalina 2 car
. If the pressure is unsatisfactory, the following failures are possible:
• Unstable engine operation
• Stopping the engine at idle
• Unstable crankshaft speed at zero load
• The motor does not work at full power
• Jerks and dips during engine operation
First, we advise you to make sure that the electrical contacts in the harness blocks of the injection units, which are responsible for the supply of gasoline, are reliable.
The fuel pressure in the power supply structure is checked using a pressure gauge with a breather for connection to the fuel rail.
Note
The fuel pressure was checked using the example of a VAZ-21116 engine. On viburnums with other engines, check in the same way.
1. When you turn on the ignition, you will hear the sound of an electric fuel pump running. If you don't hear anything, check the pump's electrical circuit.
Note
If you turn on the ignition several times without starting the engine and do not hear any operating sounds, this does not indicate a defect. It will turn on when you start the car.
2. Unscrew the protective cap of the fitting for monitoring the fuel pressure at the end of the ramp. Please note that the sealing ring is fixed in the cap. If you notice flaws on the ring, replace it or the cap.
Note
On VAZ-21126 and VAZ-21127 engines, the pressure measuring valve in the fuel rail is located slightly differently.
3. Reduce the pressure in the supply structure.
4. Take the iron protective cap and unscrew the spool
Note
If the breather used during the pressure check has a tip similar in design to the tire pump breather tip, do not unscrew the valve stem.
5. Unscrew the spool valve from the pipe.
Note
Gasoline may leak while unscrewing the spool valve. Remove drips with a cloth.
6. Connect the fitting and breather to the pressure gauge. Secure the breather to the fitting using a tie. Start the car and check the pressure on the pressure gauge. Acceptable pressure should be 360-400 kPa.
7. Stop the motor, reduce the pressure in the power structure.
8. Disconnect the pressure gauge and pressure regulation fitting. Screw the spool valve into the fitting and secure the protective cap to the fitting.
Maintenance of an injection engine (your topic is a control system)
Table, categories of operating conditions.
Category of operating conditions
A distinction is made between daily maintenance (DM), first maintenance (TO-1), second maintenance (TO-2) and seasonal maintenance (SO) for electronically controlled power systems. The frequency or mileage (in km) of TO-1 and TO-2 is established depending on the category of vehicle operating conditions. In our country, four categories (I-IV) of operating conditions have been adopted (Fig. 2.1.) (with a small letter)
The first maintenance (TO-1) includes checking the tightness of the fuel and air supply system, as well as the correct operation of the air damper drive. Fuel leaks and air leaks are not allowed. The throttle valve opening should be smooth and without jamming. During the TO-1 process, the gap between the electrodes of the spark plugs should be adjusted, and if necessary, they should be replaced. The gap between the spark plug electrodes is checked using a wrench and a feeler gauge. The gap should be 0.70-0.85 mm.
During TO-2, you should perform the same operations as during TO-1, checking the fastening of the exhaust and intake pipelines, as well as the exhaust pipes of the muffler. Loose nuts securing the fuel, air and exhaust systems should be tightened. Next, you need to check the fastening of the fuel rail, tension roller, ignition coils, engine pulleys, the condition of the exhaust gas recirculation system and clean the receiver. If necessary, replace the air filter element.
During seasonal maintenance (SO), parts of the fuel injection system must be washed without disassembling the oil deflector.
The fuel tank should be filled only with clean gasoline, and sediment and water should be drained from it periodically (in the fall). In the future, it is necessary to carefully check the tightness of the fuel line connections when the engine is idling.
Each subsequent maintenance begins with the completion of the previous operations. The operations for all brands of engines are basically the same. Some differences are caused by design features of the engines. Maintenance of the internal combustion engine consists of its external cleaning, control inspection, general diagnostics and diagnosing and regulating its systems. External cleaning of the internal combustion engine is carried out by first blowing it with compressed air, followed by wiping with cloth ends soaked in kerosene or diesel fuel.
Reduced pressure in the fuel rail - the fuel pump dies
For those blog readers who follow my YouTube channel, the information will not be new, but for the rest I will describe everything here. So over the past few days my Kalina has started having problems. And they were as follows:
- After a long period of inactivity, the engine began to start poorly, often even on the second try.
- the car became very “dull”, and it felt like the loss of power was about 20%
- fuel consumption increased by 10% when the engine was idling, and when driving too
In general, based on all the signs described above, it looked like a dying gas pump. Of course, I checked the mass air flow sensor first, since its operating voltage is also already close to critical. But when it was turned off, nothing changed for the better.
As a result, I began to deal with the fuel system. I’ll say right away so that there are no unnecessary questions:
What should be the pressure in the fuel rail of the Lada Kalina?
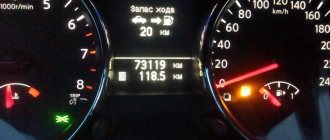
So, having bought a fuel pressure gauge, which, by the way, cost me as much as 1,500 rubles, I decided to measure the pressure, which as a result was around 3.4-3.5 kg/cm². From the data obtained we can conclude that this was not enough for normal engine operation.
Moreover, when the speed increased to certain values, the pressure in the ramp dropped to 3 kg/cm², which also should not happen in a working fuel system.
The normal pressure in the system is from 3.8 to 4 kg/cm². Of course, if you are a fan of the “retirement” driving style up to 2000 rpm, then you may not feel any difference in power loss. But when the speed increases to at least 3000, you immediately feel a failure, and overtaking is difficult with such a “stupid” ride.
Clean the injectors yourself!
Today I washed my injectors. There are several ways to wash injectors: 1.without removal, with Vince or Laurel at a service station (effective, expensive, after which you need to change the oil and spark plugs) 2. with removal, in a bath, with ultrasound at a service station (very effective, but shortens the service life of the injector, sometimes kills it immediately, is also a bit expensive) 3. without removing, pour the “miracle” additive into the tank (inexpensive, but not effective, often dirt from the tank “finishes off” the power system) 4. with removal, using a cleaner carburetor (inexpensive, does not harm the power system, relatively simple, you can do it yourself!)
So, wash the injectors yourself, using method 4! (my version, I don’t pretend to be correct or “as expected”)
We will need: El. Wire (section 0.75) – 3 meters. Connector for injector – 1 pc. Button, two-pin, without fixation – 1 pc. 12V light bulb with socket - 1 pc. Hose, preferably transparent, internal diameter 5 mm. – 15 cm. Electrical tape – 1 roll. Heat shrink – a little (to insulate connections) Carburetor cleaner bottle – 1 pc. Set of rubber rings for injectors - 1 set, (8 pcs.)
In my case, “MAMA” connectors, large and small, were additionally required. Because as a lamp with a socket, I used the number lamp from 2105 (the cheapest lamp with a socket that I came across) (see photo No. 1)
Preparation: Collecting email. circuit in the following sequence: + from the battery, input to the light bulb, output from the light bulb, input to the button, output from the button, input to the injector connector, output from the injector connector, - from the battery. A lamp is included in the circuit for several reasons, to control the circuit closure and protect the electric circuit. The windings of the injector, from “extra” electricity (do not forget that the injector is powered not by 12 V, but by 6 V), all this beauty must be assembled so that YOU are comfortable. For me, a length of 1.5 meters was enough, I placed the button at 15cm. from the nozzle connector, and the lamp 40 cm. from this connector. It’s better to do everything “conscientiously”, so that nothing dangles, tighten it with electrical tape. (correcting something in the process is stressful) (see photo No. 2, 2+) Next, we take a tube from the carburetor cleaner, stepping back some distance from the edge (so that we can insert it into the pipe of the cylinder), we wrap electrical tape so that the whole thing is difficult inserted into a transparent hose with an internal diameter of 5 mm. , insert it, wrap more electrical tape on top for reliability (see photo No. 3,4). That's it, the preparation is complete!
Source
Result after replacing the fuel pump
So, after replacing the fuel pump, a pressure gauge was immediately connected and when starting the engine, excellent readings of 4 kg/cm² could be observed, and when the speed was set to almost maximum, the pressure did not decrease.
Here you can see information on replacing the fuel pump, which was done in this case. As for the result specifically in terms of the operation of the motor and its power characteristics, everything is excellent here too. Now the car drives very quickly, there are no dips or slowdowns when pressing the gas pedal. As surprising as it may sound, fuel consumption also returned to normal both at idle and when driving.
Signs and malfunctions of the fuel pressure regulator
Welcome to the DIY car repair website. A reliable car is not one that looks beautiful, but one that rarely breaks down. Unfortunately, VAZ cars do not always please their owners, forcing them to pay a lot of attention to repairs or restoration work.
Fuel pressure control
So, one of the weakest links is the fuel pressure regulator. Due to the low quality of gasoline, it often fails, forcing you to check the VAZ fuel pressure regulator and replace it. All that remains is to find out how to diagnose the malfunction and check the functionality of the device.
The purpose of this small device
The car's system is designed in such a way that fuel flows through the injectors to the intake manifold. It is very important that the pressure does not change. In turn, the regulator makes an accurate calculation of the volume of gasoline supplied.
As a result, the device controls the pressure parameter inside two elements - the intake manifold and the fuel rail. In this case, the regulator’s task is to maintain the pressure difference at the same level. In addition, the regulator controls the pressure parameters at the injector and in the intake manifold.
A decrease in power, malfunctions of the power unit, an increase in consumption - all these are signs of a malfunction of the fuel pressure regulator (we’ll talk about this in more detail below). At the same time, the task of the car owner is to diagnose the problem in time and accurately determine whether the fuel pressure regulator is faulty or the problem lies elsewhere.
How does the Lada Kalina gasoline vapor recovery system work?
The EVAP system in question was created to prevent the release of harmful gasoline vapors into the surrounding atmosphere resulting from fuel evaporation; it includes:
- fuel shut-off valve;
- adsorber;
- solenoid valve for purging the absorbent element;
- connecting pipelines.
The most important component in the system is the adsorber (also called a carbon filter), the basis of which is activated non-edible carbon, enclosed in a plastic housing. The resulting gasoline vapors are absorbed by the carbon of the absorbent element, gradually accumulating in it. When the engine starts, the canister purge valve (KPA) is turned on, and due to the vacuum, all accumulated vapors enter the intake manifold and then burn out.
On the Lada Kalina, the adsorber is located in the gas tank area, and getting to it is very difficult. To dismantle this EVAP element, it is necessary to remove the fuel tank, but the control unit is located in an accessible place - the valve is located in the engine compartment, in close proximity to the battery, on the rear wall of the air filter housing. It should be noted that for turbocharged engines, a vacuum is not created in the intake manifold, and in order to force the vapors in the desired direction, an additional two-way valve is included in the circuit.
Signs and malfunctions of the fuel pressure regulator
The main sign of a problem is the appearance of malfunctions in the car. So, the following symptoms of a malfunctioning fuel pressure regulator can be identified:
- Problems starting the engine. The starter rotates, but the engine does not “support” its efforts;
- power has decreased significantly. As a rule, this is immediately noticeable when accelerating a vehicle or when driving downhill;
- The engine is unstable at idle speed. At the same time, it may stall from time to time (for example, at an intersection);
- fuel consumption increases.
There may be two reasons:
- Valve failure;
- the valve just doesn't hold.
The regulator valve has failed. In this case, excess fuel is not poured into the tank, but an increased pressure of 2.5 kg/cm2 or more is created. This problem invariably affects the amount of fuel injected into the combustion chamber. As a result, fuel consumption increases, and the gasoline itself does not burn completely.
The valve doesn't hold. In this case, there is a constant “staggering” of fuel throughout the system. As a result, the pressure decreases, and with an increase in engine speed, a clear fuel shortage occurs.
In such a situation, the power and throttle response of the power unit drops significantly. In addition, during starting, you need to turn the starter for a long time to create the necessary pressure.
Reception pipe for Kalina, Kalina 2, Granta for 8 cells. (2 oxygen sensors)
Dear customers, in order to avoid errors when sending an 8-cl catalyst manifold, for 2 sensors, to an injection car VAZ 2113, 2114, 2115, VAZ 2110, 2111, 2112, VAZ 1117, 1118, 1119 (Lada-Kalina), VAZ 2170, 2171, 2172 (Lada-Priora), VAZ 2190, 2191 (Lada-Granta), VAZ 2192, 2194 (Lada-Kalina 2) with a 1.6L, 8V engine, in the “Comment” line indicate how many oxygen sensors, your car model, how many valves 8 or 16, year of manufacture.
The exhaust system consists of an exhaust manifold integral with the exhaust gas catalytic converter (catalytic converter), additional and main mufflers and pipes connecting them.
A metal sealing gasket is installed between the catalytic collector and the cylinder head. The gasket consists of two steel plates connected by spot welding. The plates are stamped with protrusions that seal the exhaust channels.
Lada exhaust system:
A- engine 21124 (1.6i); B - engine 2112 (1.5i); 1 — sealing gasket of the catalytic manifold; 2 - catalytic manifold; 3 — clamping plate for the catalytic manifold mounting bracket; 4 — sealing gasket of the receiving pipe; 5 — sealing ring of the receiving pipe; 6 — additional muffler; 7 — suspension cushions for the additional muffler and the front part of the main muffler; 8 — tension bolt spring; 9 — coupling bolt of the swivel joint; 10 — exhaust pipe; 11 — locking plate for the exhaust pipe fastening nut; 12 — bracket for fastening the catalytic manifold; 13 — muffler o-ring; 14 — main muffler; 15 — rear muffler suspension cushion; 16 — additional muffler; 17 — clamp brackets; 18 catalytic converter; 19 — exhaust pipe; 20 — pressure plate; 21 — sealing gasket of the receiving pipe; 22 – bracket
Bringing exhaust gases in a car to normal is carried out using a special spare part - a catalyst. It is installed between the exhaust pipe and the front muffler. Thus, passing exhausts are cleaned and can meet the stated standards.
Catalyst 11183-1203008 (exhaust manifold, intake pipe) is one of the components of the exhaust system of the VAZ 2113, VAZ 2114, VAZ 2115, VAZ 2110, VAZ 2111, VAZ 2112, VAZ 1117, VAZ 1118, VAZ 1119 (Lada- Kalina) , VAZ 2170, VAZ 2171, VAZ 2172 (Lada-Priora), VAZ 2190, VAZ 2191 (Lada-Granta), VAZ 2192, VAZ 2194 (Lada-Kalina 2) with a 1.6L engine, 8V injector responsible for cleaning “harmful » gases of carbon oxides, nitrogen, unburned hydrocarbon compounds) in the exhaust. This is achieved by burning them inside the device due to the high temperature and the presence of oxygen in the gases.
1. gasket (21114-1008080-00); 2. control oxygen concentration sensor (11180-3850010-00); 3. exhaust manifold (11183-1203008); 4. bracket clamp (11180-1203042); 5. plug; 6. intake pipe screen (1118-1203194); 7. bracket for the exhaust pipe (11183-1203040); 8. exhaust pipe (11183-1203008); 9. suspension cushion of the front part of the additional muffler (1118-1203073); 10. additional muffler (1118-1200020); 11. clamp (1118-1203064); 12. main muffler; 13. main muffler suspension cushion (21213-1203073).
In the upper part of the cathode collector (in front of the neutralizer) there is a control oxygen concentration sensor, 4-pin Lambda probe, unpacked, Article 1118-3850010-0258006537 BOSCH; Germany in exhaust gases (lambda probe).
The second sensor - diagnostic - is installed in the lower part of the catalytic collector, after the neutralizer.
The catalytic converter ensures compliance with Euro-3 toxicity standards, reducing emissions of carbon monoxide, nitrogen oxides and unburned hydrocarbons. If there are lead compounds in the exhaust gases, the catalytic converter and oxygen concentration sensors quickly fail. Therefore, operating a car, even short-term, on leaded gasoline is strictly prohibited. Failure of the converter can also be caused by a faulty ignition system or power supply system. If there is a misfire, unburned fuel enters the converter, burns out and disables the unit with catalysts, which can lead to clogging of the exhaust system and engine shutdown (or loss of power).
Features of checking the fuel regulator
To solve the problem, it is important to know how to check the fuel regulator. This can be done using a regular pressure gauge. Everything is simple here. The device is mounted in the space between the fitting and the fuel pipe. To take measurements, the vacuum hose must be disconnected.
In this case, measurements should be made in four different modes:
- When the ignition is turned on. The nominal parameter is “three” atmospheres;
- when measured at idle – 2.5 atmospheres;
- in case of squeezing of the return flow hose - 7 atmospheres;
- with the hose removed from the pressure regulator - 3.3 atmospheres.
If the measured parameter does not correspond to the specified data or does not increase at all, then the device is faulty. In such a situation, it is enough to figure out how to change the fuel pressure regulator and perform the replacement.
Be attentive to your car, promptly respond to problems that arise, carry out diagnostics and make repairs. This is the only way to extend the life of your VAZ car and protect yourself from high costs in the future. Good luck on the roads and of course no breakdowns.
VAZ fuel pressure regulator: causes of malfunctions and ways to solve them
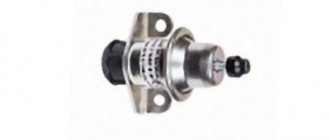
An important element of the fuel system of any car is the fuel pressure regulator. The performance of the fuel system depends on how stable the fuel pressure regulator is.
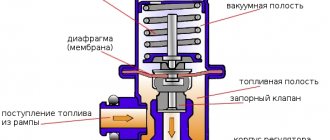
The fuel pressure regulator in VAZ cars is a valve-membrane against which the regulator spring rests on the intake manifold side, and the fuel pressure on the other. After stopping the engine, it is the RTD that maintains pressure in the fuel system. If the pressure regulator is worn out, restarting the engine will require some time and manipulation of the ignition key.
The RTD is located either in the fuel tank itself, or, if the fuel system has a recirculation system (increasingly popular), then it moves to the fuel rail. The main task of the RTD is to maintain the difference between the pressure in the tank and the combustion chamber, the injector and the intake manifold. It is thanks to the operation of the fuel pressure regulator that control over the operation of the fuel injectors, the level of pressure in the fuel system is ensured, and excess volumes of fuel are returned to the tank through the return system.
Let's sum it up
After completing the entire list of work, it is recommended to check the pressure in the system. If everything is fine, screw in the spool valve and start the engine, the fuel system should work as expected. To be completely sure, we check the Lada Kalina 8 valve while driving.
Unlike earlier VAZ models, the Kalina fuel pressure regulator is not located under the hood on the fuel rail, but inside the tank. Together with a fuel pump and a coarse filter, it is part of the so-called fuel module.
Therefore, diagnosing its malfunctions is not so convenient; to do this, in any case, you will have to disassemble the tank. Nevertheless, any owner of a Lada Kalina can detect a breakdown and replace the fuel pressure regulator if desired.
The first sign of RTD malfunction
The first sign of a faulty fuel pressure regulator is increased fuel consumption. The reason for this is simple - due to problems with the RTD, excess gasoline or diesel fuel from the internal combustion chamber does not return to the tank. This leads to an increase in pressure throughout the entire fuel system; Moreover, this increase can be significant - twice or even three times higher than the norm. If the norm is 2 kilograms per square centimeter, then with a faulty RTD this figure can reach 5 and 6 kilograms per square centimeter. This situation cannot take place for a long time, since all the “weak points” of the fuel system are very quickly discovered, and one or another breakdown occurs. In turn, a malfunction in the fuel system is fraught, firstly, with breakdowns, which, in turn, will require major repairs or even a complete replacement of the engine, and, secondly, with serious situations on the road, which are no longer fraught with costs, but with a threat to health and the lives of you and your loved ones.
It should be noted that malfunctions of the VAZ 2110 RTD after five years of operation are a regularity. It is necessary to begin monitoring the condition of the regulator after three to four years of active operation. If your car is already of advanced age, and at about the same age, the fuel pressure regulator should be monitored especially carefully for signs of malfunction.
If the power decreases and the dynamics of the engine deteriorate, the turbocharger may have stopped working altogether. This means that the fuel is not supplied to the internal combustion chamber under pressure, but gets there naturally, so to speak, by gravity. In this case, the engine at high speeds cannot cope with the fuel shortage, which can lead to rapid breakdowns.
Operating principle of the element
The regulator (RDT) is a conventional diaphragm valve, whose task is to maintain constant gasoline pressure in the line running from the tank to the fuel rail. Whatever mode the engine is operating in, its value should be in the range from 3.7 to 3.9 bar.
When the upper pressure threshold is exceeded, the valve begins to dump excess fuel directly into the internal volume of the tank. If the fuel pressure is insufficient, the regulator is not able to increase it, but if it breaks down, it can itself cause a decrease in pressure. How Kalina’s power system works is well reflected in the diagram above.
To correctly diagnose a diaphragm valve malfunction, you need to understand the algorithm by which the fuel system operates:
- When the ignition of the Lada Kalina car is turned on, the fuel pump (item 6) starts working, creating the necessary pressure in the fuel rail (item 2). If after a few seconds the starter is not started, the controller will automatically turn off the pump.
- Gasoline passes through coarse and fine filters (item 7) and enters the RTD, and from there along the line (item 4) to the ramp and injectors (item 3).
- After starting, the engine begins to consume fuel to varying degrees, depending on the driving style.
- At idle speed, the fuel pressure regulator dumps most of the fuel back into the tank (item 5), since its consumption is low, and the fuel pump constantly operates in one mode.
- At high speeds, the engine needs a lot of gasoline and the valve resets almost nothing.
There are 2 types of regulator malfunctions, characterized by a decrease in fuel pressure or, conversely, its excessive increase. The element cannot be repaired and must be replaced if broken.
Problems and their causes
- Fuel consumption has increased. The cause may be excess pressure in the fuel system due to a faulty fuel pressure regulator.
- The engine power has decreased, the dynamic performance of the car has deteriorated and continues to deteriorate. The reason is often that the RTD has stopped holding pressure (for example, due to a high level of spring wear).
- Problems with starting the engine: in order to start the engine, you have to repeatedly “torment” the starter. The reason is difficulty in the movement of fuel in the fuel system due to a faulty (for example, jammed) fuel pressure regulator.
- The car periodically stalls, and unexpected and unmotivated jerks are possible while driving. The reason is the jamming (permanent or periodic) of the fuel pressure regulator. It is to pressure surges in the network that you owe all of the above “joys”. Such manifestations are extremely dangerous, especially when driving around the city, with a minimum distance between vehicles.
How to check the fuel pressure regulator
If you have any suspicions about the RDT, its performance should be checked as soon as possible. It’s quite easy to do this even at home, just follow a few simple instructions.
We unscrew the fitting responsible for the fuel pressure and inspect the o-ring. Its condition is of great importance, so if this element is old or damaged, you will have to purchase a new ring. The next step is to unscrew the spool valve from the fitting.
At this point you will need a pressure gauge to measure the pressure while the engine is running. And if the pressure is less than what is specified by the manufacturer for the VAZ model you own and the installed engine, the fuel pressure regulator needs to be changed. Moreover, it is inexpensive, the operation itself is very simple, and you can evaluate the result on your first trip.
- karemat
- buy toys for boys
- sewing store
- engine oil liqui moly
Replacing a faulty valve
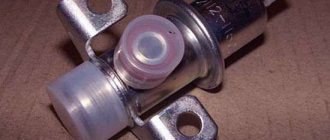
The regulator to be replaced is located in the fuel block, which includes other elements: an electronic fuel pump, a solid filter and a Kalina fuel level sensor.
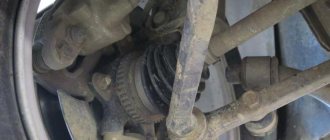
It will be useful to remove the unit completely from the tank and later change the regulator. To do this, you need to relieve the pressure, as mentioned above, and then remove the rear seat. The module is located under a hatch covered with a mat and sound insulation, which is moved to the side. You need to unscrew the screws and remove the hatch, then disconnect the wires and fuel hoses.
The pressure ring holding the assembly turns to the left. You can move it from place by light blows of a hammer on the ledge through the adapter. Then the fuel module along with the float is carefully removed from the opening.
You need to remove the wire from the regulator installed in it and remove the spring retainer with a Phillips screwdriver. After this, the valve is simply removed and replaced with a new one. Before installation on the space, the O-rings of the new part must be lubricated with fresh engine oil.
When assembling the unit, it is important to monitor the condition of the gaskets and change them in case of wear. When installing the fuel module into the gap, you need to ensure its orientation; the arrow on the cover must point towards the trunk. At the end, it won’t hurt to check the pressure again, and only later you can screw in the spool and start the engine.
To be sure, the Lada Kalina should be tested in motion, making sure that the dynamic characteristics of the car are restored.
Source: 1ladakalina.ru