Modern cars are equipped with electronic fuel pumps; mechanical ones are found only in cars manufactured before 2000. The task of this component is to ensure an uninterrupted supply of fuel. Everything functions well at high engine speeds, but problems arise when moving to low and idle speeds. Increased pressure damages fuel supply hoses and other system components. The fuel pressure regulator protects against such consequences. If there are malfunctions in it, this can be determined by several signs.
Removing and disassembling the fuel module
We are carrying out work to replace the fuel level indicator sensor, fuel pressure regulator, strainer and fuel pump.
Relieve the pressure in the power system (see “Replacing the fuel filter”). Disconnect the wire terminal from the negative terminal of the battery. Inside the car, lift the rear seat cushion (see “Removing the rear seat”) and bend the sound insulation valve that closes the hatch cover in the floor of the body under the rear seat. Use a Phillips screwdriver to unscrew the two screws securing the hatch cover...
...and remove the cover. Lifting the wire harness block clamp...
...disconnect the block from the fuel module cover connector.
By pressing the spring clamp, disconnect the tip 1 of the tee from the fitting of the fuel module cover. By squeezing the clamps (in the direction of the arrows) of tip 2 of the fuel supply tube, disconnect the tip from the fitting of the fuel module cover.
Using a 10mm socket with an extension, unscrew the 8 nuts securing the pressure plate of the fuel module. Remove the spring washers and the ground wire from the tank neck studs.
Remove the pressure plate.
Carefully, trying not to damage the fuel level indicator sensor float, remove the fuel module from the tank. We drain the remaining fuel in the module into a previously prepared container.
If replacement is necessary, remove the ring plastic spacer.
Please note: when installing the spacer subsequently, its cut must coincide with the protrusion on the fuel module cover.
Remove the rubber sealing gasket. We close the hole in the fuel tank to prevent foreign objects from getting into it. We disassemble the fuel module on a workbench. If it is necessary to replace the o-rings of the fuel pressure regulator or the regulator itself...
...disconnect the tip of the ground wire from the terminal on the regulator body.
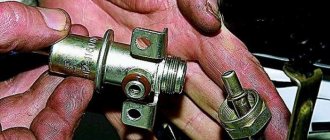
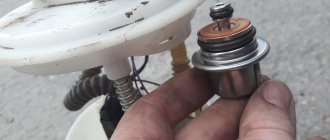
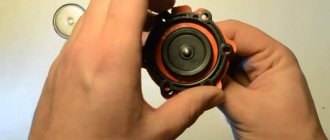
Using a screwdriver, remove the fuel pressure regulator mounting bracket.
Using pliers, remove the regulator from the module cover socket.
Remove the two rubber sealing rings of the regulator. Install the fuel pressure regulator in reverse order. We replace the regulator O-rings with new ones. Before installing the regulator O-rings, apply a thin layer of engine oil to the O-rings. To replace the fuel gauge sensor or fuel pump, the fuel pressure regulator does not need to be removed. From the inside of the module cover...
...use a screwdriver to press out the fixing plate of the common wire block...
...and disconnect the wire block from the cover connector. By pressing the latch...
...disconnect the wire block from the fuel pump. To remove the fuel level sensor...
...we release the two sensor latches...
...and move the sensor along the grooves of the housing towards the cover.
Remove the fuel level indicator sensor with wire blocks. Install the fuel level indicator sensor in the reverse order. When replacing the fuel pump, it is better to remove the fuel level sensor to avoid damaging it.
Use a screwdriver to pry up the drain tube... ...and disconnect it from the module body.
There is a retaining ring located in the groove of one of the guide posts of the module cover. We remove it by prying it with the blade of a slotted screwdriver.
By pressing the four latches of the pump holder...
...remove the fuel module cover assembly with the holder and the fuel pump.
Remove the spring from the guide post of the cover.
...remove the strainer.
Remove the lock washer from the slot in the strainer housing.
Using a screwdriver, press out the plastic latch of the holder...
...and use your finger to push the fuel pump out of the holder. We heat the plastic corrugated tube on the pump nozzle over a container of boiling water...
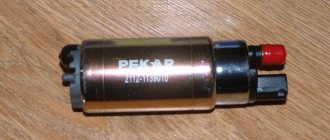
...and remove the tube from the pump connection. The car is equipped with a BOSCH fuel pump 0580454035.
A valve is installed in the fuel module housing to prevent fuel from leaking out of the housing. We assemble and install the fuel module in the reverse order. When installing the strainer, pay attention to the condition of the lock washer; if it is dented, it must be straightened or replaced. When installing the fuel module into the tank...
...arrow 1 on the fuel module cover should be directed backwards (towards the trunk). Arrows 2 on the fittings of the fuel module cover indicate the direction of fuel movement. We put the tips of the tee and the fuel pipe onto the fittings of the module cover until the latches click. Before closing the hatch cover in the floor of the body under the rear seat, it is necessary to check the tightness of the fuel module connections. To do this, connect the wire terminal to the “negative” terminal of the battery and turn on the ignition.
Replacing the fuel hose on a Priora
"Attention. The vehicle's fuel system is under pressure even when the vehicle's ignition is turned off (residual pressure remains)
Therefore, before carrying out work related to maintenance or repair of the fuel system, it is necessary to relieve the pressure!”
Now let's look at how to change the fuel hose on a Lada Priora. In order to dismantle the product you will need:
- The first, preparatory stage of the work will be releasing pressure. To do this you will need to remove the rear seat. Unscrew the fastening points of the metal hatch and remove it. Unplug the power plug from the fuel pump connector.
- Move into the car interior. Start the engine and let it run until all the fuel runs out and it stalls.
- After that, try to restart the engine, allowing the starter to operate for 3.4 seconds.
- Open the hood. Find the fuel hose.
- Now we need to find the connection point between our hose and the inlet metal tube, which enters the engine compartment from under the bottom of the car. Next, you need to press on the special plastic fastener and, holding it in this position, pull the hose in the opposite direction.
- To disconnect the second end, you will need to find the metal tube connected to the fuel rail. In this case, the connecting fastening is different from that indicated in the previous step. You will need a 10mm wrench, with which you will need to unscrew the special fastening nut.
- When installing a working product, do not forget to install new o-rings, which serve to seal the connecting points. It is prohibited to use old rings, and install new ones only when the ambient temperature is above zero.
Measures to extend service life
Fuel hoses of the Lada Priora, as on other cars, are exposed to various negative conditions (friction, bends, temperature changes). To extend their performance characteristics, it is recommended:
- carry out periodic inspection;
- place the product subject to increased friction in a protective corrugation.
With timely diagnostics and replacement of components and components, you will avoid fuel fires and other negative consequences.
Signs of a malfunctioning fuel pressure regulator
The fuel system of a modern car is a complex mechanism consisting of many parts and is one of the main systems. The fuel system contains many moving parts, one of which is the fuel pressure regulator. The flow of gasoline into the combustion chamber requires constant maintenance of a certain pressure, so this operation requires a special unit that is connected to both the combustion chamber (injectors) and the fuel system (via a valve).
However, over time, with constant and long-term operation of this unit, certain problems arise in the form of malfunctions, which can lead to certain problems in operation.
Components
This part consists of several main elements:
- Diaphragm valve is the main part of the regulator and is connected to the fuel supply system and combustion chamber (injector rail). In most domestic models (such as VAZ 2115, 2110, 2114 and Lada Priora) this unit is presented in a similar configuration, since the fuel supply systems of front-wheel drive vehicles of this family have a similar design. Therefore, the quality of breakdowns for these machines is similar;
- Pipes connected to the valves and combustion chamber on one side and, through other valves, to the fuel line on the other. The device in the VAZ 2107 models is somewhat different due to an older and unreliable design. When using equipment for rear-wheel drive, old components of an outdated design are used (the valve may work unstable when operating in a carburetor engine and the wrong choice of fuel mixture enrichment) so its design is somewhat different, although problems arise.
Failure
The design of this unit is quite simple to operate, but the valve can also fail.
This will entail certain negative consequences and the main signs will be:
- Increased fuel consumption due to partial failure of the element . When the valve unstably performs its functionality, the pressure in the rail and the fuel system drops, there is an excess supply of gasoline to the combustion chambers, which causes significant fuel consumption. This also entails, in addition to increased gasoline consumption, increased wear of the element, which will ultimately lead to complete failure of the part;
- Unstable engine operation at idle speed . If the fuel supply is poor, the engine cannot reach its optimal level of operation, so the idle air regulator operates unstably. If there is insufficient pressure and the fuel pressure regulator fails, its supply either stops or fuel flows freely through the system. This can also cause the engine to start poorly, which requires increasing the load on the starter, also causing wear. This effect manifests itself during mechanical wear of the valve, when the failure of one part of it ensures poor pressure balancing between the fuel and air;
- The crankshaft cannot maintain a constant speed level. This effect is dangerous because this malfunction can involve many elements of the system, and the malfunction of this regulator is an indirect cause of such a breakdown. Unstable operation of the crankshaft not only disorganizes the driver, but also reduces engine life (albeit slightly);
- Deterioration of engine power qualities . If the fuel supply is poor, the engine cannot fully realize its potential when moving, so its performance decreases. This causes a deterioration in the dynamic qualities of the motor and affects its service life;
The video shows signs of a malfunctioning fuel pressure regulator:
How to check and adjust the pressure of the Priora fuel pump
Normal pressure of the Priora fuel pump is necessary for the process of supplying the combustible mixture to the carburetor and its normal spraying through the nozzles. The slightest disruption in the operation of this system leads to the fact that either an excessively saturated or lean mixture is supplied to the combustion chamber, which is why the engine operates abnormally. How to check the fuel pump pressure, and what should be done if it is abnormal?
Checking the fuel pump pressure
The first thing to do is to specifically check the operation of the pump. To do this, just turn the ignition key not to the extreme position and listen to whether the electric fuel pump turns on (and this is exactly the variation that is installed in the Lada Priora car). If you hear a noise for a few seconds, followed by a click, everything is fine.
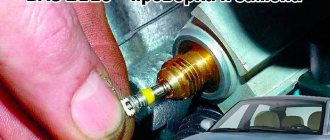
Using a pressure gauge, the check is performed on the ramp - this is where the protective valve cap is hidden, which does not allow air to get in, but presses the fuel out with pressure. The first step is to unscrew the cap and check whether the rubber in it is broken - this may be the main reason for the inoperability of the fuel pump. If it is damaged, it is better to completely replace it; fortunately, it is cheap. Then the spool is twisted. Next, a pressure gauge is connected to the outlet of the safety valve from the pump. Normal pressure is in the range of 380-400 kPa. If it is lower, then either the pump has failed or there is a blockage in the system. If it is more, then it is quite possible that the internal pressure gauge of the fuel pump is faulty and it is simply pumping fuel excessively to the carburetor. Replacing it is easy.
Naturally, before checking the pressure, the ignition is turned on, but the engine itself is not. The pump itself will equalize the pressure to the desired parameter. If this is not done, then the pressure will be at the level of 1 atmosphere with a slight deviation, because pumping is not performed.
It should also be taken into account that all manipulations are carried out at reduced fuel pump pressure. To do this you will need:
- remove the rear seat and gain access to the pump (by removing several screws on the rubberized cover);
- release the lock and let the fuel run out completely (the engine will be in neutral gear and will stall literally after a few seconds);
- Next, you need to turn on the ignition and equalize the pressure;
- It is also recommended to turn on the starter for 2-3 seconds and immediately reset the ignition key to its original position (turn off the ignition).
What happens if the pressure deviates from the norm?
If the pressure in the fuel pump is too high, too much fuel will be supplied to the carburetor.
The air will mix with it through the filter and burn in the cylinder. But if there is a lot of fuel and not enough oxygen, the mixture will not burn completely. At the same time, black smoke comes out of the exhaust pipe, and fuel drips from its end (may even be mixed with soot).
If the pressure in the system is very low, the mixture will be lean. There is too much oxygen. At the same time, the engine power is radically reduced; at idle speed the engine simply stalls, and the choke, of course, will not help, since it only regulates the operation of the throttle valve in the carburetor.
It is interesting that the on-board computer will not report a breakdown of the fuel pump - this is truly a huge mistake by VAZ engineers. In Priora, you can only read indicators when you connect a computer to the EMU unit, but not everyone can do this. And the indicators may not be true if the on-board computer itself is damaged. That's why checking with a pressure gauge on the ramp is the best option for checking pressure.
https://www.youtube.com/watch?v=QaJwthsYi3Q
Fuel pressure regulator: diagnostics, repair, replacement
Modern cars are equipped with electronic fuel pumps; mechanical ones are found only in cars manufactured before 2000. The task of this component is to ensure an uninterrupted supply of fuel. Everything functions well at high engine speeds, but problems arise when moving to low and idle speeds. Increased pressure damages fuel supply hoses and other system components. The fuel pressure regulator protects against such consequences. If there are malfunctions in it, this can be determined by several signs.
How to check the operation of the fuel pump?
First, you should check the fuse. To do this, check the instructions for its location. Next, you should check the voltage at the pump. Before doing this, be sure to check if everything is in order with the battery. The voltage at the fuel pump terminal must be checked using a multimeter or tester. The instruction manual always indicates the required voltage.
Using a tester, check the voltage supply to the fuse. Often this is where the electrical circuit breaks.
If the search does not yield results, then the voltage should be checked on the contacts themselves. All contacts must be in place and connected to ground. A broken contact or its oxidation leads to failure of the fuel pump system. If no broken contacts are detected, but the voltage drops by more than 1 volt, then the problem is in the wiring or oxidation of the contacts. There should be no short circuit in the wiring.
If, after checking the voltage, contacts and fuse, you do not find any problems, then the problem lies in the fuel pump itself. In this case, the fuel pump will most likely require replacement. In practice, it most often turns out that replacement is a last resort. First, you should try to restore and test the fuel pump again.
Before you check the fuel pump, you need to remember that, as mentioned above, pressure is the most important characteristic of the fuel pump, so it is worth measuring its level.
How to check the pressure in the fuel rail?
You will need a pressure gauge that measures pressure in the range from 7 to 10 atmospheres. If you choose a pressure gauge with a large margin, you risk getting less accurate measurement results. Specialized stores sell a kit for measuring pressure, but you can also design your own device.
If you want to assemble the device yourself, you will also need a hose with an internal diameter of 9 millimeters. You will also need plumbing tow, with which you can seal the connection between the pressure gauge and the tube. All parts are connected and tightened using a clamp. You will also need a car spool. Next you need to perform a series of actions:
- Place the car on a level surface that is prevented from rolling, turn off the ignition and open the hood.
- Check that the injection nozzles have access to the fuel rail.
- Find the fuel pressure plug and remove it. Then you should unscrew the nipple using the spool.
- Prepare an empty container (a regular bucket will do) and a clean rag. This is necessary to collect residual fuel, which under pressure can splash out in different directions. Therefore, take care of the safety of your skin (especially your face and eyes).
- Connect the device to the fitting and begin checking the mechanism.
Checking the pressure in the fuel rail should occur in four operating modes of the power unit:
- when the ignition is on;
- at idle engine speed;
- code the fuel pressure regulator tube is reset;
- when the drain tube is compressed.
Fuel rail pressure measurement results
The results may vary slightly for different car models, but in general they should be as follows:
- when the ignition is turned on, the pressure must be at least 3 atmospheres,
- at idle engine speed - at least 2.5 atmospheres,
- when the pressure regulator tube is reset - at least 3.3 atmospheres,
- when squeezing the drain tube - at least 7 atmospheres.
Fuel rail pressure fluctuates slightly during preparation. When you press the pedal, it suddenly takes on a value of 3 atmospheres; when you release the pedal, it drops to 2.5 atmospheres. When fuel enters the fuel system, turn off the ignition and begin observing the pressure gauge. The pressure in this case should drop to 0.7 bar and remain unchanged.
If the pressure drops to zero, there may be a problem with the fuel pressure regulator. In this case, the regulator must be replaced immediately. The cause could also be the fuel pump check valve.
It is necessary to observe the behavior of the pressure gauge even at 3,000 engine speeds. A drop in pressure will indicate a faulty fuel pump. Sometimes the fuel pump cannot reach the required pressure for a long time. In this case, the problem lies in a clogged fuel filter, which needs to be replaced, or in a dirty fuel pump mesh (read more about where the fuel filter is located).
If the above methods do not reveal a malfunction of the fuel pump, you will have to diagnose other units (DPZD, IAC, mass air flow sensor, compression in the engine and some other indicators and parts).
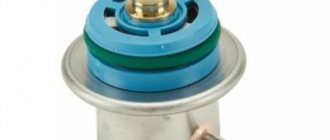
Design and operating principle
The regulator (RTD) consists of a housing, a valve, a diaphragm and a spring, which are located on the fuel rail, in the fuel return hose of the power supply system, or directly in the tank (if the car does not have a recirculation system). The purpose of the product is to send excess fuel back to the tank. When the engine speed increases, the resulting vacuum opens the valve slightly, and the excess returns to the tank.
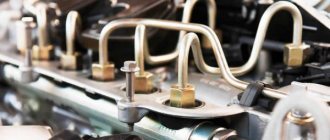
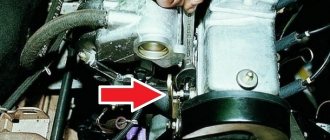
Location of the fuel pressure regulator in the fuel supply system
The process of checking the pressure in the fuel system
You will need: an air (or preferably a water) pressure gauge, onto which you need to put a hose with a diameter of 12 mm and tighten it with a clamp. The engine should be cold and the generator covered with a rag.
- Unscrew the cap of the control fitting on the fuel rail (fitting). Near the timing belt (on the right in the direction of travel), or on the left near the oil filler neck (for the VAZ 21129 engine);
- Unscrew the spool from the fitting using the wheel valve cap. At this moment, due to the residual pressure in the rail, gasoline will splash out (you can first relieve the rail pressure by removing the fuse from the fuel pump with the engine running and wait until it stalls).
- We put the pressure gauge hose on the ramp fitting and secure it with a clamp;
- Turn on the ignition. The fuel pump will turn on;
- We check the readings on the pressure gauge.
Signs and Symptoms of a Malfunctioning Fuel Pressure Regulator
- the engine stalls at idle;
- engine power is greatly reduced;
- when accelerating, it is not possible to achieve normal dynamics;
- the car reacts poorly to pressing the gas pedal;
- fuel consumption suddenly increases greatly;
- the amount of carbon dioxide emissions increases;
- the crankshaft rotation speed changes.
All these problems arise due to the fact that the regulator becomes clogged or completely clogged over time. Another common cause of failure is weakening of the spring, leading to a strong decrease in pressure. In the absence of normal pressure, fuel supply decreases, power decreases and controllability deteriorates. Such problems are especially common on Ladas - Kalina and Priora, as well as on cars of the 2110, 2112, 2114, 2115 series.
To check the part, you need to carefully inspect it itself, the vacuum hose and all connections. Any leaks found must be corrected. It is also recommended to check the membrane. Disconnect the tube that goes from the RTD to the receiver and shake it. If no gasoline comes out from inside and there is no strong odor, then the membrane is in order.
RTD in diesel engines
Diesel vehicles running on the Common Rail system are also equipped with a pressure regulator. It fits into the fuel rail or is located on the high pressure fuel pump housing. The principle of operation is approximately the same. A special valve diverts unused fuel into the return line, preventing excessive loading.
FakeHeader
Comments 28
Look in the rear left arch, there is a separator tank, there is a valve on top of it inserted through an elastic band. This valve flew out, and I washed the rust and sand fuel system three times until I accidentally discovered a valve dangling in the arch and a hole from it in the separator tank, everything that was on the road flew into it
Thanks, I'll take a look today
Look in the rear left arch, there is a separator tank, there is a valve on top of it inserted through an elastic band. This valve flew out, and I washed the rust and sand fuel system three times until I accidentally discovered a valve dangling in the arch and a hole from it in the separator tank, everything that was on the road flew into it
Do you have a photo? I don’t understand, we have an absorber under the hood and only the hose from it goes to the tank
Do not confuse the adsorber with the separator.
Look in the rear left arch, there is a separator tank, there is a valve on top of it inserted through an elastic band. This valve flew out, and I washed the rust and sand fuel system three times until I accidentally discovered a valve dangling in the arch and a hole from it in the separator tank, everything that was on the road flew into it
To prevent this from happening, you need to install fender liners!
:))))) God forbid, advise some grandfather. It must be assembled on the assembly line as expected and this will not happen
fender liners without screws novline, I installed these and everything is good! There seems to be information about them on the drive too, I advise you to look!
For some reason I am not a supporter of these mud collectors.
Rdt. When the gas is released, the pressure should not fall below 3.8 by 4 points. The RTD releases the pressure, and when the engine is stopped, the pressure in the fuel rail should not drop sharply to 0. It should remain at 2-2.5-3 bar (with the internal combustion engine not running)!
did you change the fuel filter?
Change the gas station, did you change the fuel too? check adsorber electromagnetic sensor
I changed the gas station, the same fuel (in the tank and fine cleaning)
it means the star is coming to the catalyst
Kats cut out, firmware for Euro2
DMRV means))) damn there are a lot of reasons for “being held by the ass”!
The pressure was restored, another pump was replaced, the reason “does not work” was the licked key of the kv star, the damper was loose and gave incorrect readings
Change the RTD... The pressure should be 3.8 But in general, before changing anything, you need to do diagnostics and not mindlessly change everything from one extreme to another
The RTD on the Priora releases pressure above 4 atm, right?
Change the RTD... The pressure should be 3.8 But in general, before changing anything, you need to do diagnostics and not mindlessly change everything from one extreme to another
It’s impossible to find a diagnostician during the day, they’ll charge 2k for checking (whether they’ll find it or not is unknown)
My friend lives in Surgut. Also a diagnostician. Has scanners and programs. If it is not very far from you, I recommend it. He won’t take extra, and he won’t take money for unresolved problems.
If I find anything here, in the rage I might roll it to Surgut
Change the RTD... The pressure should be 3.8 But in general, before changing anything, you need to do diagnostics and not mindlessly change everything from one extreme to another
Before changing the RTD, you should check the BN; it breaks 15 times more often than the RTD. You need to measure the fuel pressure head-on, directly. It should be at least 7-8 atm. If this is the case, the RTD is changed (if the corrugated hoses in the module are in good working order and there are no leaks) If the pressure is 1 11 m
Is the car jerking, loss of agility or the engine is difficult to start? One of the reasons for such malfunctions may be related to fuel pressure. Let's look at the instructions for measuring pressure in the fuel rail, as well as features that may arise during this activity.
Checking the fuel pressure is carried out similarly for all Lada cars (Granta, Kalina, Priora, Largus, Vesta, Niva 4x4 and XRAY), because All these models have the same type of engines.
How to check on VAZ and foreign cars
To determine a breakdown, the following procedures are performed:
- The fitting plug is unscrewed - the element that controls the fuel pressure.
- The O-ring is inspected - if it is damaged, this component must be replaced.
- The spool is removed from the fitting.
- The engine starts, the pressure in the regulator is measured with a pressure gauge.
- The information received is compared with that specified by the manufacturer.
You can check the performance of the RTD yourself, even without tools. To do this, just pinch or disconnect the valve and study the intensity of the stream. A pressure gauge will give a more accurate result. It should be connected between the fitting and the fuel hose, having first disconnected the vacuum hose. The measurement is taken at idle speed. The information obtained depends on the car model - for example, in a VAZ 2110, the pressure indicator should start at 0.3 and gradually increase to 0.7 Bar.
Fuel pressure regulator with connected pressure gauge
Has your blood pressure changed? You may have connected the pressure gauge incorrectly. Check the connection. If everything is correct, it means the regulator has become unusable.
Where is the fuel pressure regulator located and how does it work (video)
FakeHeader
Comments 28
Look in the rear left arch, there is a separator tank, there is a valve on top of it inserted through an elastic band. This valve flew out, and I washed the rust and sand fuel system three times until I accidentally discovered a valve dangling in the arch and a hole from it in the separator tank, everything that was on the road flew into it
Thanks, I'll take a look today
Look in the rear left arch, there is a separator tank, there is a valve on top of it inserted through an elastic band. This valve flew out, and I washed the rust and sand fuel system three times until I accidentally discovered a valve dangling in the arch and a hole from it in the separator tank, everything that was on the road flew into it
Do you have a photo? I don’t understand, we have an absorber under the hood and only the hose from it goes to the tank
Do not confuse the adsorber with the separator.
Look in the rear left arch, there is a separator tank, there is a valve on top of it inserted through an elastic band. This valve flew out, and I washed the rust and sand fuel system three times until I accidentally discovered a valve dangling in the arch and a hole from it in the separator tank, everything that was on the road flew into it
To prevent this from happening, you need to install fender liners!
:))))) God forbid, advise some grandfather. It must be assembled on the assembly line as expected and this will not happen
fender liners without screws novline, I installed these and everything is good! There seems to be information about them on the drive too, I advise you to look!
For some reason I am not a supporter of these mud collectors.
Rdt. When the gas is released, the pressure should not fall below 3.8 by 4 points. The RTD releases the pressure, and when the engine is stopped, the pressure in the fuel rail should not drop sharply to 0. It should remain at 2-2.5-3 bar (with the internal combustion engine not running)!
did you change the fuel filter?
Change the gas station, did you change the fuel too? check adsorber electromagnetic sensor
I changed the gas station, the same fuel (in the tank and fine cleaning)
it means the star is coming to the catalyst
Kats cut out, firmware for Euro2
DMRV means))) damn there are a lot of reasons for “being held by the ass”!
The pressure was restored, another pump was replaced, the reason “does not work” was the licked key of the kv star, the damper was loose and gave incorrect readings
Change the RTD... The pressure should be 3.8 But in general, before changing anything, you need to do diagnostics and not mindlessly change everything from one extreme to another
The RTD on the Priora releases pressure above 4 atm, right?
Change the RTD... The pressure should be 3.8 But in general, before changing anything, you need to do diagnostics and not mindlessly change everything from one extreme to another
It’s impossible to find a diagnostician during the day, they’ll charge 2k for checking (whether they’ll find it or not is unknown)
My friend lives in Surgut. Also a diagnostician. Has scanners and programs. If it is not very far from you, I recommend it. He won’t take extra, and he won’t take money for unresolved problems.
If I find anything here, in the rage I might roll it to Surgut
Change the RTD... The pressure should be 3.8 But in general, before changing anything, you need to do diagnostics and not mindlessly change everything from one extreme to another
Before changing the RTD, you should check the BN; it breaks 15 times more often than the RTD. You need to measure the fuel pressure head-on, directly. It should be at least 7-8 atm. If this is the case, the RTD is changed (if the corrugated hoses in the module are in good working order and there are no leaks) If the pressure is 1 11 m
Is the car jerking, loss of agility or the engine is difficult to start? One of the reasons for such malfunctions may be related to fuel pressure. Let's look at the instructions for measuring pressure in the fuel rail, as well as features that may arise during this activity.
Checking the fuel pressure is carried out similarly for all Lada cars (Granta, Kalina, Priora, Largus, Vesta, Niva 4x4 and XRAY), because All these models have the same type of engines.
What are the consequences of malfunctions in the operation of RDTs?
Over time, the engine starts more and more poorly. Fuel begins to come out of the cracks, which leads to a strong increase in its consumption. When the pressure changes unevenly, the dynamics of movement are disrupted, surges occur, and the car jerks during acceleration.
Is it possible to repair a failed part? In most cases, no, you have to completely change it. Repair units are almost always non-separable. Some experts suggest repairing the component, but this is dangerous. It is better to buy a new regulator - fortunately, it is inexpensive.
Determining violations in the operation of RTDs is not a very difficult task, which can be handled independently. Remember that this part of the machine needs to be checked periodically. By detecting the problem in time, you will protect important car components from rapid wear.
How to change it correctly?
Next, we will look at how to correctly replace the working fluid of the cooling system in a Lada Priora car with an electronic pedal or with air conditioning. You can change the refrigerant at a service station, but this task is quite simple and anyone can handle it on their own. For the best effect, it is necessary to flush the cooling system, we will discuss this below.
Preparation
Before you begin the process, prepare the following:
- fresh refrigerant in the required volume;
- seal for the drain cover if the old one is worn out;
- set of wrenches;
- clean rags;
- container for collecting used antifreeze.
The Lada Priora Repair and Maintenance channel provided a video that demonstrated the procedure for draining the working fluid from the cooling system.
Step-by-step instruction
How to replace antifreeze on a Priora:
- Drive the car into a garage with a pit; you will need a flat surface to perform the work. Wait until the engine cools down; the entire process is carried out cold.
- There should not be high pressure in the cooling system. To reset it, open the hood and unscrew the expansion tank cap. If the engine is hot, coolant may spray out of the hole, so use a rag when opening it.
- Dismantle the plastic protection of the power unit. To remove it you need to unscrew two fasteners on the sides. It is not necessary to dismantle the clamps, but removing them will make the task more convenient.
- If your car is equipped with a transmission with control cables, then it is necessary to dismantle the starter device. To do this, disconnect the negative terminal from the car battery. Press the fastening of the connector with the wiring and disconnect the plug from the output of the traction relay. Remove the protective cap from the nut securing the tip of the wire connected to the positive terminal of the battery. Using a 13mm wrench, unscrew the nut and remove the cable tip from the contact screw on the traction relay. Then use the same tool to unscrew the screws and dismantle the starter device. If the car's transmission is controlled by traction, then there is no need to dismantle the starter.
- Find the drain plug; it is located directly on the cylinder block. You need to place an old bucket or basin under it, into which the used refrigerant will be drained. Unscrew the cap and wait until the liquid comes out of the system. Also unscrew the protective valve under the radiator device; some of the substance will also flow out of it. When the draining is complete, you need to tighten both plugs. Don't forget to check the condition of the seal on the drain cap. If it is worn out or there are traces of defects, the ring must be replaced.
- Assess the condition of the refrigerant drained from the refrigeration system. If there are traces of deposits, wear products, or the liquid as a whole is very cloudy and viscous, it is recommended to flush all components. To do this, pour about 7.8 liters of distilled water into the system through the expansion tank. You can add vinegar or citric acid to it to remove dirt. The use of special cleaning agents is allowed. After filling, the engine starts, you can perform a test drive. Then the procedure for draining the refrigerant from the power unit is repeated. If the liquid is still dirty, then the washing is repeated until it comes out clear.
- Assess the condition of all pipes and lines of the cooling system. If there is damage or signs of leaks, the hoses must be replaced.
- The next step is to pour new refrigerant into the system. To prevent an air lock from appearing in the lines and eliminate air entering the system, it is recommended to slightly loosen the clamp of the pipe connected to the throttle assembly. The hose is then disconnected.
- The cooling system is filled with fresh antifreeze through the filler neck in the expansion tank. New refrigerant is poured in until it comes out of the pipe disconnected from the throttle. When this happens, the line is connected into place and the clamp is securely tightened. Then the refrigerant is added to the system to the required level.
- All previously dismantled components are reassembled in reverse order.
- The engine starts and the journey is carried out. Now you need to once again make sure that the fluid level is correct. Make sure there is no leakage from the drain hole.
Signs of a malfunctioning fuel pressure regulator
Every engine fuel system contains a fuel pump. Electric fuel pumps have recently been installed in gasoline engines; mechanical models are already outdated and are no longer used on modern vehicles. Mechanical fuel pumps live out their days on cars produced in the last century.
The performance of the electric fuel pump must be such as to ensure uninterrupted fuel supply at any engine speed and under any load. But what to do when the engine is running at idle or low speed, and a small portion of fuel is required? After all, the pressure that is created in the engine power system for heavy loads will be excessive at idle speed. And excess pressure can lead to disastrous results - breakage of fuel hoses or other damage. For normal operation of the fuel system, there is a fuel pressure regulator.
Controller operation in different modes
Operating principle of RTD
If we take a simplified look at the operating principle, it is quite simple. The pump pumps fuel into the ramp, from which it also enters the fuel chamber of the regulator. As soon as the pressure force exceeds the spring stiffness, the membrane begins to move towards the vacuum cavity, dragging the valve with it. As a result, the drain channel opens and part of the gasoline flows into the tank, while the pressure in the ramp drops. Because of this, the spring returns the valve with the membrane to its place, and the return channel closes.
But as already mentioned, the RTD adapts to the operating mode of the motor. And it does this due to the vacuum in the intake manifold. The greater this vacuum, the stronger its effect on the membrane. Essentially, the vacuum created creates an opposing force against the spring.
In reality, everything looks like this: to operate the engine at idle speed, an increase in the amount of fuel is not necessary, and therefore no increased pressure is required.
In this operating mode, the throttle valve is closed, so there is not enough air in the intake manifold and a vacuum is created. And since the vacuum chamber is connected to the manifold by a pipe, a vacuum is created in it. Under the influence of vacuum, the membrane presses on the spring, so less gasoline pressure is needed to open the valve.
Under load, when the throttle valve is open, there is practically no vacuum, which is why the membrane does not participate in creating force on the spring, so more pressure is required. Thus, this element functions in the power system depending on the operating mode of the motor.
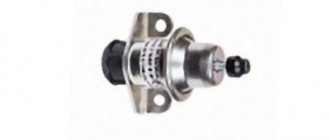
What is a fuel pressure regulator?
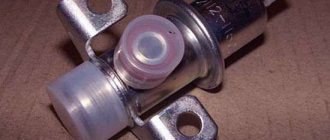
The fuel pressure regulator (FPR) is a vacuum valve that transfers excess fuel through a return hose into the fuel tank. The RTD is a housing that contains a valve, a membrane and a spring. There are also three terminals in the housing: two terminals for the passage of fuel through the regulator, the third is connected to the intake manifold. As engine speed increases, the vacuum created in the manifold (at the third terminal) overcomes the force of the spring and moves the membrane, thereby opening the valve slightly. Excess fuel gets access to the second outlet and goes back to the gas tank. An RTD is often also called a check valve.
As a rule, the check valve is located on the fuel rail; it can also be embedded in the fuel return hose of the power supply system.
Causes of fuel pressure regulator malfunctions
RDT may fail for several reasons. For example, defective parts are found on Russian-made cars. There are significantly fewer defects on foreign models, but you can purchase a defective RTD by purchasing a non-original spare part.
Mostly the check valve breaks down due to natural aging. Let's say this can happen after a hundred thousand mileage or more. It should be noted that check valve failures are not common. Most often, in an RTD, the membrane dries out over time, less often the valve jams, and even less often the spring breaks or weakens.
Sensor failure may occur due to low-quality gasoline. For example, in winter, fuel was filled with water, and water got into the regulator. If the fuel filter is not replaced on time, dirt gets into the parts of the power system, including the regulator. In this case, the RTD valve most often jams. It’s hard to imagine what could happen to the spring, but apparently, it still breaks sometimes.
Characteristic symptoms of fuel pressure regulator malfunctions
By what signs can you determine that an RDT is not working:
- the engine is very difficult to start, you need to turn the starter for a long time and at the same time keep the gas pedal pressed in order for the engine to start;
- The engine idles unsteadily or the speed is very low, the engine often stalls. At the same time, it does not gain power at all; when trying to accelerate, it results in a deep failure;
- The spam engine changes speed sharply, this is especially noticeable at idle:
- Fuel is leaking from the fuel hoses. Attempts to tighten and replace clamps and replace hoses do not help.
How to check the fuel pressure regulator for serviceability
The fuel pressure regulator is not an electrical sensor and cannot be checked using instruments. It should also be taken into account that the RDT cannot be disassembled or repaired. Someone writes that the fuel check valve can be repaired. I would like to see what it looks like and where you can buy a repair kit. Typically, RTDs are inexpensive, and even for that reason they would not be worth repairing if they were repairable.
How to choose a good quality fuel filter for Lada Priora?
When purchasing, you need to rely on the markings on the filter. This will help eliminate the problem of purchasing an item that does not match the parameters and type of connection.
Many motorists are interested in what kind of fuel filter is installed on the Priora and whether it is necessary to buy its analogue. The standard cleaner is Salut, but it can be replaced with another domestic or foreign consumable.
Most Priora drivers prefer products from BIG and SCT companies. They are distinguished by high cleaning quality and affordable cost.
The gasoline filter from Mann was well noted for the Lada Priora. But its price category is much higher and not every owner of domestic transport will be able to purchase the product. And, despite excellent reviews, the element will have to be changed according to the recommended mileage.
The Priora gasoline filter from MAHLE is distinguished by good quality lint-free inner paper. The price of the consumable is high, but it guarantees reliable operation of the car throughout the entire period of use. The domestic cleaner Nevsky attracted buyers with its low price. If worn-out elements were correctly replaced, there were no complaints about its operation.
After choosing a purifier, you need to take into account the specifics of its installation. First you need to find out how to change the fuel filter on a Priora carefully and quickly. Then you can begin repairs and restore your car. A mandatory step will be to check the correct installation.
Source
Signs of a malfunctioning fuel pressure regulator
The fuel system of a modern car is a complex mechanism consisting of many parts and is one of the main systems. The fuel system contains many moving parts, one of which is the fuel pressure regulator. The flow of gasoline into the combustion chamber requires constant maintenance of a certain pressure, so this operation requires a special unit that is connected to both the combustion chamber (injectors) and the fuel system (via a valve).
However, over time, with constant and long-term operation of this unit, certain problems arise in the form of malfunctions, which can lead to certain problems in operation.
Components
This part consists of several main elements:
- The diaphragm valve is the main part of the regulator and is connected to the fuel supply system and the combustion chamber (injector rail). In most domestic models (such as VAZ 2115, 2110, 2114 and Lada Priora) this unit is presented in a similar configuration, since the fuel supply systems of front-wheel drive vehicles of this family have a similar design. Therefore, the quality of breakdowns for these machines is similar;
- Pipes connected to the valves and combustion chamber on one side and, through other valves, to the fuel line on the other. The device in the VAZ 2107 models is somewhat different due to an older and unreliable design. When using equipment for rear-wheel drive, old components of an outdated design are used (the valve may work unstable when operating in a carburetor engine and the wrong choice of fuel mixture enrichment) so its design is somewhat different, although problems arise.
Failure
The design of this unit is quite simple to operate, but the valve can also fail.
This will entail certain negative consequences and the main signs will be:
- Increased fuel consumption due to partial failure of the element . When the valve unstably performs its functionality, the pressure in the rail and the fuel system drops, there is an excess supply of gasoline to the combustion chambers, which causes significant fuel consumption. This also entails, in addition to increased gasoline consumption, increased wear of the element, which will ultimately lead to complete failure of the part;
- Unstable engine operation at idle speed . If the fuel supply is poor, the engine cannot reach its optimal level of operation, so the idle air regulator operates unstably. If there is insufficient pressure and the fuel pressure regulator fails, its supply either stops or fuel flows freely through the system. This can also cause the engine to start poorly, which requires increasing the load on the starter, also causing wear. This effect manifests itself during mechanical wear of the valve, when the failure of one part of it ensures poor pressure balancing between the fuel and air;
- The crankshaft cannot maintain a constant speed level. This effect is dangerous because this malfunction can involve many elements of the system, and the malfunction of this regulator is an indirect cause of such a breakdown. Unstable operation of the crankshaft not only disorganizes the driver, but also reduces engine life (albeit slightly);
- Deterioration of engine power qualities . If the fuel supply is poor, the engine cannot fully realize its potential when moving, so its performance decreases. This causes a deterioration in the dynamic qualities of the motor and affects its service life;
The video shows signs of a malfunctioning fuel pressure regulator:
Inspection and repair
As mentioned above, if your car's throttle body is protected by a casing, getting to the regulator may not be easy. Before starting the test, we advise you to study this unit and also check the integrity of the wiring. An important point: further checking of the regulator cannot be carried out correctly with a discharged battery. If there are no problems with all this, then you can start checking. There are several methods:
- Check the resistance between the windings. There must be an open circuit (infinite resistance) between C and B, as well as A and D. But between A and B, C and D, the resistance should be from 30 to 100 Ohms;
- Checking with a homemade tester. It can be made from a 6V AC transformer. Armed with such a tester, you will need to check whether the regulator rod moves normally. Some car enthusiasts simply lightly press their finger against the end of the rod and try to understand whether the rod moves.
Let us immediately note that if the elements of the sensor “filling” fail, the entire device will have to be replaced - it is not repairable. However, some manipulations can solve the problem at least temporarily. So, for example, if you checked the regulator using the second method and made sure that the rod stopped moving, do the following:
- Wedge the regulator with silicone grease. If it gets inside the device, there will be no consequences;
- If lubrication does not help, soak the stem in alcohol and wipe with a cotton swab. Alcohol can also replace carburetor cleaner;
- If the above cleaning products are ineffective, use WD-40. This is an extremely aggressive product that should be used last.
If cleaning the regulator does not produce results, you will have to buy a new device. A car enthusiast can disassemble it and try to identify the cause of the breakdown. In most cases, the regulator stops working properly if the guide cone needle is unusable (wedge, abrasion, deformation).