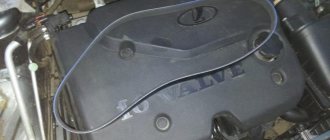
About the belt
All belts are different; the Niva 2121 uses a V-belt, while more modern Nivas such as Urban and Chevrolet use a poly-V-belt. The poly V-belt has a larger contact patch and is more resistant to wear.
The length of the belt depends on the number of attachments; if the car has air conditioning or power steering, the belt will be significantly longer than in a Niva without additional options.
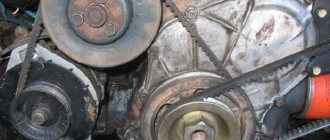
Alternator belt Niva 2121 (carburetor)
The belt in such a field is slightly longer than in a field with an injector and power steering due to the fact that the belt drive also rotates the cooling fan with a pump. In the injection Niva, the cooling fan starts automatically.
| Model | Equipment | Belt type | Belt size, (mm) | Belt number | vendor code |
| 2121 | Pump, Generator | Klinova | 10x940 | 2101-1308020 | 2101-1308020 |
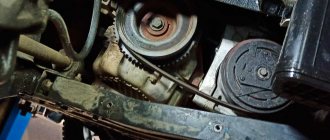
Alternator belt Niva 21213 (Injector, power steering)
In this car, the generator drive also rotates the power steering pump.
| Model | Equipment | Belt type | Belt size, (mm) | Belt number | vendor code |
| 21213/21214 | Pump, Generator, Power Steering | Klinova | 10x838 | — | 21214-3407042-01 |
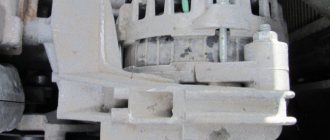
Niva Urban generator belt
Niva Urban is a more modern modification of the Niva with plastic bumpers. A poly V-belt is used here as a generator drive.
| Model | Equipment | Belt type | Belt size, (mm) | Belt number | vendor code |
| Urban | Pump, Generator, Power Steering, Air Conditioning | Poly-Vline | 1125 | 5PK1125 | 21218-1041020 |
Niva Chevrolet
This car is significantly different from the classic Niva, therefore. and its components are completely different. In the Chevy Niva, the air conditioning compressor is driven by a separate belt. The alternator belt rotates the power steering, alternator and pump. Due to the large amount of equipment, the belt length is quite long.
| Model | Equipment | Belt type | Belt size, (mm) | Belt number | vendor code |
| Chevrolet | Pump, Generator, Power Steering | Poly-Vline | 1888 | 5PK1888 | 2123-1041020-30 |
Niva Chevrolet air conditioner belt dimensions
Source
Alternator belt size for VAZ 21214 injector
We check the belt tension by its deflection between the pulleys of the units.
1. With normal belt tension, its deflection under a force of 98N (10 kgf) should be 10–15 mm between the pump pulleys and the generator
2. or 12–17 mm between the pump and crankshaft . We adjust the belt tension by moving the generator (with its fastening nuts loosened): from the engine to increase the tension or to the engine to decrease the tension.
3. To replace the belt, loosen the nut securing the generator to the tension bar with the “17” head on the carburetor engine.
4. or a “13” head – on an injection engine. We move the generator towards the cylinder block to loosen the belt tension.
Drive tension
The ignition must be turned off. After this, open the hood and remove the plastic trim. Then loosen the air duct clamp. You can use a regular screwdriver for this.
Then use a 10 mm socket wrench to unscrew the screw holding the air filter. After this, remove the air duct from the filter housing. At this point the preparation stage can be considered complete.
Removal and installation of the generator of the injection engine Niva 2121, VAZ 2131, Lada 4x4
Generator device Niva 2121, Niva 2131, do-it-yourself repair
Disconnect the negative cable from the battery. Remove the oil pan protection plate and the right mudguard of the Niva 2131 engine (see Removing the oil pan protection plate and injection engine mudguards).
Disconnect the output wire “D” of the generator.
Having moved the rubber cover, use a 10mm wrench to unscrew the nut securing the wires to terminal “B”...
Remove the VAZ 2131 coolant pump drive belt (see Adjusting the tension and replacing the coolant pump drive belt).
Using the “13” socket, unscrew the nut of the bolt securing the generator to the tension bar.
Using a 13mm wrench, unscrew the nut of the bolt from the lower mounting of the generator to the bracket on the cylinder block and remove the bolt. We take the generator out of the engine compartment downwards.
Having unclenched the three protrusions of the casing,...
Using a Phillips screwdriver, unscrew the two screws...
...and remove the voltage regulator with the brush holder.
Disconnect the wire and remove the voltage regulator with brush holder.
Use a 10mm wrench to unscrew the nut...
Replacing the NIVA alternator belt. Alternator belt after 25 km. on NIVA 21214
on NIVA
VAZ
21214
with power steering is changed after removing
the belt
from the power steering
Replacing the NIVA VAZ 21214 power steering belt. Tensioning the NIVA power steering belt
Niva power steering
5 minutes. The pump bearing and seal will fail faster if...
...remove the sleeve and capacitor wire.
Using a Phillips screwdriver, unscrew the screw...
Using a Phillips screwdriver, unscrew the screw securing the rectifier unit and the three screws securing the ends of the stator windings.
The screws securing the ends of the Niva 2121 stator windings are equipped with insulating washers.
We remove the ends of the stator windings...
...and remove the rectifier block.
Using a 21mm spanner, unscrew the pulley mounting nut, holding the rotor with a 8mm hexagon.
Remove the washer and pulley parts.
Remove the washer from the rotor shaft.
Using a Phillips screwdriver, unscrew the four screws holding the covers together.
Using a sharp scriber or paint, we mark the relative positions of the covers and the stator for subsequent assembly.
...we disconnect the front cover with the stator and the rear cover with the rotor.
Using a screwdriver, pry up the stator of the VAZ 2131.
. remove it from the front cover.
Using a drift that rests strictly on the end of the rotor shaft (so as not to damage the plastic bushing located under the slip rings),...
...knock out the rotor with the bearing from the back cover.
Using a puller, we press the bearing from the rotor shaft of the Niva 2121 generator.
We press the new bearing onto the shaft using a suitable piece of pipe, applying force to the inner ring.
Using a tester, we check the stator and rotor windings of the Niva 2131 generator for an open circuit or short circuit to the housing.
Transferring the generator to the top 21214 drawing
Niva is an excellent domestic SUV that can compete with modern jeeps. VAZ 21214 received a durable body, a powerful power plant and a reliable suspension. Like any car it has its drawbacks. These include the location of the generator - the unit is installed in the lower part of the body. When testing for strength in forest and mountainous areas, dirt, sand, and water get into it. Another unpleasant point is that coolant constantly drips onto the unit. The problem can be solved by moving the generator upstairs.
After reading this article, you will learn:
- What is needed to move the generator upstairs. How does the process work for cars with and without power steering? Is it worth buying a new unit for VAZ 21214.
Study this drawing carefully. The author decided to make a bracket for moving the generator with his own hands. The part is made of metal, the thickness of which should be 4 mm, and the width and length should be 80 mm. To assemble the bracket, you will need parts from other domestic cars:
- Belt 6РК1290; Adjustment bar; Crankshaft pulley from tens.
Photo, details of the manufactured bracket 21214:
As you can see in the photo, the standard fan is installed on a pump pulley from GAZ 3110, we also take a crankshaft pin from 2110 and a 6RK1290 brand belt. The generator should be located on the top left side. It must be attached to the top using an M8 cylinder head bolt; at the front, a standard bolt and studs are used. For fixation, the bracket must be secured with an additional lock nut.
This generator transfer drawing differs from the first one in that it uses a belt with a size of 1375 mm. There are fewer steps here, but you will have to work with a grinder - you need to reduce the plane on the head located in the area of the M8 bolt.
The front cover will need new bolts and studs. This drawing of a bracket for mounting a generator is also suitable for other models, for example, for 21213.
The drawing suggests moving the generator to the place of the hydraulic booster. To do this, you need to make a bracket and install it next to the power steering. You need to select washers for the bracket ears in advance.
This option uses a belt with a size of 1220 mm
It is important that the angle of its wedge must be exactly 40 degrees. An excellent solution would be to buy a belt with ZIL 157
The return hose has a center length of 1115 millimeters, and the high-pressure pressure hoses are 1450 mm. Check all dimensions carefully, remember the saying: measure 7 times, cut once, there is no need for mistakes here. There is no standard hole for these hoses in the right casing, so you will have to take it and cut it yourself.
The bracket itself for moving the device upstairs is made according to this drawing:
The pump must be turned upside down so that the generator is completely seated. The result of the transfer looks like this:
If you don’t have much experience in carrying out such upgrades, then you can buy a ready-made kit. It will include a new bracket for the Niva and the necessary fastenings. Reviews from motorists indicate that the cost of this simple part is too high.
Should I install a more powerful current generation unit?
We have already described above why the unit wears out quickly. An excellent solution is to install a new generator. Another common reason is the installation of off-site equipment that consumes a lot of electricity. The current strength of a standard unit is not always enough, so you should think about installing a more powerful generator.
The model depends on the year of manufacture of the car and engine. For example, the first Nivas with a 1.6 power plant have a device with a remote regulator, which was used in the “classics”. In more modern machines the regulator is already built-in.
If you want to buy an aftermarket unit, it would be wise to get a 2003 model year Chevrolet. The selection must be made according to the catalog numbers and parameters that are present in this table:
If you can modify the fastenings yourself, then the list of available gHepaTopoBs can expand significantly. Craftsmen even install devices from foreign cars.
In any case, you should strive to modernize and improve your car. And this applies not only to electricity. The Niva is a reliable SUV, but it lags far behind its foreign competitors in terms of comfort. You can move on to this issue immediately after improving the technical component of the car.
Generator replacement
To repair or replace the generator, the car owner will have to remove the unit completely from the car or turn to professionals for work. If you still want to carry out the replacement yourself, then first you will need to prepare all the necessary tools:
The procedure consists of the following sequence of actions:
The structure is assembled in the reverse order; the entire procedure will take about two hours if you have all the necessary tools.
Also interesting: Niva Chevrolet steering tips
Additionally, it is worth noting that when everything is assembled, you will need to adjust the position of the generator using the tensioner. To do this, you need to unscrew the tensioner nut and tighten or loosen the belt, while observing the battery charge.
If the indicator returns to normal, then the selected tension is sufficient. There is no need to tighten the structure, as the generator bearing may fail. If the tension is insufficient, the generator will work intermittently, and this can also lead to breakdown.
Installed a new Chinese generator on Shevik
How did they even manage to tighten the 1885 belt? I can't imagine))
First I'll tell you about the generator
I took the old one, they completely disassembled it, looked at it and said that it had come to an end. The bearings were torn, and the rotor was worn out to such an extent that repairs would cost 2,500 rubles. And a new one costs 3100. It’s Chinese, but the warranty is 3 months, we checked it at the stand - everything works.
Therefore, it is better to take a native gene with the same width of the roller and with the correct number of rivulets (grooves). That’s why the belt is called a ripple belt, because the grooves must match, it turns out something like rails.
I wanted to buy a 100 Amp Pramo, but I couldn’t find it anywhere in the city; the original genes cost 4,000 rubles. So I decided to try Chinese))
First you need to loosen the belt, which if tense, cannot be easily reset. So, our task is to loosen the tension roller; it is held in place by a platform with three nuts. You will need a 10mm wrench, it is very advisable to have a ratchet with the same head, preferably an elongated one, because the third nut is located directly under the belt and it is better to approach it from the side.
The first 2 nuts are easy to get out with a regular open-end wrench. But the third one is much easier with a ratchet.
We've loosened it - now we turn the adjusting screw (key 10) so that it moves as far up the platform as possible, so the entire platform with the roller will move freely up and down.
We need to go up to throw off the belt.
We remove the generator itself (in my case, I already put it back)
Replacing the VAZ 2121 Niva alternator belt. Photos, instructions on how to change the alternator belt on a Niva
This photo report shows in detail how to replace the alternator belt on a VAZ 2121 Niva . On average, the original alternator belt runs about 100 thousand kilometers, which is known from the reviews of many owners of this car.
It is important to understand that after replacing the belt with a new one, its lifespan may be slightly shortened, since a good belt is difficult to find.
Of the necessary tools, we only need a regular 17mm wrench, or you can take a ratchet wrench and a 17mm socket for it.
You can also check out our photo report on replacing the generator on a VAZ Niva
for repair of VAZ (Lada) 2121 (4x4)
Let's sum it up
Taking into account the above information, it becomes clear that the alternator belt on the Niva Chevrolet needs to be changed more often than almost all car owners think. It is also important to look at the general condition of the belt, inspect it for wear, cracking, etc. At the same time, you need to evaluate its tension and make adjustments if necessary.
As a result, you can count on a fairly long service life of the generator belt, as well as reliable and measured operation of auxiliary equipment (provided there are no other breakdowns, liquids getting on the belt, etc.).
Source: krutimotor.ru
Nuances
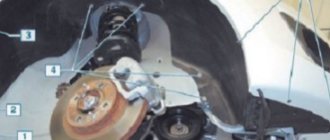
When replacing a generator with a Niva 21213, 2121, 21214, a number of subtleties arise, and one of them is the location of the generator unit. It is located at the bottom of the engine compartment.
Actually, this is why problems arise with the operation of the structure: while driving, various contaminants get on the generator, and coolant drips. If you don’t want to constantly change the generator unit, it is recommended to move it upstairs.
To ensure that no problems arise during the operation of the car, it is important to monitor the condition of the car. First of all, it is recommended to regularly inspect the generator.
So, when the “battery” light blinks on the dashboard, if suspicious noises or creaking sounds occur, you should be wary and think that the generator is not working correctly.
Timely inspection will help to avoid unpleasant situations in the form of breakdowns of the constituent elements of the generator, and as a result, failure of entire electrical systems.
Read news about the new Niva
Power steering belt for VAZ 21214
Content:
Now we will talk about the power steering belt of the VAZ 21214. But before we start, we should remember what a power steering (power steering) is, how to care for it and whether it is absolutely necessary.
Story
It’s amazing, but for more than 50 years of serial existence of the hydraulic booster, it has not undergone significant changes. But along with it, electric power steering was created.
There was no need to install a power steering servo for the first cars, because low speeds did not achieve good maneuverability. And then there was no need to talk about comfort. There was only one way to make steering easier: increasing the diameter of the steering wheel.
And it was only towards the end of the 30s that cars began to be equipped with the first control amplifiers. These were pneumatic installations that were powered by a compressor. But after a short period of time, the first hydraulic boosters arose, which were distinguished by the accuracy of their operation and silence. It was precisely this amplifier model that the designers fell for. And in 1951, the Chrysler Crown Imperial appeared, which was equipped with a Hydraguide hydraulic booster.
By and large, power steering is a mechanism whose main element is the pump. The operation of the pump is ensured by a belt that comes from the crankshaft.
With the help of a distributor, the gain is monitored, which is transmitted to the steering wheel, and turns the steered wheels in a strictly dosed manner.
Advantages and disadvantages
+ it makes the work of your hands easier, especially when parking;
+ weakening of shocks from road unevenness transmitted to the steering wheel
– lack and absence of reactive effort. The point is that the hydraulic booster device can greatly help the driver, reducing that amount of returning force that helps “feel the car.” Therefore, designers need to find a middle ground: create a steering wheel that is not too tight and get good information content from the steering wheel.
Power steering care
Specifically, violation of operating criteria leads to failure of the power steering. Therefore, you should keep the following in mind:
- Check the oil level from time to time.
- Inspect the system for tightness.
- Inspect and adjust, as necessary, drive belt tension.
- Avoid holding the steering wheel in the last position for more than 5 seconds, because this may cause the oil to overheat.
Power steering belt VAZ 21214
Although the power steering belt is small, it is an important part of the car. Thanks to it, the power steering pump is driven from the crankshaft.
Despite the fact that there are several types of belts, there are two main ones: V-belt and rivulet.
The condition of the belt must be constantly monitored, and when undergoing maintenance, it must be diagnosed. Depending on the manufacturer, power steering belts should be changed every 50-60 thousand km. The replacement can be created independently or in a car repair shop. If you decide to make the replacement without the help of others, then you need to keep in mind that the VAZ 21214 power steering belt is located behind the alternator belt, so you need to remove two belts before replacing.
At the time of writing, the belt can be purchased for 125 -250 rubles, depending on the region.
Source: vaz-21214.ru
Replacing the alternator belt on Niva
The alternator belt on a Niva can easily last 100,000 km, which has been tested by many car owners from personal experience. But with subsequent installation, its service life may be reduced, since choosing a real original belt can be very difficult. If you decide to replace it, then to perform this maintenance you will need a 17-mm open-end wrench or a socket with a ratchet and extension, as well as a universal joint.
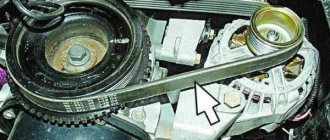
So, the first thing you need to do is loosen the belt tensioner nut, as clearly shown in the photo below:
After the nut is loosened, you need to move the generator to the side so that the belt is free. Shown in more detail schematically in the picture:
And at this moment, when the belt is as loose as possible, you can remove it from the pump pulley:
And then from the generator drive, since it will already be completely free:
We buy a new one for about 80 rubles and replace it. Installation is carried out in the reverse order and do not forget about the tension so that the battery is charged normally.
Chevrolet Niva alternator belt: how to check and change the auxiliary drive belt
The accessory drive belt is most commonly known as the alternator belt. With all this, it is important to realize that this belt, in addition to the car’s generator itself, also drives the power steering, air conditioning, etc. It goes without saying that if problems arise with the drive belt, malfunctions in the operation of the suspended units will also inevitably appear.
Next, we will look at when to change the Chevrolet Niva alternator belt, what signs indicate the need for replacement, as well as how to replace the Chevrolet Niva alternator belt with your own hands.
Diagnosis and elimination of alternator belt whistling
Is the alternator belt whistling in your car? - Don't panic. The first thing you need to do is do a little diagnostics. Inspect the belt for obvious damage.
Check that it is well tensioned and that there is no obvious shift in the pulley line. Pay special attention to the surface of the belt - there should be no liquids on it.
After the inspection, you will be able to draw preliminary conclusions and make a decision on further repairs:
If the belt is visually damaged, there are serious cracks on the surface, and the edges are frayed, then you cannot do without replacing the belt. At the same time, buy only original parts for your VAZ model.
Otherwise, after a couple of thousand kilometers you will encounter this problem again. By the way, low-quality Chinese fakes often “whistle” immediately after installation.
Is there obvious contamination on the belt (oil, antifreeze)? — Carefully clean the belt from excess dirt (if possible). If dirt has become embedded in the product and cleaning does not produce visible results, then it is better to replace the alternator belt.
Checking the alternator belt, tightening and replacing the Niva Chevrolet belt
First of all, to check the condition of the Chevrolet Niva belt, you should remove the engine screen cover (attached to 4 studs). To check the belt tension, press your finger on the belt in the area between the generator pulley and the pump (cooling water pump).
If you press with a force of about 7.5-8 kgf, normally the belt should bend by 11-13 mm. By the way, both sagging and tightening of the belt are not allowed. The fact is that a very tight generator belt puts additional load on the bearings of the generator itself; it also wears out faster, stretches and can break.
- To adjust the tension of the generator belt, remove the rubber sleeves through which air is supplied to the throttle;
- Then, using the “13” head, you need to loosen the 3 nuts that secure the tension roller bracket;
- Next, using a key or head 13, you need to rotate the adjusting bolt clockwise. This will allow you to tighten the belt;
- Then it remains to tighten the nuts securing the tension roller bracket. After completing the adjustment, turn the crankshaft 2 turns. Afterwards you will need to check the belt tension again by hand.
Now let's move on to replacing the alternator belt. Replacing the Chevrolet Niva belt, and specifically the drive belt of auxiliary units, is necessary if cracks, breaks, or delamination are detected. Also, for the version with air conditioning, remove the air conditioning compressor drive belt (Chevrolet Niva air conditioning belt).
Next, loosen the nuts securing the tension roller bracket, and then rotate the adjusting bolt counterclockwise. This rotation will loosen the belt tension. Then the belt is removed from the tension roller, as well as from the other pulleys.
Let's dwell on this point again. Normally, the belt deflection should be 11-13 mm. with a force of 7.5-8 kgf. The belt tension itself is carried out by moving the tension roller and rotating the tensioner bolt, provided that the tensioner bracket fastening nuts are loosened. Please note that after completing the adjustment, the crankshaft should be turned a couple of turns and the belt tension checked again. It would seem that everything is simple, but there is one aspect.
It goes without saying that it is difficult to check the correct belt tension by hand. To get the clearest data, you can use one method. To check, you need an electric steelyard, a block, and also a regular ruler.
The check is carried out like this:
- First, the air supply socket is removed;
- a block rests against the belt;
- an electric steelyard is attached to the other end of the bar;
- a ruler is staring at the block;
- the “zero” on the ruler is aligned with the edge of the air socket;
Next, you need to pull the steelyard by hand until the reading is 7.6 kg. The block itself will press on the belt, the belt will bend, and the ruler with the block will move down. This allows you to see along the edge of the air socket how much the generator belt bends.
If the deflection is more than 12mm, then the belt should be tightened, if less, you need to loosen the generator belt. It is important to obtain a deflection of about 12 mm, then rotate the crankshaft pulley and check the tension again. If everything is in order, the adjustment can be considered complete. Finally, tighten the adjusting bar nuts. Next, you need to start the engine, let the engine run for a few minutes, and evaluate the operation of the auxiliary drive.
One way or another, during a test run of the engine, the new alternator belt should not make any external sounds (whistle, creaking, grinding). Also, equipment bearings should not make noise. If suspicious noises occur, you should turn off the engine and perform additional checks. Perhaps some element is faulty. From time to time it happens that after replacing the drive belt for auxiliary units, the generator, power steering pump, etc. begin to make noise.
If everything was in order before replacing the belt, you can imagine that the belt was still too tight, and mistakes were made when adjusting it. In a similar situation, you should carry out all the checks yourself or seek help from experienced specialists.
Belts
Drive belt for generator-pump and power steering. I will never forget this story. It began with the department purchasing 50 short Nivs. After 5 thousand km. Belts whistled in unison. She herself announced the approach of a car with a high-frequency whistle, which, as it sometimes seemed to me, was louder than the sounds of the engine. The factory and manufacturer recommended tightening the belts. But I already felt what this would lead to. I dropped everything and started looking for a normal belt. On those cars where they didn’t listen to me and “tightened” the belt, more than once or twice, either the pumps or the generator bearings very quickly fell apart.
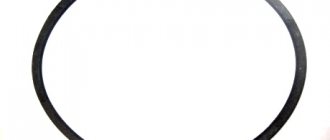
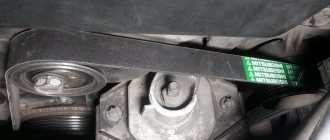
Bosch V-belt, 950 mm
I draw your attention to the most important thing: the belt should be toothed, not solid. The average service life of these belts before replacement is about 50-60 thousand km. They will not tear and will continue to stand, but they will no longer be “quite rubber”. In good climatic conditions in the middle zone, they last longer, but if we take the “resort places” of our homeland (Yamal, Yakutsk), then they are simply changed once a year as a consumable. Important: on cars with power steering, the second belt is the same if the pump is Russian-made. And 10 mm shorter if the hydraulic pump is purely German. A nameplate with a large number of German letters is glued to the German pump. The ZF mark is there both here and there.
Poly V-belts for Shniva. A small digression: it makes me smile when I look at the Shnivovodov forum once a year. Several posts are devoted to this topic (belts). With foam on his lips, a man from Moscow proves to a man from Vorkuta how different belts differ from each other. Not knowing and not understanding that in Vorkuta there is ONE belt in the store and no one is talking about what can be supplied (this is a specific story told to me by a Vorkuta resident).
Chevrolet Niva belts, drive units and air conditioning
In general, there are about 5 manufacturers of this product. The main two are Contitech and Gates. Without an alternative, it's Gates. There is a little thing here called experience and rake. I brought Contitech belts to different cars, being confident in their quality. And the owners tell me that they either whistle or have cracks. On the third case of marriage, I decided to get to the bottom. All these belts were made in a Romanian factory. It is also used to make the drive belt for the Shniva. The conclusions are yours. For the ShNiv with air conditioning, without further ado, I found a German Bosch.
Rollers
Drive belt tension roller and parasitic roller. Here, perhaps, only one thing needs to be said: the cause of failure of drive belts in most cases is the rollers. As soon as the bearing or the plastic on the bearing begins to play, immediately after this the belt begins to “eat”. I didn’t see all kinds of rollers in the store: both blue and green ones))) I’ll just say that while GM controlled deliveries to the assembly line, rollers from the German company INA were installed on the engines. You can find a German video in stores and sellers, but be careful. The INA manufacturer's name must appear on both the bearing and the plastic part of the roller.
Source
Troubleshooting
During the operation of any car, unpleasant situations often arise in the form of failure of one or another element. Niva is no exception, and most often the generator suffers.
If the generator seems to be faulty, it is recommended to check its functionality using a multimeter. To do this, you will need to start the engine and check the voltage at the battery terminals. The standard value that a multimeter should read is 13.6 V.
If the readings during measurement are higher, it means that a break or short circuit in the windings has occurred in the structure. The same can be said about the case when the voltage is below the specified number. This procedure is carried out regardless of the engine: injector or carburetor.
Also, if the breakdown is caused by another reason, you can replace the generator itself. Usually, for replacement, they turn to special service stations, but if necessary, the work can be done with your own hands.
Next, it’s worth considering what the owner of a car with a whistling alternator drive belt should do. It is recommended to immediately inspect the mechanism and find out whether it is possible to continue moving or whether it is necessary to immediately begin repairs. Diagnostics is performed as follows:
Open the hood, remove the plastic protective cover from the engine (if it is in the way) and carefully inspect the belt drive for water or process fluid. It happens that the drive gets wet after driving through deep puddles. If oily liquid is found, not only on the belt, but also on the cylinder block, try to find its source
Carefully inspect the pump, power steering pump and air conditioning compressor - all units located next to the drive. When inspecting, pay attention to the engine gaskets so that oil does not leak from under them. Make sure that the belt is not cracked and that there are no threads on the sides. Check the tension using the vehicle's operating instructions. A universal method is to rotate the free section of the belt around the longitudinal axis
The tension is considered satisfactory when the element rotates no more than 90°.
Also interesting: Niva tuning for off-road use from a professional
If none of the above methods brings results, you will have to look deeper - loosen the drive belt and remove it from the pulleys. Then try rotating each pulley by hand, the goal is to detect any sticking in the shaft that is causing the belt drive to slip. If everything is in order here, carefully examine the working side of the strap - the “licked” surface will make it clear that you received a low-quality product.