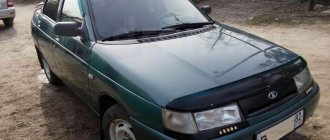
Probably, hardly anyone will argue with the fact that the VAZ “ten” is not the pinnacle of design thought. However, there is nothing surprising here, because this car was designed back in the last century. At the same time, the compensator, and quite a serious one, in this case is the price. In other words, a certain compromise is proposed - the imperfection of the car in exchange for an acceptable cost. Well, the choice is ultimately made by the car owner himself, deciding whether this option is suitable for him.
You can talk about the advantages and disadvantages of this model for quite a long time. However, this is not what we are talking about now. Those who decide that the “ten” is a suitable option in terms of the ratio between price and quality often want to somewhat refine their iron horse during operation, making changes to both the exterior and the interior.
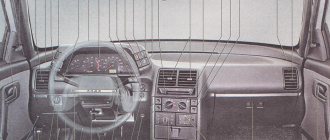
If we talk about tuning the car interior, then one of the main objects of improvement here is the dashboard. Many people simply don’t like the native version, which, frankly, doesn’t look very attractive. Yes, after the “Zhiguli” this is an undoubted step forward, but it’s already the 21st century outside the window, and I want something more beautiful and pleasing to the eye.
Why you should know the pinout
But before you start this kind of upgrade, you need to understand which wire leads where. The pinout of the instrument panel of a VAZ-2110 car is a very important point when “tuning”. Without this, you risk simply getting confused in a fairly large number of wires, buttons and various sensors. The pinout will be useful in any case - both when making minor improvements and when completely replacing the instrument panel.
The process of installation and dismantling itself is quite labor-intensive, but if you know the correct sequence of actions, then there is nothing particularly difficult about it.
For these works you will need a minimum set of tools - a screwdriver and pliers.
For those who are doing this for the first time, it is best to stock up on self-adhesive pieces of paper, like those on which prices are written in stores, and a pen. With their help, at the time of disassembly, you will indicate, firstly, the sequence of dismantling the parts, and secondly, which wire is connected where. At first glance, this may seem time-consuming, but in fact, for beginners, such markings will help them put the panel back together faster.
At the same time, before starting work, it is best to stock up on a pinout diagram - at least conditional. After all, during the work process you need not to confuse anything and correctly understand each wire and connection during the reassembly process. It is worth noting one very important point. By and large, understanding the pinout of the panel of the “tenth” family will not be difficult even for a beginner.
But you need to remember that there are certain differences here, depending on the plant where the car was manufactured and the year of its manufacture. For example, the instrument panel may be an old model, with a mechanical odometer. If the odometer is electronic, then this is a newer version. Accordingly, there are certain differences in pinout between these panels.
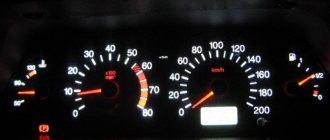
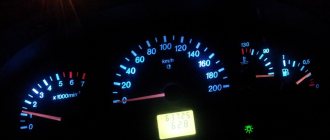
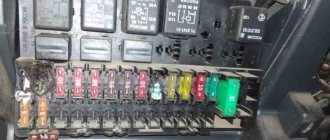
Tidy error codes
Standard errors in car self-diagnosis do not accurately indicate a breakdown. Due to the simplicity of the on-board computer, the device can only indicate the direction where to look for the problem. The decoding of standard errors looks like this:
- 0 – no errors detected – the system is in perfect order;
- 1-2 the voltage in the on-board network is exceeded or too low;
- 3 – malfunction of the float sensor in the gas tank;
- 4/5 malfunction in the antifreeze and ambient temperature sensor circuits, respectively;
- 6 – critical overheating of the power plant, it is necessary to wait for the antifreeze to cool down;
- 7 – not enough oil in the engine crankcase;
- 8 – the problem lies in the brake system;
- 9 – the battery is dead or the part is damaged;
- E – error in the firmware, EEPROM data packet is broken.
It should be taken into account that in some cases, the error code may be two-digit. For example, if 15 is displayed on the display, this may indicate the presence of breakdowns in circuits No. 7 and 8. Having found out what each error means, you can independently determine the source of the problem and correct the breakdown.
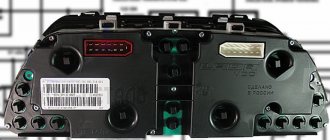
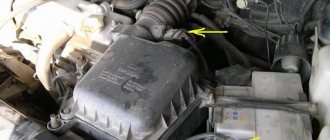
Which wire goes where?
First, let's look at the back of the instrument panel. At the top there are:
- fuel level indicator;
- dashboard lighting lamps;
- control of right and left turns (separately);
- tachometer;
- block with many plugs;
- coolant temperature gauge.
As you can see, there is really nothing particularly complicated here. At the bottom of the instrument panel on the back side there are controllers:
- high beam;
- "emergency lights";
- CHECK ENGINE;
- battery charge;
- parking brake;
- oil pressure;
- air damper (for models with a carburetor);
- outdoor lighting work.
In addition, there is also a speedometer and a brake fluid level indicator lamp.
Now let's take a closer look at the pads. There are two of them - white and red. In the first, the connectors and wires look like this (in order):
- Ground wire black.
- Red-brown – low-voltage supply from the ECU to the tachometer.
- Yellow – high-voltage supply to the tachometer from the coil.
- Red-blue - comes from the battery through the 6th fuse Const with a voltage of 12 volts.
- Green-white - leads to the coolant temperature sensor.
- Green-yellow – fuse F1, responsible for the side lights.
- This connector has no color, it goes to the throttle valve.
- Red and white – leading to the CHECK ENGINE indicator light.
- 2 orange wires leading to two F19 + 12 volt power fuses.
- Same as the previous connector.
- 2 blue-brown wires leading to the “VK” terminal of the handbrake.
- The output to terminal D of the generator is a brown-white wire.
- Gray and blue - wire going to the oil pressure sensor.
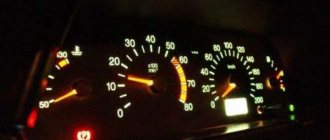
Icons on the dashboard of the VAZ 2110: what do they mean?
Along with the description, all designations require decoding. Knowing the names of the indicators will not provide a complete understanding of the situation. Below, under similar numbers, is the decoding of each sign:
- 3-4 – lamps indicate the turn signals are on;
- 7 – the gas station icon indicates that there are less than 8 liters of fuel left in the tank;
- 8 – symbol confirming the normal operation of the dimensions;
- 9 – exclamation mark indicates incorrect brake operation;
- 10 – dimensions included;
- 13 – emergency stop mode activated;
- 14 – a critical engine failure has been detected, urgent intervention is needed;
- 16 – critical drop in battery charge;
- 17 – handbrake lamp, indicates that the lever is raised;
- 18 – possible oil leakage from the engine crankcase;
- 19 – the symbol indicates the closing of the carburetor damper.
By deciphering the symbols, you can independently determine the essence of the problem and fix the problem.
Features of connecting BC
In conclusion, I would like to dwell in more detail on such a point as installing an on-board computer. In the typical pinout diagram shown just above, there is only one wire leading to it - brown. But for the correct operation of this device, this alone will not be enough. Therefore, here is a complete pinout diagram for connecting the on-board computer:
- Green wire – comes from the electronic control unit, needed to obtain information about fuel consumption.
- Orange – goes to the ignition switch, to terminal 15.
- White-red - in the same place, only to terminal 30.
- The common ground wire is black.
- Brown – needed to take speed data.
- Red-green - to the positive circuit of the fuel level sensor.
- White - leads to the light control, which is responsible for the lamps that illuminate the instrument panel.
Hello everyone) A new entry is dedicated to the transition from the AutoDevice (AP) panel with one window 2110-3801010-04 to the new VDO Panel 1118-3801010. The devices are completely different, so the modifications affected primarily the pads.
I took a new 32-pin block from the VAZ 2112 harness; I haven’t seen it on sale separately yet.
It’s not possible to get the contacts out of the green block, unlike the old 13-pin ones. Therefore, the wires were cut with a margin. Then they were soldered to the ends of the wires from the white and red blocks, and covered with heat shrink for insulation.
Information that was used during electrical work: Pinout of old-style VAZ 2110 instrument cluster connectors:
Wiring color coding:
Pinout of new VAZ instrument cluster connectors:
Connecting the instrument block “1118-3801010” (new model) to a VAZ 2110:
To connect the old pads X1, X2 with the new one, you need to connect according to the diagram:
Functional
The pinout of this VAZ model is as follows:
- Electronic speedometer;
- Electronic type tachometer;
- Coolant temperature indicator;
- Fuel level indicator in the tank;
- Indicator lamps in the amount of 12 pieces.
Instrument panel diagram
This combination is fixed on a special board, in a separate socket using two screws. The panel is removed after unscrewing them. The accuracy of the board is ensured by the printing method of production and installation of this pinout; foil getinax is used for printing.
Instrument panel pinout
* - on VDO and Schetmash panels with two windows, an external VDO temperature sensor is used, mounted under the bumper. Not used on panels with one window. For panels with a mechanical odometer, this contact receives a signal from terminal “W” of the fuel level sensor (FLS).
Color coding for wiring of old-style panels:
The instrument panel is securely attached to the rear of the panel housing and all instruments work efficiently. If the readings of one of the devices are incorrect, repair or replacement of parts should be carried out.
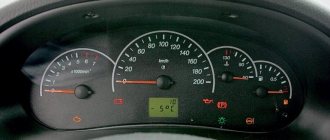
Instrument panel device
Control panel of the domestic “ten”
What to do if the instrument panel does not light up and does not work? How is the instrument panel tuned and how should it be disassembled if necessary? First of all, let's look at its device.
The vehicle instrument cluster includes the following elements:
- tachometer, which allows you to monitor the number of revolutions of the internal combustion engine;
- speedometer showing the speed of movement;
- fuel level controller in the tank;
- temperature controller of the power unit, namely antifreeze in the cooling system;
- control indicators, of which there should be 12;
- diode indicators for the instrument panel suspension of the VAZ 2110;
- a reserve connector into which the control lamp is turned on;
- several terminals for connecting cables.
It should be noted that the red block on the electrical circuit is marked with X2 symbols, and the white block with X1 symbols, so it is impossible to confuse these elements. If we talk directly about the “tens” control panel, then these cars use several types of instrument panels located on the dashboard. In this case, the majority depends on the year of manufacture of the vehicle - the car can be equipped with either an old or a new version of the tidy.
- One of the features of the old dashboard is that all the devices are installed symmetrically.
- In the control panel of the new model, several indicators - the temperature of the power unit and the gasoline level - are located with a slight shift to the right.
Instrument panel wiring pinout
If appliances do not work or light bulbs stop lighting, often the only solution is to disassemble the panels. In practice, certain components may well refuse to work; the disassembly and diagnostic procedure, as a rule, helps solve the problem. However, before repairing the instrument panel of the VAZ 2110, we recommend that you familiarize yourself with the pinout of the panel. This is done in order to understand where this or that wire leads and what function it performs, what safety elements are used, etc.
In principle, “reading” a disassembled dashboard is not a problem, especially since all the necessary information is contained in the service manual for operating the vehicle. If you have such a book and a machine at hand, as well as the desire, you can fix any problems in the operation of the control panel without the help of an electrician.
Common faults and solutions
Tidy "tens" with installed LEDs
The control panel may stop working for several reasons.
As a rule, removing the instrument panel is carried out for the following malfunctions:
- The backlight on the “tens” control panel stopped working. In this case, it is necessary to diagnose the condition of the contacts, as well as the condition of the wiring responsible for the suspension. The shield could stop working simply due to the combustion of safety elements, or the lamps could fail due to wear, often the cause is a short circuit. In principle, as practice shows, there are more than enough reasons, so sometimes identifying and solving a problem without a tester can be very problematic.
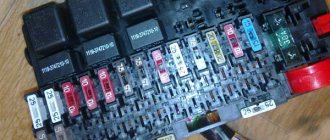
- One of the most serious problems for which a disassembled device may have to be replaced is complete failure. If there is a system failure, and all sensors and indicators on the dashboard stop working without exception, the controller arrows fall down, and the light bulbs simply do not light up. To eliminate the problem, you must first diagnose safety component number 15, it is marked as F6 and this part is located in the fuse block. If this component is burned out, then this problem can be solved simply by replacing it with a new one. However, first you need to figure out exactly what the reason for its burnout is. First, you should find and eliminate the cause, only then install a new element. As a rule, the cause of a blown fuse is a short circuit in the on-board network.
- The arrows began to spontaneously move up and down. This problem occurs quite often in domestic dozens; as a rule, the main reason is the problem of poor ground contact. Firstly, the ground wire is connected to a partition designed to separate the passenger compartment and the engine compartment. If you need to get to it, you will need to dismantle the audio system from its installation location; the quality of its fixation must be checked. Secondly, quite often during installation the mass is removed to another place so that it is more conveniently accessible. So if you have an anti-theft system, but there is no wire under the car radio, try looking for it under the trim, in particular, next to the driver’s left foot. Thirdly, the ground wire could have been damaged during installation of a new car radio. When the negative wire is connected, the ground wire must be unscrewed. Next, it is reinstalled, however, as practice shows, it is often less reliable than it was originally. As a result of vibrations that occur during driving, driving on uneven roads, including potholes and bumps, the mount begins to weaken over time. Accordingly, this leads to the contact being lost, and this, in turn, leads to the inoperability of the control panel. So, first of all, you need to securely fix the wiring, as this can cause certain difficulties in the future.
- Malfunctions related to the operation of the device itself. If you need to qualitatively check whether everything is normal with this device, dismantle it as much as possible from the installation site, but to do this, do not disconnect the wires that power it. First, the white wire marked X2 is diagnosed, which is connected to the first contact. In addition, using a multimeter, you should also diagnose the presence of voltage on pins 9 and 10. If the system is working properly, you will notice when diagnosing that the system voltage is 12 volts. We also recommend checking the back of the dashboard - all conductive tracks on it should be intact.
- As practice shows, the problem of the control panel not working is often caused by the failure of the cigarette lighter itself. This is because many car enthusiasts practice connecting various electronic devices and gadgets to this socket for various functions. For example, it could be a charger for a mobile phone, a tablet; the charger can also power a video recorder, radar detector, GPS navigator and other devices. Since devices of this type consume a large amount of current, the devices are often damaged by the cigarette lighter itself, and the problem of burnout of the F19 fuse element can also often occur. Accordingly, the control panel either turns off completely or continues to function, only incorrectly. If the fuse is working, you can try to disconnect the plug socket. If these steps do not produce any results, then simply replace the safety device.
- Tuning the dashboard of a VAZ 2110 is often the reason for its performance. The new shield may not have been installed correctly and is no longer working. Or, during installation of the device, not all wires were connected, or they could simply be bent. If the problem is in the wires, then replacing them will solve the problem (video author - LedStyle70).