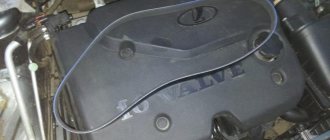
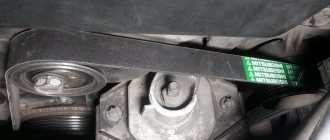
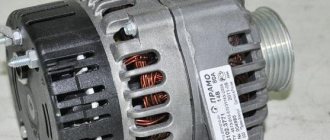
Installed new consumables
The replacement procedure for a car without air conditioning is described above. On cars with air conditioning, a compressor pulley is added to the device, onto which the belt drive is also tensioned.
It is important to correctly adjust the belt tension. If it is not tensioned enough, the generator will not be able to operate at full capacity, thereby reducing the battery charge level. This will lead to rapid wear of the battery. If the tension is too high, wear on the accessory bearings increases. If a force of 100 N (10 kgf) is applied, the deflection between the pulleys of the water pump and generator should be 10-15 mm, between the crankshaft and pump pulleys - 12-17 mm.
Adjustment is carried out by moving the generator relative to the engine. The closer to the engine, the tension is weaker, further away it is stronger. After installing and tensioning the belt, you need to start the engine and check the operation of the belt.
Replacing the accessory belt is a simple procedure. By learning how to do it, you can save time and money at a car service. If the belt drive breaks on the way, you can always replace the product yourself.
Video “Replacing the alternator belt on a Chevrolet Niva”
This video demonstrates how to install the accessory belt on a Chevrolet Niva.
From the moment of its appearance and at the time of writing, all Chevrolet Niva cars were equipped with a single engine model - 2123. This engine is easy to maintain; almost all elements on it can be changed independently with a minimum set of tools. Belt drives are especially easy to adjust. They are installed on the generator and other engine auxiliaries such as air conditioning. Most of them can be changed independently of each other, so the Niva Chevrolet alternator belt with air conditioning can be changed as easily as on a simpler version.
Purpose of a car pump
The main function of the water pump is to circulate antifreeze in the engine cooling jacket. The antifreeze cooled in the radiator flows through the pipe to the pump impeller, which, rotating, pushes the liquid further into the engine cooling circuit. The heated coolant (coolant) from the engine jacket returns in a reverse circle to the radiator, where it is cooled under the action of the fan and goes back to the pump. In this way, coolant circulation is organized in the engine cooling circuit. The rotation of the pump impeller occurs due to the crankshaft through a belt drive.
The Chevrolet Niva pump is not fundamentally different from other car pumps
If the pump fails, the removal of heated fluid from the engine stops and it overheats.
Therefore, if a part fails completely, it is important to turn off the engine in time, otherwise the motor will quickly fail due to overheating. Rebuilding the engine will cost much more than the cost of replacing the pump
Drive tension
The ignition must be turned off. After this, open the hood and remove the plastic trim. Then loosen the air duct clamp. You can use a regular screwdriver for this.
Then use a 10 mm socket wrench to unscrew the screw holding the air filter. After this, remove the air duct from the filter housing. At this point the preparation stage can be considered complete.
Adjustment
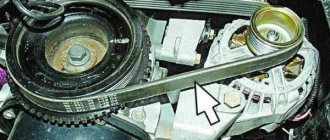
To start adjusting the Niva Chevrolet alternator belt, you need to loosen 3 nuts. They don't unscrew completely. 1-2 turns are enough to begin further work.
The adjustment assembly fastener is indicated in the image above and marked with an arrow. To carry out this procedure you will need a key number 13.
The adjustment is made with the same key set to 13. By rotating the screw in the direction of unscrewing, loosening occurs; if you rotate it in the other direction, tightening, then tension occurs.
Examination.
The correctly tensioned alternator belt on a Chevrolet Niva can be checked by pressing on it at point P indicated in the figure. With a force of 75N, the permissible deflection should be 1-1.2 centimeters.
It is possible to more accurately measure the tension level only in a service station that has the necessary equipment for this. The same applies to tightening the nuts. The manufacturer recommends tightening with a force of 20-25 N*m. A special torque wrench is used for this.
The need for periodic inspection.
The main feature of the Chevrolet Niva engine is that in addition to the generator, this belt also drives the cooling system pump. If it is weakened, then over time it may slip and, in addition to insufficient voltage supplied by the generator, there is a risk of engine overheating as a result of the pump stopping. The risk of higher wear and tear on the pulleys it drives also increases due to increased vibration.
An overtightened belt also leads to severe wear of the bearings. In addition, you may notice a whistling sound when the engine is running, which indicates that it is experiencing strong friction and as a result is overheating.
Some subtleties
After about 50 thousand kilometers, the stove breaks down on a Chevrolet Niva. You can repair the heater yourself, since you do not need special tools for this. Allow some time to disassemble the unit and determine the malfunction. In general, repairing a domestic SUV is not a difficult task if you have all the necessary literature. You can also contact experienced friends who will help you with repairs. In addition, some operations are simply impossible to perform on your own.
From time to time you will need to go to a service station to have specialists check the level of harmful emissions, as this is part of a routine inspection. Irregularity in this matter can lead to accelerated wear of parts.
Replacing the air conditioner belt.
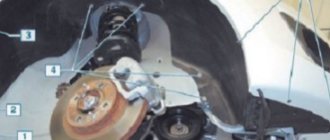
To change the Niva Chevrolet air conditioning belt, you need to place the car on an overpass or inspection hole. After this, you need to remove the engine protection.
To do this, using a 13mm wrench, unscrew the 4 bolts around the perimeter.
After which you can remove the oil pan protection.
Using a 8mm head, unscrew the screws holding the protection.
Unscrew the front mudguard.
In order to check the tension, you need to press it with your hand between the compressor and crankshaft pulleys. The permissible deviation should be no more than 0.8 centimeters.
If it is worn out, then we proceed to replace it. To do this, use a socket wrench to loosen the bolts securing the tension roller.
If the air conditioning belt is in good condition, but is loose, you need to turn the bolt, tightening it clockwise, this will lead to tension.
Replacement is carried out if there are cracks, signs of delamination and breaks on the belt. To change, you need to loosen the bolt, to do this you need to rotate it counterclockwise.
After which it can be easily removed from the pulley. On Niva, a four-strand compressor with a length of 810 millimeters is used to drive the compressor.
The belt is put on so that it is closer to the inner edge of the pulley. Then you immediately need to check its tension.
After installing the part, reassemble the components in the reverse order.
In the article we will talk about replacing belts on a Chevrolet Niva. There are three of them - a gas distribution mechanism, an air conditioner and a generator. It is worth noting that the timing drive only on Opel engines has a belt drive. On other engines it is chain driven. Therefore, in our article we will only consider repairs on Opel power units. It is also worth noting that the generator drive belt also rotates the pump and power steering pulley. The easiest way to change the air conditioner belt is to start with that.
How to unscrew the crankshaft pulley?
Removing the pulley. Unscrew the nut
The pulley can be secured to the end of the crankshaft using a power bolt or nut. The nut is found on most rear-wheel drive cars. It may have special protrusions for engagement with the “crooked starter” handle, the so-called “ratchet”. To remove the nut, workshop technicians use a 36 or 38 socket wrench with a welded long handle and a locking device placed on the pulley. How to unscrew the crankshaft pulley ,
secured with a nut, at home? To do this you can do the following:
- put the car on a “pit” or overpass;
- engage 4th gear to prevent the crankshaft from turning when unscrewing the nut;
- raise the parking brake handle all the way up to prevent the wheels from turning and the vehicle from moving forward;
- tap the edges of the fastening nut with a wooden hammer;
- Using a socket wrench that matches the size of the nut and a handle extension in the form of a metal pipe, try to move the nut with a sharp counterclockwise movement from its stuck position.
Video: How to unscrew the nut on the yoke pulley and replace the oil seal
If successful, you can, by changing the position of the key head, gradually unscrew the nut to the end. If this attempt is unsuccessful, then the following method can be used:
- put the gear knob in neutral position;
- remove the caps from the spark plugs to prevent sparking and engine starting;
- place the head of the wrench on the nut and rest the end of the lever against the ground or spar so that the pulley cannot turn to the right;
- briefly turn on the ignition to give the crankshaft a rotation impulse. Usually one or two attempts at starting will help the nut come out of place, and then it can be easily unscrewed with a wrench.
On most front-wheel drive cars, the pulley is secured with a bolt. Before removing the crankshaft pulley ,
tightened with a bolt, the following operations should be performed:
- lift the right side of the car from the front and install it on a trestle or stump, remove the wheel;
- remove the air filter unit, protective casing, loosen and remove the drive belt of the electric generator, remove all parts that prevent free access to the pulley;
- to lock the crankshaft, you need to remove the plug in the clutch housing and insert a pry bar into the hole, resting it against the flywheel teeth;
- Having placed the head of the wrench over the bolt, using the lever extension, apply several sharp forces in the direction of left rotation to tear the bolt from its initial position. Most attempts are successful. If that fails, you can try the method given above for unscrewing the nut, briefly running the starter.
You should also keep in mind the experience of the common people, which allows you to reduce the adhesion of the nut and bolt to the pulley. If you lubricate a bolt or nut with vinegar essence, brake fluid or WD type grease in advance, they will unscrew more easily. There is information about where the crankshaft sensor is located and how to check it.
How to replace the air conditioner belt
In order to replace the air conditioning belt on a Chevrolet Niva, you need to use only one 12 key. There are no difficulties in carrying out repairs; it is enough to install the car on an inspection hole or overpass. This makes it much easier to make repairs, because the belt is located at the bottom. To remove it, you will need to loosen the roller mount. This will release the tension on the belt itself. Pay attention to the condition of the roller - it must rotate without jamming, otherwise it will also need to be replaced.
After installing the new belt, simply tighten it using the bolt installed on the roller. Please note that when replacing all belts in a comprehensive manner, this should be installed last. First replace the timing belt, then the generator, and lastly the air conditioner.
Removing the timing belt
The manipulations that we will discuss below should be carried out only on cars equipped with Opel engines.
When replacing the timing belt on a Chevrolet Niva, follow these steps.
- Remove the air conditioning and cooling radiators completely. Before this, of course, you will have to drain the liquid from the cooling system and bleed off the freon. There is no need to remove the fans from them.
- Remove the A/C compressor and alternator drive belts. Be sure to remove the tension mechanisms as well.
- Remove the upper part of the timing housing.
- Place marks on the shaft gears. They must definitely match. There is a notch on the engine crankcase that should match the mark on the pulley.
Remove the air purification filter housing.
List of main works:
- Inspect the crankshaft pulley damper.
- Remove the balancer shaft belt.
- Check the condition of the front crankshaft oil seal.
- Replacing the torsional vibration damper
- Install the drive belts.
- Starting the engine and checking its operation
Someday, every car enthusiast who is accustomed to doing everything with his own hands is faced with the need to dismantle the crankshaft pulley. Most often this is due to the replacement of seals, which over time become old, crack and begin to leak oil. For an experienced motorist, removing the crankshaft pulley is not particularly difficult, however, as online forums show, ordinary motorists who decide to save money often encounter great difficulties here.
This is what the crankshaft pulley looks like
Installing the pump and timing belt
Further instructions for replacing the belt on a Chevrolet Niva.
- Unscrew the bolts and remove the crankshaft position sensor and the roller that tensions the timing belt. It often happens that the roller cannot be secured and you have to knock it down with a chisel.
- Remove the pump; to do this you need to unscrew three bolts.
- All surfaces must be cleaned, degreased and a sealant applied to them. After this, you can install a new pump.
- Install a new drive belt and rollers. Check if the marks on the camshafts and crankshafts match. To do this you will need to turn the crankshaft several times.
- All elements that were previously removed must be installed in their places.
- Pour liquid into the cooling system.
In order to charge the air conditioning system with freon, you need to contact a service center.
Purpose of a car pump
The main function of the water pump is to circulate antifreeze in the engine cooling jacket. The antifreeze cooled in the radiator flows through the pipe to the pump impeller, which, rotating, pushes the liquid further into the engine cooling circuit. The heated coolant (coolant) from the engine jacket returns in a reverse circle to the radiator, where it is cooled under the action of the fan and goes back to the pump. In this way, coolant circulation is organized in the engine cooling circuit. The rotation of the pump impeller occurs due to the crankshaft through a belt drive.
The Chevrolet Niva pump is not fundamentally different from other car pumps
If the pump fails, the removal of heated fluid from the engine stops and it overheats.
Therefore, if a part fails completely, it is important to turn off the engine in time, otherwise the motor will quickly fail due to overheating. Rebuilding the engine will cost much more than the cost of replacing the pump
When to change the alternator drive belt
Now let’s talk about how the belt is replaced on a Chevrolet Niva. There are no regulations regarding the generator drive belt, but the manufacturer still indicates the period when the element needs to be inspected. So, a condition check should be carried out approximately every 15,000 km. It can be considered normal if there are no cracks, traces of oil or antifreeze, or excessive wear on the surface.
If a whistle appears when the load is turned on, this is the first sign that the device needs to be replaced. Of course, you should first try to tighten it up to get rid of such a nuisance.
What are the signs to recognize a malfunction?
A number of signs indicate the need to replace old rollers with new ones. They appear both directly while driving, in the form of extraneous noise, and during visual inspection.
- Mechanical damage on the surface of the rollers;
- Noticeable play;
- Grinding noises when turning. This is a clear sign that the car needs repairs;
- Damaged bracket or bearing;
- Leaking oil;
- High temperature during operation;
- Strong vibration during operation;
- Difficulty in turning the shaft.
Also interesting: Niva 2121 - tuning, photo - Lada master
How to change the alternator belt
If the car has air conditioning, you will have to remove the belt that drives the compressor. Replacing the belt on a Chevrolet Niva was described above. After installing the new alternator belt, install the air conditioner drive. As for the tension of the compressor drive, it is necessary that when pressed with a force of 10 kgf, it bends no more than 8 mm. But do not tighten it too much, as this will lead to rapid wear of the bearings and belt ridges.
When replacing the rollers and alternator belt on a Chevrolet Niva, you need to perform the following manipulations.
- Remove the hoses that supply air to the throttle valve. This will relieve the tension.
- Using a 13mm socket, loosen the nuts that secure the tension roller bracket.
- Using a 13 mm socket or wrench, turn the adjustment bolt counterclockwise. This will weaken the alternator belt.
- Remove the generator belt from the tension roller and pulleys.
The procedure is very simple and does not require deep knowledge. Installation is in the reverse order. First, put the belt on the crankshaft pulley, and lastly, wind it by the pulley. When you install the element, you can begin adjusting.
Installing a new generator
The algorithm for installing a new generator is practically no different from dismantling the old one, only all steps are performed in reverse order. So, the car owner will need:
- Screw the assembly to the engine by turning and fixing two bolts - upper and lower. At the same time, there is no need to tighten them too much, since then the belt still needs to be tensioned.
- Install a new V-ribbed repair on the pulleys. You need to put it on with a little effort and go around the pulleys in the following sequence: hydraulic pump pulley, roller, crankshaft pulley, power steering pulley, roller, generator pulley.
- Tension the belt by tightening the adjustment bolt and the special plate. It is important that the belt deflection in the upper free part does not exceed or be less than 15-16 mm.
Then all that remains is to tighten the three bolts of the bottom plate and check that the power source is secure.
Tension adjustment
In order to check the belt tension, you just need to press your finger on it approximately in the middle - between the gears of the coolant pump (pump) and the generator itself. If the force is 8 kgf, then the maximum deflection value should be no more than 12 mm. But you don’t need to tighten it too much, as this will reduce the life of the bearings and belt. And not only the generator, but also other auxiliary devices. When replacing a belt roller on a Chevrolet Niva, it is important to follow the instructions and correctly adjust the tension.
This will lead to rapid wear of the battery.
Replacing the Niva Chevrolet camshaft drive chain tensioner shoe
The size of the belts is indicated on the outside of the belts. The belt tension is adjusted by moving the tension roller 3, rotating the tensioner bolt 5 while the nuts 8 securing the tensioner bracket 4 are loosened. The optimal indicator of belt deflection between the generator and pump pulleys is mm with an applied force of N 10 kgf.
And so, if the alternator belt still fails on a Chevrolet Niva, then it should be...
Unscrew the alternator mounting nut one turn. One of the most common causes of generator failure is a broken belt, since its service life is the shortest compared to other car designs.
I rest a block against the belt, with an electronic steelyard attached to the other end. To avoid accidental short circuits, you need to turn off the power to the car. You can replace the alternator belt on a Niva yourself; for this you need a jack, a set of wrenches and a screwdriver.
Then check the belt tension and tighten the fastening nut. Lastly, replace the crankshaft sensor and connect the connector.
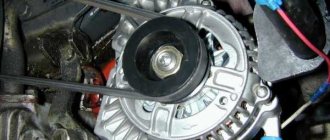
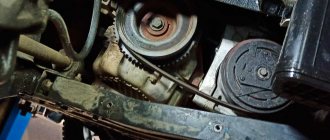
Installed new consumables The replacement procedure for a car without air conditioning is described above. On cars with air conditioning, a compressor pulley is added to the device, onto which the belt drive is also tensioned.
It is important to correctly adjust the belt tension. To replace the belt, unscrew the crankshaft position sensor screw and remove the sensor from the bracket socket without disconnecting the wires. Remove the power steering pump drive belt, see.
Reasons for failure
- Entry of a foreign body. This is most likely evidenced by traces of impacts on the body and marks on the flat side of the belt.
- Incorrect belt tension adjustment - too strong or too weak. In this case, the tension indicator, tensioner cover or tensioner limiter breaks. This can be caused by incorrect tightening of bolts or incorrect sizing.
- Work in high temperature.
- Part misalignment. Because of this, belt marks can be seen on its surface.
- Mechanical damage from tools during installation.
When to change accessory drive
Carry out steps 2 and 3 for adjusting the belt tension and push the generator towards the engine until it stops. Remove the belt first from the pump pulley, then from the generator and crankshaft pulleys.
Place the new belt on the crankshaft pulley first, then on the alternator pulley, and then on the pump pulley. If the new belt is tight on the pump pulley, and the generator is pushed all the way towards the engine, carefully turn the pump pulley by hand or slowly turn the crankshaft until the belt is completely seated on the pulley.
Have an assistant turn the crankshaft. According to the Chevrolet Niva maintenance regulations, the auxiliary unit belt must be replaced once every 60 km, or once every 2 years, whichever occurs first.
My belt went 32 km, but went for 3 years.
This is what it looked like after its run. I found a box for this belt. It contained a spare belt, which I always carry with me in case of a breakdown on the road.
Preparing to replace the Chevrolet Niva alternator belt
I can’t say whether it came off normally or not, but I know cars on which the belt looks better after 40 thousand miles. As I already wrote, I stopped buying spare parts in stores.
To check the belt tension, press your finger on the belt in the middle between the compressor and crankshaft pulleys. With a pressing force of about 10 kgf, the belt deflection should be about 8.0 mm.
Now let's get back to replacing the Shnivy alternator belt. To replace the belt, remove the rubber hoses for supplying air to the throttle assembly.
replacing the alternator belt on a Chevrolet Niva
Disconnect the DPKV crankshaft position sensor connector. Unscrew the sensor mounting bolt with a screwdriver and remove the device. Unscrew the alternator mounting nut one turn.
If necessary, unscrew the tension roller and move it upward.
Remove the belt (see Checking the condition and replacing the auxiliary drive belt). When rocking and rotating the rollers by hand, there should be no play, jamming, or noise in the roller bearings. Otherwise, the rollers must be replaced.
Using a flat screwdriver, pry off the protective cover of the tension roller bearing...
Using a socket or a z-shaped spanner “17” we unscrew the nut securing the tension roller...
...and remove it from the bracket axis. If it is necessary to dismantle the tension roller bracket associated with removing the timing cover...
...remove the spacer bushing of the roller...
...and a washer.
Using a 13mm socket, unscrew the three nuts securing the bracket to the timing cover. We remove the mounting elements of the bracket from the studs of the timing gear cover...
...and the bracket itself.
Remove the roller axis from the hole in the bracket.
Tension roller bracket fastening elements. Install the bracket and tension roller in the reverse order. To remove the support roller...
...pry off its protective cover with a screwdriver...
Use a 17mm socket to unscrew the roller mounting bolt...
...and shoot a video.
We remove the Belleville washer...
...and a spacer sleeve. Install the support roller in reverse order.
Replacing the generator belt rollers is a standard procedure that you can do yourself. This article provides detailed instructions on how to carry out replacement on a Niva Chevrolet car.
Before moving on to the symptoms and solution to the breakdown, it is worth talking about the possible causes of failure, as well as what they are expressed in :
- Entry of a foreign body. This is most likely evidenced by traces of impacts on the body and marks on the flat side of the belt. Incorrect belt tension adjustment - too strong or too weak. In this case, the tension indicator, tensioner cover or tensioner limiter breaks. This can be caused by incorrect tightening of bolts or incorrect sizing. Work in high temperature. Part misalignment. Because of this, belt marks can be seen on its surface. Mechanical damage from tools during installation.
A number of signs indicate the need to replace old rollers with new ones. They appear both directly while driving, in the form of extraneous noise , and during visual inspection.
Replacement is necessary if:
- Mechanical damage on the surface of the rollers; Noticeable play; Grinding noises when turning. This is a clear sign that the car needs repairs; Damaged bracket or bearing; Leaking oil; High temperature during operation; Strong vibration during operation; Difficulty in turning the shaft.
It would also be a good idea to check the serviceability of the belt. It should not have cracks, cuts or delaminate. If it has defects, it must be replaced.
1. First of all, you need to loosen the belt and remove it, otherwise you will not have access to the bearings themselves. To do this, you need to loosen the roller, which is held by a platform with nuts. There are three nuts, they require a 10mm wrench. Once they are all unscrewed, you need to unscrew the adjusting screw so that it moves up from the platform. This will allow the section with the rollers and belts to move freely up and down. In order to remove the belt, move the platform up. It is also worth noting that it is not necessary to remove the belt completely - just lower it from the faulty part.
2. The next step is to remove the faulty rollers:
- Place the car in first gear to prevent the crankshaft from turning; Unscrew the nut that secures the part. Remove the spring washer and remove the part.
The process of removing generator rollers on a Niva Chevrolet is identical to any other car.
Replacement takes place in several steps:
1. First, remove the bearing protective cover;
2. After this, using the 17th spanner , remove the nut that holds the bearing structure;
3. Next you need to remove the spacer ring, which is located behind the roller;
5. The new ring is installed in its place; 6. A new roller is installed in place of the old bearing. Before doing this, you should check the diameters of both parts to avoid the mechanism not working; 7. Next, the bearing is fixed using a washer with a spring mechanism and a nut;
8. After this, the belt is put on the new roller.
After this, a final check of all mechanisms is carried out and the elements are collected in the reverse order.
1. You can put the car in 4th gear, put the belt on the roller and push in the direction of rotation of the crankshaft. When it starts to turn, you need to pull the belt onto the generator pulley, and it will fall into place on its own.
2. In the same way, you can not push the car, but lift the wheel and spin it, or spin the generator itself.
This makes it easy and quick to replace the Chevrolet Niva generator belt rollers. You should regularly diagnose the moving parts of the car in order to prevent possible breakdowns in time and replace faulty parts.
We recommend replacing the bearings and belt every 40 thousand kilometers.
Replacing rollers lada 2123 (vase 2123)
The alternator belt on a Chevrolet Niva performs a connecting function between the engine and the generator, helping the latter produce the necessary energy. However, there is a special roller between the crankshaft pulley and the generator pulley, which helps the belt to be in the required tension and not slip out of its place of fixation.
Over time, this connecting element may need to be replaced. This procedure is quite simple and you can do it yourself, without any help.
Why does the roller fail?
Before inspecting the roller for damage, you need to know why it breaks:
- A foreign body has entered - traces and marks on the roller body will indicate this.
- The belt adjustment is not performed correctly - this applies to both too weak and too strong belt tension.
- Entry of a foreign body. This is indicated by impact marks on the body and marks on the flat side of the belt.
- Incorrect belt tension - it is overtightened or weak. This negatively affects both the tension roller and the insufficient outgoing voltage from the generator.
- The part works in a skewed state - this will cause belt marks on the body.
How to identify a faulty belt tension roller?
The presence of extraneous noise or increased vibration may indicate that you should start replacing the rollers; first of all, they may appear during engine operation. Also, replacement will be necessary during a visual inspection if:
- Part backlash.
- Mechanical damage to the body.
- Damage to the bearing or bracket.
- There is difficulty when turning the shaft.
You should also inspect the belt for cracks, delamination, cuts and, if any are found, it must be replaced.
Step-by-step procedure for replacing a Niva Chevrolet
First of all, it is necessary to prepare all the tools so that dismantling is quick and easy. You must have keys for “10” and “17” on hand.
- So, in order to dismantle the roller, you need to loosen and remove the belt. And to do this, you need to loosen the tension roller along with the landing pad, where you need to unscrew the three nuts to “10”. However, such work is not necessary, and if not necessary, you can only loosen its central bolt with a key set to “17”.
- When the belt is “thrown off”, it is necessary to engage first gear, thereby blocking the crankshaft from turning.
- Unscrew the nut on the roller and remove it along with the spring washer.
- When starting to dismantle the generator roller itself, you must first remove its protective cap.
- Then, using a wrench set to “17”, remove the central nut.
- And after that we remove the spacer ring, which prevents the rollers and the motor housing from aligning.
Installation of new parts
- Before installing a new, working roller, you must first mount the ring, then the roller itself.
- Next, using a washer with a spring mechanism, tighten the bolt.
- After this, put on the belt and tighten the tension roller so that the belt is pressed no more than 1 centimeter from its position.
Thanks to such a well-coordinated and precise procedure, it is possible to replace the alternator belt rollers on a Niva Chevrolet quickly and in the shortest possible time.
Such checks should be carried out every 30 thousand kilometers, thereby eliminating the possibility of new malfunctions.
In the Dimavto.com online store, any car enthusiast customer can choose and buy drive belt rollers for the Lada Chevrolet Niva with a 1.7-liter engine capacity from such manufacturers as INA, RUVILLE.
If you have questions, or they appeared during the selection process, and this prevents you from making a final decision, our support service will come to your aid.
This will help you choose the right parts that match your car model.
The success of finding the required part in our store is due to the widest range of spare parts supplied to us from manufacturers from different parts of the world.
Our store's policy is based on careful checking of the quality of the spare parts we sell and their compliance with the highest standards. All products sold by us are of original origin.
Each buyer buying drive belt rollers for Niva Chevrolet 2123 selects a spare part according to the search pattern from a huge catalog that suits him best.
Spare parts search options:
- By product code;
- By car manufacturer and model.
- With tips from a parts specialist.
The selected product can be immediately picked up in the cart on the website online, or you can call 096 258 29 80 or 093 630 27 55 and place an order in person.
Using the catalog, our customers can not only find the product they need, but also read its characteristics. Here you can see a detailed image of the product from photographs and videos. Our pricing policy is always transparent and accessible.
To make it easier for you to understand the features of spare parts Drive belt rollers and their compatibility with Niva Chevrolet 2123 by year of manufacture, modification and type of car, it is better to play it safe and clarify the nuances with our managers.
Before purchasing drive belt rollers (tensioner, bypass) for replacement, it is better to consult with specialists. Taking precautions will help you easily replace an old part with a new one the first time. To do this, our managers are guaranteed to help you with your choice and quickly complete your purchase with delivery.
Replacing the drive rollers of VAZ-2123 auxiliary units
The condition of the belt tension rollers should always be checked when removing or replacing the drive belt. When rocking and rotating the rollers by hand, there should be no play, jamming, or noise in the roller bearings.
- In many cases, noise when the roller bearing wears out is observed when the engine is running.
- We carry out the work on an inspection pit or on a lift.
- Remove the accessory drive belt. For this:
- Remove the mudguards from the engine compartment.
