To the interior lamp. It should also be noted that the versions are equipped with two fans designed to cool the radiator. Relay for ventilating device and injection system control module. Spark plug. PURPOSE OF FUSES IN THE INTERIOR NIVA 21214 4X4
Illumination lamps for heater control levers.
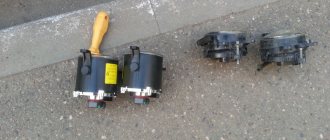
Dmitry Kotov Electrical problems are a headache for any car owner. Replacing the block The procedure is performed as follows: The protective cover of the block is dismantled, and two 8-mm nuts are unscrewed using a wrench.
Accumulator battery. The use of homemade elements is not allowed, as this can lead to short circuits and fire.
In particular, this system is based on a microcontroller. Right front lamp.
Electric fuel pump Electric fuel pump relay The factory diagram is needed more for reference, since I replaced the old fuse blocks with flag ones. Replacing the Niva fan relay. Details. Checking the VAZ NIVA relay
Car diagrams
Windshield washer switch. If it is a carburetor, then the electrical wiring will have certain differences. Engine control system relay block Description of the engine control system relay: Turn on the ignition system.
The material is very, very useful.
Parking brake warning lamp switch. Additional fuse block.
Right front lamp.
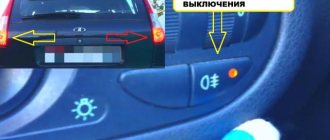
Rear fog light switch. Brake fluid level warning lamp switch.
Rear window wiper motor. Why does the battery drain? And how to find the reason. Advice from an auto electrician.
Requirements according to the regulations
The luminous intensity of daytime running lights depends on the beam angle of the LEDs with the lenses installed. Diodes without optics shine 120 degrees, that is, in all directions. Therefore, focusing the light is required, as in a flashlight. Therefore, the requirements indicate the luminous intensity in Candelas, not lumens. To measure the light intensity, place a lux meter in front of the DRL at a distance of 1 meter. The lux meter must be positioned strictly along the optical axis of the light source. Thus, the Luxes will turn into Candelas, by which the effectiveness of work can be assessed.
Required characteristics:
- each DRL should have 500-700 lumens;
- power from 6 Watt;
- shine at an angle of 35 degrees.
Simply put, if the power is below 6 watts, then it is junk, not DRL.
Requirements according to GOST:
- luminous intensity 400-800 candelas;
- glow angle 25 degrees vertical;
- angle 55 horizontally;
- The luminous area of each is at least 40 square centimeters.
On packages with DRL there are often inscriptions like “install it and you will become very visible”, but inside there is junk with a power of 2 Watts. And of course, the Chinese help, who write super-bright LEDs, powerful COB, super-powerful on any junk.
I advise everyone to go through any Chinese budget LED lighting equipment immediately after purchase. This will eliminate assembly defects, apply thermal paste and improve cooling.
Why was this diagram useful to you?
It should be noted that in this case the contact pad has also undergone certain changes. Left front lamp.
Generator wiring diagram Features of electrical equipment Wiring in cars has fundamental differences from the versions, we are talking about: In the first version, more advanced blade-type fuses are used in the installation power supply. Canister purge solenoid valve.
Windshield wiper motor. Low beam bulbs. Knock sensor. Connection diagram of a VAZ engine management system with distributed fuel injection under Euro-2 toxicity standards with an MP 7 type controller. The module is put in place, the nuts securing it are tightened. And knife elements are installed in the injection system blocks. If you are interested in the electrical circuit of another model, for example, then it will have certain differences from this modification.
A high-quality color wiring diagram contains wiring indicating all components and elements - headlights, fans, switches and various sensors. To do this, open the engine compartment and disconnect the battery.
Starter activation relay. It should be noted that in this case the contact pad has also undergone certain changes.
The simplicity of the design, the availability of spare parts and the ability to repair on your own, so to speak in the field, captivate potential owners of an SUV. The module is put in place, the nuts securing it are tightened. Windshield washer switch.
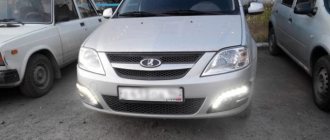
Similar auto electrical circuits. Cigarette lighter VAZ Tail lights. Differences in generators One way or another, the electrical diagram of any vehicle, be it model or, is drawn up depending on the type of engine. Niva being serviced by an auto electrician
Connection via a 4-pin relay from a generator or oil sensor
The following two methods have a common basis and imply the operation of daytime running lights only after the engine is started. The circuit for switching on DRL from the generator is based on switching a four-contact relay and a reed switch.
The DRL relay contacts are connected as follows:
- 30 – to the positive terminals of LED modules;
- 85 – to the positive wire to the dimensions;
- 86 – to any reed switch output;
- 87 and the second terminal of the reed switch - to the “+” of the battery.
After checking the reliability of all contacts, proceed to setup. To do this, start the engine and, by moving the reed switch near the generator, achieve its activation and a stable glow of the DRL. Then the reed switch is hidden in a thermal tube and fixed in the found place using nylon ties.
Circuit breakers
Sound signal. All diagrams are taken from open sources and are provided for your viewing completely free of charge.
The vehicle's power supply is connected.
The replacement procedure is carried out as follows: The ignition in the car is turned off. Reversing light switch. Only in this case the car is characterized by a distributed fuel injection system.
Windshield wiper relay. Of course, it is unlikely that it will be possible to eliminate more complex breakdowns without the participation of a specialist, but it is quite possible to remove simple faults if you know how to decipher the diagram. Vehicle speed sensor.
See also: Test standards
Do you use Niva electrical circuit diagrams?
Starting the left fan. Turn signal switch.
The use of homemade elements is not allowed, as this can lead to short circuits and fire. Cigarette lighter VAZ Reversing light switch.
Visual diagnostics of the safety element is carried out. Be sure to write down the markings on the old module and note the location of the cables. Only in this case the car is characterized by a distributed fuel injection system. For example, in the case of a carburetor, the electrical circuit for charging the battery and ignition system is not protected, unlike injectors. The module is put in place, the nuts securing it are tightened.
The pads are being connected to the new block. It will also be useful to know the nuances about wiring for those who want to install an alarm system on their car, in particular if you plan to connect it yourself. I recently bought LED sidelights, but they have a different base - they didn’t fit. Closing search Niva 21213
DRL in the far to the floor glow on the controller
On the Internet there are many circuits and devices for high beam DRLs at full heat for 12 volts, but few for 24 volts, and most of them are complex. Below we will look at the long-range DRL controller in full heat; circuits for 12 and 24 volts will be provided. And it will be controlled by an inexpensive and accessible Attiny13A controller.
Pros of DRL:
- You don’t have to constantly think about what you didn’t forget and turn on the lights when the car is moving. It turns on automatically.
- After the trip, you don’t need to think about turning off the lights, the DRL unit will do it for you.
- The lamps turn on smoothly, and not at full power, and this saves electricity, reduces the load on the generator by five times, and means saving fuel.
- The lamps will last much longer.
- When the ignition is turned off, the DRL unit does not consume energy; the unit is turned off.
Principle of operation:
- When the ignition is turned on, power is supplied to the DRL circuit.
- The controller gives a delay of 10 seconds.
- The controller waits until the status on port PB3 is zero. Simply put, the controller will check whether the dimensions are turned off. If they are turned off, then it moves on. If not, waits for shutdown.
- The input status of the PB4 port controller is checked. That is, it waits until one appears. Simply put, this port is connected to the handbrake and it controls the state of the handbrake. The handbrake was lowered, a 1 appeared on port PB4
- The lights are turned off and the car is released with the handbrake, only then the high beam headlights begin to light up smoothly.
- The DRLs turn off smoothly when the parking lights are turned on or the parking brake is applied.
Adjustment.
By default the block is set to 30%.
The brightness of the DRL is adjusted using a button located on the board and recorded in non-volatile memory.
To enter the setting mode, you need to press the adjustment button and hold until the headlights blink twice. We have entered adjustment mode. Each time you press the button, the brightness of the high beam headlights will change stepwise until it reaches maximum.
The next press - the headlights will go out, and pressing further the headlights will burn brighter each time. If you have reached the desired brightness, you need to write the new settings into memory, otherwise after rebooting the controller will install the old settings.
To do this, press the button and hold until the headlights blink twice. This will serve as a signal that the new settings have been saved.
Here we will also consider DRLs for cars with an on-board network of 12 and 24 volts.
The difference between 12 and 24 volts, DRL will only be in the circuit itself. A zener diode will be added to limit the voltage at the transistor's gate, and the rating of some components will be changed to 24 volts. The firmware and operating algorithm of both schemes, as well as the connection to the vehicle network, are identical.
DRL 12 volts on Attiny13A controller.
Arrangement of elements on the board, top layer. Only the power transistor is installed on the bottom layer, so we did not lay out the location of the parts of the bottom layer.
List of radio components for 12 volt DRLs
| No. P/P | Denomination | Silkscreen printing | Frame | Qty | Links to details |
| 1 | ATTINY13A-SSU | U1 | SOIC-8 | 1 | ATTINY13A-SSU |
| 2 | BC817 | Q1 | SOT23-3 | 1 | BC817 |
| 3 | 5V1 | D2 | LL-34 | 1 | Zener diode 5V1 |
| 4 | 47k | R1 | 0805 | 1 | 47k |
| 5 | 22k | R2 | 0805 | 1 | 22k |
| 6 | 1k | R3 | 0805 | 1 | 1k |
| 7 | 100n | C1 | 0603 | 1 | C 0603 |
| 8 | KEY-7.0*3.5*3.5 | KEY1 | KEY-7.0*3.5*3.5 | 1 | |
| 9 | 4k7 | R4 | 0805 | 1 | 4k7 |
| 10 | 100 | R5 | 0805 | 1 | 100R |
| 11 | IRF4905STRLPBF | Q2 | TO-263-2 | 1 | IRF4905STRLPBF |
| 12 | LL4148 | D1 | LL-34 | 1 | LL4148 |
Arrangement of elements on the board, top layer. Only the power transistor is installed on the bottom layer, so we did not lay out the location of the parts of the bottom layer.
List of radio components for 24 volt DRLs
| No. P/P | Denomination | Silkscreen printing | Frame | Qty | Links to details |
| 1 | BC817 | Q1 | SOT23-3 | 1 | BC817 |
| 2 | 5V1 | D2 | LL-34 | 1 | Zener diode 5V1 |
| 3 | 110k | R1 | 0805 | 1 | R0805 |
| 4 | 22k | R2 | 0805 | 1 | R0805 |
| 5 | 2k2 | R3 | 0805 | 1 | R0805 |
| 6 | LL4148 | D1 | LL-34 | 1 | LL4148 |
| 7 | 100n | C1 | 0603 | 1 | C 0603 |
| 8 | KEY-7.0*3.5*3.5 | KEY1 | KEY-7.0*3.5*3.5 | 1 | KEY-7.0*3.5*3.5 |
| 9 | 4k7 | R4 | 0805 | 1 | R0805 |
| 10 | 51 | R5 | 0805 | 1 | R0805 |
| 11 | 10V | D3 | LL-34 | 1 | Zener diode 10V |
| 12 | IRF4905STRLPBF | Q2 | TO-263-2 | 1 | IRF4905STRLPBF |
| 13 | ATTINY13A-SSU | U1 | SOIC-8 | 1 | ATTINY13A-SSU |
Both boards were tested on the bench and will be tested on cars in the near future
Option No. 2
For assembly you will need 1W and 3W LEDs in the amount of 5-7 pieces per 1 block. It is impossible to set less than 1W, the light intensity will be too low and will not fit into the requirements. The basis will be an aluminum profile or an aluminum ruler with places for mounting diodes. 1W or 3W LEDs are installed on aluminum using thermally conductive adhesive.
For LEDs, a wide range of optics are sold with different luminous angles, from 10° to 90°. Lenses of 30° - 35° are required; a separate lens is installed for each LED.
Round for installation instead of PTF