Description of faults and basic information
During vehicle operation, vibrations inevitably appear, which are suppressed by silent blocks. They also prevent deformation. Failure of these parts is accompanied by:
- unstable behavior of the car on the road;
- uneven tire wear;
- squeaks in the rear beam area, impacts on the body (this is especially noticeable on bad roads).
It is worth noting that the described signs are indirect. Loud knocks occur when the rear strut is faulty. In order to accurately determine the cause of the appearance of the described symptoms, it is necessary to diagnose the chassis.
Symptoms of a problem
There are several main signs of failure of the rear beam silent blocks, including:
- Unstable behavior of the car on the roads;
- Tires wear unevenly, which is not difficult to notice from the tread pattern;
- When driving on a bad road (that is, 95% of all our roads), unpleasant squeaks and impacts on the car body are observed.
These signs are indirect, since they may be associated with other failures of the vehicle’s chassis. For example, dull knocks are also a sign of a faulty rear pillar. Therefore, in order to make sure that there is a particular problem, you will need to fully diagnose the chassis.
Malfunctions
Often, replacing the rear beam bushings is due to the fact that defects arise in the design of the element. They are like this:
- The elasticity of the rubber element deteriorates;
- The rubber breaks;
- The central bushing is displaced;
- Rotations occur in the seat.
If problems are detected with the silent block of the rear beam, you will need to drive the car into the garage in the near future and replace the damaged components. Unlike foreign cars, changing the silent seal on a VAZ 2109 is quite simple and without outside help. Plus it costs almost pennies.
Before you start replacing the silent blocks of the rear beam, you need to decide what exactly you will replace the old, worn bushings with.
We figured out the markings and realized that for the VAZ 2109 you need to take only those that are suitable in size and diameter for the rear beam of the nine.
Today, for the VAZ 2109 they offer two types of silents, differing in the material of manufacture.
The choice should be made based on the available budget. Rubber elements cost several hundred rubles less. As for manufacturers, we recommend paying attention to the companies SEVI, BelMag, Boge and SS20.
To replace you will need:
- New rear silent blocks;
- A small wooden beam;
- A device for pressing in a silent block (you can do the job without it);
- Open-end wrenches;
- Socket wrenches;
- Spanners;
- Hammer.
When everything is ready, you can start working.
- Place the car on a level surface in the garage above a pit or overpass. Be sure to place wheel chocks and shoes under the wheels. All for your safety.
- It is better to remove the rear wheel to make it easier to work.
- But it is not at all necessary to remove the rear beam. Just complicate your work with unnecessary dismantling processes.
- On the left side of the driver is the pressure regulator rod for the rear brakes. It will disturb you while you work, so we advise you to remove it. This is done by removing the locking bracket of the rod and the handbrake cable. You will remove the latter from the right side from the mount.
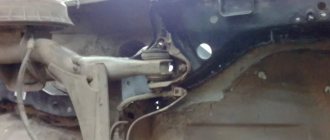
- Unscrew the nut from the bolt with a 12mm wrench that holds the rear beam to the bracket. This may cause problems. Place a socket wrench on the driver to increase leverage on the fastener. Remove the bolt, lift the car with a jack and move the beam down. It will come out of the eyelet this way. Do not overdo it to avoid damaging the nearby brake hose. If you press too hard on the pry bar while moving the eye, you risk breaking the hose.
- Take a pre-prepared wooden block and insert it between the body and the beam. This must be done so that the beam is below the eye.
- Using a hammer and a drift (regular metal tubing will do), knock out the old worn bushings. By the way, if you come across such a concept as “fungi”, don’t worry. This is what car enthusiasts often call these bushings because of their external similarity.
- Clean the seat from accumulated dirt and rust. Be sure to lubricate the areas with soapy water. Without it, it will be difficult to press in new silent blocks. Or use a simple dish detergent. Under no circumstances should you lubricate the seats with grease or oil, as these substances will soon begin to corrode the element.
- Now it presses in new elements. Ideally, you should have a special pressing tool. If you don't have one, use a regular hammer.
- Take out a wooden block.
- Armed with a second jack, lift the beam and insert the mounting bolt into place and tighten it with a nut.
- Reinstall the rear wheel and lower the car to the ground.
Only upon completion of all these stages can the bolts of the new silent blocks be tightened until they stop.
Such an operation should not cause any special problems, so it is not at all necessary to go to a service station and spend extra money.
Purchasing a new item
So, you have found out that problems with the chassis are associated with the breakdown of silent blocks. Before starting work, you must purchase a new spare part. First of all, look at the labeling. It is important to buy an option specifically for the VAZ-2109. If you make a mistake, it will be impossible to install the silent block. The spare part must be marked: 2109-2914054. Many auto parts sellers may recommend purchasing a spare part from the “ten”, but to install it you will have to work hard to press the rubber part.
There are two types of silent blocks:
- With rubber bushings. Traditional spare part, provides softness during suspension operation. The main disadvantage is the fragility of such a spare part, especially if you often travel along sections of the road with poor asphalt surface.
- With polyurethane inserts. More rigid, which is its main drawback. Moreover, such a spare part lasts much longer, since it is resistant to temperature changes and deformations.
Choose a silent block based on material based on your budget and preferences. Manufacturers BelMag, SEVI, SS20 and Boge have earned good reviews from experts and car enthusiasts.
Features of elements
The main function of silents is to eliminate vibrations and deformations that occur during vehicle operation.
When choosing new silent blocks for the rear beam of a VAZ 2109, pay attention to the markings. It should be 2109-2914054. For VAZ 2114-15 models, the markings are different, but the elements themselves are very similar.
In principle, it is possible to install a silent block from a dozen on a VAZ 2109, but you will have to work hard with pressing in the rubber bushing due to the difference in size. The reverse procedure is not possible.
Rear beam
How is the replacement carried out?
Before starting work, place the car over a hole or drive it onto an overpass. Be sure to secure the wheels with chocks. Next, follow the instructions:
- Remove the rear wheel. It will be much easier to work without it.
- To replace the silent block you will not need to remove the rear beam, so do not rush to dismantle it.
- When working on the left side, you will need to remove the linkage associated with the pressure regulator at the rear of the brake system. To do this, you will need to remove the handbrake cable from the mount located on the right side and the rod fixing bracket.
- Using a 12mm wrench, unscrew the nut located on the rear beam mount. Here you may need to create additional leverage using a socket wrench that fits over the knob. After you remove this bolt, jack up the side of the car you are working on.
- Carefully push the beam down until it comes out of the eyelet. Watch your actions, as you risk breaking the brake hose.
- Prepare a wooden block in advance, which at this stage will need to be placed between the body and the eye. In this case, the beam should be below the eye.
- Further work can be done with a special tool, but we will tell you how to dismantle the silent block without a puller. Take a metal tube and a hammer and use them to knock out the old bushings.
- Clean the seat.
- To make crimping easier, lubricate the seats with soapy water or dishwashing liquid. In this case, it is forbidden to lubricate the seats with oil or grease, since these chemical compounds will corrode the rubber part of the part over time.
- Using a hammer or special tool, press the silent blocks into place. Reassemble the vehicle.
Useful tips
- Before disassembling the beam, you need to loosen the tension of the hub nuts and other connections that are tightened with a large torque.
- It is recommended to change rubber-metal hinges in a specialized workshop - this requires special tools, as well as experience in such work.
- The instruction manual states that the beams must be dismantled together with the brackets by unscrewing the three nuts holding them in place. But due to long-term use of the machine, the studs can rust and therefore easily crack. For this reason, it is recommended to remove the beam by disconnecting it from the brackets - it is better to let them remain on the body.
The beam is installed in place in the reverse order; there are no pitfalls here. After the car is already on the ground, you need to tighten all the nuts. It is also necessary to check everything after 80-100 km. After installing the beam in place, the brake system must be bled, the parking brake must be adjusted, and, if necessary, the camber and toe must be adjusted.
Signs of wear and need for replacement
- One of the rear tires is more worn than the other.
- The wheel alignment relationship is seriously compromised.
- Driving the car has become more difficult, especially when turning: the car pulls strongly to the side and the driver needs to apply significant effort to prevent the car from skidding.
All the signs listed above indicate that the silent blocks of the rear beam have become unusable and it’s time to change them. These parts do not have a strictly defined service life, but it is generally accepted that they need to be changed every 100,000 kilometers. The reasons for premature wear of these parts can be either bad roads or poor-quality material of the blocks themselves, which has low wear resistance.
DIY reinforced rear beam for VAZ 2109
I couldn’t sit calmly, I wanted to modify the rear suspension. The independent suspension was immediately dropped due to the cost of 27,500 auto product, judging by the price it was removed from F1 or it is made from vibranium from which Tony Stark’s father wanted to make a shield))). A beam with guy wires is what I need, I thought, BUT again the PRICE and my friend TOAD dissuaded me from rash actions.
You can find out what a green card is here avtocivilka.ua
After looking at the design of the reinforced beam and climbing the network, I decided to make it myself. To do this, I bought 2 jet rods from a Lada, 4 bolts and nuts. At work, without removing the beam from the machine, I took a tape measure, marked everything and went ahead. Ears for the levers were cut out of 3 mm sheet,
Marking the middle of the beam.
Drilled the center brackets.
Here they are already in place.
With the side ones it was more difficult, I drilled them one by one, welded the inner one and marked the outer one through it.
Fitting
All with copper grease.
The beam is ready.
I haven’t installed the rod (stabilizer) while I’m riding like this. I wanted to make adjustable rods, but that's for next time.
Now about the result: the car has become more composed, turning and changing lanes goes better in the rut and confidently holds the road, maybe this is again a placebo, but I like it))).
Reaction rod 2101-07 large transverse 2x280 560 rub. Bolt m12x70x1.25 fastening reagent. rods 2101-07 4x20 80 rub. Nut m12x1.25 with nail. ring 4x10 40 rub.
It will take you 2 hours to do everything without rushing. That's all for now...
Instructions
Tools and consumables
- A set of new silent blocks for the VAZ 2109 car.
- Set of socket heads with a wrench.
- Set of spanners.
- A puller for rear silent blocks (you can buy it in a store or make it yourself).
- Metal brush.
- L-shaped mount.
- Jack.
Sequencing
- The wheel of the car, near which it is planned to replace the silent block, is jacked up and then removed using a set of socket wrenches (in principle, the wheel does not need to be removed, but then the work will not be so convenient).
- Once the wheel is removed, the rear beam, lever and the block itself will become visible. This entire assembly should be thoroughly cleaned of dirt and rust using a wire brush.
- Since we will not remove the rear beam, we should unscrew the mounting nut by 19. It is located directly behind the wheel. This nut and bolt secures the rear beam to the arm.
The fastening nut of the rear beam is unscrewed with a socket head by 19
- As soon as the nut is unscrewed, you should carefully remove the mounting bolt from the lever. To move it, you can lightly tap it with a socket wrench (but you shouldn’t use a hammer, as you can damage the threads).
- After removing the bolt, you need to use a pry bar to move the beam eye down, since this is the only way to get to the silent block.
To do this, the car should be jacked up another 8-10 centimeters. Displacement of the eye using a pry bar inserted into the slot above the block - The displaced eye must be fixed in the lower position.
For fixation, you can use the same mount. Eyelet fixed in down position - The next step is to remove the worn silent block.
This can be done using a puller, which is installed on the eye and tightened, squeezing the block out. The block is squeezed out of the eye using a puller - After removing the old block, the hole in which it was located should be thoroughly cleaned of rust and dirt with a wire brush.
A metal brush is used for cleaning - The new silent block is pressed into the beam using a puller, after which the unit is reassembled, the previously removed wheel is installed in place and the car is removed from the jack.
Video: how to replace silent blocks of the rear beam on a VAZ 2109
Choice
Before you start replacing the silent blocks of the rear beam, you need to decide what exactly you will replace the old, worn bushings with.
We figured out the markings and realized that for the VAZ 2109 you need to take only those that are suitable in size and diameter for the rear beam of the nine.
Today, for the VAZ 2109 they offer two types of silents, differing in the material of manufacture.
| Silent block type | Peculiarities |
| Rubber silent block | They are not as durable, but provide greater softness when operating the car's suspension. |
| Polyurethane silent block | A more rigid modification, in which the increased rigidity is the main disadvantage. At the same time, these products are more resistant to temperature changes, do not deform so quickly, and remain operational longer. |
The choice should be made based on the available budget. Rubber elements cost several hundred rubles less. As for manufacturers, we recommend paying attention to the companies SEVI, BelMag, Boge and SS20.
Size difference
Car rear suspension
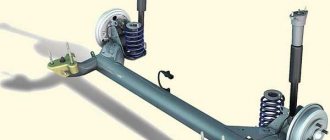
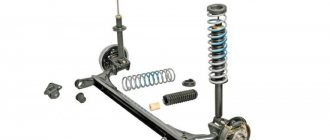
It is much simpler than the front one. The suspension is of a dependent type, the left and right sides are connected using a cross beam. It is continuous, made by welding several elements. The front edges of the rear beam are connected to brackets on the side members. To ensure the mobility of the mechanism, hinges with silent blocks are used.
At the rear of the beam there are mounts for the wheel hubs. They are fixed with bolts on the flanges. All brake components are also located here. A double-row bearing is installed inside the hub to facilitate wheel rotation. A shock-absorbing strut and spring are attached to the reverse side of the rear beam. The shock absorber is installed on top in the body cup.
Tags: rear beam came off, repair of mounting for VAZ 2108, 2109, 21099, 2113, 2114, 2115
Comments 34
It didn't hurt too bad
normal. everyone is alive and well. basin HFCH
The most important thing is that everything is fine)))
electrode MP-3 or some other?
No, esab’s ones are exclusive. MP3s blow God knows where. But these ones are just a fairy tale. The troika cooks almost the entire bodywork in my hands. Occasionally I cook one and a half www.esab.ru/ru/ru/
It's clear. I'll have to promote myself there additionally
our EVERYTHING was pushing!
I don’t know how the chisels work, but on my 12th coupe, no matter how you lift it, the doors close perfectly
into the jack or into the threshold? into the threshold through a meter board? specify...
I always put it in the threshold, I don’t put anything in it. Only a diamond jack with a recess for the threshold
I think that the thresholds have already been changed, and a thick amplifier has been welded in. You shouldn’t exaggerate the capabilities of the Lada
I’m the only owner, only if someone cooked it at night while I was sleeping))) I can, of course, not be lazy and shoot a video tomorrow or the day after tomorrow
come on, jack the end of the door into the threshold, and hang out the whole side.
well, a jack at the end of the door is not a problem, but hanging the side with such a jack simply won’t work
come on, jack the end of the door into the threshold, and hang out the whole side.
counter question, why didn’t they show the whole side on the video?
Then I’ll try to hang the whole side with a normal jack, I’m even curious)))
from 2 approaches to the front jack - the entire side is hung
Well done, I wasn’t afraid, of course I almost got to this point, the new spar was torn, I also opened it from the interior, reinforced it with plates, since one pin attaching the beam to the spar was torn off (thanks to the stampers for their contact welding of these pins), it was drilled right through hole, and pulled off the pin with engravers, and drove for six months with a torn spar =) the beam also danced and the car was constantly chattering, there is also a blog entry if you’re interested
The need to remove the rear beam may arise for many reasons. This has to be done when strange sounds are heard (dull blows, metallic ringing, squealing rubber, etc.) coming from the rear of the car when turning, on bumps and holes, or constantly. Sufficient experience is required to identify the real problem. The problem can be caused by various reasons:
- silent blocks worn out or torn to the side (this creates a feeling when one shock absorber “disappears” when turning - the knock is quite sharp and strong),
- The stabilizer may be knocking,
- There may be play in the axle bearings, as well as a number of other reasons.
It is recommended that diagnostics be carried out by specialists, despite the fact that repairs are planned to be carried out independently.
Description of the spare part
The rear beam on the VAZ 2114 is a steel element of the torsion bar suspension that provides connection between the rear part of the car body and the wheels. Gives the car lateral stability . Has a U-shaped section. It has high bending rigidity and low torsional rigidity. The design of the rear beam is simple.
The part consists of two longitudinal-type arms connected by welding. At the stern there are special holders with holes used for mounting shock absorber elements. There are also flanges with holes for fastening the axle of the rear pair of wheels. A malfunction of the rear beam is manifested by the knocking of wheels and abrasions on the body from tires.
Modification of the rear beam 2108
The rear torsion beam in front-wheel drive VAZs is a self-stabilizing type of suspension, since the BEAM itself is a STABILIZER. and the amplifier is needed only to add torsional rigidity to the stabilizer beam.
The reason for writing such an article was a blog entry in which the author tried to strengthen the beam by adding a homemade “stabilizer” to it.
The idea was subjected to severe negative criticism; in general, many did not consider the idea useful, but it interested me - the idea of a stiffer beam... Let's move on to the analysis of existing solutions
Standard suspension 2108
The main load-bearing element of the suspension is a beam consisting of trailing arms 14 and a connector 13, welded together through reinforcements.
Rear anti-roll bar
To increase the angular rigidity of the rear beam, reduce the lateral roll of the car and improve the grip of the wheels on the road when cornering, we install a rear suspension stabilizer bar.
The stabilizer allows you to distribute the load on both shock absorbers when moving over uneven road surfaces with one of the wheels, and also helps to improve the vehicle's handling and stability when cornering.
Source: Tuning 2108 (ed. Behind the Wheel)
Standard suspension
The rear suspension is semi-independent, with an elastic beam, with helical coil springs and double-acting hydraulic telescopic shock absorbers. The longitudinal arms are welded to the beam through reinforcements. To increase lateral stability and reduce vehicle roll, a stabilizer bar made of ∅14 mm steel rod runs inside the beam. The ends of the rod are welded to the levers.
Pay attention to the bar
1 - beam; 2 — anti-roll bar;
Rear beam
Reinforced rear beam for VAZ 2108-12, Kalina, Priora, Granta. A stabilizer is welded into the beam - a 30 mm diameter pipe made of 30KhGSA steel, and the beam is also reinforced with braces on shs or rubber bushings.
Conclusion: there is a point in strengthening the beam, there is no point in attaching an additional stabilizer to the body. The article is more for thought, I myself plan to weld a 20 mm pipe and ShS amplifiers)
How to disassemble the rear suspension?
This work is also best done on a viewing hole or overpass. Sequencing:
- Remove the trim that is located in the trunk.
- Loosen the nuts that hold the posts in place.
- After this, you need to loosen the wheel bolts.
- Be sure to remove the handbrake cable, drums, tubes and hoses. Otherwise, you will damage them when removing the rear beam.
- To remove the struts, you need to install a puller on the spring.
- After this, you need to unscrew the lower bolt securing the shock absorber strut to the rear beam.
- The top of the stand is secured with one nut.
After removing both struts, you can begin disassembling the rear beam mounting elements. To do this, you need to dismantle the brackets that secure it to the body. There is nothing complicated in the design of the rear suspension. All work on dismantling and replacing worn elements is carried out independently without any problems. Assembly of the unit must be carried out in reverse order. Try to carry out repairs and maintenance of the rear suspension of the VAZ-2114 in a timely manner.
Replacing the rear suspension beam on a VAZ 2108, VAZ 2109, VAZ 21099
It is more convenient to remove the rear axle from a VAZ 2108, VAZ 2109, VAZ 21099 on a lift. If it is not possible to place the car on a lift, carefully raise the rear of the car by placing a jack under the beam. Then install supports under the jack sockets on the car body.
HELPFUL ADVICE . It is necessary to remove the rear axle with assistants who will hold and lower the rear suspension beam. If, after removing the rear suspension beam, you intend to disassemble the rear beam, first loosen the wheel bolts and hub nuts.
WARNING Loosen and tighten wheel bolts only with the vehicle on the ground. The tightening torque of the bolts is 65-95 Nm (6.5-9.5 kgf-m).
1. Remove the tips of both parking brake cables from the equalizer and remove the cables from the holders on the bottom of the car (see “Parking brake” in section 8 “Brake system”).
2. Disconnect the brake hoses of the rear wheels from the pipelines on both sides of the car and the elastic arm of the pressure regulator from the bracket on the rear axle beam (see “Replacing the pressure regulator” in section 8 “Brake system”)...
3. Unscrew the nuts of the lower fastening of the rear struts, remove the bolts and disconnect the rear struts from the rear axle beam brackets on both sides of the VAZ 2108, VAZ 2109, VAZ 21099. Helpers should hold the rear beam.
4. Unscrew one nut on both sides of the bolts securing the rear beam to the brackets, knock out the bolts and remove the rear axle beam from the car by rolling the beam out from under the car on wheels.
USEFUL ADVICE The manufacturer recommends removing the rear axle beam along with the brackets from the VAZ 2108, VAZ 2109, VAZ 21099 vehicle by unscrewing three nuts securing them. However, after prolonged use, rusted studs may break. Therefore, it is better to remove the rear axle beam by disconnecting the beam from the brackets that remain on the body.
5. Install the rear suspension beam on a VAZ 2108, VAZ 2109, VAZ 21099 car in the reverse order of removal. Finally tighten the nuts of the rear beam mounting bolts with the vehicle standing on the ground. After installing the rear axle beam, bleed the brake system on a VAZ 2108, VAZ 2109, VAZ 21099 and adjust the parking brake.
Start disassembling the front suspension
All work must be done on an overpass or pit. When replacing the VAZ-2114 suspension, try to use special tools - this will make the work much easier. The sequence is something like this:
- You definitely need to press the handbrake.
- Secure the rear wheels using wheel chocks.
- If decorative caps are installed on the rims, they must be removed.
- If the wheel bearing is being replaced, you will need to unlock and slightly unscrew the nut in advance.
- The wheel bolts also need to be loosened.
- Having lifted my side of the car that is being repaired, it is necessary to completely unscrew the wheel mounting bolts and completely remove it.
You will need to remove the braces from the stabilizer link. After this, using a puller, the ball joint is disconnected from the steering knuckle. It is screwed from below with two bolts; they must be removed using a “17” key. Without this, it will not be possible to dismantle the VAZ-2114 suspension arm.
Beginning of work
If everything is ready for work, you can start replacing.
Important! To avoid injury from the vehicle falling, place the body on reliable metal stands.
The order of work will be as follows:
- Raise the rear of the car with a car jack, place the body on a stand, remove the wheel;
- After this, you should treat all the fastening bolts to be removed with WD 40 liquid, allow some time for the liquid to interact with the metal;
- Next, use 19mm wrenches to unscrew the nut from the bolt connecting the rear beam to the mounting bracket on the body;
- The regulator in the brake system will interfere with the removal of the beam; it should be disconnected;
- Now nothing interferes with the dismantling of the beam. The fastening bolt is removed, the beam is lowered down and a wooden block is installed between it and the body. Its size is selected in such a way that it becomes possible to replace the silent blocks of the VAZ-2109 rear suspension.
After this, they begin the most labor-intensive process, pressing the rubber-metal hinge out of the seat. They do this in different ways. You can try to knock it out with a hammer or remove it using a device. When this does not help remove the hinge, you can try making a hole in the rubber of the part. This will release the tension and allow you to remove it from the socket.
Installation process
Let us describe the process of replacing the front side member on VAZ 2108/2109 cars:
Using a plasma cutter, in the absence of which you can use a hand hacksaw for metal, you need to cut off a new spar. Its size must be identical to the size of the damaged VAZ part. Once you have everything you need to make the repair, you can begin installation. The spar is connected to other parts, using guide templates, you can achieve precise installation. Now you can start welding parts 2108 / 2109, but first you need to check everything carefully. Only after this will it be possible to secure the part in several places. She welds the joint to the joint using arc welding. Fix the side member on the front panel of the VAZ. The method of spot or through welding is used here.
Please note that if you replace the spar, the second option is more reliable. All you have to do is go over the welding areas with a grinding machine. It will be enough to tap the new contact points between the spar and the wheel arch with a hammer to secure the result.
Finally, apply primer, soundproofing and sealant to 2108 or 2109.
Body geometry VAZ 2108/2109
If you have completed all stages of the work, then you can be proud of yourself! But remember that doing the repairs yourself is quite difficult. If you have doubts about your skills, it is better to contact a car service. It may cost a little more, but the car will serve you for many years.
How to remove the rear beam of VAZ 2108 - 99, VAZ 2110-12, Priora, Granta
Related videos
Replacement of vase beams. 2108; 2109; 2110.
Replacing the rear beam of a VAZ 2110 car with a Priorovskaya one
Replacing the rear beam of a VAZ 2109
beam broke in motion (granta)
Replacement of silent blocks of the VAZ rear beam. The easy way.
How to replace the rear beam on a VAZ 2110 - detailed instructions.
Additional materials
Replacement of silent blocks of Priora beam, VAZ 2110-12, 2108-21099
How to remove the rear beam from a VAZ 2109.
HOW TO REMOVE THE REAR BEAM OF VAZ 2110,2111,2112
Rear beam for VAZ 2109 Priorovskaya original
Replacement of silent blocks of rear beam 2108-15,2110-12, Priora, Kalina
Assembly moments, replacement of the rear beam of the VAZ 2110.
Replacement of silent blocks of the rear beam of VAZ 21099
Reinforced rear beam GTStech for VAZ 2108, Kalina
COMPARISON of the rear beam of VAZ 2110-12 and KALINA
Assembling a VAZ 2108, replacing the rear beam (Part 1)
replacing the joints of the "daisy" extension without removing, grant, Kalina, VAZ 2108 - 2115
Removing the rear beam 2108-099
Replacing the axle shaft of the rear hub axle on VAZ 2110, 2112, Kalina, Granta, Priora, 2109 2108, 2114 and 2115
Suspension faults
It should be noted that car suspension repairs can be easily done on your own. The most vulnerable component is the shock absorber struts. They bear the maximum load, since the car is constantly experiencing dynamic forces that are transmitted from the wheels, especially when driving on uneven roads. Moreover, steering rods create lateral loads during turns. Shock absorber struts are the most expensive suspension components. But their reliability is quite high, so most often rubber seals and silent blocks fail, as well as tie rod ends, ball joints, and bearings. All those components that are included in the suspension device of the VAZ-2114.
If repairs have recently been carried out, it is possible that the threaded connections have become loose.
Please note that car suspensions use nuts with plastic inserts on the threads. They are used to secure it to the bolt.
When repairing the front and rear suspension, you must have not only a standard set of keys, but also the following tools:
- For tightening springs.
- Tie rod end remover.
- Puller for ball joints.
- When replacing a wheel bearing, an appropriate puller must be used.
Replacing rear beam silent blocks on a VAZ 2109
Silent blocks produced by AvtoVAZ can safely be called one of the highest quality parts. It is not surprising that other foreign manufacturers also use them for their cars.
Element appearance
The durability of almost any part, including the silent block, directly depends on the driving style of the motorist. The service life of the element is more than 30 thousand kilometers.
Preparatory work
If you nevertheless decide to repair the spar on a VAZ yourself, first you will need to acquire the following tools for the job:
- welding machine;
- metal hacksaw or plasma cutter;
- grinding machine;
- metal spatula.
Since spar replacement and repair are carried out using the same technology, the set of tools will also be the same. First you will need to dismantle all electrical equipment, parts, engine components and chassis.
The next stage is heating the parts. But first you will need to get rid of the old coating, remove the sealant, sound insulation and primer. Now you can cut off the heated spar
Please note that if the wheel arch is also being replaced, there is no need to separate it first
Please note that it is better to purchase spars complete with other parts. This way you will be sure that they will fit each other perfectly and will not spend so much time installing them
What is a trailer for?
Passenger cars are not well suited for transporting long or heavy loads, because their design is optimized for the comfortable transport of people, and the trunk can only accommodate a few large boxes. If you need to deliver bulk or dirty cargo from point “A” to point “B,” you can’t do without a towed vehicle, because it has a higher carrying capacity, and it’s much easier to wash it. Therefore, the trailer significantly expands the capabilities of a passenger car in the field of transporting any cargo, especially those that do not fit well with the upholstery of the passenger compartment or trunk, as well as those that exceed the carrying capacity of the vehicle.
Installation and dismantling of beams
The VAZ 2109 beam is very convenient to install and dismantle when using a lift. But if your garage is not equipped with such an addition, then carefully lift the “back” of your swallow with a jack. For greater reliability, place special shoes or at least bricks under the wheels and engage the gear.
Once the vehicle is raised, the wheels can be unscrewed. Then remove the shock absorbers from the rear suspension. The parking brake cables are disconnected and the “shirts” are removed. The brackets securing the cables to the vehicle body are bent, and the cables themselves are removed from the brackets.
When dismantling the brake hoses located on both sides of the beam, be sure to plug the resulting holes with something. Otherwise, brake fluid will leak.
What to do next
Before installing a new part, thoroughly clean the seat with a wire brush and rags. The cleaned area is treated with a solution of soapy water to facilitate installation of the new part. It is almost impossible to do this without a special device. If you don't have one, don't worry, you can easily make it yourself. A bolt with a nut or a stud 12 mm thick is suitable for this. You will also need two thick steel washers. Their diameter should be slightly larger than the outer diameter of the part being replaced.
Replacing silent blocks 2109, or rather, installing them is done like this. The bolt and washer are installed in the eye of the beam. On the other side, they also put on a washer and screw on the nut. Now you can tighten the nut with a wrench while simultaneously guiding the hinge. This can be done by tapping the joint with a hammer. If the edge of the hinge rests on the washer, select a spacer between the fixture washer and the beam. You can use a large wrench.
After the rubber-metal hinge is in place, the device is removed and the beam can be put in its place. To do this, lift the car body and pull out the previously installed wooden block. Using a jack, carefully lift the beam and align the hole of the hinge and bracket, while correcting their alignment with a drift or other suitable object. Place the bolt in place, tighten the nut, and put the wheel in place.
The VAZ-2109 silent block is replaced in a similar way on the other side of the car. The final tightening of the nuts is carried out after the wheels have been installed and the car has driven for a short distance. At this point, the replacement of the VAZ-2109 silent blocks can be considered complete. If you still have any questions, watch the video:
Rear spar repair kit 2108-09
The rear spar repair insert allows you to replace only part of the body part, which simplifies the repair and makes it cheaper. The repair kit is a reinforcing element located on a bend; it is believed that this particular place on the body is subject to intense rusting.
In practice, it is not always possible to use a repair insert, since both the rear beam fastening in the side member (the main problem of 2109) and the jack often rot. The average cost of a repair insert in auto stores is 700-800 rubles, catalog numbers are 2108-5101372 and 2108-5101373 (right and left sides).
Replacing rear side members on a Nine in a car service center
Replacing rear LPs is a labor-intensive and quite complex job that requires care, metalworking skills, and the ability to use welding. Not every car owner undertakes to carry out such repairs on their own, so quite often the owners of front-wheel drive VAZs turn to professional technicians. The cost of replacing the rear spar 2108-09-099 can vary significantly, it depends on various factors:
- the location of the auto repair company, usually in the metropolitan region and large cities, repairs are more expensive;
- car service level;
- general technical condition of the car.
If the car body is heavily rusted, not all craftsmen agree to repair such a vehicle. I would also like to note that many auto repair shops fundamentally refuse to hire VAZ-produced cars, preferring to engage in more profitable repairs of foreign cars.
