Domestic “tens” are equipped with an electronic engine control system, which allows for proper operation of the motor, based on the readings of various controllers. One of these is considered to be a temperature sensor in the VAZ 2110. You can learn more about this device, its operating principle, as well as diagnostics and replacement from this article.
Characteristics of DTOZH
In order for the injectors, as well as other elements of the VAZ 2110 injector 16 or 8 valve circuit, to operate in normal mode, the ECM reads readings from many devices. At first glance, it may seem that the coolant sensor is not a particularly important device for the “tens” engine, but this is not so. How the devices are turned on, where the indicators are located and what functions they perform - first, we suggest you familiarize yourself with the answers to these questions.
Location, functions and operating principle
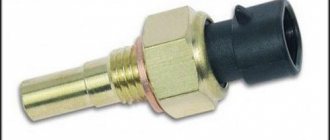
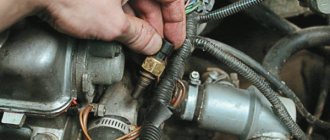
The coolant temperature sensor is an electronic device, essentially a semiconductor resistor with a negative coefficient. The controller resistance changes according to the environment. The device is designed to control the temperature during the circulation of consumables in the cooling system of the VAZ 2110 with further transmission of the received data to the dashboard. In addition, this device is also responsible for emergency fan start. In the VAZ 2110, the DTOZH is located in the head of the engine BC. Many car enthusiasts confuse the DTOZH, calling it the VAZ 2110 fan switch sensor, but this is incorrect.
The design of the coolant controller on the VAZ 2110 is quite simple. The greater the temperature effect exerted on the device, the lower its resistance will be. The principle of operation is to transmit a signal from the device to the ECM unit, which, based on this data, regulates the supply of the combustible mixture to the cylinders of the power unit. Until the engine warms up normally, a richer fuel mixture will enter the cylinders.
First temperature sensor
Content
In the engine, the first sensor is assigned to the coolant receiving transmission. When the temperature of the sensor resistance increases, the direction changes in the direction by the amount of a certain instrument scale. Such a scale will show an increase in engine temperature degrees in the coolant and allows additional cooling devices to start through a special relay on the mounting block or fan.
In the summer, many drivers remove the thermostat in order not to touch the thermostat valves and let them flow through a long system. When the winter period approaches, a temperature cooling sensor is installed again so that the engine starts heating the engine.
Methods of testing for functionality
There are several ways to diagnose the antifreeze temperature controller - visually and using a tester. Before arming yourself with a multimeter, you should carefully inspect the device’s case. If it shows signs of corrosion, deposits or damage, this indicates that the regulator needs to be replaced.
As for checking with a multimeter, the procedure is as follows:
- First, the device should be removed; to do this, you just need to find its installation location, turn off the power and unscrew the device. Next, you will need a container to fill with refrigerant.
- The next step is to heat the container after you put the DTOZH in it. But before that, it should be connected to the tester probes. Please note that when diagnosing, you must know exactly the heating temperature level of the liquid; this is what will allow you to determine the performance of the controller. The container heats up, and you will need to compare the results obtained with those indicated in the table. The table itself is shown below.
- If the temperature level does not correspond to the nominal resistance value or vice versa, this indicates a malfunction of the device. Too high a signal level from the coolant temperature sensor also indicates its failure. There are cases when the problem, when the values are higher than optimal, can be solved by cleaning the surface of the device, but such measures, as a rule, help if the deviation of the indicators is insignificant (author of a video about self-diagnosis of DTOZH - channel Device and car repair).
When to change the coolant temperature sensor
- The sensor is replaced when a breakdown occurs, but it is better to change it in advance, for example, when the engine is being replaced, because if the sensor wears out, the readings will be inaccurate.
- In the electrical circuit, you also need to check the current supply; if the arrows twitch in erratic motion, the voltage supply may be incorrect or unstable, so you will need to change the stabilizer.
- You can also notice visually when this device begins to break down; this can be seen when there is a liquid leak, severe corrosion of the clamps begins, or cracks appear on it.
- The condition of the coolant should also be checked. If used for more than three or five years, it is worth changing it, this indicates clear signs of contamination.
- In order for the sensor readings and instrument readings in motion to be in normal condition, you must first of all carefully monitor all this and not allow it to happen until the last moment.
Possible malfunctions and ways to eliminate them
The following symptoms may inform the car owner about the failure of the DVT:
- The quality of the exhaust gases is too low, which is associated with a violation of the combustible mixture in the cylinders.
- Fuel consumption has increased, and noticeably.
- Problems have arisen in the operation of the power unit. The dynamics of the vehicle may decrease, and the engine power as a whole will also deteriorate.
- Combinations of errors may appear on the dashboard, and the ECU may also send a signal to the dashboard about the need to check the performance of the motor.
- The power unit has become more difficult to start.
When they detect the first signs of problems, many motorists immediately drive their car into a garage or service station to change the controller. In practice, symptoms of DTOZ malfunctions are often associated with damage to the electrical circuit and poor contact of the device with the vehicle’s on-board network. Therefore, if you encounter a similar problem, we first recommend checking the condition of the wiring.
Photo gallery “Diagnostics of DTOZH”
1. DTOZH connected to a multimeter in a container with antifreeze
2. Dependence of temperature (left), resistance (right)
Second temperature sensor
The second device is designed to turn on an electric fan, so it has a different meaning, although it also reacts to temperature.
Such a device is installed in a place that has close contact with the cooling liquid or in any location; it can also be installed on a radiator. In an automobile system, the temperature sensor is considered the most reliable, but when the device is turned off, the product automatically turns on on the engine, and when starting an engine whose temperature range is exceeded, fuel consumption increases.
- In such situations, problems arise in a car with a cold engine, fuel consumption increases, or the composition of the processed gases or exhaust may deteriorate.
- The temperature regime of operation of the power plant is closely related to the enrichment of the fuel mixture. If you go with a scan tool to directly access the sensor, this output is mostly displayed in degrees Celsius, it should show fairly low or otherwise room temperature when the engine is very hot and when it is cold.
- When switching from high speed to idle, the engine stalls.
- When starting the engine, difficulties arise and fuel consumption increases.
Instructions for replacing the controller
Replacing the regulator looks like this:
- First, the battery terminals are disconnected. All coolant should be drained from the radiator unit.
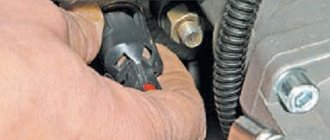
- Next, you need to disconnect the wiring from the device; to do this, you just need to disconnect the plug. For greater ease of removal, you can remove the air filter.
- After this, the controller is dismantled; to do this, it must be unscrewed. The unscrewing procedure is performed using a wrench. The failed device is removed from the outlet hose hole.
- As for installation, in this case the procedure will look similar, only in reverse order. When installing a new device, do not forget to change the O-ring. When installing the controller, tighten it as much as possible and connect the wiring to it. Now all you have to do is refill the antifreeze and connect the battery, after which you can check the performance of the DTOZH.
Why does the engine temperature sensor break?
In fact, there are not many of them. On VAZ 2114, 2110 or 2107 cars, the causes of breakdown are not much different.
First of all, you should pay attention to the entire cooling system - evaluate the integrity of the wiring, the quality of contacts and terminals, the serviceability of fans, as well as the level and quality of antifreeze.
All these factors can lead to the fact that the sensor fails earlier than the car owner expects (not “if”, but “when”, because any part fails sooner or later, and something as small and actively used is even more so)
Thus, before installing a new analyzer in place of the faulty one, it is worth making sure that the entire system is working normally, so that the installed part does not burn out prematurely because the car owner was too lazy to look for breaks in the wiring.
Replacing diesel fuel assemblies
Removal of diesel fuel assemblies in VAZ 2110
The VAZ 2110 interior temperature sensor is used to monitor temperature parameters in the car. This controller is also a transmitter connected to the ECM. In cold weather, the VAZ air controller transmits information to the ECU, which promotes optimal air flow throughout the car interior. As in the previous case, the malfunction of the device may be due to problems in the operation of the electrical circuit, so it would be a good idea to check the wiring if the controller does not turn on.
To replace the interior air temperature sensor, you need to perform the following steps:
- The car must be set to the parking brake. Disconnect the battery.
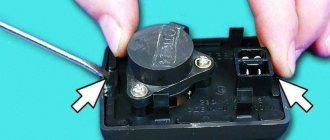
- Using a flat-tip screwdriver, you need to move the device body away from the installation site.
- First, the upper part of the diesel fuel assembly is removed, this will allow for more convenient dismantling of the controller. When the device is removed from the latches, proceed carefully, since you will still need to disconnect it from the wiring (two connectors). First, the wiring is disconnected, then the combustion engine itself is removed.
- As for installation, the procedure looks similar, but is done in reverse order. After installation, it is necessary to diagnose the functionality of the device.
CO functions
The cooling system is responsible for removing excess heat that is generated during operation of the power unit. If the engine overheats, the consequences can be catastrophic.
Cooling system diagram
In addition to heat removal, CO additionally performs several other functions:
- Helps accelerate engine warming up to optimal operating temperature;
- Warms the air inside the cabin;
- Cools the lubrication system;
- Cools exhaust gases.
In total, three types of cooling systems can be used on cars:
- Air. The cooling process is carried out by blowing air over the units;
- Liquid. The coolant is a special liquid - water, antifreeze or antifreeze;
- Combined. Both types of cooling are mixed in one system.
antifreeze or antifreeze acts as a cooler .
Possible problems of the TOZh and MVR sensor on the VAZ 2110-2112
The meter, which determines the degree of heating of the coolant, is an extremely reliable element. However, it has very characteristic malfunctions:
- loss of contacts in the electrical connector, inside the sensor or in the connection diagram;
- problems with the insulation of the device, defects in the insulation of the plug connector, short circuit.
It is quite simple to understand that the temperature sensor of the VAZ 2110 is faulty, because through a logical controller it controls the operation of the fan, which turns on when the internal combustion engine is sufficiently warmed up. Accordingly, based on erroneous or missing information received from the regulator, the controller may make incorrect decisions, causing engine overheating or excessive fuel consumption due to difficulties in reaching normal temperature conditions.
Problems with the mass air flow meter can be determined by the corresponding “Check Engine” indication on the dashboard of the VAZ 2110 and characteristic symptoms of a malfunction:
- the car noticeably loses power and at the same time consumes much more fuel;
- your car now accelerates and starts poorly when the engine is warm.
Diagnostics of the mass air flow sensor VAZ 2110
If you have doubts about the operation of the MRI sensor, simply disable it. If after this the car’s performance has stabilized somewhat, the problem is definitely in the incorrect fuel consumption parameters set by the regulator. This does not mean that you can drive without it at all, since gasoline consumption in this mode, which is an emergency mode, is also not optimal.
We start the self-diagnosis mode, read the error codes of the temperature sensor
Being extremely simple, the operation will help you correctly identify possible problems with the car based on the information that the electronic microprocessor controller receives from the sensors.
- While holding down the daily mileage reset button, turn the ignition key. You can check the functionality of all elements of the dashboard.
- Press the reset button again twice, thereby skipping the information about the firmware version, we can observe error codes. By holding down the reset button, you reset the error values for re-diagnosis and verification of troubleshooting.
Replacing the temperature sensor on the mass air flow sensor
The above error codes 0115 and 0116 mean that the problem is only in the mass air flow sensor temperature meter. It is enough to check its performance in a similar way for DTOZH. The product is located near the air filter.
To remove the temperature sensor, simply disconnect it from the electrical connector. First disconnect the negative terminal of the battery. After replacing the sensor, if it was the problem, the “Check Engine” indication should disappear after four normal engine starting cycles.
We're sorry, but the requests coming from your IP address appear to be automated. For this reason, we are forced to temporarily block access to the site.
To continue, please enter the characters from the image in the input field and click "Submit".
Cookies are disabled in your browser
. We will not be able to remember you and correctly identify you in the future. To enable cookies, follow the tips on this page.
Articles
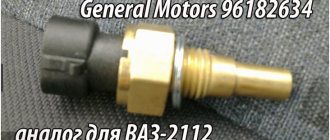
For oxygen sensors, the designation 21120-3850010 was first used. Then an article appeared with the numbers 1118 (see photo). It appears to be a new type of sensor. It will be easier to use BOSCH articles.
Exhaust system of VAZ-21120 engine
We list the article numbers of the remaining sensors:
- Mass air flow sensor (21124 or 21120): 21083-1130010-01, -10, -20;
- Mass air flow sensor (motor 21120 with ECU January 4.1): 2112-1130010, -01;
- DPDZ: 2112-1148200;
- РХХ: 2112-1148300-02;
- DPKV: 2112-3847010, -01, -03, -04;
- DTOZH: 2112-3851010, -01, -02, -05;
- Speed sensor: 2110-3843010-13, -18;
- DPRV: 2112-3706040, -02, -03;
- DD: 2112-3855020, -01, -02, -03;
- Oil pressure sensor: 2106-3829010, -01, -02;
- Antifreeze level sensor: 2110-3839310-10, -11, -12, -13, -14;
- Coolant temperature indicator sensor: 2101-3808600, -02, 2106-3828010.
The last three sensors are not connected to the ECU. However, a rough road sensor (2123-1413130) can be connected. It affects the operation of the engine, although it is attached to the body.
In general, on VAZ-2112 hatchbacks, sensors may be different from those indicated in the list. But then we are talking about an 8-valve engine. And everything that we indicated applies to 16 valves, here is a diagram of this engine.
Symptoms of a problem
You can assume that something is wrong with DTOZH No. 2, based on the characteristic signs:
- Reduced power and deterioration of the traction characteristics of the internal combustion engine.
- Problems with starting the engine, which, even after starting to work, tends to stall.
- Increased content of harmful substances in the exhaust gases (mixture too rich).
- Detonation knocks in the cylinders (mixture too lean).
- Floating idle speed.
- Dips when the engine is running at full load.
In any case, measures to detect and eliminate the malfunction should be taken without delay.
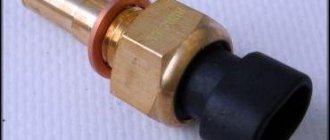
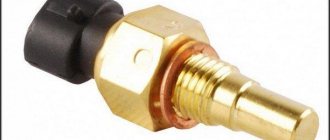
Device
The compact measuring device is smaller than the little finger and consists of several parts:
- A metal body that is constantly in contact with the coolant (coolant) and has edges for gripping with an open-end or spanner wrench.
- A resistor placed inside the housing that changes its resistance depending on the temperature.
- A plastic connector with one or two contacts connected to the electrical wiring.
Such a part is inexpensive and, if necessary, it should be replaced without delay.
Repair VAZ 2108 2109 21099
Tuesday, September 22nd, 2015
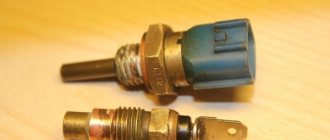
The most important thing you need to know about the temperature sensor of the VAZ 2110 is that there is not one. VAZ 2110 has two temperature sensors: - Coolant indicator temperature sensor
This is a sensor designed to display information about engine temperature on the instrument panel. It doesn’t affect anything else, it’s not connected anywhere - it only affects the temperature indicator on the panel. — Coolant temperature sensor connected to the ECU. This sensor radically affects the operation of the car engine. It is from this that the control program knows the engine temperature and sets the injection duration to the injectors. It is precisely this sensor that is used by the ECU to turn on the fan of the VAZ 2110 engine cooling system. Therefore, with high fuel consumption, a boiling engine, or a non-working fan, it is this sensor that needs to be checked.
Temperature sensor VAZ 2110
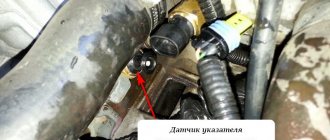
The temperature sensor is a thermal resistance, that is, a resistance that changes depending on the engine temperature. The sensor is installed in the exhaust pipe of the cylinder head near the thermostat. It twists inside the pipe and its sensitive part interacts directly with the coolant. The sensor connected to the injector has two contacts, and the temperature indicator has only one contact.
Location of temperature sensors VAZ 2110
As a rule, checking the VAZ 2110 temperature sensor comes down to measuring its resistance at different temperatures. The sensor has two contacts - the resistance between them must be measured with a multimeter. Checking the temperature sensor of the VAZ 2110: 1) When the engine is cold, remove the connector from the sensor and check whether it is oxidized. Then use a multimeter to measure the resistance. We put the connector in place. 2) Start the engine and warm it up. If the temperature indicator works correctly from its temperature sensor, then it will show us the correct temperature. 3) Turn off the engine, remove the connector again and measure the resistance of the temperature sensor. It should become less than it was on a cold engine. On a cold engine at a temperature of about 0 degrees, the sensor resistance should be about 10 kOhm. At a temperature of 90 degrees, the sensor resistance will be 240 Ohms. 4) When the resistance of the temperature sensor is less than 240 Ohms, the ECU should start the cooling system fan. To check this, you need to take a 100 Ohm resistor and connect it to the contacts of the temperature sensor connector. When the resistance of the connector contacts closes, the fan will begin to rotate; when it opens, it will turn off. 5) If the resistance of the sensor does not change depending on the engine temperature, then the sensor is faulty and needs to be replaced. 6) If the cooling system fan does not turn on even on a hot car and closing the contacts of the sensor connector with a resistance of 100 Ohms, the fan also does not start, then you need to check the fuse, the fan relay on the block to the left of the passenger seat under the glove compartment. Where the ECU is installed. 7) Anyone interested can drain the antifreeze, unscrew the sensor and take it home. Place it in boiling water and measure the resistance - it should be 100-200 Ohms. Although the same thing can be done on a car. The coolant temperature indicator sensor does not spoil life much, but it should still be in working order. Checking it is similar to the method described above - measuring the resistance at different temperatures of the VAZ 2110 coolant.
Temperature indicator VAZ 2110
Replacing the temperature sensor of a VAZ 2110: 1) We replace the temperature sensor on a cold engine. Unscrew the cap of the expansion tank and drain the antifreeze to the level of the temperature sensor. 2) Unscrew the sensor with a 19 mm wrench. Screw in a working sensor in its place. 3) Add antifreeze to the previous level, put the connector on the sensor, and close the expansion tank with a lid. 4) Start the engine and see if antifreeze is leaking through the temperature sensor
What to pay attention to: There is no need to confuse the temperature sensors of the VAZ 2110 with each other. The sensor that is connected to the ECU is installed higher, on the exhaust pipe
The temperature gauge sensor is below, screwed into the engine housing in the area of the cylinder head. To check the temperature indicator, you can use resistors of various values. By connecting it to the sensor contacts, the arrow on the panel should show different temperatures. 10 kOhm - 0 degrees, 240 Ohm - 90 degrees, 100 Ohm - 130 degrees.
Temperature and fuel gauge glitches
The VDO instrument panel does not work.
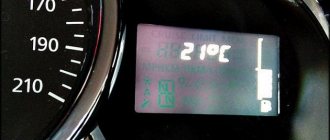
Temperature and fuel levels are “buggy” Incorrect temperature and fuel readings? Probably many owners of VAZ 2110 - 2115 have already encountered the problem of incorrect display of fuel and temperature indicator on the VDO instrument panels, “Ch. Vladimir.
The actual engine temperature is 90 degrees (we know this for sure), but on the instrument panel it shows 110 degrees. There are 10 liters of gasoline in the tank, but the instrument panel shows either 20 liters, then 15 liters, and sometimes correctly 10 liters. Moreover, usually the tachometer and speed always show the correct values. I had this problem for about a whole year. When I test the instrument panel (Press the daily mileage button - hold it down, turn on the ignition, all instrument indicator arrows deviate over the entire scale span and the LCD segments are completely filled, and the emergency fuel level warning lamp lights up. When testing the instrument panel, the temperature indicator should smoothly go a distance from 50 degrees to 130 degrees. The fuel level should smoothly go a distance from 0 to 1). If the pointers work correctly during the test, then the problem is electronics. Car service centers say that these instrument panels cannot be repaired. Just buy a new one of the same instrument panel and everything will be fine. It was a pity to spend money on a new VDO instrument panel (about 2,400 rubles), since the engine speed and speed of the car were shown, the temperature was monitored on the STATE 510 trip computer, and when refueling I had to set the gasoline in the same way on the standard computer. It was read theoretically from the controller. By the way, the calculation was quite accurate, but it was annoying to constantly put out gasoline.
By the way, here is another main feature that confused me, the fact is that the temperature gauge began to jump strongly when the car’s lights, low beam, etc. were turned on.
Recently I decided to tackle this problem and fully understand it. I didn’t really believe that it was an electronics failure. The solution turned out to be very simple. In fact, it was just necessary to bring a good “ground” to the instrument panel. Or just restore the default one. After all the ground connections, the instrument panel began to work correctly. The temperature and fuel gauges now work accurately, even with the lights, heaters, etc. on.
All the “grounds” that need to be checked are described below: A fragment of the article taken from the site www.chiptuner.ru
The first ground connection of the vehicle is located inside the instrument panel, on the top left of the relay and fuse mounting block, under the sound insulation. On cars of the first years of production, the ground wires to the welded stud were approached on top of the sound insulation, and then someone’s bright mind came up with the idea of hiding the wires under it. So access to the stud is very inconvenient and is only possible using a tube wrench or an extended 10-mm socket. If there is insufficient connection in this place, when you turn on the headlights or electric window motors, the windshield wiper and washer may turn on, and the central door locking system may work.
The second connection is located on a welded stud, on the center console of the instrument panel, on the left side, above the left console screen, under the M6 nut.
But even if this nut is tightened properly, and the problem remains, then we move on to the most important point of mass for the entire instrument panel, grounding the entire metal frame of the panel. This is a welded stud with M6 thread. It is located on the lower, inner (cabin) side of the engine shield, in the middle. The nut screwed onto this stud also secures the bracket that secures the front part of the left screen of the console, which some diagnosticians and electricians mercilessly remove due to the fact that there are frequent cases of damage to the ECM harness or central locking system on this bracket. As a rule, the nut is tightened very, very mediocre. If there is insufficient contact in this and the previous connection, when turning on the side lights, headlights and radiator fan motor, deviations of the temperature and fuel level indicator arrows are possible.
Source
How to check
There are many cases in history when the owner installs a new spare part, but it does not work. Therefore, after purchasing a temperature sensor, it is recommended to measure the resistance before installing it on the same VAZ or another car. To do this you will need a multimeter (tester). We convert it to an ohmmeter. At room temperature (+23 °C, +25 °C), the readings should be around 2780 Ohms (as in table No. 1). If you lower the DTOZH into a glass of boiling water (+100 °C), hold it for a while and take readings, a result in the range of 175–180 Ohms should appear on the tester screen. This means the purchase is in good condition. Can be installed on a car.