What it is
Hydraulic compensators are parts for tuning a car engine.
The device automatically adjusts the valve clearance. The GKK was never installed by the factory on the old sevens. Some cars of that time had mechanical type regulators. But the efficiency of their work left much to be desired.
Owners of the VAZ 2107 must manually adjust the valve clearance every ten thousand kilometers. To do this, you have to dismantle the cover and use a feeler gauge to set the gaps.
Built-in mechanical elements are subject to wear. An incorrectly adjusted gap leads to increased engine noise. As a result, the car's dynamics decrease and fuel consumption increases. After 50 thousand mileage it is necessary to install new valves.
Hydraulic compensators on the VAZ 2107 are free of these disadvantages. The part lasts a long time: it works properly for up to 150 thousand kilometers. The gap is set automatically and is constantly maintained at the desired level.
The engine responds positively to such care, which is reflected in an increase in engine life, its power and in a decrease in gasoline consumption.
How do hydraulic valve compensators work?
The engine of each car is designed with the expectation that cold parts have the same size and gap between them, and when they heat up, they expand. As a result, the gap between engine parts also changes. To control this gap, a hydraulic compensator device was invented. When filling the channels with engine oil, the hydraulic compensators of the VAZ 2107, 2112, 2114 and other car models are capable of adjusting the gap even under conditions of a fairly worn layer of parts. This is the main principle of operation of hydraulic compensators.
The engine does not cause any problems until repair or replacement of hydraulic compensators is required. As a rule, the problem manifests itself in the form of increased engine noise. Have you ever heard the expression: the hydraulic compensator is knocking on a VAZ 2112, or any other car? Now you understand what we are talking about. Actually, we talked about the reasons for the knocking earlier, so we won’t dwell on it. Let's better pay attention to the question of how to replace hydraulic compensators?
The need to use additives
Replacing the VAZ 2112 hydraulic compensators, a video about which is presented in the article, should be done only after the car owner knows what changes occur when using additives. They promise that they can reduce noise and clean channels and holes in hydraulic compensators. Be careful when purchasing generic additives. Read the instructions carefully. What type of engine is the additive intended for, what oil is it used with. Inattention can damage the engine.
After the VAZ 2112 hydraulic compensators (16 valves) have been replaced, a video about which you can watch in the article, you should inquire about the quality of the additives that are designed to change the properties of the oil. That is, improve the quality in order to achieve the effect we need at the moment. There are additives that improve the sliding effect. Rubbing parts with additives have a lower coefficient of adhesion. Due to this assistance, the engine increases power.
Hydraulic compensators on the VAZ 2109 should be used with additives that can increase the coefficient of adhesion. In automatic transmissions, it is necessary that the two wheels of the turbine transmit torque better. The hydraulic compensator must receive oil constantly and in the required quantity. If these conditions are violated, the operation of the hydraulic compensator is disrupted. This means that the gaps in the gas distribution mechanism will also be compromised. Not only knocks appear, but the normal operation of the engine is also disrupted.
The installation of hydraulic compensators on a VAZ 2107, a video about which you can watch in the article, must be accompanied by the use of the correct additives that will eliminate the consequences described above. If they are really high quality, then the desired effect will be achieved. The channels will be cleaned, the knocking will disappear.
But this effect will happen if the additive is original and not a fake. There are a great many low-quality additives on the market. Buy with caution, it is better to double check. Liqui moly Hydro, for example, is one of the most popular. If you also use oil from this company, you really get the effect. What the manufacturer promised, he delivered.
Now Hado has appeared on the additive market. It can be purchased at an affordable price. This is a product of the Ukrainian chemical industry. According to consumer reviews, there are no particular complaints. Additives really eliminate noise. Whether or not to use these compounds to eliminate noise and flush hydraulic compensators is up to everyone to decide for themselves. The main thing is to first make sure you need it, and then purchase it. When purchasing, pay special attention to the manufacturer. You can't allow counterfeits to come in. A fake can lead to complex and expensive repairs. But the price should not be too low, since in this case you risk purchasing a fake. The acceptable cost is 900 rubles.
One of the options for improving the VAZ 2107 engine is the installation of hydraulic compensators. This part not only reduces noise from the operation of the power unit, but also completely eliminates the need for periodic adjustment of valve clearances. Installation of hydraulic compensators is possible in a garage, for which you will need to prepare the system elements and the necessary tools.
Reasons for failure of VAZ 2112 hydraulic compensators
- Using inappropriate or poor quality oil
- Oil filter malfunction
- Failure to comply with oil change schedules
- Increasing the landing gap in the plunger pair
- Worn high pressure chamber check valve
- Incorrect operation of the engine lubrication system
- “Airiness” or partial filling of the hydraulic compensator with oil
- Microparticles of worn parts entering the hydraulic compensator in the oil
In this article we will tell you how to correctly replace hydraulic compensators on a VAZ 2112. What you need to consider when purchasing this part, and what alternative options are available when replacing this device.
Hydraulic compensators. What is it and why do they knock
Modern cars are becoming more advanced and smart. This also applies to the gas distribution mechanism. It is very important that the valve always opens and closes at the right time, so that ideally there are no gaps between the camshaft and the valve itself. This offers many benefits, such as increased power and reduced fuel consumption. Previously, valves were adjusted manually, then mechanical “wide” pushers appeared (which, by the way, are still used today on many cars), but the pinnacle of evolution was hydraulic compensators or simply “hydraulic compensators”. They have many positive aspects, but they also have a lot of negative ones, in particular they can knock. Today I will try to talk about the device in a simple and understandable language, as well as some breakdowns, there will be a video version at the end...
Design of hydraulic compensators and types of devices
The design of the hydraulic compensator in its modern form involves two schemes. However, structurally they differ little, and in any case, the entire mechanism is hidden in a non-separable metal case. The only difference is where the device is mounted: in one case these are the sockets of the gas distribution mechanism, in the other - the sockets of the valve rocker arms. The set of parts in both cases is the same: plunger with bushings, valve and plunger spring, ball valve.
At the moment, there are 4 types of compensators - some are gradually becoming a thing of the past, but are still found in power units, while others are confidently becoming more widespread.
Hydraulic support, the principle of which is based on interaction with levers and rocker arms. Nowadays such mechanisms are practically not found, but in previous generations of power units they were used very actively.
Roller hydraulic pusher - it is used quite often.
Hydro support.
A hydraulic pusher (hydraulic compensator) that regulates the clearances between the valves and the camshaft. Widely used on new car models.
Accordingly, the future lies in various modifications of hydraulic pushers, while hydraulic mounts are quickly becoming obsolete among car designers.
Installation of hydraulic compensators on a VAZ (classic engine)
After installing hydraulic compensators
there is no need to adjust the valves, the engine becomes much quieter (the valves stop knocking). But there are also disadvantages: the hydraulic compensator mechanism is very sensitive to the quality of engine oil (dirty oil can clog the mechanism).
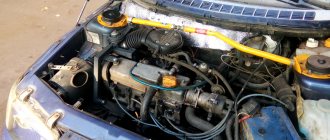
Description of the installation process of hydraulic compensators. So, we have an engine:
The pan with the air filter, gas draft and block cover are removed. As you can see, everything inside is dirty with oil residues :(.
The sprocket counter washer is flared
The asterisk is installed so that the marks are opposite each other.
The sprocket mounting bolt is unscrewed; for reliability, the sprocket is suspended with wire.
We unscrew the nuts securing the bed and remove it together with the camshaft.
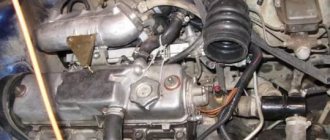
This is what the engine looks like after removing it :). Everything here is also clogged with fuel oil :(.
This is what the camshaft looks like - there is wear and risks.
And this is one of the levers.
We remove the levers and lay them out, remembering the position.
We unscrew the cams and carefully, so as not to tear off the low edges, tear off the bushing of the adjusting bolt and unscrew them.
We wipe off all the dirt, cut down the area opposite the 2nd valve so that it is in the same plane as the sockets.
We carefully clean everything with kerosene.
The planes of adjacent nests are ground in for greater tightness with a sharpening stone.
Now you can screw in the bushings. Here lies ambush number 1
. Not every bushing fits perfectly into the socket. Sometimes it is enough to screw the bushing designed for the first socket into the second socket, and the second will ideally screw into the first. In this case, it is clear that the bushing did not go into the first socket, and it was screwed into the second, and the first was left for a snack. In our case, we still had to take one bushing from another set. The one we rejected can easily enter another car without any problems.
This is what screwed-in bushings with pushers look like.
Now we unscrew the bushings, remembering their position.
We throw support washers into the head and press them using a special mandrel.
You can admire the installed washers.
Press the O-rings into the distribution plate. Here lies ambush number 2
. Again, the rings do not always fit perfectly into the plate. You can try others from the kit, sometimes it helps. In our case, we had to take one more ring from another set. If everything worked out, we assemble the assembly with the bushings.
We install what we got into the head.
Now the crucial moment - you need to check that the plunger does not jam. Loosen the bushing until the plungers move freely in the bushings.
Now we throw the springs inside.
This is what the block head looks like now.
And install the plungers in their places.
Now you need to adjust the stroke of the plungers. To do this, we install valve drive levers 4,6,7 and 8 and install a bed with a camshaft turned in accordance with the instructions :).
We install a special device to accurately calculate the stroke of the plungers.
With the help of such a thing, the stroke is measured.
To access levers 1 and 8 you have to use the bent tip.
Having removed the bed, we throw washers to bring the plunger stroke to normal. We used not only the rings from the kit, but also others of different thicknesses to more accurately set the stroke.
Then we align them with a mandrel.
We do the same with the remaining plungers.
Now we drill the oil drain in the bed, removing the camshaft from it.
And cut the thread.
This is what happened.
In order for the tube to be straight down, you need to cut the thread on it to a certain level.
And then bend it on the spot to the desired angle so that it fits exactly into the hole of the cross.
After blowing and cleaning the bed and camshaft, we put them back together.
We install the lubrication system pipes. Fill the system with oil. We plug with our fingers those bushings in which the oil has reached the top.
Installing the ball valve
And a plunger. Here lies ambush number 3
. It is necessary to check the tightness of the valve. To do this, a ball is thrown into the plunger and blown. It should not allow air to pass through. If unsuccessful, you can try replacing the ball. We had to take one ball from another set. The valve is re-checked in place; the plunger must resist being pressed into the valve body.
We install the levers in their places.
And we install the bed with the camshaft in place. You must remember to set it to its original position.
We tighten the nuts and tighten them with the required force.
This is what the installed system looks like.
We screw the sprocket into place and lock the lock washer.
This is what the result looks like. All that remains is to install the cover and air filter.
First start of the engine with installed hydraulic compensators:
All this disgrace was done to the car _and_ VAZ-21063 1990, mileage 283 thousand km at the time of installation..
installed and tuned and started... guys, you know I want to strangle my whistling carb with a cut pan and forward flow, which disturbs the quiet monotony of the engine... it rumbles so much, it’s already pleasant (almost starts to rev)... I recommend... It’s enough to eat, but the result is worth it...
To begin with, I would like to inform you that our spark plug wrench-tube is suitable for unscrewing a pair of nut-bolts from a well... then I recommend running the threads of each ring... and when tightening, estimate the number of turns and tighten carefully... it’s better to undertighten than to look for a new plate... I also say this I have to say that I doubted the tightness of the connection of the oil supply tube (with the thread that) from the distributor bed to the “tee”... so I installed the thread on a threaded anaerobic sealant (blue)... and the end of the tube entering the “tee” was coated with sealant (high-temperature and carefully without excess)... that’s all the washers fell into the wells without shrinkage and were previously brought to their normal “flat” state through a hammer-anvil pair... I checked the tightness when pumping oil with the plunger pairs inserted (see the instructions, when pumping oil the plunger begins to rise, etc.) without any checking the tightness of the ball and plunger head...
The engine runs really quieter and does not affect the service life of the shaft and bed. The service life of the compensators themselves has not yet been studied.
When installing a non-original shaft, you need to pay attention to whether it is designed to work with hydraulic compensators. Hydraulic compensator shafts differ in the height of the cams and the contact with the plunger occurs slightly differently. If at the original lift it is almost not noticeable, then if you add another 2mm of valve travel, the angles become much larger and the contact with the plunger will not be where expected.
z.y. However, to remove the original valve supports, I recommend having a 21mm socket. The spark plug has a size of 20.6 mm, sometimes you have to persuade it to fit with a hammer, and the stamped steel head may not withstand the force. but with all the advantages, there is one disadvantage, the system does not tolerate old and dirty oil, I had just this and it turned out that they poured me something at the station that is unclear... the result is that one valve rattled very quickly, one of the plungers stopped working, but after complete cleaning and filling clean oil on your own, and not something unknown that was poured at the stations, everything fell into place, although I had to spend the entire day off cleaning...
I drove about 1.5 thousand on them, the feeling at the moment is twofold, if everything is good, then the engine is really quieter, pulls very well, runs smoothly, my glitch with cylinders 1 and 4 has disappeared, for some reason there are always spark plugs They were black, but everything was fine. It’s very pleasant to drive, especially at speed on the highway, you can hear not the engine but all the other bearings...
but there is one thing, they are very picky about cleanliness, it so happened that out of ignorance I poured the sewing oil, which was lying in layers in the engine, fuel oil, so to speak, and with this fuel oil the oil channels were clogged and the hydraulics were stopped working, the engine seemed to be cleaned with more, but this fuel oil will still float up from somewhere and clog the channel
Why are hydraulic “adjusters” needed?
As the engine gradually reaches operating temperature, its other components also heat up. The associated expansion of parts causes a decrease in a variety of gaps in the power unit. And adjusting the gaps in the gas distribution mechanism is a very important operation, since the stability of the engine largely depends on it. It is clear that manual adjustment is a tedious and ineffective task; special mechanisms cope with it much more successfully. Moreover, during active vehicle operation, the valves are constantly under both mechanical and thermal load. And we must not forget that all timing components heat up unevenly, which, combined with natural abrasion, leads to increased wear of the valve mechanism.
The operating principle of hydraulic valve compensators is based on ensuring optimal thermal clearance. But it should be different, since the intake valves, compared to the exhaust valves in contact with hot gases, heat up an order of magnitude less. In addition, “regulators” are able to take into account the wear of the valve mechanism, although this does not solve the problem of increased fuel consumption and a decrease in engine power.
Returning to the issue of manually adjusting the timing belt, one cannot help but notice that such an adjustment should be carried out after 15 thousand km. However, it is highly not recommended to carry out such a procedure without very specific skills, since it is necessary to take into account a wide variety of temperature fluctuations. This is the same as in the case of the average temperature in the ward, which does not provide objective data on the condition of the patients. And a completely different matter are hydraulic compensators that regulate the gap automatically, taking into account current parameters.
Design of hydraulic compensators on Niva Chevrolet
On all classic VAZ engines, rockers were installed in the gas distribution mechanism, and valve clearances were adjusted using special screws. The engine systems of the 2123 Niva Chevrolet models are equipped with hydraulic shock absorbers, which are similar in shape to adjusting bolts. Clearance holes are eliminated due to displacement elements and the required oil pressure in the engine. The design, complex at first glance, consists of the following parts:
- Hydraulic compensator housing.
- Return spring.
- A plunger pair, which is divided into two parts - upper and lower.
Reasons for the characteristic knocking sound:
- lack of oil pressure in the system;
- the oil channels in the engine are dirty, causing the entire lubrication system to become clogged;
- lack of oil material in the design;
- the area intended for the hydraulic compensator is worn out;
- parts and components of the device designed to automatically adjust the thermal clearances of engine valves have worn out.
Operating principle of hydraulic compensator
A ball-shaped valve supplies engine oil to the hydraulic element cavity. Under the influence of lubricant, the piston of the device extends, which leads to an increase in the height of the hydraulic valve. This leads to a reduction in the valve clearance in the gas distribution mechanism to a minimum level.
The oil stops flowing when it reaches the maximum compression level. When production occurs, the valve again releases the required amount of oil. Thanks to this, pressure is constantly maintained in the GKK, which reduces the valve clearance.
If you decide to install a compensator, be prepared to use only high-quality oil.
Malfunctions of hydraulic compensators
The main indicator of failure of hydraulic compensators is their characteristic knocking sound. It is he who signals that it is time for a replacement. There may be several reasons for this:
- spent resource;
- premature wear of the plunger pair due to wear products entering the device;
- clogged oil supply channels.
If the hydraulic pushers have become unusable after working for the required period, it means that the car owner paid maximum attention to the engine.
But the other two cases are a consequence of the use of low-quality, inappropriate oil, its untimely replacement, malfunctions of the oil pump or other elements of the lubrication system.
The hydraulic compensator will work ideally only when its internal space is completely filled with oil. Otherwise, dynamic loads will gradually destroy it and they begin to knock.
Advantages and disadvantages of hydraulic compensators
After installing hydraulic compensators on the VAZ 2107, it reduces noise when the engine is running. The high-frequency component caused by the operation of the standard timing belt disappears from the sound spectrum. When driving in 4th gear at speeds up to 80 km/h, the sound of the engine is completely inaudible in the cabin.
Timing parts with hydraulic compensators wear out more slowly, since they do not experience constant shock loads caused by the presence of gaps. The camshaft and rocker lobes maintain a smooth surface even with high mileage. When installing hydraulic compensators on a mechanism with already worn cams, the latter gradually level out during operation.
Engine characteristics (power, throttle response, efficiency) remain unchanged. But due to the absence of differences in valve clearances, engine operation becomes uniform.
The conditions of abundant lubrication in which the hydraulic compensator parts operate ensure a complete absence of wear on the latter. During the first 20-30 thousand mileage, the plungers and bushings grind in, their mating surfaces become mirror-like. With further operation, no traces of wear appear on the parts, their linear dimensions do not change.
The only drawback of hydraulic compensators is their increased sensitivity to the quality of engine oil and the presence of contaminants in it. Otherwise, the plunger may get stuck, causing a change in the gap and the appearance of shock loads that can damage the mechanism. The same consequences are caused by “oil starvation” of the engine.
Pros and cons of a hydraulic compensator
There are many positive aspects to this mechanism:
- It is completely maintenance-free and works automatically
- Increased timing system resource
- Maximum pressure, which gives good traction
- Minimum fuel consumption
- The engine always runs quietly
Well, despite all the advanced design, there are also a fairly large number of disadvantages.
- Since all work is based on oil pressure, you need to fill in only high-quality lubricants. Synthetic is desirable
- Need to change oil more often
- The design is more complex
- Expensive repairs
- Over time, they can become clogged, which impairs engine performance (consumption and traction), and the timing belt begins to make noise.
The biggest disadvantages are that the design is expensive and complex, and is VERY demanding on the quality of the oil. If you pour “don’t understand what” they will very quickly fail and require replacement. For example, conventional mechanical pushers are much simpler and less demanding on the quality of lubrication.
Basic faults
Hydraulic compensators, like any car part, tend to wear out and break. They are constantly under load. But they work for a long time: from 120 to 150 thousand mileage. Sometimes they fail ahead of time.
Two circumstances indicate a malfunction:
- a characteristic knocking sound appears, reminiscent of a clattering sound;
- motor power decreases.
Engine knock
The main sign of wear of a spare part is the appearance of a clattering sound. Since extraneous knocking noises can occur on the VAZ 2107 for various reasons, you need to check what is its source. To do this, you will have to open the hood and start the engine.
A characteristic clattering sound comes from under the valve covers and does not disappear while the engine is running. At the same time, the sound may have interesting features.
- The knocking noise appears on both a warm and cold engine. If you increase the speed, it may stop. This indicates possible valve ball wear. The hydraulic compensator will have to be completely replaced. But before doing this, make sure that the device is not dirty. A good cleaning may easily fix the problem.
- The engine starts knocking only after warming up. This indicates that the elements of the part have worn out. It's time to buy a new one.
- The characteristic clattering sound appears only at elevated speeds. Most likely there is too much or too little oil coming in. You need to check its level. And if necessary, repair the oil receiver.
- The knocking is constantly present and does not subside under any conditions. This usually occurs when there is a gap between the rocker and the camshaft lobe. Try cleaning the hydraulic compensator or replacing it with a new one.
Reduced power of the power unit
If the hydraulic compensator malfunctions, this inevitably leads to a decrease in engine power. You will feel that the dynamic characteristics of the VAZ 2107 have decreased. And this is not surprising!
Indeed, as a result of an incorrectly set valve clearance, the wrong amount of fuel enters the engine. As a result, the fuel mixture is formed in incorrect proportions, which reduces the power of the power unit.
How to get rid of the knocking of hydraulic compensators with your own hands
Increased engine noise may indicate the presence of serious malfunctions, which can lead to complete inoperability of the unit.
The knocking of hydraulic compensators when cold does not belong to this category, but if this part is not adjusted, the engine will consume more fuel, develop less power and the comfort of driving the car will sharply decrease. The wear of the piston group will also increase due to incorrectly selected gaps in the gas distribution system.
This article will tell you in detail how to eliminate the knocking of hydraulic compensators, as well as how to do this work efficiently and with minimal time and financial costs.
Knocking of hydraulic compensators: reasons
To understand how to get rid of the knocking of hydraulic compensators, you need to have a good understanding of the operating principle of these parts. The thermal expansion of the metal as a result of heating was the reason for the invention of this type of mechanism.
In old-style cars, instead of hydraulic compensators, adjusting bolts were installed, with the help of which the thermal gap was manually adjusted. This method of eliminating increased gaps in the gas distribution system required the car owner to spend a significant amount of time and money, because the need for manual adjustment arose every time the car traveled 10 - 15 thousand km.
In modern cars this function is fully automated using small inserts between the rocker arms and the valve stem. The operating principle of this part is quite simple:
- Oil from the lubrication system enters the cylindrical cone of the compensator under pressure when the camshaft cam does not apply pressure. Inside the part there is a plunger pair, with the help of which the filling of the internal cavity with oil is regulated until the moment when the pressure part of the mechanism extends to a distance that completely compensates for the existing gap between the part and the valve stem.
- At the moment when the camshaft rotates to the angle required to start applying pressure to the valve, the oil supply is shut off and, taking into account the fact that oil is a practically incompressible liquid, the compensator maintains the required length and transmits the force from the camshaft to the valve stem without delay.
- After the valve returns to the closed position, the entire cycle of operation of the hydraulic compensator is repeated again.
Click on the picture to enlarge
Considering the fact that the internal volume filled with oil can vary depending on the size of the gap, it is possible to completely avoid delays in valve opening and, as a result, increased noise of the gas distribution mechanism.
Unfortunately, hydraulic compensators, like any car part, can fail. A malfunction of this part will inevitably lead to the formation of a characteristic knocking sound during engine operation. Most often, hydraulic compensator noise is caused by the following reasons:
- Wear.
- Manufacturing defects.
- Internal valve jammed.
- Air in the internal cavity of the part.
- Valve mechanism clogged.
What is required to install on the seven
To install the elements on the “seven” yourself, you need to have the following tools and accessories on hand:
- Torque wrench.
- A set of wrenches (socket wrenches, socket heads, open-end wrenches).
- Drills and electric drill.
- Copper and steel wire.
- New gasket for the timing cover.
- Angle grinder or some files.
- Rags.
- Fine abrasive grinding disc.
- Set of hydraulic compensators.
- Frame for block head washers.
- Mechanism for replacing plungers.
Even before checking the hydraulic compensators, you need to prepare a special tool - without it it is quite difficult to carry out all the work.
Replacing rocker arms on a VAZ 2107
Rockers (rocker arms) are one of the elements of the valve timing mechanism of the VAZ 2107 engine. The purpose of the part is to transmit energy from the camshaft cam to the valve stem. Since the rocker is constantly exposed to mechanical and thermal stress, it wears out over time.
Rocker arms are designed to transfer energy from the camshaft lobe to the valve stem
Determining the suitability of rocker arms
If during operation of the “Seven” there is a decrease in engine power or a characteristic knocking sound is heard in the cylinder head, then the likely cause is a broken rocker arm. During repair work, it is necessary to clean the rockers from dirt and carbon deposits and check them for wear and damage. If any defects in parts are found, they are replaced with new ones. If the rocker arms are in normal condition, install the products on the cylinder head.
If the rocker arm is heavily worn or there is visible damage, the part needs to be replaced
Is it possible to level the rocker arm?
When adjusting valves or repairing the cylinder head, you may notice that the rocker arms are slightly at odds with respect to the camshaft, i.e., the distance between the rocker plane and the camshaft journal is not the same. To eliminate this nuance, some owners of “classics” align or change the springs that press the rocker arms, or replace the rocker itself, but the problem may still remain. In fact, on all classic Zhiguli models, including the VAZ 2107, misalignment is not as bad as incorrect valve clearance. Therefore, it is the gap that deserves attention. The main thing is that the parameter is adjusted properly and is 0.15 mm when cold.
When the rocker arm is skewed, some motorists change the part itself, the springs, and sometimes the camshaft, but they do not achieve the desired effect
How to replace a rocker arm
If there is a need to replace the rocker arms on the “seven”, for example, 1 part in case of its breakdown, then it is not necessary to dismantle the camshaft. To do this, it will be enough to pry the spring with a screwdriver, remove it, and then remove the rocker itself. The new part is installed in the reverse order. If all the rocker arms are being replaced, then it is wiser to dismantle the camshaft.
Hydraulic compensators VAZ 2107
Hydraulic compensators are devices that independently adjust the valve clearance. The part is a more advanced product compared to the mechanical type regulator that was used on older cars. On the VAZ 2107 and other “classics” hydraulic compensators (GKK) were not installed. As a result, every 10 thousand km. mileage it was necessary to adjust the thermal clearance of the valves. The adjustment procedure was carried out manually, i.e. it was necessary to dismantle the valve cover and set the gaps using a special feeler gauge.
Description: why hydraulic compensators are needed and how they operate
The mechanical elements that are responsible for adjusting the gap wear out over time. If the gap is not adjusted in a timely manner, engine noise will appear, dynamics will decrease, and gasoline consumption will increase. As a result, with a mileage of 40–50 thousand km. the valves themselves need to be replaced. To put it briefly in terms of mechanical adjustment, this design is far from perfect.
On the “classic”, hydraulic compensators are not installed, so you have to adjust the thermal clearance of the valves manually every 10 thousand km. mileage
Find out how you can regulate fuel consumption: https://bumper.guru/klassicheskie-modeli-vaz/toplivnaya-sistema/rashod-topliva-vaz-2107.html
When equipping the engine with hydraulic compensators, you do not need to think about the need to adjust the valves. The hydraulic support itself will set the required gap, which has a positive effect on the life of the power unit, increasing power, and reducing fuel consumption. In addition, the part is characterized by a fairly long service life - about 120-150 thousand km. mileage To fully understand how hydraulic compensators work on the VAZ 2107 and any other car, it is worth considering their operating principle.
The hydraulic compensator consists of a housing, an upper and lower part and a return spring
Motor oil enters the hydraulic element through a special valve in the form of a ball. The lubricant extends the GKK piston, changing its height. As a result, a position is reached in which the hydraulic part minimizes the valve clearance in the gas distribution mechanism. After this, oil does not flow into the hydraulic compensator, since there is a certain (maximum) pressing moment. When a gap forms between the valve and the hydraulic element, the valve mechanism opens again and pumps oil. As a result, high pressure is always created in the GKK, providing maximum compression.
Read about changing the oil in the gearbox: https://bumper.guru/klassicheskie-modeli-vaz/kpp/zamena-masla-v-korobke-peredach-vaz-2107.html
Oil is supplied to the hydraulic compensator through a special valve, as a result of which the piston lifts the hydraulic element and presses the cylinder head valve
In addition to the listed advantages, hydrosupport also has disadvantages:
- the need to use high-quality oil;
- repairs are more complex and expensive.
Signs of malfunctioning hydraulic compensators and their causes
Like any other car part, hydraulic compensators fail over time and there are characteristic signs of this:
- the appearance of a knocking sound;
- reduction in power of the power unit.
Clunking noise under the valve cover
The main sign indicating a problem with the hydraulic mount is an extraneous knocking sound (clattering sound) after starting the engine, coming from under the valve cover. Since the noise and the reasons for its appearance may differ, you need to learn to distinguish the nature of the knocks and only then draw the appropriate conclusions.
- Knock in the engine when starting. If the noise disappears a few seconds after starting the power unit, then this effect is not a sign of a problem.
- The appearance of a knocking sound from the hydraulic mounts on a cold and warm engine, while the noise disappears when the speed increases. The probable cause is wear of the check valve ball, which indicates the need to replace the main valve. The problem can also occur when the hydraulic element is dirty. To fix the problem, resort to cleaning.
- The knock is only present when the engine is warm. This type of noise indicates wear of the hydraulic compensator elements. The part must be replaced.
- Knocking noise when the power unit operates at high speeds. The problem can be either too much or too little engine oil. In this case, it must be monitored and brought to normal. The reason may also be related to problems with the oil receiver, which will have to be eliminated.
- Constant presence of knocking. The likely cause is clearance between the camshaft lobe and the rocker. The problem is eliminated by cleaning or replacing worn-out parts.
Video: example of knocking hydraulic compensators on a VAZ 2112
Loss of engine power
If problems occur with hydraulic compensators, engine power is reduced, which naturally affects the dynamic characteristics of the car. This phenomenon is caused by a malfunction of the gas distribution mechanism: the valve opens and closes earlier or later than necessary. As a result, the engine is not able to develop its power indicators.
How to identify a faulty hydraulic compensator
Having determined that the occurrence of knocking in the engine is associated with malfunctions of the hydraulic compensators, it remains to check which part has become unusable. Diagnostics is carried out in the following sequence:
- The valve cover is removed from the engine immediately after stopping the unit.
- Set the piston of the first cylinder to top dead center (compression stroke), for which the crankshaft is turned with a special wrench.
- Apply force to the rocker arm of the intake valve.
Having identified a failed hydraulic compensator, replace the element with a new part.
If, when pressed, the rocker arm moves easily, this indicates a malfunction of the hydraulic compensator. The remaining hydraulic elements are checked in the same way, turning the crankshaft to the appropriate position (similar to adjusting the valves). VAZ 2107 car owners who have installed hydraulic compensators recommend checking the serviceability of the hydraulic supports by pressing the part with a screwdriver. If the element fails, a significant move will be observed (more than 0.2 mm).
Video: how to identify non-working hydraulic compensators using the example of a Chevrolet Niva
Installation of hydraulic compensators on classics.
Of course, you can adjust the valves yourself if you do everything according to the book, but here you will need skill. The valve is a delicate matter and requires the motorist to have experience in this matter. On the other hand, you can contact a service center, where they will adjust the valves for you for a symbolic 2200 rubles (+ cylinder head cover gasket). This is of course good, but I had to adjust the valves every 10tkm. I contacted one hundred, then I started doing the adjustment myself, but in the end I got fed up with all this and decided on an expensive timing belt modernization.
1. What is needed to install hydraulics on a classic head?
Let's look at cylinder heads 2101 and 21213 (21214 st.b. until 2008). So, the seats for the adjusting bolts are the same. The cylinder heads are identical, as a result, their timing parts are interchangeable (although AvtoVAZ does not recommend installing hydraulic compensators on Zhigulis during the WARRANTY period).
Therefore, to install hydraulics on a classic engine, we need to purchase: Hydraulic compensator 21214 of the old model (21214-1007160), Camshaft assembly 21214 (21214-1006008-00), Hydraulic compensator oil supply ramp 21214 assembled of the old model (21214-1007180SB).
It would also be a good idea to stock up on a torque wrench (0-100nm), a 21mm socket, a new valve cover gasket, and an aerosol carburetor or caliper cleaner.
2. Pitfalls when installing hydraulic compensators on a classic engine:
Mistake #1 Buying counterfeit products. Alas and ahh, but the problem of counterfeit spare parts for classics remains relevant. So buy original spare parts in stores such as Baltkam, Dvizhkom, Avtopiter, AutoAll.
Mistake No. 2 Dirt and old oil deposits when installing hydraulics. After dismantling the old clearance adjustment system, BE SURE to clean the installation areas of the hydraulics from old grease and oil deposits using a carburetor cleaner and compressed air. It is also necessary to blow out the oil rail of the hydraulics with compressed air to avoid clogging it with foreign small particles.
Error No. 3 Installing hydraulics without removing the retaining rings. Folks, these rings on the hydraulics are for transportation purposes; before installing the hydraulics on the engine, they MUST BE REMOVED!
Error No. 4 Violation of the tightening torque regulations for the threaded connections of the cylinder head and timing gear. So, if you tighten the cylinder head and timing belt by hand, at a discount, by eye, yes, I’ve done this 1000 times, everything will be ok, I promise, I answer with my mother... know, there is a special place in hell for you! Now live with it)
Based on the technical regulations: - the hydraulics are tightened in 2 broaches, the first with a force of 15 nm, the second with no more than 25 nm (from 20 nm to 25 nm); — the camshaft assembly with the pastel is tightened in 2 broaches: the first 20 nm, the second no more than 30-35 nm.
If you overtighten the hydraulics, they can wedge or become completely jammed, but if you don’t tighten the hydraulics, they will unscrew.
Error No. 5 Installing Niva rockers. So, the classic and Niva rockers differ in shape and size, the 2121 rocker is larger than the 2101. Therefore, after installing the 2121 rocker, many people start to jam their valve stem seals. The only correct choice would be to keep the old rockers.
3. Pitfalls when operating hydraulic compensators on a classic engine:
Stone No. 1 The quality of the engine oil and its replacement frequency. Hydronics like to work on synthetics and semi-synthetics. I leave the choice of oil manufacturer brand to your discretion. I use semi-synthetic 10w40 both in summer and winter. To make your choice easier, I’ll give you the following information: a 4L canister of the small one I use costs about 2000 rubles. I oil it approximately every 6-7tkm, along with filters and spark plugs.
Stone No. 2 Warming up the engine before starting to drive. Before you start driving, you must let the car idle (no more than 2000 rpm) for 5 minutes in summer and 15 minutes in winter. This is necessary to pump the hydraulic oil system.
Additional recommendations from the author of the article:
Recommendation No. 1 When installing hydraulics, be sure to install camshaft 21214.
Recommendation No. 2 If you want to get an increase in power, then it will also not hurt you to install a split gear and install any other improved camshaft from a 214 Niva like an Estonian or OKB.
Recommendation No. 3 When changing oil, use flushing and flushing oils, this will extend the life of hydraulics.
Recommendation No. 4 Additionally, it will be necessary to install an automatic chain tensioner (this will be discussed in a separate article)
Recommendation No. 5 Before the first start, get ready to adjust the ignition; for me it ran 100 degrees counterclockwise.
1. Now I am not bothered by the noise of the valves. While the engine is running, you can hear the chain and rotation of the gearbox input shaft. 2. Lack of constant maintenance of the timing mechanism. 3. The car began to start better and switched to diesel when the ignition was turned off.
Alternative.
My neighbor, who has owned a Niva-Chevrolet for more than 10 years, advised us to replace them completely with simple adjusting bolts from our domestic “classics”. He himself had already changed the hydraulic lifters 2 times until he was advised to do so in one of the services. Since then he hasn't had any problems.
Having gone to the service center, I consulted with specialists. They confirmed to me that on Niva they make such a replacement quite often and then do not return to them with problems.
It is not a problem to purchase adjusting bolts. In a store nearby they cost 800 rubles for 8 pieces. The problem was finding plates for them and springs for the rocker.
But this matter was resolved quite simply by disassembly, and cost 300 rubles for everything including bolts!
The service work, including adjusting the bolts and replacing the valve stem seals, cost me 1,000 rubles. Total issue price is 1300 rubles. + hour of time.
You can do it yourself, but the prospect of removing the camshaft and then installing it correctly, to be honest, did not appeal to me.
Diagnosis of GCC
Listening to knocks and monitoring the dynamics of the VAZ 2107 engine is, of course, a useful habit. But you still have to roll up your sleeves and drive the car into the garage. After all, for an accurate diagnosis, you need to get the device and inspect it personally.
- Remove the valve cover.
- Using a special wrench, rotate the crankshaft so that the cylinder piston is in the compression stroke.
- Try pressing the rocker arm on the intake valve.
If the rocker arm easily gives in to your efforts, the hydraulic compensator requires replacement.
You can also check the functionality of the hydraulic supports using a screwdriver. If you press on a faulty mechanism, it will give play.
How to install a hydraulic compensator on a VAZ 2107
Before starting work, prepare the following tools:
- new parts;
- set of keys and sockets;
- torque wrench;
- Screwdriver Set;
- rags;
- New timing cover gasket.
Follow these steps in order:
- Remove the air filter.
- Remove the carburetor.
- Remove the distributor. The valve cover must be completely free to operate.
- Using a 38mm wrench, rotate the crankshaft so that the camshaft mark aligns with the protrusion on the bearing housing.
- Secure the chain to the sprocket with a wire to prevent it from falling into the engine.
- Bend the bolt stopper on the camshaft sprocket and unscrew the fasteners.
- Using a socket, unscrew the camshaft mount and remove it.
- Remove all rocker arms and springs. Find a way to label each rocker so you can put it in place when you assemble it!
- Unscrew the adjustment bolts and their bushings.
- Blow out the oil rail with a compressor.
- Remove the locking elements from the hydraulic compensators.
- Install the CV joints through the ramp and tighten them slightly.
- Tighten the hydraulic compensators to a torque of 2 to 2.5 kg/m.
- Install a new camshaft from 21214.
- Remember to place the oil rail ring on the first stud.
- Follow the camshaft tightening sequence as shown.
- Make sure that the oil line takes a shape that does not interfere with the installation of the valve cover.
- Install and tighten the camshaft gear.
- Install the carburetor, distributor and air filter.
As you can see, the work can easily be done with your own hands in the garage. An experienced master will take no more than two hours to complete everything.
Debugg
Since there are several hydraulic compensators in a car, it is worth using acoustic diagnostics to determine the faulty one. An experienced technician knows how to check hydraulic compensators for functionality using acoustic diagnostics, that is, sound.
For an experienced master, such manipulations are not difficult. After identifying the problematic hydraulic compensator, to eliminate the knocking, it is necessary to wash it, return it to its place and restart the engine. If this measure does not help, you will have to replace it. Let's consider step-by-step actions in the case of both procedures.
How to wash the hydraulic compensator?
The mechanism in question must be washed in a room protected from dust and drafts. It won’t be possible to not disassemble the engine at all, but there is also no need to rid it of every screw.
At the preparatory stage, prepare three deep containers the size of the compensator, as well as a flushing liquid, which can be kerosene or good 92-grade gasoline.
Also, before washing, leave the car in the garage for a day to allow as much oil as possible to drain into the pan. Further actions are as follows:
- Disconnect the battery to de-energize the car.
- Get rid of the air filter.
- Remove the bolts to remove the cylinder head cover.
- Remove the hydraulic compensator from its sockets after removing the rocker arm axles.
- Use a synthetic bristle brush to clean the outside of parts.
- Wash the hydraulic compensators in the first container. To do this, immerse each of them in the liquid and press the ball valve through the hole in the plunger using a wire. Be careful not to break the spring. Next, press the plunger itself. As soon as you notice that the movement has become easier, carefully squeeze out the valve ball and drain the fluid from the compensator. Use a syringe to additionally rinse the channels in the body and proceed to a similar rinse in the second container.
- At the final stage, you will be tested; for this you will need a third container with flushing liquid. How to check hydraulic compensators before installing them in place? It is enough to dip them into the third container, draw liquid into the HA and lower the valve, then remove the part with the plunger up. If you press the plunger with your finger, it should not move.
- If there is no movement, return the parts to their place by installing the rocker arms, cylinder head cover and other elements. Remember to tighten the bolts from the middle to the edges.
After the assembly is completed, start the engine and wait a couple of minutes until it idles, at which there should be no knocking after flushing. Cleaning also helps get rid of knocking after the engine warms up and reaches operating temperature.
Engine disassembly
First of all, you need to completely remove the air filter housing along with the pipe so that they do not interfere. Next, remove the throttle, after which you need to remove the valve cover. The camshaft gear will have to be removed, so we reduce the risks on the gear and bed, unscrew the nut securing the gear and remove it.
The gear needs to be secured so that the timing chain does not fly off, otherwise it will not be so easy to put it in place. Now unscrew the nuts securing the camshaft bed and remove it together with the shaft. After this, you need to remove the plungers (levers) and number them in order so as not to confuse them during installation, unscrew the adjusting bolts and their bushings. You need to pump out the maximum amount of oil from the bushing seat using a regular syringe and clean the wells with a dry, lint-free cloth.
Sources
- https://7vaz.ru/tjuning/gidrokompensator-na-vaz-2107.html
- https://sto-AvtoStroy.ru/avto-lada-drugoe/gidrokompensatory-vaz.html
- https://AutoClub174.ru/lada-drugoe/ustanovka-gidrokompensatorov-na-vaz-2106.html
- https://7road.ru/drugoe/ustanovka-gidrokompensatorov-na-vaz-2107.html
- https://semerkavaz.ru/dvigatel/gidrokompensatory-na-vaz-2107/
- https://MySummerCar.ru/drugoe/ustanovka-gidrokompensatorov-na-vaz-2107-inzhektor.html
- https://soloserv.ru/avto/kak-ustanovit-gidrokompensatory-na-vaz-2107
- https://RoomAvto.ru/novosti/ustanovka-gidrokompensatorov-na-klassiku.html
- https://bumper.guru/klassicheskie-modeli-vaz/grm/grm-2107/gidrokompensatoryi-na-vaz-2107.html
- https://avto-lover.ru/drugoe/gidrokompensatory-na-vaz-2106.html
- https://www.vazdriver.ru/ustanovka_gidrokompensatorov/ustanovka_gidrokompensatorov_na_vaz2107_vaz2106_na_lyuboy_klassicheskiy
[collapse]