Home / Repair
Good afternoon, dear site visitors. In this article I will tell you and show you how to replace the VAZ 2107 torque rod bushings yourself. The replacement principle is the same for all Classic VAZ models.
In the previous article “Replacing torque rods of VAZ cars,” I showed how the rods are completely changed, but if only the rubber bushing (silent block) is worn out, then it makes sense to replace only that.
First, we need to carry out diagnostics and find out whether the bushings on all reaction rods need to be changed. How to correctly diagnose the front and rear suspension (chassis), I recommend that you read the special article (I will post a link later).
To perform this operation, we need an inspection hole. It's good that I have it. Previously, when she wasn’t there, I kept running to the neighbors to let me dig into my car, but now everything is much simpler.
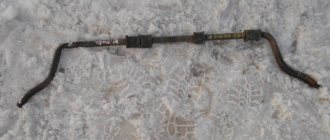
Having rolled the car into the inspection pit, I determined that the rubber bushings on the transverse link had worn out. Now let's start working.
The first thing to do is remove the transverse torque rod. I took a metal brush and thoroughly cleaned all the threads on the bolts from dirt and treated them with WD-40.
Now that we have everything ready, I unscrewed both nuts without much difficulty.
Our next challenge was to pull out the bolts. Why the test? Because if the rubber band becomes loose, then moisture gets between the bolt and the metal sleeve and corrosion begins. All this leads to the fact that, under the influence of corrosion, the bolt sticks to the bushing and sometimes it is simply impossible to remove it.
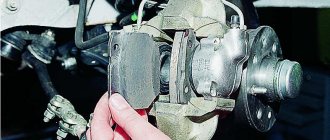
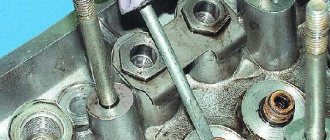
In my case, I was very lucky and the bolts went in very easily. The left bolt came out perfectly, but the right one rested on the lower spring cup.
The photo above shows where the bolt rested. To remove the bolt, you need to load some scrap metal into the trunk or ask a friend to press down a little on the back of the car. This way, the bracket will go down a little and the bolt can be pulled out freely.
Now we just extract the traction, there should be no difficulties here. If the jet thrust is slow, you can help it with a pry bar.
Replacement of rubber bushings of torque rods.
To remove the rubber bushing, we need to knock out the metal inner race (bushing). After rummaging through my toolbox, I found a suitable attachment. I don't know what it is, but it fits just right. In my opinion, this is a tool for punching holes in the wall, like an ancient hammer drill :).
A few more blows and the bushing flew out along with the adapter. Here, be careful not to hit your fingers with a hammer when the bushing comes out sharply.
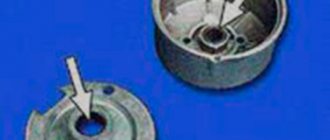
After all the efforts, this is the picture we get.
In the photo above you can see how the rubber bushings are cracked and this is not too much wear. With more wear, the inner metal clip falls out on its own and so does the rubber band.
The next step is to squeeze out the old gum. We will need a rod for extrusion and a support for the jet thrust.
I was too lazy to make a special puller, so after rummaging around in the garage I found a suitable tool.
Instead of a thrust bushing, I used a holder for large dies (which are used to cut threads), and for extrusion, I used an ordinary metal round timber with a diameter of 25 millimeters.
The photo above shows how I installed this structure. With a little force, the bushing will easily squeeze out.
In the photo above you can see how the bushing began to come out.
With a little more effort, she jumped out.
Preparation for installation of torque rod bushings.
Before installing a new bushing, be sure to clean out all dirt and rust inside the metal torque cage. If this is not done, then when pressing in the new bushing may get wrapped and damaged, which is not what we want. And the installation of the bushing itself will be problematic.
The internal bushings are also subject to wear and tear, and if they are very worn, then feel free to replace them with new ones.
If it is still suitable for further use, be sure to chamfer the edges.
This is necessary so that when we press in the metal bushings, they do not damage the rubber bushing. Why am I saying this because there were cases when I had to replace new rubber bushings due to their damage.
I bought new rubber bushings in advance. I didn’t try to buy expensive and branded bushings, because regular ones last quite a long time. Of course, you can buy expensive self-stabilizing ones, but I took simple ones.
Let's start installing the VAZ 2107 torque rod bushings.
In order for the bushing to easily fit into the thrust cage, it needs to be lubricated with soap. Then we install the bushing and torque rod, as shown in the photo below.
Under the influence of a vice, the bushing will go into place. When compressed, the elastic band will begin to bend in one direction and it would seem that it does not want to go in, but you don’t pay attention and squeeze further, it simply has no chance and it will eventually go in. The main thing in this matter is to quickly tighten the vice.
After the work done above, we got this result.
And now, the most important task remains. We need to press in the inner metal sleeve.
I made this bullet from a regular bolt. I happened to have a lathe and just sharpened the head of the bolt, but you can sharpen it with a sharpener.
I don’t remember exactly the thickness of the bolt, but, in my opinion, 10 millimeters. This bullet fits into the sleeve and looks like this.
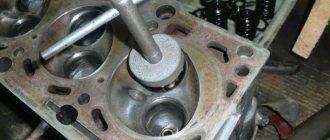
We lubricate the bullet with soap and then, in the same way as before, crush the bushing with a vice.
Everything calmly falls into place, but since there is a bullet installed in the metal sleeve, it will not reach the end, because it will rest against the cheek of the vice.
Now we need a stand to press the bushing. I used an inch sleeve and it fit just right.
Having placed the coupling, we reseat the bushing.
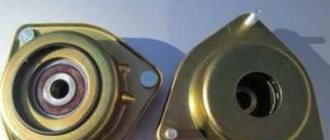
After all the work done above, this is the result.
If the inner metal clip protrudes slightly on one side, you need to level it with a hammer.
And now all we have to do is install the rod in its place. Don’t forget to lubricate the bolts with nigrol, you never know what quality the rubber bands will be.
That's probably all, we replaced the VAZ 2107 torque rod bushings.
Until new publications.
The basis of safe driving is the stability of the car on the road. This rule applies to both trucks and passenger cars. And the VAZ 2107 is no exception. The handling of this car has always left much to be desired. To somehow make life easier for drivers, engineers developed a jet thrust system for the “Seven”. But any part, as we know, can fail. And then the driver will be faced with the question: is it possible to change a broken rod with your own hands? Yes, you can. Let's try to figure out how this is done.
Replacement of silent blocks of VAZ 2107 Lada Master
This type of work is needed quite often on the “seven”. As a rule, the need is caused due to the rapid wear of the elements themselves. The rubber used in manufacturing does not tolerate temperature changes well, which causes the part to begin to deteriorate and does not fulfill its functional purpose. For this reason, experts advise replacing them once a year, and if necessary, more often. The workflow does not cause any difficulties; the simplest tools are enough.
- Preparing for work
- Required Tools
- Changing the upper silent blocks
- How to change the lower silent block
- Features of replacement on the rear suspension
Preparing for work
Replacing silent blocks begins with selecting the necessary parts. If you make a mistake at this stage, there is a possibility that the next repair work will be approaching.
Drivers often buy parts made of rubber. But they have certain disadvantages - they creak and collapse quite quickly. Experts recommend using polyurethane silent blocks. They cost more, but are more durable and have a longer service life.
This element should be changed as soon as a strong creaking or knocking noise appears. The need for replacement is determined visually. The occurrence of cracks, scuffing, and deformation are the main causes of failure. A silent block malfunction can have a negative impact on all suspension elements.
Required Tools
To carry out the replacement you will need:
- hammer, chisel and pry bar;
- liquid key and gas burner;
- You can’t do without a silent block and ball puller.
Before repair work, it is necessary to treat all threaded areas that need to be disassembled for several hours. The front part of the car should be jacked up and jack stands placed under the car. The wheel is removed from the side where it should be replaced.
Changing the upper silent blocks
The event is simple, but has its own characteristics. Everything is done quite quickly. The nuts securing the bumper and ball joint are unscrewed, which is pressed out with a puller. The nuts of the upper arm are unscrewed and pulled out completely. We remove the silent blocks. We install new ones without using lubricants. The lever is put back, but the nuts are not screwed in tightly. The support is installed, then the wheel, and the car can now be lowered. And only now do we finally tighten the screw.
Sometimes difficulties may arise - the mounting screw will rust. It should be cut with a grinder and pulled out in parts.
How to change the lower silent block
Here everything is a little more complicated. All work will have to be done by car. Unscrew all the fastening nuts of the lever axle. A puller is screwed onto either side to use it to squeeze the silent block out of the socket. The same procedures are performed on the second side. We press-fit parts for replacement. The nuts are screwed on, but not tightened too much. The wheel is put on, the car is lowered to the ground. Now the mount can be tightened as much as possible. If there is no puller, then the entire lever with suspension elements is removed. In this case, the silent block is knocked out with a regular hammer.
Features of replacement on the rear suspension
The levers are removed one by one. They replace the hinges. To make the work easier, you should drive the machine into a pit or use a lift. The main difficulty may arise with the internal bushings, which become sour. But even in this situation, you can use an angle grinder.
If the mounting bolts can be reached without any problems, then replacement is easy. Before pressing in a new bushing, the seat should be cleaned of corrosion and remaining rubber particles. Next, the mating surfaces are coated with a soap solution. Do not use automobile oil and grease, as the rubber may be damaged from their impact. Now the bushing can be driven into the lever with one blow.
Repair work to replace silent blocks is familiar to every driver. This is due to the fact that this element is not reliable and often breaks down, requiring regular replacement. There is nothing complicated about it; even a novice driver can perform all the steps.
Tie rod malfunctions
The jet thrust of the VAZ 2107, like any other car, takes on loads aimed at shifting or rocking the rear axle. If these parts fail, the car’s behavior on the road changes: handling deteriorates, braking distance increases, and even there is a threat of a sudden change in trajectory or the car overturning. What factors cause breakage or wear of steering rods?
- Static loads. It is impossible to avoid this factor, but you can reduce it without overloading the car.
- Torsional loads. They most often occur when hitting an obstacle. You can reduce them by reducing speed in front of an obstacle.
- Chemical effects of water and chemicals sprinkled on roads in winter.
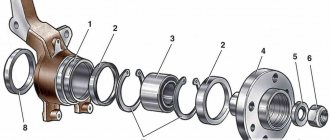
Device
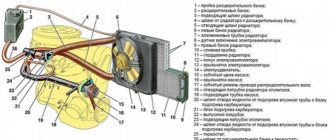
The unit consists of two key elements housed in one housing:
- Main gear, consisting of drive and driven hypoid gears. It increases torque, reduces angular velocity and rotates the axis of rotation by 90 degrees.
- Center differential, which includes axle gears and satellites. They allow the wheels to spin at different speeds when turning or driving over rough terrain.
The rear gearbox also includes a flange, bearings, oil seals, oil deflector, axles, shims and other parts. There are plugs on the housing for draining and filling transmission oil.
A breather is installed in the upper part to ventilate the housing. If its hole becomes clogged, excess gas pressure can force oil through the seals.
When to change jet rods on a VAZ 2107?
As we mentioned, only high-quality metal is used in the manufacture of rods (usually steel). The latter is able to withstand enormous loads over many years of operation.
The “weak link” of the part is the lugs, which are not a continuation of the rods, but are only welded to them. It is no secret that welding has its own service life. Over time, the joints may become damaged or even collapse.
To eliminate problems in movement and prevent breakage of rods, it is necessary to inspect the condition of the part from time to time.
If signs of destruction, cracks, deformation and other malfunctions appear, the VAZ 2107 jet rods must be replaced.
In this case, pay special attention to silent blocks - they often cannot withstand loads and break. As a result, the fixation of the rods deteriorates, they move relative to the base and cease to perform their functions
At the same time, you should not wait until the rubber bands fail. If knocking noises occur during movement, inspection, or detection of cracks on the rods, replace them immediately. To do this, you don’t need to go to a service station - you can do everything yourself, as it’s not at all difficult.
The procedure for performing repair work
Replacement of a faulty part of the steering mechanism is carried out in the following sequence:
- We clean the assembly from dirt using a brush, and apply a penetrating compound to the threaded connections.
- Using pliers, remove the fixing cotter pins and, using a spanner wrench or a “22” socket, unscrew the nut on the pin.
- The steering rods are detached from the steering knuckle using a special puller. The device is put on the assembly from above and using a bolt, the finger is squeezed out of the eye.
Helpful advice: if you first tap the joint using a copper or bronze drift, the dismantling process will be significantly accelerated.
The manufacturer of the VAZ 2107 recommends replacing worn steering rods as a set. The service life of these structural units from one batch installed on a vehicle is usually the same. Replacing only one of them does not fundamentally solve the problem; a little time will pass and the repair process will have to be repeated for the remaining elements of the system.
Malfunctions of the front suspension of the VAZ 2101
The service life of front suspension elements directly depends on the conditions and intensity of vehicle operation, as well as on the quality of the parts used. Since this or that malfunction manifests itself in different ways, it is worth dwelling on each of them in more detail.
Noises and knocks while driving
Extraneous sounds in the operation of the suspension can occur for a number of reasons:
- failure of shock absorbers. In this case, it is necessary to replace the damaged shock absorbers;
- wear of silent blocks. “Broken” hinges need to be replaced;
- development of the transverse stabilizer in the rubber cushions. Inspection and replacement of worn-out products is required;
- The shock absorber rod mount has come loose or the rubber cushions have become unusable. It is necessary to check the fasteners and, if necessary, replace rubber products;
- ball joint malfunctions. When a working appears, the failed supports must be replaced;
- increased clearance in wheel bearings. It is necessary to adjust the gap, and if the bearings are worn out, parts need to be replaced;
- wheel imbalance. It is necessary to check and, if necessary, balance the wheels;
- wheel rim damage. The disk needs to be restored or replaced;
- spring breakage or sag. The front suspension springs need to be replaced;
- damage to the bumpers. Rebound buffers that have become unusable require replacement;
- loosening of the upper or lower arms. In this case, it is necessary to check and tighten the nuts and bolts.
Video: causes of knocking in the front suspension
The car is pulled to the side
If the vehicle pulls to the side, then there can be no question of any safety of movement. There may be several reasons for this behavior:
- different tire pressures. The correct pressure must be checked and set;
- The front wheels are at the wrong angle. A visit to a car service center is required to adjust the wheel alignment;
- Excessive play in the wheel bearing. If there is a large gap, adjustment should be made;
- The front suspension arms or axle are deformed. Replacement of damaged parts is required;
- the springs have uneven subsidence. The front springs need to be replaced;
- The brake mechanism is not fully released. The brake mechanism should be checked and the malfunction eliminated;
- Tire tread has a big difference in wear. Worn tires need to be replaced;
- wheel imbalance. Eliminated in the same way as with knocking in the suspension.
Suspension breakdowns
Sometimes in the operation of the suspension characteristic impacts of metal on metal occur, which is called breakdown. This indicates that one or another part of the suspension does not fulfill its function. The reasons for this phenomenon may be the following:
- sag of front springs. Elastic elements need to be replaced;
- The shock absorbers have become unusable. If damping devices break or fail, they should be replaced;
- deformation of levers. Levers with changed geometry must be replaced with serviceable ones.
There can actually be many more faults in the front suspension. For example, the appearance of squeaks when driving over uneven surfaces may indicate the failure of silent blocks, oil smudges on shock absorbers indicate damage to the product and indicate the need to replace it, etc.
Signs
What may indicate the need to replace this element? If you do not take into account external inspection, a traction fault can be determined by the nature of the car’s behavior. Over time, the bushings become loose and the rod no longer performs its function.
The car rolls more when cornering, and dull knocks are also heard in the cabin. This indicates failed silent blocks. Well, if the rod is rusty and broken, part of it will simply drag along the ground. It is hardly possible not to notice such a malfunction. But how can you get home if your traction breaks on the way? You can hang part of it on some element under the bottom (for example, a muffler) using a wire and carefully move to the parking area and repair.
Purpose of thrust rods on the VAZ 2107
Tie rods provide protection against swaying and loss of control on the road, during sharp turns and obstacles. Even earlier versions of the car had similar problems. But inside the cars there were only ordinary springs; no one knew anything about the system with rods.
It is for this reason that the vehicle caused many problems when driving. Only over time the suspension was modified. A system was installed with several long rods. This part carried the main load.
Classic VAZ 2107 cars and other models contain the following version of the torque rod kit:
- Long.
- Short.
- A large transverse one, which also serves as the basis for the entire system.
Installation location - near the car axle located at the rear. The system is visible only from the inspection hole, where repair work is usually carried out if the reaction rods are replaced.
FakeHeader
Comments 7
Hello. Two years have passed. I just came across your story. Now I was tightening the upper silent blocks, the rubber bands on the outside stupidly came out from under the washers. And I didn’t make it to 60. I’m sitting here scratching my turnips. True, my graphics are blurry. But the lower ones were also lubricated, they were tightened for 80 minutes and did not come out.
Hello! Thank you for remembering) The range is 60-90 N*m because our rubber products are produced according to specifications. It’s not clear to anyone what specifications a particular manufacturer has. You shouldn’t pinch the rubber bands—that’s a fact. My silent blocks drove for 3000, then I swapped them as is with levers onto a friend’s car, tightened them by eye - and it’s still running.
About modernization of jet thrusts
Sometimes drivers decide to independently increase the reliability of the VAZ 2107 suspension and extend its service life. To this end, they are modernizing jet thrust. Typically, modernization of rods means two operations. Here they are:
- installation of dual jet rods;
- installation of reinforced jet thrusts.
Now a little more about each of the above operations.
Twin rods
Most often, drivers install dual rods on the VAZ 2107. The reason is obvious: for this procedure you don't have to do anything with the pulls. You simply purchase not one, but two sets of rods that are installed in a regular place near the rear axle of the “seven”. Plus, you purchase not ordinary, but elongated mounting bolts, on which this entire structure rests.
The obvious advantage of such modernization is the increase in the reliability of the suspension: even if one of the tie rods breaks while driving, the car is unlikely to lose control and the driver will always have a chance to notice the problem in time and stop (a break in the tie rod is almost always accompanied by a strong knock on the bottom of the car, which cannot be heard this is simply impossible). This design also has a drawback: the suspension becomes stiffer. If earlier it “eaten up” small unevenness in the road without any problems, now the driver will feel even small pebbles and holes while driving.
Reinforced rods
The appearance of cracks between the rod base and the lugs will shorten the service life of the parts. This problem can even cause an accident - the car suddenly pulls to the side when the traction breaks.
To avoid unpleasant surprises, special reinforced parts are installed in the rear suspension. They are made of alloy or cold-rolled steel and differ from conventional ones in the diamond-shaped section of the base and powerful welding seams that hold the lugs.
Reinforced rods differ from standard ones in the following characteristics:
- Reduced weight of parts.
- Improved paint coating that prevents corrosion of elements.
- High strength welded seams.
- Increased resistance to torsion, compression and tension.
Installation of reinforced rods is recommended for full use of the Chevrolet Niva off-road. They don't offer much benefit for city or highway driving. Under gentle operating conditions, the strength of standard rods is quite sufficient, so there is no point in overpaying for reinforced parts.
Replacing bushings and silent blocks on VAZ 2107 rods
Silent blocks with bushings are disposable parts that need to be replaced immediately. In a garage, restoring parts becomes impossible. To replace you will need to acquire the following things:
- The beard is 10 mm in diameter.
- Hammer.
- Press-fitting device. It may also be needed when the rear axle is being repaired.
Sequencing
Follow the above instructions when removing the traction. Parts must be pre-treated with WD-40. A wire brush helps remove dirt and dust. Further actions are performed according to the specified algorithm:
After removing the rod, the bushing should be removed without problems;
But this behavior is typical for parts without serious rust, with severe wear. Otherwise, you will have to use a hammer to knock the structure out of its place. The beard is inserted inside first.
They get rid of the silent block if the rubber part is damaged too much. Use a screwdriver or a mounting shovel to pry up parts that prevent everything from being freed; Using a sharp knife or sandpaper, carefully clean the surface of the eyelet inside. Remains of rubber and rust should then disappear completely; A new bushing is placed in the eye and pressing is carried out using new equipment; The beard helps with this part of the job.
The main thing is to act carefully to avoid damage.
Diagnostics of rubber-metal joints
To check the condition of silent blocks, you need to use a pit or overpass. Without such amenities, it will be problematic to drive the seven, so there should be a pit in every garage. therefore, it can be repaired by hand without any problems. But you need to determine whether the VAZ-2107 silent blocks need to be replaced; the price of one is approximately 50 rubles. For a set of 8 silent blocks you will pay 400 rubles.
Carefully inspect the suspension on the lever, evaluate the appearance of the rubber-metal hinge. If the rubber has obvious damage - it has begun to become cracked, or there are any cuts at all, then all elements must be replaced. When carrying out repairs, try to do as much work as possible. Therefore, you not only change all eight silent blocks, but also, after assessing the condition of the balls, replace them if necessary. It is also worth looking at the condition and tightening the nut if necessary.
Installation of traction is done as follows:
- First, the rod is mounted in the front bracket. Before inserting the bolt into the desired hole, it is treated with nigrol;
- The reaction rod is placed in the rear bracket. Don't be surprised if the holes at the mounting location don't line up.
If the jet rod was broken, then the bridge would move all the time under load. This led to the shift.
To adjust the holes, you need to use a mounting spatula, resting it on the bracket, and unscrew the bridge until the fasteners align. When they match, you need to insert the bolt and secure it with a nut.
With the help of such manipulations, you will be able to replace the jet rods with your own hands and save money on visiting a service station.
I am glad to welcome you, friends, to the blog ""
The knocking noise in the rear wheels of the kopeck, deuce and the next row of classic models of the domestic automobile industry appears from wear on the bushings of the reaction rods or, as they are also called, rods. Almost all classic VAZs in their layout contain these elements necessary for the rear axle.
Some car owners change the entire rod, but to eliminate knocking or other malfunctions, it is enough to change only the bushings, which wear out very quickly, unless, of course, the rod itself is bent or deformed. Naturally, changing a complete rod is much easier than knocking out a worn rubber band and then pressing a new one back in, but this process is more economical and not so complicated.
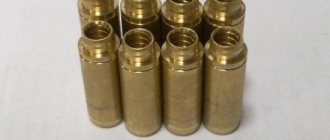
On the market today you can find many different repair kits, both for complete rods and for bushings separately
When purchasing, you should pay attention to the equipment, and more specifically to the number of large and small rubber spare parts. Most provide sets with 4 large and 6 small bushings. It is better to take a repair kit for the VAZ-2121 in which all the elements are of the same large size
Of course, you will have to tinker with them, but the resulting result will meet all expectations. In addition to rubber bushings, it will be necessary to purchase metal bushings, which in any case will also need to be replaced
It is better to take a repair kit for the VAZ-2121 in which all the elements are of the same large size. Of course, you will have to tinker with them, but the resulting result will meet all expectations. In addition to rubber bushings, you will also need to purchase metal bushings, which in any case will also need to be replaced.
The procedure for replacing rear torque rod bushings must be carried out in the inspection pit. First of all, you need to unscrew the nuts on the bolts that connect the rod to the car body and the bridge. Then remove the bolts and release the rod itself.
When using the machine for a long time, to carry out this operation, you may need special tools, for example, a metal spacer, with which you can knock out a rusted bolt. After removing the jet thrust, you can begin to knock out the worn bushings. To do this, it is better to clamp the eye of the rod in a vice, and use the same spacer and hammer to knock out the rubber. Once the bushing has moved out of its place, it can be easily removed by prying it off with a screwdriver. As a last resort, if it is already stuck to the metal, the bushing can be pulled out with pliers. After freeing the rod ear from the rubber bushing, its inner surface must be cleaned with sandpaper and the surface wiped with a dry cloth.
When installing a new bushing, you need to make sure that the inner surface of the ear is smooth and free of roughness. Next, the rod and the new elastic band are treated with soapy water in order to avoid much friction. The bushing to be replaced is inserted into the eye of the rod and, using a vice, is carefully and slowly pressed into place. After this, the metal part is installed in the same way. The same actions must be performed with the second part of the jet thrust.
In addition to replacing the bushings, you also need to take care of the bolts and nuts. It is advisable to change them too, because jet thrust is a moving element of the car. The seats of the car body and axle are pre-cleaned and lubricated with special oil. After this, the rod with the replaced bushings is screwed to the body. You can also lubricate the bolts themselves, thus protecting them from corrosion.
Knocks and shaking in VAZ cars mainly depend on the rear thrust rods, so attention should be paid to them, especially since solving the problem does not involve large financial investments and does not require more skill and experience. There were even cases when the rear rod simply burst in the area of the eye and the rear axle “drove” along the road, but the domestic car still kept moving
Do it yourself... or install our reinforced bridge on the field
Craftsmen have long figured out how to eliminate the shortcomings of a factory design: their method is to weld the beam with a metal profile. The types of profile sections, geometry and attachment points vary significantly.
Another way of “strengthening” the Niva refers to the higher aerobatics of the so-called “collective farm tuning”. This is a replacement of the Niva bridge with a UAZ Spicer beam.
Both methods have positive and negative sides. You will have to not only buy a rear axle for the Niva (in case the standard axle is really bent), but also, in fact, completely reengineer it.
At the same time, you will spend a lot of money on purchasing additional equipment and materials, and will perform a number of labor-intensive operations with a welding machine and an angle grinder. In addition, the bridge can “fold” during the welding work itself - such, alas, is the quality of the metal of factory stockings.
It is not surprising that the cost of such a do-it-yourself product increases several times.
However, now there is another, simpler and more civilized way to solve the problem.
We have designed a reinforced Niva rear axle that is ready for installation and operation. It should be noted that this is the first VAZ rear axle in Russia manufactured from scratch, as part of a full production cycle! This is its main difference from numerous handicraft developments that use purchased components.
For high-quality assembly and welding of bridge elements, we have designed a specialized welding jig. It ensures fixation of parts before welding, thereby maintaining linearity of dimensions and geometric accuracy of welding of brackets, flanges, and suspension spring cups.
In terms of bending strength and rigidity in the vertical plane, it is not only not inferior, but also in many ways superior to standard Niva bridges, welded with a profile.
Why are we sure that the new stocking of the Niva IZH-TECHNO bridge will not “fold” under loads typical for operation in extreme off-road conditions?
We use steel of increased thickness, which generally has a positive effect on the strength of the bridge. The thickness of the pipe is 6 mm, the thickness of the “nut” (bridge body) is 6 mm, the thickness of the rod mounting brackets is 5 mm. For comparison: in a factory bridge the thickness of these elements does not exceed 3 mm.
At the same time, the weight of the product increased slightly compared to the factory design: the stocking itself weighs 19.75 kg, the bridge with brackets assembled - 24.39 kg.
The bridge body is made by cold stamping from high-strength steel.
Another bridge - different characteristics: the reinforced stocking of the Niva rear axle can undergo elastic (temporary) deformation under the influence of loads under which the standard Niva bridge inevitably undergoes plastic (irreversible) deformation (read - folds).
The geometry of the “nut” differs from the geometry of the standard factory one, which allowed us to achieve uniform distribution of forces in the horizontal and vertical planes.
Stiffening ribs installed at the junction of the “nut” and the axle tubes reliably fix the tubes and do not allow them to deform under high loads.
Also of interest:
A wide inspection plug in the base to check the condition of the main gearbox pair in the “vehicle on wheels” position, without removing the axle—that’s what was sorely missing. However, its functionality does not end there: you can pour oil into the crankcase through it, controlling its level through the open drain hole. No additional devices are required.
- For the convenience of laying brake pipes and hoses along the stocking, a perforated strip is provided, which, in addition, reliably protects them from mechanical damage.
- You can choose the axle configuration that is optimal for your car. Select any axle configuration option depending on the characteristics of your vehicle, including the presence or absence of an anti-lock braking system and the location of the lower links (see the Applicability section).
- The drain and filler plugs of the axle housing are completely “recessed” into the housing. This means that they will not be cut off during use, and you will not need to worry about protecting them from damage.
And that is not all. By going to the catalog, you can read in more detail about all the technical features of the Niva rear axle from IZH-TECHNO.
Replacing jet rods on a VAZ 2107
It is necessary to prepare a kit with tools and consumables in advance. Their main list is as follows:
- Hammer;
- Set with open-end wrenches. The reinforced double type parts are sometimes difficult to remove without additional tools;
- Blades for installation;
- WD-40 – this composition removes rust;
- A set with new reaction rods, including a transverse one.
When everything is ready, they begin the work itself.
Removing jet rods
Removing old parts is the first step where work begins.
The process involves the following sequence:
- A wire brush is used to remove rust and dirt from threaded connections. Then WD-40 is used for processing. You will need to wait some time before the work can continue. The instructions are also relevant for the classic model.
- Completely unscrew the nut, due to which the washer is held on the free side. This process is difficult, it is better to take a long wrench and, if necessary, re-treat the surface with WD-40.
- Dismantling the bolt and nut, moving to the other side. The rear parts are dismantled in almost the same way.
- Unscrewing the nut from the lower shock absorber mounting. The bolt with the spacer sleeve is also removed.
- Shift towards the shock absorber itself. Otherwise you won't be able to access the second bolt.
- Clean the bolt threads with a wire brush, then apply WD-40 again.
- Unscrew the nut and pull out the bolt. The elastic band also changes if necessary.
The bolt is simply cut off if the nut cannot be unscrewed. Removing the reaction rods involves using a spatula for installation. Remains of the fastening must be removed if the bolt had to be cut off.
Reverse welding of cracks will not help when they appear on the surface. The seam then still cannot withstand the load. Such parts can only be replaced in full.
Repair and installation of jet rods
Reuse is permissible only if the metal part remains intact. Rubber silent blocks must be replaced in any case. The old parts are removed from the lugs and then new ones are installed. Treating the surface with dishwashing detergent simplifies this process.
New rods are installed in the following order:
- The traction eye is mounted in the front bracket;
- The securing bolt is lubricated with nigrol, lithol. Everything is inserted into the bracket and tightened with a nut;
- The tie rod eye is inserted into the rear tie rod bracket;
- Insert the bolt with lubricant, then secure with a nut.
A situation is acceptable when the holes at the traction eye and the bracket do not coincide with each other. Then take a mounting blade and, if possible, correct the current position.
The lower part of the shock absorber at the rear is secured when the bulk of the work is completed.
When a VAZ-2107 needs to replace jet rods
As previously mentioned, rods are made of high-quality metal (mainly steel). This raw material can withstand heavy loads over many years of use.
The weak point of the rods is the eyes. These parts are welded to the rods and are not a continuation of them, and the welding has a certain service life. Over time, the solder joints may gradually become damaged or destroyed.
To avoid problems when driving and to prevent malfunction of the rods, you need to periodically check the condition of the spare parts. If deformation, cracks, or signs of destruction occur, the reaction rods must be replaced.
In this case, there is no need to wait for the rubber bands to fail. If knocking noises occur while the vehicle is moving, inspect and identify damage to the rods, change them immediately. To do this, you don’t have to go to a service station; you can do everything yourself.
Types of breakdowns and their causes
The parts are made of high-strength alloy steel, so they are practically not subject to deformation.
The jet rod can only bend as a result of hitting large stones or tree stumps off-road.
More often, car owners have to deal with other problems:
- Cracks in the welds between the rod base and the eyes. If a breakdown is not detected in time, the part may fall apart while moving.
- Corrosion of rods. A rusted base loses strength and is easily deformed or broken.
- Wear and damage to rubber bushings of silent blocks. Over time, rubber dries out and cracks. This process is enhanced by physical activity. As a result, play appears in the connection of the rod with the bridge and the body. This worsens the car's directional stability and can lead to the lugs coming off.
How to replace jet rods on a VAZ 2101-VAZ 2107?
Note! If you decide to replace all the rods, then think about replacing the bolts, what this will give you, firstly, it will be more pleasant to work with new bolts, and secondly, the nuts will be screwed much easier on the thread than will happen with old rusty bolts , and thirdly, in the future, if you have to work with the rods again, the new bolts will be much easier to unscrew and knock out (Nothing will rust because in a short time), but we recommend replacing the bolts only if the old bolts have already deteriorated and everything is rusty!
1. Absolutely all the links that are present in the rear suspension of a classic car are removed identically, so we will not show a separate photo about each link and explain how it changes, let’s take the central link as an example (Others are removed in the same way, but there are some nuances, we will we’ll indicate everything), in general, let’s get started, first of all, lubricate the bolts and nuts securing the torque rods with a penetrating lubricant (This can be WD-40), then let the lubricant soak thoroughly (5 minutes is enough) and after waiting for that, you can start working.
2. First of all, take two wrenches (One of which should be a spanner, and the other a knob and head, this is much more convenient) and holding the bolt from turning with one, unscrew the nut with the other, as soon as the operation is completed, knock out the bolt using the handle of a hammer or using something similar (the bolt can be completely knocked out with a drift or another bolt of a suitable size), then lift the rod to the top and clean the entire seat from dirt, if there is any dirt on the metal eyes (This is where the bolt is inserted that secures the rod, there are two eyes in total, on one end the head of the bolt sticks out, and on the other there is a nut) traces of rust are found, then in this case take sandpaper and clean it off, on the other side the central link (Where it is attached to the body) is disconnected in the same way, after disconnecting, remove completely traction from the car.
3. We have sorted out the central links, if you decide to remove the transverse rod, you need to unscrew it in exactly the same way (It is attached to the sides), but there is one problem in the installation, when the rod is removed, the angles of the rear wheels change (They collapse) and therefore when the new link If you bring it up, you will find that the hole for the bolt will not match (see photo below), but you can overcome this by inserting a powerful screwdriver into the hole and forcefully aligning these two holes and pulling it out, on the other hand immediately insert a bolt that will be hammered in later you will have to tighten the nut of this bolt, and the rod will be completely installed.
4. And let’s say a few words about the last links, they are the most difficult to change, because there you will also need to unscrew the lower part of the rear shock absorber (How to unscrew the rear shock absorber from below, read the article entitled: “”, paragraph 2-5), after To do this, fold back the lower part of the shock absorber so that it does not interfere and do exactly the same actions as with the other rods, that is, with one key, hold the bolt from turning, and with the other, unscrew the nut, knocking out the bolt, disconnect the rod from one end, it is completely disconnected from the body identically.
5. During all the replacement operations, you will only have problems with the bolts, namely, it will be very difficult to put them back in, especially you won’t be able to put them back in if you work with the rear wheels hanging, we will give advice, almost always when replacing the suspension tie rods should be loaded, sometimes it should be heavily loaded, sometimes even the wheels will have to touch the ground just a little. You take all this into account and, in connection with these features, adjust the height and degree of loading of the rear suspension of the car.
Note! And by the way, so that the bolts can be easily removed in the future and the threads do not turn sour, we recommend that you lubricate them with solid oil before installation, and then in the future they will easily come loose, even if you don’t want to change the rods yourself after a while but take the car to a service station, then for lubricated bolts will only thank you, so take this into account and there will be much fewer problems with bolts!
Additional video clip: A detailed video clip that explains the process of replacing all torque rods on a classic car is attached just below:
How to remove and install the front axle gearbox
As a rule, it is removed for repair and replacement, using special equipment and you need to have special skills, so repairing it yourself in a garage can lead to an undesirable result. Therefore, it is better to entrust this to specialists.
To remove the gearbox we will need:
- The keys are strictly for twenty seven, thirteen and seventeen.
- Balloon key
- Hexagon preferably twelve
- Hammer
- Syringe for filling transmission oil
- Chisel
- And any container for oil
Be sure to remove the front wheels, drain the oil from the crankcase, and disconnect the driveshaft from the gearbox.
We remove the fastening bolt from the left cover, having first unscrewed the nut, to the transverse front suspension.
We unscrew the three nuts that secure the covers to the axle gearbox, and remove the right front wheel drive.
We turn the steering knuckle so that the drive follows it, disconnect the gearbox from the drive itself, after which it can be removed. Everything is installed back in the reverse order; after collection, oil is added.
Also, quite often the rear axle is strengthened; the Chevrolet Niva requires this because the basic design was inherited from the classic Lada, and it is operated in more severe conditions. This leads to deformation of these components, thereby reducing the service life of the bearings sharply, and the parts of the rear gearbox wear out quite quickly.
As a rule, owners prefer to leave this to specialists or refuse altogether because:
- Doing it yourself will require a lot of effort.
- This procedure is quite expensive
- Bridges don't often bend
- Lost traction
If you nevertheless decide to strengthen the rear axle, the Chevrolet Niva will only thank you.
So what should you do:
We place it on the bed, pressing the bridge with a belt so that it does not fidget. Next, we cut off the prepared profile, adjusting it to the stocking. We adjust the profile on both sides to the bridge, loosening the corners along the edges with a grinder, notching a little and bending it with a hammer, bringing it into a trapezoidal shape, while making sure that the bolts move freely. Then we clamp the rear axle into the jig, after which we take the fiftieth corner, the thickness of which is four, and cut out four ears from it. We fix it all by welding and use a grinder to give it the same look. And we drill holes of the diameter we need. The reinforcements that are welded protect the vertical holes in the base, and to strengthen the horizontal plane, we cut out and weld a metal knob. After all the steps, we hang the bridge and paint it. If it is not clear, you can watch the video below. The resulting structure is a bridge reinforced with a special profile 60*60*2, which is welded with small seams, followed by its control so that the planes are parallel so that the bridge does not bend during welding. Since the profile is welded on top, this can lead to a suspension play of four and a half to five centimeters.
Therefore, if you are planning to strengthen the bridge, it is better to consult a specialist and decide whether to carry out the entire process yourself or trust a specialist.
What links are included in the rear suspension?
The Chevy Niva bridge is held in place using five parts. To prevent longitudinal and transverse displacement, four longitudinal rods (two each: front and rear) and one transverse rod are used. At the ends of the products there are eyes into which silent blocks are inserted to prevent knocking in the suspension. One end of the rod is attached to the bridge, the other to the car body.
The parts have the same diameter and differ only in length. The longest is the transverse thrust. The length of the elements ensures vertical mobility of the rear axle. Thanks to this, the silent blocks do not twist, even if the suspension moves by the full stroke of the shock absorber.
Remedy
Increased noise from the rear wheels
— The wheel fastening is loose
Tighten the wheel nuts
— Wear or destruction of the axle ball bearing
Inspect the axle shaft and replace the bearing
Constant increased noise when the rear axle is operating
— The rear axle beam is deformed, the axle bearings are damaged
Straighten the beam and check its dimensions, replace the axle bearings
— The axle shafts are deformed and have unacceptable runout
Replace the axle shafts with new ones
— Incorrect adjustment, damage or wear of gears or gear bearings
Determine the gearbox malfunction, repair or replace the gearbox
— Worn or incorrectly adjusted differential bearings
Remove the gearbox, repair and adjust
Noise when accelerating and braking the car
— Incorrect adjustment of the main gear gear engagement
Adjust the engagement
— Damage to the axle bearings
Replace bearings
— Insufficient amount of oil
Restore the oil level and check for leaks in the seals or rear axle beam
— Incorrect side clearance in the meshing of the final drive gears
Adjust the gap
— Increased clearance in the drive gear bearings due to loosening of the flange nut or wear of the bearings
Adjust the clearance, replace bearings if necessary
Noise when cornering
— Damage to axle bearings
Replace bearings
Knock when starting to move the car
— Wear of the hole for the pinion axle in the differential box
Replace the differential box and, if necessary, the pinion axle
— The rear suspension rod mounting bolts are loose
Tighten the bolts
Oil leak
— Worn or damaged drive gear oil seal
Replace the oil seal
— Wear of the axle shaft seal, leading to oiling of the brake shields, drums and pads
Check the runout of the axle shaft and beam deflection. Repair or replace damaged parts
— Loosening of the bolts securing the rear axle gear housing, damage to the sealing gaskets
Tighten the bolts, replace the gaskets
Purpose of thrust rods on the VAZ 2107
Tie rods provide protection against swaying and loss of control on the road, during sharp turns and obstacles. Even earlier versions of the car had similar problems. But inside the cars there were only ordinary springs; no one knew anything about the system with rods.
It is for this reason that the vehicle caused many problems when driving. Only over time the suspension was modified. A system was installed with several long rods. This part carried the main load.
Classic VAZ 2107 cars and other models contain the following version of the torque rod kit:
- Long.
- Short.
- A large transverse one, which also serves as the basis for the entire system.
Installation location - near the car axle located at the rear. The system is visible only from the inspection hole, where repair work is usually carried out if the reaction rods are replaced.