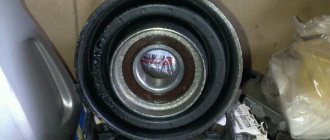
One of the most common problems on Niva-2121 cars is the malfunction of the CV joint, or rather its failure. The earliest symptoms, as a rule, are minor: a slight crunching sound appears while driving a car. And in this regard, many car owners are wondering how to remove the inner CV joint on a Niva in order to replace it?
If the CV joint is not changed in time, the consequences can be very different. Therefore, it is very important that the replacement is made on time.
Tools that may be required for replacement
In order to remove the inner CV joint on a Niva yourself for the purpose of subsequent replacement, you may need tools such as:
- Driver and ratchet.
- Head 13.27 mm.
- Hammer.
- Extension.
- Jack.
- Flat screwdriver, chisel.
- Balloon wrench.
Many people prefer to change the CV joint themselves to save money. But it is worth noting that auto mechanics are not born, not every person can do this, that is, not all people know how to remove the internal CV joint on a Niva. Therefore, in this case, it is best to seek help from specialists. But it is worth noting that replacing this element is a rather expensive procedure.
What does a CV joint consist of?
Be sure to remember the following before removing the inner CV joint on a Niva. Each car owner decides for himself: either he changes the unit himself, or turns to specialists for help. But in both the first and second cases, you need to know what parts the CV joint consists of and be able to understand the mechanism.
The CV joint consists of:
- Sharikov.
- Fist.
- Cases.
- Separator.
- Internal and external anthers.
The CV joint is an external part located at the very bottom of the car. The internal and external anthers perform two main functions: they protect the hinge from dirt and dust.
It is worth noting that there are two mechanisms on each wheel drive. These mechanisms have the same structure, the only thing is that they differ from each other in shape and size. On most car models, as a rule, the right and left CV joints are interchangeable.
Therefore, if you have any doubts about this, it is best to go to a car service center and check with specialists.
It happens that the entire mechanism requires replacement, but most often the external mechanism is erased, while the internal one continues to function. However, sometimes it may require replacement.
The design of this mechanism itself is quite simple. And in this design there is a separator that spins the balls. They are located in the grooves of the fist and the outer housing. All these elements are covered by anthers. They protect parts from dust and dirt, and also thanks to them, lubricant does not leak out.
If replacement is required, then you can either install a new mechanism, or just change its individual parts.
View topic
Of course, I also rely on experts, but it will be much more difficult for them to give the correct answer. Really, it will help not only me, but also others.
How to remove the front gearbox on a Chevrolet Niva
I’ll probably even make a good video for YouTube on how to solve this problem, because right now there are no instructions. By the way, one friend on the forum wrote about the same problem, not here. He replaced the transfer case with a new one - it didn’t help. I rebuilt the gearbox - it didn't help. I checked the gearboxes - it didn't help. And then he dropped the topic. Maybe this information will also help. If you drive in neutral, there is no hum. There is also a funny thing - on the second one there may or may not be a buzz as the stars rise in the sky. In order to at least somehow clarify why and how I decided to crawl under the car while it was standing on a hillock with its wheels. He turned on the neutral on the gearbox and began to pull the cardan shafts.
How to remove front wheel drives
Quite often, novice motorists try to independently remove the right inner CV joint on a Niva. In order to do this, you need to study the following information.
It is best to carry out the work either on a lift or in a viewing hole.
To begin with, it is recommended to drain the oil from the front axle gearbox. Then you need to unscrew the adjusting nut of the hub bearings, after which you should remove the tapered sleeve.
The shock absorber is removed as follows. To begin, it is recommended to disconnect the lower shock absorber mount from the lower arm spring support cup.
Removing the lower ball joint is carried out as follows:
- To begin with, it is recommended to disconnect the lower ball joint from the lower arm of the front suspension.
- After these manipulations, it is necessary to move the steering knuckle to the side, then remove the tail of the outer hinge housing from the hub.
- Then, using a spanner number 19, unscrew the bolt securing the front axle bracket to the right bracket of the power unit support. Then you need to remove the bolt.
- Next, you need to use socket No. 13 to unscrew the 3 nuts securing the front axle bracket, as well as the bearing cap of the internal joint housing to the gearbox housing.
- After this, it is necessary to remove the front axle mounting bracket. Then you need to pry off the bearing cover of the inner hinge housing using a mounting blade.
- Next, it is recommended to remove the internal joint housing from the gearbox.
It is imperative to remember that the gearbox housing and the bearing cap connection are sealed with a gasket.
The gasket itself is asymmetrical; therefore, it is installed in one position on the studs of the gearbox housing.
As for the left drive, it should be removed in the same way as the right one. The only exceptions are 3 nuts, which should only be attached to the bearing cap.
As for the drive, it should be installed in reverse order.
Preparation
The main stage is preceded by preparation, which includes: 1. Draining the oil from the RPM through the drain hole;
2. Disconnecting the driveshaft with a 13 key
3. Removing the right wheel drive.
4. Dismantling the lower ball joint on the left side.
5. Removing the suspension extension.
6. Removing the gearbox from the brackets on the right and left, using a stop.
This is followed by disassembling the gearbox, thoroughly cleaning the surfaces from dirt and grease, and troubleshooting the components.
How to remove the inner CV joint on a Niva-2121
The stages of dismantling include the following actions:
- To begin with, it is recommended to raise the car. This can be done using a jack. In this case, it is very important that the car is in the inspection hole.
- Then you need to knock off the protective cap of the hub nut. This can be done using a hammer and screwdriver.
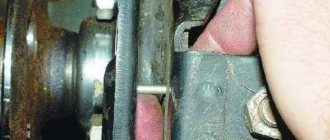
- Next, using wrench No. 13, you need to unscrew the ball joint fastening nuts to the steering knuckle.
- After these manipulations, you need to remove the drive shaft from the Niva front wheel hub. And in order to remove or replace the outer CV joint, it is necessary to remove the retaining ring.
- In order to release the inner CV joint, you must first unscrew the 3 nuts securing the pressure plate.
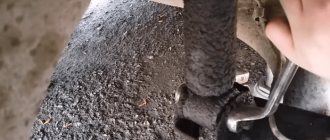
- Next, you need to pry off the plate with a sharp chisel or a screwdriver, after which you need to pull out the inner CV joint from the front axle gear housing.
- Due to the fact that the space between the shock absorber and the front suspension spring is very minimal, it is not very convenient to pull out the drive assembly, so it can be disconnected.
- If this is necessary, then you need to knock down the defective CV joints, and it is best to install new ones in their place. But it is better to do this in reverse order.
- Then you need to apply lubricant, and then securely fix the boot clamps.
- The assembled drive should be installed on the Niva in the reverse order.
And most importantly, you need to know and keep in mind that if you remove both drives at once, then there must be either an internal drive or a plug of suitable diameter on one side.
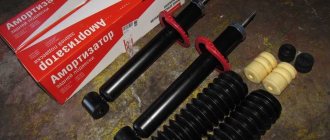
As for the front wheel drives on the Niva car, when they fail, they are removed for replacement. Such reasons may be: damage to the hinges, deformation, damage to the rubber boots. When operating your car, you should pay special attention to the condition of the boots. If they are in a damaged state, then it should be remembered that through this breakthrough, dirt can enter the lubricant, which mixes with the lubricant, and the latter, in turn, begins to work on the principle of sandpaper, because of this, the permissible gaps increase, causing grinding and knocking until it completely flies out.
The most basic sign that indicates a drive malfunction, as already mentioned, is the presence of knocking and grinding noises.
Step-by-step instructions for DIY replacement
After installing the vehicle on the inspection hole, it is secured using anti-recoil devices. It is recommended to disable the handbrake first. To remove the old seal, you must first disassemble the rear hub assembly and remove the axle shaft.
The unit must be disassembled in strict accordance with the instructions:
- The wheel nuts are loosening. After this, jack up the car and remove the wheel.
- There may be rust on the rear axle shoulder that extends past the brake drum that needs to be removed. The part is additionally treated with lubricant.
- There are two fastening bolts on the drum, to unscrew them you will need a 12 mm wrench. The drum is gently tapped with a hammer, which allows it to move.
- You can use 2 methods to remove the drum. It is squeezed out using bolts that are provided for fastening. The drum is knocked down with a hammer. The procedure is performed as carefully as possible to avoid damage to the edges.
- The axle shaft seat is cleaned, which will ensure easy removal of the drum in the future.
The next step is to remove the axle shaft. The Chevrolet Niva has 4 bolts designed to secure the axle. The shock absorber is held in place by a bracket located on the other side of the axle shaft. Once all the bolts are removed, the shock absorber will not hold the rear axle, which is pushed down by the spring.
If oil leaks, you need to jack up the vehicle higher and place a container to collect the fluid under the work area. If the rear axle stocking rests in an inclined position in the other direction, this will eliminate the oil leak.
If the shock absorber is attached to the spring cup, there is no need to unscrew it. In this case, do not use a stand. To unscrew the 4 bolts that secure the rear axle shaft, you must use a 17 mm wrench
When performing the procedure, pay attention to the growers, which should not be in the rear mechanism. If the old groover gets lost and the technician installs a new part, it will get caught in the space between the drum and the shoe, causing the wheel to jam in the vehicle.
After unscrewing the bolts, the axle shaft is removed with a sharp movement along with the bearing. If you can’t pull it out of the holder, it is recommended to secure the wheel to the stud with three nuts and pull it firmly. At home, you can tie the wheel to the garage door with a rope. They knock on the gate with a hammer and the axle shaft comes out of the cage.
After dismantling the axle shaft, the technician will have access to the metal shield intended for attaching the brake pads. It is fixed with two upper bolts, which are inserted into the holes. The remaining actions are performed in accordance with the instructions:
- There is a thick rubber lining on the rear axle flange, which is recommended to be removed.
- The old oil seal is pryed off with pliers or a screwdriver and removed from its installation location, which must be cleaned and wiped with a rag.
- Apply a small amount of transmission oil to the new seal. It is installed in a seat in a level position.
- The oil seal is pressed with a round attachment, which is made from a pipe. To avoid damage to the rubber gasket, it is recommended to use the old oil seal during pressing.
After replacing the oil seal, all parts are cleaned of oil - pads, brake cylinder, metal shield and drum. Before assembling the axle shaft, it is recommended to inspect its bearing. If there is no lubrication, the part is processed. If signs of bearing wear are observed, it is replaced with a new part. The need for replacement is determined by sticking or slight noise or difficulty rotating. If malfunctions are observed, then the axle shaft should be taken to a service center, since the bearing can only be replaced with special equipment.
Upon completion of the oil seal replacement work, the oil in the rear axle gearbox is checked. To do this, unscrew the filler plug from the gearbox casing and visually determine the amount of fluid. If there is not enough oil, it is added through a hose that is inserted into the filler neck.
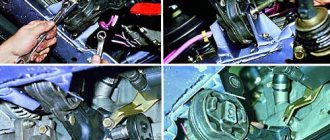
How to replace an outer CV joint
How to remove the inner CV joint on a Niva 21213 is more or less clear. Let's consider the process of replacing the outer CV joint. In order to replace the outer part of the pair in the assembly, it is necessary to completely remove the axle shaft with “grenades” from the car.
The sequence of such actions is as follows:
- First you need to lift the car. This can be done using a jack.
- Next, you need to install a stand - this is necessary in order to minimize the likelihood of accidents, so to speak, to be on the safe side in case the jack does not cope with its task.
- Then you also need to install the wheel chocks.
Thanks to these safety measures, any injury or damage will be avoided. The most important point is this: before lifting the body, it is imperative to loosen the hub nut. A socket and wrench extension may be required to carry out this work.
The further sequence of actions is as follows:
- Be sure to remove the front wheels.
- Next, you need to unscrew the lower mount that holds the front shock absorber.
- Then you need to move it as far as possible to the side. It is recommended to do this so that further work is not complicated.
- After these manipulations you need to secure it. In this case, you can use absolutely any available means.
After this stage, it is recommended to unscrew the bolts, and this should be done directly on the ball joint.
The next part of the work looks like this:
- You need to remove the nut on the hub.
- Then pull it towards you, and then remove the outer CV joint.
Differential locking
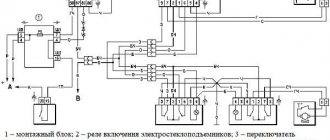
Sometimes you can come across a misconception about why a small handle is needed next to the shift lever on a Niva. Some car owners believe that it is needed to connect front-wheel drive. However, the front-wheel drive of this car is permanently connected. As is the rear one. Cars of the Niva family have permanent all-wheel drive. The handle actually serves to switch the operating modes of the differential of the transfer mechanism.
In the “forward” position, the differential operates as usual, but if you move it back, the differential is locked, and the forces from the motor are applied to the differentials of the axles, which makes the drive more rigid. It is worth noting that there are also special types of locks for front and rear axles.
In theory, when used in conditions where the car is stuck, it will be able to overcome the obstacle if there is sufficient traction on at least one wheel. In this case, it is better to lock the differential before overcoming an obstacle, but never after entering an area that is difficult to overcome. This application of locking will avoid wear and damage to the transmission.
Read more: Table of alcohol removal from the body calculator
Drive gear adjustment
To carry out the operation, use the original device A.95690, mandrel A.70184 or an analogue made according to the drawing.
During turning, the parts control the force when turning the gear (should be 157–196 Ncm); for used bearings, a torque of 39.2–58.8 Ncm is valid. The use of a proprietary dynamometer 02.7812.9501 is not necessary.
Acceptable accuracy will be provided by a household steelyard. When working with it, you should wind one end of a 1 m long cord around the flange, and secure the other end to the scales. By pulling the device in a perpendicular direction, fix the turning torque. So, new bearings should provide 7-9 kg, and with mileage - 2-3 kg.
The process involves replacing the support washers with new ones - thicker than before. There are 7 standard sizes to choose from in increments of 0.05 mm within the range of 1.8-2.1 mm. Washer material – bronze or steel. In this case, the gears are installed tightly, but can be turned manually.
How to change the oil
Every forty-five thousand kilometers, according to the regulations, the oil in the gearbox must be changed. For this we need:
- key for seventeen.
- A container where you can drain the old oil.
- Seventeen hexagon.
It is best to change the oil on a car after it has been running hot for a while.
After the car has been warmed up, unscrew the drain plug and drain the oil into a specially prepared container, then screw the plug back.
We unscrew the oil filler plug and fill in new transmission oil; this manipulation can be done using any syringe. Fill the oil to the lower level of the edge, a special filler hole, after which we screw the plug back. At this point, the process of changing transmission oil is considered complete.
How to replace the shank oil seal on the front axle
If an oil leak is detected, the oil seal should be replaced. To replace we need:
- Key for fourteen and thirteen.
- Screwdriver Set.
- Hammer.
- Torque wrench.
Before replacing the shank oil seal, that is, repairing the field yourself, you need to turn off the engine and turn off the gear, drain the oil from the front axle crankcase, then disconnect the front propeller shaft from the drive gear of the front axle gearbox flange. We remove the housing of the internal hinge of the front wheel drive smoothly from engagement with all the gears of the axle shafts. It is necessary to determine the moment when resistance to rotation of the nut flange occurs and replace the oil seal. Everything is installed back in the reverse order, after which oil is poured into the gearbox.
How to replace the housing seal and bearing
To replace we will need:
- Beard
- Any hammer, as long as it’s not wooden
- The sealant is also any better transparent
- Retaining ring puller
We remove the front wheel drive, then remove the bearing retaining ring, use a wooden block and a hammer to knock it all down and remove the shaft bearing and housing.
Using a punch and a hammer, remove the oil seal of the so-called inner CV joint from the front wheel.
We lubricate the edge of the oil seal with special transmission oil, and apply a small layer of sealant to the outside surface.
After the work has been done, carefully use a hammer to press the oil seal back into the body, install the removed parts in the reverse order, and if necessary, replace the old CV joint with a new one.
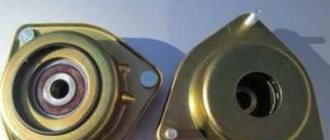
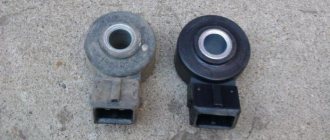
What you need to know about signs of bearing wear
A broken car hub is usually a serious problem and should not be ignored.
The main reasons for hub failure are:
- careless driving on roads;
- multiple overloading of cars;
- driving on sandy soil or “mud baths”;
- frequent car slipping;
- aggressive driving style with sharp acceleration and braking.
These reasons can have a significant negative impact on the hub housing, outer or inner bearing ring. They are also sources of dirt, moisture and sand getting inside the bearing mechanism, which causes the journal to fail.
The following list of signs may indicate a failure of the wheel bearing on a Niva-Chevrolet car:
- the appearance of vibrations during movement, clearly felt on the steering wheel or the body as a whole (it is necessary to take measures to replace the bearing, since there is a possible risk of it jamming);
- spontaneous change in trajectory while driving (also possible due to incorrect wheel alignment adjustment);
- a specific sound penetrating inside the cabin (sometimes accompanied by a crunching sound caused by the displacement of the bearing rollers);
- uneven and intense wear of tires due to misalignment of the wheels due to a failed bearing.
- the appearance of extraneous sounds - a crunching sound that can be heard while moving from the passenger compartment. This sound is produced by balls that move in the broken walls of the bearing.
- vibration is a harbinger of bearing seizure. This is a very important sign, it is quite difficult not to notice it, since it is felt throughout the body and radiates into the steering wheel.
- The car pulls a little to the side. This may be caused by the need to perform a wheel alignment. But also the deviation from the course may be due to the fact that the bearing jams a little and it stops the wheel.
The appearance of even one of these signs requires immediate inspection and, if necessary, replacement of the Niva Chevrolet wheel bearing. This work is quite simple, so even a novice car enthusiast can do it.
There are two main signs that indicate replacement is necessary:
- There was a knock and play in the hub area
- There was a strong hum and grinding noise in the hub area
To make a replacement, carefully do the following:
If this is the front wheel, then the Niva Chevrolet front hub is removed. To do this, the car must be placed on a level surface and jacked up on the replacement side. Then disconnect the pads from the caliper. Unscrew the nut on the axle. We remove all spare parts from the wheel. Take a skein and disconnect the hub from the brake disc.
We remove the bearing. To do this, remove the plate and oil seal from the inside. We take a cleat and a hammer and remove the internal bearing. Install a new one.
Replacing bearings must be changed on both sides at once, and it does not matter whether it is the rear or front wheels. In order not to damage the body, pressing must be carried out using a wooden plate and a pipe.
Putting the knot back together
Reassembly must be done in reverse order.
Bearing wear manifests itself as the following symptoms:
- Vibration of the front wheels, which can be reflected in the steering wheel or felt in the cabin.
- Knocking or crackling sounds in the front of the car when driving;
- Heating of the front wheels in the axle area.
1. The hubs get hot
It is important to understand that when braking, the kinetic energy of the car is converted into thermal energy. As a result, the brake discs and the hubs on which they are attached become very hot.
Heating of the part during movement, and not during braking, indicates wear of the bearing or its incorrect adjustment.
The second option is typical for adjustable hubs. The adjusting nut must be tightened with a force of 2 kgf*m. If you tighten it further, the tapered bearings will be too tight.
Their rotation will be difficult. Prolonged operation of the machine in this condition leads to bearing failure and wheel jamming.
2. The adjusting nut is unscrewed while moving. Sometimes this happens literally after 20-50 kilometers. The phenomenon is observed in three cases: the master forgot to tighten the nut, there was a misalignment between the bearing races, or play appeared in the coupling of the CV joint with the hub.
Refinement technology using the example of the Niva “Turbo Osa” car
The technology has been tested on this model; the RPM (front axle gearbox) has an independent suspension as standard. To save time, you can purchase ready-made tying kits.
Many car enthusiasts make brackets, plates and fastenings with their own hands, providing colleagues with drawings of their own design.
Important! Such structural elements must be made of durable steel. It is unacceptable to use factory silumin elements as a platform for fastenings.
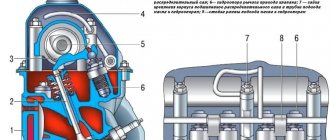
Disassembly and repair of the front axle gearbox
Before removing, clean the gearbox from dirt. We install the dismantled gearbox on a workbench.
Using a 10mm spanner, unscrew the eight nuts securing the front cover to the gearbox housing.
| We remove the cover... |
| ...and a gasket. |
| Using a 10mm socket, unscrew the bolt securing the locking plate of the left differential box bearing cover... |
...and remove the plate. Similarly, remove the locking plate of the right cover.
Rear axle
A diagram of dismantling the unit will also be described below. Specific repairs to the rear axle gearbox of the VAZ 2121 Niva require specifics. It is simply impossible to briefly describe every possible malfunction and its elimination. Therefore, the diagram for removing the rear assembly is:
- Unscrew the axle shaft.
- Bend back the locking plates.
- Move the axle shaft.
- Remove the mounting bolts and remove the assembly.
As you can see, the rear assembly is much easier to remove. All that remains is to secure it on the workbench and disassemble it. However, you still need to remember that the part is very heavy and move it carefully.
General rules for revision
1. The untethered bridge must be fastened at three or four points that do not have a rigid connection with the engine. 2. The front axle beam and anti-roll bar are used as supports. 3. When determining the new position of the RPM, it is important to prevent horizontal displacement of the axes of the propeller shaft and axle shafts.
The bridge can be uncoupled using a gearbox suspension kit from Chevrolet NIVA.
Therefore, most car owners prefer steel brackets made independently or in the factory.
For cars taking part in off-road competitions, a version of the RPM steel body has been developed. This gearbox is structurally equipped with lugs for independent suspension. There are also additional subframes for extreme conditions of use of the NIVA. When installing the latter, the question: “how to untie the front axle” does not arise, since the gearbox is mounted in the subframe.
Possible faults
The need to adjust the elements of the front axle is assessed by the presence of noise and vibrations that occur in various operating modes of the VAZ 21214. Thus, conditionally acoustic signs can be divided into two groups: • Constantly recorded; • Fixed during braking with the help of an internal combustion engine or acceleration.
The nature of the sounds may resemble: • Howling (wear of the main pair); • Crunching, “trolleybus” hum (destruction or overtightening of the shank bearings, unscrewed drive shaft nut, axle bearings, incorrect adjustment of the gearbox gears); • Intermittent “shuffling” (differential bearing). The difficulty of diagnosis lies in the abundance of extraneous noise produced by other components of the car.
Kit options
On sale you can find several different options for ready-made kits for decoupling the VAZ 2121 front axle gearbox. Let's look at some of them.
Ready-made kit kit ZSTehnology OPM-1 for untying the Niva RPM, which includes a steel front gearbox housing cover and brackets connected through silent blocks and welded to the front beam. The retail price of this complex is 3100 rubles. Among the disadvantages: you will have to buy additional clips and stabilizer bushings.
Some useful tips:
• Since the engine no longer bears additional load, you can replace the standard hard cushions of the power unit with softer ones, from VAZ classics. • When attaching the lugs to the front axle beam, welding should be carried out by an experienced welder who is familiar with the technique, which allows not to “release” the metal. The beam is a load-bearing structural element of the car, and its strength should not be reduced. • The welding areas should be cleaned of scale, then the joints should be thoroughly primed and painted. • After untying, the RPM should not touch the engine and beam either in a static position or while the vehicle is moving. • If you are producing a suspension lift, you should select a decoupling kit that takes into account the increased angles of the CV joint and driveshaft. • The silent blocks of the brackets of the untethered gearbox are subject to wear in the same way as the cushions of the power unit or suspension elements. The replacement of these elements should be included in your list of operations during maintenance.
Uncoupling the Niva front axle
- Go to page:
Uncoupling the Niva front axle
Post by FISHER4x4 » 31 Jan 2022, 15:20
________________________ Niva Club recommends:
Uncoupling the front axle gearbox (OPM1)
Uncoupling the front axle gearbox OPM-2 of the “Ultra-PRO” series
Re: Untying the front axle of a short Niva
Post by Vigilant Falcon » Jan 31, 2022, 3:32 p.m.
Contact Ivan: https://vk.com/ivan_magellan he knows where to get the best and correct connection in Ukraine
Re: Untying the front axle of a short Niva
Post by Constructor » 31 Jan 2022, 15:34
Re: Untying the front axle of a short Niva
Post by Vigilant Falcon » Jan 31, 2022, 03:39 p.m.
Re: Untying the front axle of a short Niva
Post by FISHER4x4 » 31 Jan 2022, 15:49
Sequence of work
- We purchase (make) a tying kit. When making it yourself, we drill holes in the pan in accordance with the diameter of the studs .
- We securely install the car on supports, preferably above the inspection hole.
- Drain the oil from the gearbox.
- We dismantle the CV joint drives, having first freed the steering knuckles of the wheels.
- Disconnect the front driveshaft from the flange.
- We remove the axle gearbox from under the car.
- On a flat working surface, separate the bottom tray and side covers of the RPM.
- On top of the CV joint drive covers, using elongated studs, we fasten the earring brackets. It is possible to replace the installation sequence of covers and brackets, depending on the kit you choose.
- Instead of a standard pan, we attach a reinforced one, with installed clamps for attaching the anti-roll bar to the beam. In addition to the factory gasket, we use sealant. The pallet will experience additional loads, so the tightness needs to be improved.
- We hang the RPM with the rear mount on the stabilizer beam. We center the axis of the propeller shaft and the axis of its flange in the gearbox.
- On the bridge beam we mark the fastening lugs for the brackets for the front suspension of the gearbox housing.
- We weld the eyes to the bridge beam and perform anti-corrosion treatment.
- We fix the earrings in the eyes using polyurethane or rubber silent blocks.
- We check the vertical alignment of the propeller shaft and CV joint drives.
- We attach the axle shafts and driveshaft, and secure the steering knuckles of the wheels.
- Fill the gearbox with oil according to the operating instructions.
- Without starting the engine or removing the car from its supports, check the free rotation of the wheels and front driveshaft .
- We make a test drive, after which we re-inspect the car in the inspection pit.
The front axle decoupling is complete, your SUV has become much more comfortable on the highway and more reliable off-road.
Lateral clearance in GP and differential bearing preload
In accordance with the instructions, the lateral clearance and preload of the bearings are adjusted using tool A.95688/R.
In its absence, a caliper of a suitable size will perform the specified role.
To ensure the required preload, fix the distance relative to the bearing caps at the beginning of tightening and at the end. The required difference between the values is 0.2 mm.
The side clearance is adjusted by bringing the driven gear closer to the drive gear until it disappears. Initially, one of the nuts is in a loose position, the other (working) is tightened. After eliminating the gap, gradually tighten the attached nut until the jaws of the caliper move apart by 0.1 mm. The backlash adjustment stops when a slight knocking sound of the teeth appears. Next, both nuts are tightened evenly to a distance of 0.2 mm. The correctness of the work is indicated by uniform play in any position of the gears.
Video of front axle operation
It all started with the desire to change, and for the better, Niver's directional stability. I performed a similar procedure on a UAZ, albeit in a different way, but it’s definitely worth it. The “yaw” effect on the road disappears. No need to constantly taxi. And in ruts, at least those on asphalt, the car behaves completely differently: it drives diagonally along the ruts calmly and without any desire to suddenly jump out somewhere. I ventilated this moment in relation to Niver. There is not a lot of information online about changing Niva castor. In general terms, the castor or the longitudinal inclination angle of the steering axis of a wheel on a field is changed in two ways: 1) by distance washers on the axis of the lower arms 2) by adjusting forks on the upper arms. On top of everything else, there is one more point, or rather an element that requires strengthening. This is the lower arm axle bushing. There are often cases when it breaks and the lower arm mounting bolt bends. I decided this moment for myself by installing the following details:
In this way we strengthen the beam and improve the behavior of the car on the road. For some, a slightly increased effort on the steering wheel when cornering may be a minus, but taking into account the advantages that are added, you don’t notice this minus. We saw off the back part of the bushing after the amplifier is installed. We use it to determine the length to cut the sleeve. Then we scald everything, clean it, paint it.
Thoughts about separating the RPM from the engine have been brewing since the acquisition of this VAZ “miracle”. After looking at several articles on various sites, I decided to do it. Since the considered designs seemed unsuccessful in my opinion, I began to improve them.
There were no special issues with the rear mount. Sheet of iron 5 mm, holes are marked according to the gasket of the gearbox cover, fastenings + elastic bands for jet thrust “re-bent in place” from 2101. The holes for these fastenings are drilled last and also “in place”. The gearbox cover studs are unscrewed and replaced one by one with long ones (I took 60 mm bolts with sawed off heads) of appropriate strength:
There were no drawings, since I did everything “on the spot”, cut out templates, tried them on, etc.
The front mounts are a little more complicated; they are metal discs made of the same 5 mm iron, but with a characteristic “nose”:
A platform is welded to this “nose” with which it (the disk) will be attached to the beam. The diameter of the hole is slightly larger than the diameter of the narrow part of the “grenade”; it is better to mark the holes for the studs after removing the CV joints, taking into account that the RPM should drop at least 1 cm. The hole for the fastening bolt is marked and drilled after this disk is placed on the cover studs. I did not change these studs, their length is sufficient.
A similar platform with a pre-drilled hole is welded to the beam so that the bolt (I took from the elastic) fits in without distortion and does not catch the beam. After everything is prepared (the rear mount is screwed to the gearbox cover and tied to the stabilizer, the front mounts-discs are put on studs and nuts are attached to them, sets of rubber “donuts” from shock absorbers are installed between the supporting platforms), unscrew the gearbox from the engine and position RPM relative to the oil pan, providing the required clearance of approximately 10 mm. Next, we mark the location of the holes at the upper platforms and, having secured the gearbox from falling, remove the fastening disks and drill. Having installed everything in place, we mark and drill holes for attaching to the stabilizer.
Removing front wheel drives
First, the preparatory work: I lift the front on chocks, remove the wheels, brake calipers (two bolts on the inside of the hubs), unscrew the hub nut.
After this, you can begin to remove the front wheel drives. I'll start with the left drive. Not because it’s correct, but it’s simply easier to remove, there’s no such problem as with the right one.
Before disassembling the front drive, you need to drain the oil from the gearbox!
How to remove the left front drive on a Niva
I unscrewed the nuts securing the ball joints (in the note about the link to: replacing the brake hose, you can clearly see it), and tapped the levers. The upper ball joint popped out of the lever (1 in the photo below), and the lower one failed. I was embarrassed to knock too hard, and it was inconvenient to knock on it, so I completely unscrewed the ball joint from the lower arm (remember to put the nut back in place later), three bolts with nuts (number 2 in the photo).
I remove the hub from the drive and move it to the side, let it hang on the steering rod. She doesn't bother me there.
The next step is to unscrew the flange securing the drive to the gearbox and try to tug lightly on the CV joint, the left one came out slowly. If he doesn’t want to go out himself, you can knock on his ears,