labavto.com
The Lada Kalina has earned a reputation as a comfortable and reliable car. But, like all vehicles, it is not immune to various types of breakdowns. Quite often one or another electrical equipment fails. Some breakdowns are not critical, for example, the cigarette lighter does not work, but there are also those that can completely render your vehicle immobile.
This is, first of all, the failure of such an important component as the fuel pump. It is not always necessary to change the consumer in order to restore its functionality; very often it is enough to replace the fuse and the relay responsible for it to restore its functionality.
Car Lada Kalina
Let's say right away that on the Lada Kalina car the electrical circuits are protected by electrical fuses and relays located in several compartments. For example, the fuse for the cigarette lighter is located in the main compartment under the panel, and the fuel pump is located in the additional compartment.
All blocks with electrical fuses are installed in easily accessible and convenient places, so changing and checking protective elements will not cause difficulties even for a novice car enthusiast.
Non-specific types of services
Even if the rules for safe operation of the vehicle are observed, the heater control unit may require servicing or replacement. This happens as a result of sudden switching of the heating knob of the Lada Kalina car. The operating instructions indicate that you must wait until the system warms up to a minimum, otherwise expensive repairs will be required.
From a financial point of view, the stove control unit will not be cheap, so its careful operation will save the family budget.
The heater control unit cannot be replaced independently due to the need to use special equipment. Much less often problems arise at the level of the engine control system.
The need to visit a service station will be caused by driving on a gravel road, an accident, or the result of unprofessional maintenance. The engine management system is responsible for fuel injection, so any deviations in its operation immediately put the car on hold. How long it will take to replace the engine control unit will be decided by the technician after an inspection.
It is cheaper, but repairs take much longer when the body electronics unit comes under attack. The problem can only be diagnosed in a service center. The duration is due to the fact that if the engine control unit can be replaced as a single whole, then part of the wiring must be changed along with the electronics.
Voltage surges or a simple short circuit can damage a certain sector. The light control unit will be the first to tell you about this.
Incorrectly working turn signals or emergency lights are the first sign indicating a failure in the electronic component of the car. There is no point in delaying a visit to the service center. Otherwise, the ESP unit responsible for dynamic stabilization will come under attack. Even with minor problems, the driver will notice a decrease in the lateral dynamics of the vehicle.
Lada Kalina requires regular maintenance as prescribed by the manufacturer. If the specified deadlines are met, each element of the system will work properly.
back Why the hood on Kalina does not open - do-it-yourself repair work
Next Brake pads Lada Kalina
Tags control unit, maintenance, electrical package
Where is the fuse box?
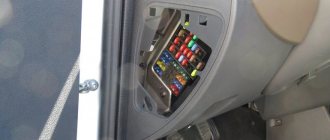
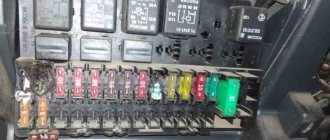
The largest compartment, which houses most of the fuses and relays, is located on the left side of the instrument panel and is covered with a cover. The second, in which the elements responsible for the power unit control systems are located, is located in the lining of the floor tunnel. This is where the fuel pump fuse is located.
Location of the fuse and relay box on the Lada Kalina
Removal and replacement instructions
Replacing and identifying an unusable element in both the first and second blocks occurs in approximately the same way, so let’s consider the replacement process using the example of the one installed to the left of the dashboard.
Diagram on the back of the cover
Preparation
Be sure to remember that before you carry out work on electrical equipment, it doesn’t matter whether the cigarette lighter or the fuel pump has failed, the first thing you need to do is turn off the power to the system. To do this, turn off the engine and remove the negative terminal of the battery.
This video shows how you can quickly solve a problem with blown fuses on a Lada Kalina.
- We find the location of the block, it’s not difficult - the designers placed it on the left side of the dashboard under the cover.
- Open the lid.
- Using the diagram and table, we establish the location of the protective element we need.
- The block contains tweezers, with the help of which we extract the required element.
- Let's examine it.
- We check with an ohmmeter or lamp.
- If the spiral is burnt out, install a new one of equal value.
- We connect the removed battery terminal.
- We start the car.
- Let's see whether our consumer has earned money or not.
- If everything is in order, then the work is finished. If the consumer does not work or the electrical fuse has blown again, then everything is more serious. It may be necessary to check the circuit or dismantle the consumer and check it.
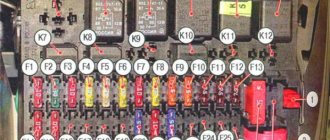
Layout of relays and electrical fuses
Explanation of the diagram shown in the photo.
The request returned an empty result.
Work with the block, which contains the element protecting the fuel pump and other elements responsible for the operation of the engine, is carried out in a similar way.
The request returned an empty result.
The protective element designed for 15 amperes, responsible for the fuel pump of the Lada Kalina, is designated F2 in the photo. To remove it, you need tweezers. All other work is carried out in the same way as in the large compartment.
Recommendations for use
- If you are a responsible car owner, then be sure to carry with you a set of electrical fuses of various ratings. Perhaps they will help you out at some point.
- Under no circumstances should you install wires or bugs. This can lead not only to failure of the electrical consumer, but also to a fire.
- Replacement only with an element of the same value is acceptable.
- Before work, do not forget to turn off the power to the system.
Sorry, there are no surveys available at this time.
Common faults
Like any other electromechanical device, the Priora cigarette lighter tends to break. Sometimes this can be caused by design defects, sometimes by malfunctions in the machine's on-board circuit, and sometimes by the fault of the user himself. Common cigarette lighter malfunctions include:
- sinking of those same bimetallic “ears”;
- burnout of the spiral;
- broken contact in the connector;
- fuse blown.
Malfunctions can also include the burnout of a backlight lamp, however, this is more related to a decrease in the level of comfort than to serious breakdowns. In addition, it does not in any way affect the operation of the device itself and can be easily eliminated by replacing the lamp.
The sinking of the lugs is characterized by the lack of fixation of the cartridge in the pressed position. It can be caused either by the low quality of the metal from which they are made, i.e. defect, or high intensity or long period of use of the cigarette lighter.
The problem is solved by bending the “ears” inward using a thin screwdriver, naturally after de-energizing the on-board circuit. If after a short period of use the problem occurs again, it is better to replace the cigarette lighter.
When the spiral burns out, the cartridge is fixed when pressed, but does not heat up. The fault is diagnosed by ringing it using a car tester. It is not recommended to restore the spiral, as this may lead to a decrease in its resistance, which will make unwanted adjustments to the operation of the on-board circuit. In this case, the cigarette lighter also needs to be replaced.
Contact failure can be easily determined by removing the tunnel lining and checking the condition of the connector. This malfunction is not critical and can be fixed independently in a few minutes.
But as for the fuse, it makes sense to consider this malfunction separately, since its malfunction is most often caused by the human factor.
Removal and installation of VAZ (Lada) Kalina 1117 mounting blocks
Tool:
- Medium Phillips screwdriver
- Small tweezers
- Large tweezers
Note:
The relay and fuse mounting block is located in the instrument panel under the cover, to the left of the steering column. The cover contains a control unit for external lighting, instrument lighting and a regulator for the direction of headlight beams.
1. To access the mounting block, we pry the instrument panel cover by the lugs on the left and right sides.
2. We lower the lid.
3. The sockets for fuses and relays are marked on the body of the mounting block, and on the inside of the cover there is a diagram of the location and the purpose of the fuses and relays.
Principle of operation
When voltage is applied to the starter by turning the key in the car's ignition switch, current flows simultaneously to the solenoid relay and the starter itself. The starter begins to rotate, and at this moment the solenoid relay moves the moving part of the bendix to the engine flywheel, thereby starting to rotate the engine by the crown on the flywheel, after which the engine starts, the ignition key is released, the current on the starter and solenoid relay disappears, thereby stopping the starter and moving the bendix away from the flywheel.
Kalina mounting block (fuse box)
Electrical problems with the Lada Kalina occur just like with any other car. Finding out the causes of malfunctions is usually done by checking fuses and relays.
Mounting block Lada Kalina
The relay and fuse mounting block is located to the left of the steering column on the instrument panel.
Before replacing relays or fuses, be sure to disconnect the negative terminal of the battery.
Lada Kalina mounting block fuses
Fuse designation
(rated current. A) – Protected elements
F1(10) – Immobilizer, warning lights and arrow indicators of the instrument cluster, switch circuits and reverse lamps, direction indicator circuits F2 (30) – Electric window circuits F3 (10) – Hazard alarm circuits F4 (20) – Windshield wiper, rear window defroster switch circuit F5 (25) – Heater motor, electric power steering control unit, windshield washer F6 (20) – Horn F7 (10) – Instrument cluster LCD indicator, brake light switch and lamps, interior lighting F8 (20) – Rear window heating element F9 (5) – Side light bulbs in the right block headlight and right flashlight, glove compartment light bulb F10 (5) – Side light bulbs in the left block headlight and left flashlight, outside light indicator in the instrument cluster, license plate lamps F11 (7.5) – Chains of fog light lamps in the rear lights F12 (7.5) – Low beam lamp (right headlight), right headlight leveling motor gearbox F13 (7.5) – Low beam lamp (left headlight unit), light control gear motor of the left headlight unit F14 (10) – High beam lamp (right headlight unit), high beam headlight indicator in the instrument cluster F15 (10) – High beam lamp (left headlight) F16, 17 (10) – Fog lamps (optional) F18 (15) – Seat heating elements (optional) F19 (10) – ABS electrical circuits (optional) F20 (15) – Cigarette lighter heating element F21 (10) – Transmission reverse lock circuit F22 (15) – Security alarm control unit F23 – Reserve F24 – Reserve F25 – Reserve F26 (25) – ABS electrical circuits (optional) F27 (5) – Spare F28 (7.5 ) – Spare F29 (10) – Spare F30 (20) – Spare F31 (50) – Electric power steering
Note that in the previous article we looked at why the stove on a Priora does not work and how to repair it with your own hands.
Mounting block relay
Designation
– Name – Powered consumers
K1 (optional)
– Headlight washer relay – Headlight washer electric motor
K2
– Window lift relay – Window lift motors
KZ
– Starter relay – Starter traction relay
K4
– Additional relay – Switch and winding of the rear window heating relay, switch heater electric motor, windshield wiper and washer switch
K5
– Turn signal and hazard warning lamp relay – Turn signal and hazard warning lamps
K6
– Windshield wiper relay – Windshield wiper motor
K7
– High beam headlight relay – High beam lamp unit - headlights
K8
– Horn relay – Horn
K9 (optional)
– Fog lamp relay – Fog lamps
K10
– Rear window heating relay – Rear window heating element
K11 (optional)
– Seat heating relay – Seat heating elements
K12 (reserve)
–
How to remove and replace the cigarette lighter on a Lada Granta: photos and saw - Behind the wheel
22.10.2019
In this article we will analyze the reasons for the malfunction of the cigarette lighter on Kalina, as well as its diagnosis and replacement.
For smoking motorists and passengers, the cigarette lighter is a very important thing in the car, but it can also serve as power for the car compressor, power strip or charger.
If you find that your cigarette lighter has stopped working, there may be several reasons for this.
Why doesn't the cigarette lighter work?
Perhaps the fuse was blown due to too much load from the compressor, charger or cigarette lighter splitter. This is one of the most common and easily fixed problems. You will need to open the fuse compartment cover to the left of the steering wheel and replace the blown one. Typically used before. 15 or 20A regular flag.
Another common reason for the cigarette lighter not to work is the unbending of the metal contacts inside it. For example, you often use a charger or power strip.
Because of this, the contacts inside the cigarette lighter are unbent. In order for it to work again, you just need to bend them.
This must be done carefully using a thin flat-head screwdriver without shorting the contacts, otherwise the fuse will be blown out.
If you decide to completely replace the cigarette lighter, you will need to dismantle the console from the handbrake to the dashboard with the gearbox casing, only then can you remove the cigarette lighter.
Replacing the cigarette lighter yourself
- Using a Phillips screwdriver, unscrew the 3 screws securing the plastic trim of the handbrake, then remove it and put it aside.
- Now, in order to get to the self-tapping screw securing the plastic console with the gearshift knob, you will need to unscrew the handbrake end switch.
- After this, you can freely unscrew all the screws securing the floor tunnel and the side part.
- Next, carefully remove it from the latches and pull out the gearshift knob casing and lift the tunnel.
We disconnect the block with a wire from the cigarette lighter and pull it out of the seat.
Now all that remains is to replace the cigarette lighter with a new one and reassemble in the reverse order.
You can make the replacement easier by removing only the gearbox cover and prying the cigarette lighter through the hole. This way we will save time.
How to replace the cigarette lighter lamp
- After we have removed the cigarette lighter, we will disassemble it and replace the backlight lamp, if one is burnt out.
- Removing the metal base of the cigarette lighter
- We take out the green housing of the cigarette lighter, from which we remove the lamp socket
- Carefully remove the A12-8 lamp from the socket and replace it.
- Exactly the same lamps are used to illuminate the buttons and dashboard.
Replacing fuses on a Lada Granta car
≡ 5 November 2022 Category: Repair
The Lada Granta car has two mounting blocks: the first is located in the cabin and protects almost all electrical circuits of the car, except for the power ones; they are protected by the fuses of the power unit, which is located under the hood.
Let's consider replacing the fuses in the cabin unit.
Firstly, experts recommend disconnecting the negative terminal of the battery whenever tampering with the car’s electrical equipment. Then you need to remove the cover on the instrument panel, it is located near the headlight control unit. No special tools are required here, you just need to gently pull the upper left part of the cover with your hand and remove it from the latches one by one:
In the Norma and Luxury trim levels, below the headlight control unit there is a trunk opening button; when removing the cover, you need to carefully disconnect it from the plug:
So, the cover is removed, you can proceed directly to replacing the fuses.
The mounting block looks like this:
Location of the main fuse block
The main fuse and relay block of the Lada Kalina is located under the left panel of the steering wheel, where the main light switch is located.
In order to gain access to the main fuse panel of the Lada Kalina, you need to do a number of manipulations:
- On the closing panel, on the left and right, there are grooves that need to be pulled alternately. Also below. This operation should be done carefully so as not to break the plastic fasteners.
Gently pull and remove from the grooves
Gained access to the fuse box
Thus, the fuses and relays of the main unit of the Lada Kalina, as well as the control board, are changed.
Location of additional fuse box
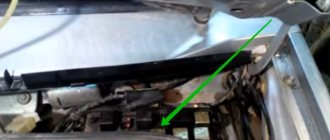
The additional fuse box is marked with an arrow in the photo.
The additional relay and fuse box for the Lada Kalina is located to the right of the front passenger's feet. It can be accessed by unscrewing the cover bolts and removing it. In order to dismantle this block, unscrew the 3 mounting bolts. The replacement process is carried out in the same way as with the main unit.
- fuel pump activation relay;
- cooling system electric fan fuse (50A);
- cooling system electric fan relay (low speed);
- main relay;
- cooling system fan relay high speed).
Diagram and marking of fuses and their replacement
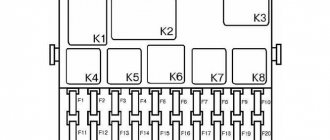
If you turn over the cover of the Lada Kalina fuse box, you can see the markings and which fuse and relay are responsible for what. Also, it can be seen in the vehicle’s service and technical book.
Fuse box diagram
Let us indicate and decipher the fuse number, amperage and what it is responsible for:
F1 - (10) - Instruments: immobilizer control unit, hazard warning switch, instrument cluster. If, when starting the engine, the starter does not turn and the immobilizer icon flashes, then you need to pay attention to this fuse. F2 — (30) — Electric windows. Read more about why window lifts may not work here. F3 - (10) - Hazard warning switch F4 - (20) - Windshield wiper F5 - (25) - Heater, electric power steering control unit F6 - (20) - Horn F7 - (10) - Instrument cluster, interior lighting F8 - (20 ) — Heated rear window F9 — (5) — Side light (right side) F10 — (5) — Side light (left side) F11 — (7.5) — Immobilizer control unit F12 — (7.5) — Low beam (starboard side) F13 — (7.5) — Low beam (left side) F14 — (10) — High beam (starboard side) F15 — (10) — High beam (left side) F16.17 — (10) — Fog lights F18 — (15) — Heated seats F19 — (10) — ABS F20 — (15) — Cigarette lighter F21 — (10) — Reverse lock F22 — (15) — Electrical package control unit F31 — (50) — Control unit electric booster
Relay layout in the mounting block
Also, relays are installed on the fuse block. Let's give them a breakdown according to numbering:
K1 - headlight washer relay; K2 - power window circuit activation relay; KZ - starter activation relay; K4 - additional relay (ignition relay); K5 - relay for turning on direction indicators and hazard warning lights; KB - relay for turning on the windshield washer and wiper; K7 - headlight high beam relay; K8 - relay for turning on the sound signal; K9 - relay for turning on the front fog lights; K10 — relay for turning on the heated rear window; K11 — relay for turning on the front seat heating circuit; K12 - backup relay.
Replacing fuses and relays
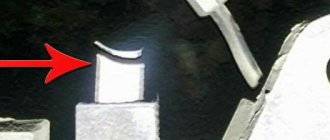
Replacement of fuses and relays is carried out using special tweezers. They are in the photo below, marked with an arrow.
List of contact relays
If we open the main fuse box of Kalina 2, we will see a set of electrical relay housings. There are no other blocks containing relays in the car. We list the elements used in the “Lux” package (21927/21947):
- K1: radiator fan relay;
- K2: relay switching on door locks;
- K3: additional starter relay;
- K4: additional relay (switches current 50A);
- K6: wiper relay;
- K7: relay that turns on the high beam;
- K8: signal relay;
- K9: relay that turns on the low beam;
- K10: rear window heater relay;
- K11: main ignition relay;
- K12: relay turning on the fuel pump;
- K13: additional relay;
- K14: radiator fan relay 3;
- K15: windshield heater relay 1;
- K16: windshield heater relay 2;
- K17: relay that turns on the air conditioning compressor.
The pliers that you will find in the Kalina 2 fuse box will be of two types. “Large” ones are intended for dismantling relays K1-K6, as well as K13-K17.
You can compare the layout of elements in “Lux” and in “Norm/Standard”:
Location of the main fuse block
The main fuse and relay block of the Lada Kalina is located under the left panel of the steering wheel, where the main light switch is located.
In order to gain access to the main fuse panel of the Lada Kalina, you need to do a number of manipulations:
- On the closing panel, on the left and right, there are grooves that need to be pulled alternately. Also below. This operation should be done carefully so as not to break the plastic fasteners.
Gently pull and remove from the grooves
Gained access to the fuse box
Thus, the fuses and relays of the main unit of the Lada Kalina, as well as the control board, are changed.
Location of additional fuse box
The additional fuse box is marked with an arrow in the photo.
The additional relay and fuse box for the Lada Kalina is located to the right of the front passenger's feet. It can be accessed by unscrewing the cover bolts and removing it. In order to dismantle this block, unscrew the 3 mounting bolts. The replacement process is carried out in the same way as with the main unit.
- fuel pump activation relay;
- cooling system electric fan fuse (50A);
- cooling system electric fan relay (low speed);
- main relay;
- cooling system fan relay high speed).
Diagram and marking of fuses and their replacement
If you turn over the cover of the Lada Kalina fuse box, you can see the markings and which fuse and relay are responsible for what. Also, it can be seen in the vehicle’s service and technical book.
Fuse box diagram
Let us indicate and decipher the fuse number, amperage and what it is responsible for:
F1 - (10) - Instruments: immobilizer control unit, hazard warning switch, instrument cluster. If, when starting the engine, the starter does not turn and the immobilizer icon flashes, then you need to pay attention to this fuse. F2 — (30) — Electric windows. Read more about why window lifts may not work here. F3 - (10) - Hazard warning switch F4 - (20) - Windshield wiper F5 - (25) - Heater, electric power steering control unit F6 - (20) - Horn F7 - (10) - Instrument cluster, interior lighting F8 - (20 ) — Heated rear window F9 — (5) — Side light (right side) F10 — (5) — Side light (left side) F11 — (7.5) — Immobilizer control unit F12 — (7.5) — Low beam (starboard side) F13 — (7.5) — Low beam (left side) F14 — (10) — High beam (starboard side) F15 — (10) — High beam (left side) F16.17 — (10) — Fog lights F18 — (15) — Heated seats F19 — (10) — ABS F20 — (15) — Cigarette lighter F21 — (10) — Reverse lock F22 — (15) — Electrical package control unit F31 — (50) — Control unit electric booster
Relay layout in the mounting block
Also, relays are installed on the fuse block. Let's give them a breakdown according to numbering:
K1 - headlight washer relay; K2 - power window circuit activation relay; KZ - starter activation relay; K4 - additional relay (ignition relay); K5 - relay for turning on direction indicators and hazard warning lights; KB - relay for turning on the windshield washer and wiper; K7 - headlight high beam relay; K8 - relay for turning on the sound signal; K9 - relay for turning on the front fog lights; K10 — relay for turning on the heated rear window; K11 — relay for turning on the front seat heating circuit; K12 - backup relay.
Replacing fuses and relays
Replacement of fuses and relays is carried out using special tweezers. They are in the photo below, marked with an arrow.
Arrows indicate tweezers
How to start a car without a starter
If the starter on your car is faulty or the battery is dead, then the car can be started in other ways.
You can try to start the car from a tow, from a hill, etc. turning on the ignition and second gear, this method is relevant for both a dead battery and a broken starter. These manipulations can only be performed with a manual transmission.
If the starter rotates but does not turn the engine, then the solenoid relay is most likely faulty. With such a malfunction, the engine can be started quite simply, just turn on the ignition and bridge the contacts on the solenoid relay, as shown in the picture, and the engine will start.
