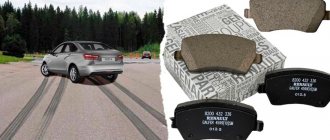
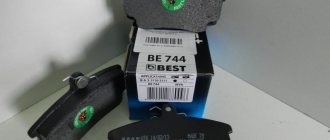
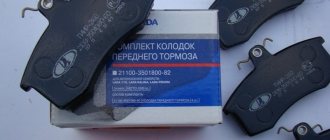
The pads also need to be replaced if the linings are oily, have deep grooves and chips on them, or if the linings are detached from the base of the pads.
We carry out the work on a flat area, inspection ditch or overpass.
Attention!
The brake pads of the rear wheels must be replaced as a set - all four pads. Replacing the pads of only one brake mechanism can lead to the car pulling to the side when braking.
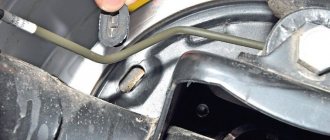
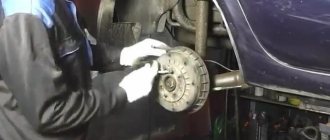
We show replacing the pads on the right rear wheel. Before removing the brake drum, lower the parking cable lever all the way - the car must be released.
We remove the rear wheel and securely fix the car on a factory-made support stand.
To remove the drum, the pads must be brought together.
2283-14-03-01
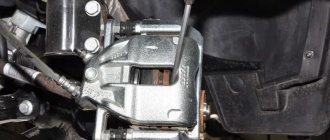
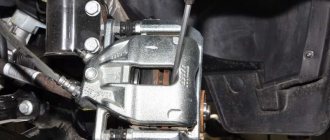
To do this, use a slotted screwdriver to rotate the ratcheting nut of the mechanism for automatically adjusting the gap between the pads and the drum through the threaded hole in the brake drum, thereby reducing the length of the spacer bar.
To do this, use a slotted screwdriver to rotate the ratcheting nut of the mechanism for automatically adjusting the gap between the pads and the drum through the threaded hole in the brake drum, thereby reducing the length of the spacer bar.
Device
The unit consists of the following parts:
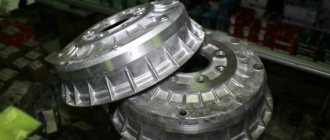
- The Lada Vesta brake drum with a bearing and an ABS ring is mounted on the rear pillar axle. The body of the part has four threaded holes for fastening the wheel. It has a cylindrical shape and is cast from cast iron. The inner surface is carefully processed to eliminate roughness.
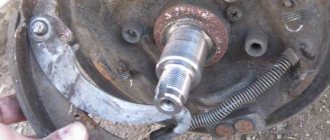
- The pads are semicircular in shape, with a diameter 2 mm smaller relative to the inner diameter of the drum. Friction linings are attached to the outer sides. The upper part of the pads is connected to the brake cylinder, and the lower part touches the mechanical stop.
- The cylinder has two pistons that extend in opposite directions.
- The ABS system contains 2 elements - a speed sensor and an impulse rotor (a metal toothed ring). The sensor is attached to the wheel stand guard. The rotor is pressed onto the outside of the drum bearing.
- The spacer bar consists of a threaded rod that screws into a hollow tube. A ratchet wheel is pressed onto the surface of the tube.
- The upper coil spring returns the pads to their original state after removing the force from the brake pedal. The lower spring maintains constant pressure on the lower ends of the pads against the stopper.
Photo source: https://www.drive2.com/l/530431348347765662/
Knowing the design of the node, you can understand the causes of its problems and quickly fix them.
DSC_9324
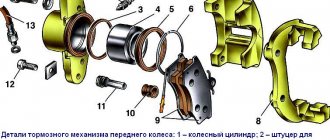
Elements of the rear wheel brake mechanism.
Elements of the rear wheel brake mechanism.
The mechanism for automatically adjusting the gap between the shoes and the drum is made in the form of a composite spacer bar.
When you press the brake pedal, under the action of the pistons of the wheel cylinder, the pads begin to diverge and press against the drum, while the protrusion of the adjuster lever moves along the cavity between the teeth of the ratchet nut. When the pads are worn to a certain level and the brake pedal is pressed, the adjuster lever has enough travel to turn the ratchet nut by one tooth, thereby increasing the length of the spacer bar and at the same time reducing the gap between the pads and the drum. Thus, the gradual lengthening of the spacer bar automatically maintains the gap between the brake drum and the shoes. The same system maintains the parking brake in constantly working condition without any adjustments.
Common problems
When using the pads, some problems arise. To check, you need to remove the rear pads on the Vesta and carefully examine them. By the appearance of the elements you can determine how worn they are:
- uniform abrasion of the friction layer indicates uniform wear;
- severe wear of the layer and the visibility of brake rivets indicate an excessively long service life;
- greater erasure of one of the sides of the circle indicates an incorrect distribution of force for braking one of the parts;
- the appearance of irregularities on the surface is a sign of a malfunction of the caliper guide pins.
- Uneven wear of the layer may indicate incorrect installation of parts; they should be replaced.
Other signs appear when moving. Usually, by sound, a car owner can understand that a particular part requires either replacement or major repairs.
Main signals about problems:
- A squeaking noise when braking occurs when the pad and disc are not mated correctly. This happens when installing an analogue or when dirt gets between the moving elements.
- The appearance of vibration at speed also indicates that the installed parts do not fit the discs.
DSC_9301
The spacer bar is a rather complex mechanism, which, if the elements are damaged or significantly corroded, is best replaced.
If the condition of the spacer bar is satisfactory, then it should be washed in any solvent and a thin layer of grease should be applied to the threads. The spacer bar is a rather complex mechanism, which, if the elements are damaged or significantly corroded, is best replaced. If the condition of the spacer bar is satisfactory, then it should be washed in any solvent and a thin layer of grease should be applied to the threads.
Signs of pad wear
Before each vehicle departure, check the amount of fluid in the brake system reservoir. The level must be above the min mark. If it is lower, this is one of the signs of abrasion.
Another sign is that the pedal softens at first and then drops. The distance from pressing the pedal to stopping the car increases noticeably.
When the linings of one of the wheels wear below a critical value, the car can be felt skidding in the opposite direction.
If such signs, knocks and squeaks are detected, the pads are inspected. Check whether their wear has reached the limit values. For overlays the thickness limit is 2 mm. The maximum size of the drum rubbing surface is 204.45 mm.
DSC_9303
Before assembly, completely screw in the rear end of the spacer bar so that its length becomes minimal.
Before assembly, completely screw in the rear end of the spacer bar so that its length becomes minimal.
Install new rear wheel brake pads in reverse order.
Before installing the brake drum, clean its working surface with a wire brush to remove dirt and wear products from the pads.
When do you need to change the rear brake pads on Vesta?
The ability to minimize the braking distance depends on the quality of the brake discs. Rear pads are either disc or drum, depending on the Lada Vesta model. It is important that the selected products are of the same type and manufacturer.
According to the manufacturer's recommendations, the rear pads must be replaced every 15 thousand km. However, there are a number of reasons to carry out the procedure immediately:
- reducing braking speed;
- depressurization of the brake circuit;
- oiling of linings;
- the appearance of extraneous sounds: grinding and creaking;
- indicator light on the instrument panel;
- the appearance of deep chips and grooves on the product;
- overheating of the disk and hub.
Any of the factors may indicate wear of the brake elements.
DSC_9261 (Copy)
When cleaning the brake drum, be careful with the ABS sensor reference ring.
When cleaning the brake drum, be careful with the ABS sensor reference ring.
After installing the brake drum, tighten the hub bearing nut to the prescribed torque of 175 N∙m.
It is advisable to install a new self-locking nut. On the left wheel this requirement is more critical than on the right.
Similarly, we replace the brake pads of the right wheel.
We check the brake fluid level in the hydraulic drive system reservoir and, if necessary, bring it to normal.
To adjust the position of the brake pads, press the brake pedal several times. We hold it down and then raise and lower the parking brake (when moving the lever, you must keep the parking brake release button on the lever depressed at all times so that the ratchet mechanism does not work). In this case, clicks will be heard in the brake mechanisms of the rear wheels from the operation of the mechanism for automatically adjusting the gaps between the pads and brake drums. We raise and lower the parking brake lever until the clicking in the brake mechanisms stops.
If necessary, adjust the parking brake.
What rear pads should I put on the Lada Vesta?
When purchasing a set of parts, you should not chase cheaper options. The quality of products in many cases decides the issue of driver safety on the road. It is better to purchase the necessary parts for Lada Vesta from a trusted supplier.
There is a list of verified products with article numbers that fit the Lada Vesta. However, the selection largely depends on the type of pads.
On Lada Vesta with a 1.6 liter engine, drum-type brake pads are usually installed. It is believed that they last longer than disk ones. The average service life of such products is 100 thousand km, and in some cases exceeds the specified mileage. Original versions (article 8450076668) from the manufacturer are expensive, which is why it can be difficult to find them on sale. Therefore, analogues are used for replacement:
- BP53168 - manufacturer Fenox;
- BS-5717 - Japanese company Lynx.
In some cases, similar spare parts from Ford Fusion are used, but they are usually modified. Only a master can do this on his own. It is better to choose options that do not require additional adjustment.
For the 1.8 liter Lada engine, disc options are usually chosen. The following models are suitable:
- Blue Print (ADN142117);
- Brembo (P56086, P59050);
- Delphi (LP1865);
- Ferodo (FDB4069);
- Hi-Q (SP1564);
- Renault (410608481R);
- Bosch (0986494160).
Before purchasing, you should make sure that the parts fit perfectly both in size and according to technical regulations.
Discs are a good alternative
On the Lada Vesta sedan, rear disc brakes will be installed in three cases:
- If it is a Vesta Sport sedan;
- If we are talking about a concept;
- If the car was prepared for WTCC racing, and the preparation was carried out by LADA Sport.
Photos for each case are presented below.
It turns out that you can install disks
WTCC sports cars do not have ABS systems, and in general we are not talking about road cars. The first two cases are closer to reality. Conclusion: you can install disks, the question is why.
Instructions for replacing the brake drum
You can entrust the replacement of the brake drum to a car service center, but you can also do it yourself if you have the necessary skills. In addition to reliable hands, we will need some more tools and devices.
Required tools and supplies
Before starting repair work, you should stock up on:
- Knife, screwdriver, thick screwdriver, chisel, hammer. That's all for removing the hub plug.
- Hex head 30.
- Collar.
- Extension.
- Torque wrench.
- Balloon wrench.
- Jack.
- Three-legged puller 67.7823-9519.
- Cord brush.
- Rags.
- Solvent, rust converter.
- Wheel chocks.
- Retaining ring remover.
Removing the drum from the hub
In order to remove the brake drum, you must perform the following steps:
- Place the vehicle on a smooth, horizontal surface.
- Secure the machine using stops. It is most effective to install stops under the wheel located diagonally to the raised one (for example, for the raised rear right one, this is the front left one).
- Install the jack.
- Strip the bolts, but do not unscrew them. For now they should press the wheel tightly.
- Hang up the wheel. It is safer to repair the car by placing it on a special rack. Don't settle for a wobbly jack.
- Check the condition of the bearing by spinning the wheel. A faulty bearing may hum. Check wheel play. If a hum is heard or the bearing is loose, it must be replaced.
- Remove the hub nut cap. To do this, you may first need to use a thin screwdriver, or even a knife. Then you should move on to a thicker tool. A chisel sharpened at the optimal angle allows you to quickly knock off a tightly seated cap.
- Unscrew the hub nut after cleaning the axle threads.
- Remove the drum assembly with bearing. If its inner ring is “soured” on the axle, then a puller will be needed.
Comments
TOP materials of the week
TOP products in the store
Are you satisfied with the standard low beam of the Lada Vesta?
Lada.Online
- about the project
- ·
- Rules
- ·
- Confidential Policy
- ·
- Contacts
- ·
- mobile version
- ·
- LADA concepts
- ·
Lada (“Lada”) is a brand of cars produced by JSC AVTOVAZ. Previously, it was used only for export cars, and for the domestic market, cars were produced under the Zhiguli brand. In 2004, the management of AVTOVAZ announced the transition to the Latin alphabet for the official spelling of the names of all cars produced by the plant: Lada - instead of "VAZ" and "Lada".
Lada.Online is the largest Russian-language automotive resource with a daily audience of thousands, which is dedicated primarily to cars of this brand, the domestic automotive industry and the automotive world in general.
This site is not the official LADA website.
© 2022 Lada.Online. Copying of material is permitted only with a link to the source.
Don't delay repairs
Untimely replacement of components leads to accelerated wear and failure of new components. Thus, a handbrake cable that was not replaced in due time holds the shoe close to the drum.
When the lining wears off, the iron block damages the surface of the drum very quickly. After installing a new spare part, such a drum begins to intensively destroy the lining. A faulty block kills the drum, and vice versa.
But it's not just about wear and tear and increased repair costs. When iron rubs against iron, the braking distance increases, and the uneven distribution of braking forces leads to a deviation from straightness. Driving with faulty brakes is dangerous.
