Failure of any element of the brake system can lead to very serious consequences. The rear brake pads of LADA “Kalina” are precisely such consumables that affect safety. Therefore, they require regular monitoring of their condition throughout the entire period of operation of the vehicle. In case of wear or detection of problems and defects, immediate replacement of the Kalina rear brake pads is necessary. You can do this yourself or contact the service center specialists. If you choose the first option, you first need to know how to change the rear pads on a Kalina.
When to change the rear pads of LADA “Kalina”
The peculiarity of the LADA Kalina braking system is that when braking, the load is distributed unevenly and most of the kinetic energy is absorbed by the front brakes. Therefore, replacing the rear Kalina pads is done 2-3 times less often than the front ones. To find out when it’s time to change the pads, it’s useless to rely on the Kalina’s odometer readings. The number of kilometers a car travels between pad replacements can vary by half. The rate of their wear is influenced by many factors, some of which cannot be controlled and taken into account:
- driving style (during aggressive driving with frequent sharp acceleration and braking, the pads can wear out several times faster than during calm, smooth driving);
- quality of friction linings (counterfeits or pads from cheap brands last much less); the condition of the rear brake drums (if they have uneven wear or ellipticity, the wear rate of the pads increases greatly);
- exposure to external factors (chemicals that are sprinkled on the road surface in winter, other active substances that get on the friction linings).
Under normal conditions, the Kalina rear pads are replaced after 50-60 thousand kilometers. But you need to focus not on mileage, but on the thickness of the friction linings. If they are chipped, peeling, or become thinner than one and a half millimeters, they must be immediately replaced with new ones. Otherwise, damage to the brake drum or leakage of brake fluid may occur (if the linings are thin, the pistons may completely come out of the brake cylinders, which will cause depressurization of the circuit).
Replacement of brake pads for rear wheels of Lada Kalina
Tool:
- Driver for socket attachment
- Knob attachment 10 mm
- Knob attachment 13 mm
- 7mm wrench attachment
- Knob attachment E-8
- Open-end wrench 13 mm
- Wheel key
- Rubber hammer
- Large hammer
- Mounting blade (2 pcs.)
- Medium flat screwdriver
- Pliers
- Jack
- Support stand
Parts and consumables:
- Wood block
- Brake pads (4 pcs.)
- Cord - 0.5 m
Notes:
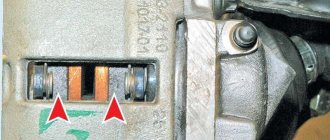
The degree of wear of the brake pads of the rear wheel is assessed by the condition of the front pad, which wears out faster than the rear one.
For this purpose, an inspection window is made in the brake mechanism shield, closed with a rubber plug.
By removing the plug, you can assess the degree of wear of the front brake pad.
If the lining thickness is less than 1.5 mm, the brake pads of both wheels must be replaced. The pads also need to be replaced if the linings are oily, have deep grooves and chips on them, or if the linings are detached from the base of the pads.
Warning:
The brake pads of the rear wheels must be replaced only as a set - all four pads. Replacing the pads of only one brake mechanism can lead to the car pulling to the side when braking.
1. If the fluid level in the brake hydraulic reservoir is at the MAX mark, then before installing new pads, use a syringe or a rubber bulb to pump out some of the liquid from the reservoir so that when the pistons are recessed into the working cylinder of the brake mechanism, liquid does not flow out from under the reservoir cap. The parking brake lever must be lowered all the way (the car is released).
2. Using a 10mm socket, unscrew the four nuts securing the rear heat shield of the additional muffler.
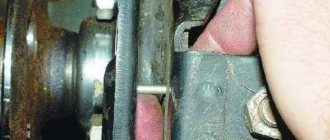
3. Remove the rubber cushion from the front suspension bracket of the additional muffler. We move the heat shield forward, opening access to the parking brake adjustment unit.
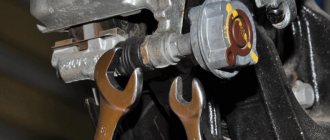
4. Holding the adjusting nut of the cable end with a 13mm wrench, use a head of the same size to unscrew the locknut. By rotating the adjusting nut counterclockwise, we release the cables.
5. We remove the rear wheel and securely fix the car on a factory-made support stand.
Note:
If the car is equipped with ABS, then the brake mechanism has some design differences, shown below.
Brake mechanism of the rear wheel of a car with ABS: 1 - brake mechanism shield; 2 - ABS sensor; 3 — front block; 4 — spacer bar; 5 — wheel cylinder; 6 — parking brake drive lever; 7 — rear block; 8 — ABS sensor master disk; 9 - brake drum.
6. On a vehicle equipped with ABS, the wheel speed sensor should be disconnected from the brake shield to prevent damage to the sensor. To do this, use the E-8 head to unscrew the sensor mounting screw.
7. We remove the sensor from the hole in the bracket, which is located on the brake mechanism shield. Below, all work is shown on a car without ABS. The differences will be written separately.
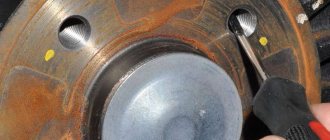
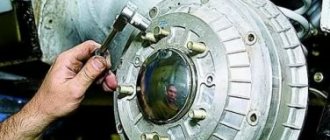
8. Using a socket wrench (preferably a hex head) “7” we unscrew the two guide pins of the wheel.
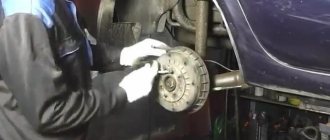
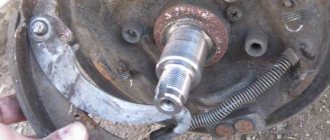
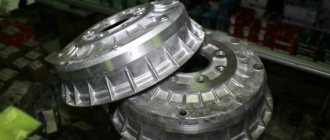
9. Remove the brake drum.
Warning:
After removing the drum, do not press the brake pedal as the pistons may come out of the cylinder completely.
10. If the drum cannot be removed, then, turning it evenly, use a hammer with a plastic tip (or an ordinary hammer through a wooden block) to strike the end of the drum.
11. By pressing on the pads and resting against the shoulder of the brake shield with two mounting blades, we recess the pistons inside the working cylinder.
12. Using a screwdriver, we remove the hook of the upper tension spring from engagement with the block.
13. We remove the spring.
14. We remove the upper stops of the pads from the slots of the cylinder pistons and remove the spacer bar.
15. Using a screwdriver, pry the hook of the lower tension spring out of engagement with the block.
16. We remove the spring.
17. Using a screwdriver, remove the pressure spring from engagement with the block.
18. Remove the front pad.
19. Having disconnected the pressure spring from the rear block, lower the block.
20. We remove the parking brake drive lever from the hole in the parking brake cable end.
21. Straighten the cotter pin and remove it from the hole in the parking brake lever pin.
22. Remove the washer from your finger.
23. Remove the lever and remove the finger.
24. Install the parking brake lever onto the new pad in the reverse order. Install new pads in reverse order.
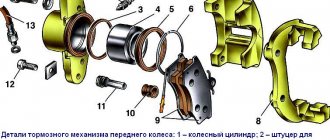
Elements of the rear wheel brake mechanism: 1 - front block of a car without ABS; 2 — front block of a car with ABS; 3 - spacer bar; 4 - upper tension spring; 5 - finger; 6 — washer; 7 - cotter pin; 8 — rear block of a car with ABS; 9 — rear block of a car without ABS; 10 — parking brake drive lever; 11 - lower tension spring.
Note:
To make it easier to assemble the pressure spring with the block, we hook a wire or cord about 0.5 m long to the hook of the spring.
While tensioning the spring, insert its hook into the hole in the block and then pull out the wire.
25. After replacing the pads on both wheels, the parking brake must be adjusted as described here.
The article is missing:
- Photo of the instrument
- Photos of parts and consumables
Source:
What is needed to replace the rear pads of LADA “Kalina”
If you decide to replace the Kalina rear pads yourself, you will need:
- wheel wrench;
- jack;
- keys for 7 and 12;
- slotted screwdriver;
- metal brush; pliers;
- a pair of M8 bolts for pressing out the brake disc (bolt length is about 70 mm);
- brake fluid;
- a rubber bulb or syringe to remove some of the brake fluid from the reservoir;
- a small container into which you can drain the brake fluid;
- two mounts;
- rubber hammer;
- WD-40;
- set of new rear pads.
Attention: replacement of rear Kalina pads is carried out only as a set, two on the right and left sides. You should never change pads “one at a time” or only on one side!
Tuning and improving the brake system on Lada Kalina
Some car enthusiasts remodel the brake system in order to improve the quality of braking and facilitate replacement, or, in short, they carry out tuning. There are two ways to make your brakes better and more reliable.
Option 1. Replacing the rear drum brakes with disc brakes from the Lada Kalina SPORT version.
Standard brakes on Lada Kalina in SPORT configuration
To do this, you will have to spend 9,500 rubles and buy parts, namely: rear wheel hubs, brake discs and pads. At the same time, braking during movement will improve, the brakes will respond faster and better. The holding of the vehicle on the parking brake will increase.
Option 2. Installing rear sports drums from or TRW. In this case, you will have to replace the brake pads from the same companies. This will improve braking performance and increase safety.
General Characteristics of Pad Problems
The most common problem with brake pads (see photo) is squeaking, and this sound can be produced even by a newly purchased car. This sound will continue for several days while the grinding process takes place. After this, the pads on the Lada Kalina car will work silently.
A layer of material can be erased much faster by braking sharply several times while driving. Therefore, accelerate the car to 90 km/h or more if you have a Lada Kalina Sport, and press the brake hard. The procedure must be repeated until the front or rear pads heat up to the required temperature and their excess parts burn out.
However, this does not happen all the time. If even after prolonged use they do not stop squeaking, you will have to replace them. Keep in mind that the brake does not always start to work poorly; in some cases it only causes negative sensations for the driver. You must immediately try to determine the cause of the sound.
Squeaking in the brakes can be caused by foreign moisture that gets inside when driving at high speeds, which happens quite often if you have a Lada Kalina Sport. In this case, clean the brakes and wait a few days before using the brakes again. In addition, the front and rear pads begin to squeak when the ambient temperature drops below zero.
Replacement timing
In the Lada Kalina model, many car enthusiasts note that the brake pads are too hard. It is recommended that immediately after purchasing a new car, you replace factory parts with products from other manufacturers . Such pads will not scratch the brake disc and will ensure reliable operation of the entire system. During operation, it is also necessary to periodically inspect parts. If the thickness of the rear pad is below 2 mm, it needs to be changed.
On average, parts of normal quality last for 2 years or 10-12 thousand kilometers. But with frequent movement in the city, they wear out faster. It is best to check the condition of these parts before and after the winter months, as well as if squeaking occurs during braking.
Which ones to choose
Today in auto shops and at the car market you can find pads for Kalina from dozens of manufacturers, some of which are either uncertified products or even fakes made in the nearest gateway.
It is better to buy brake pads in specialized stores, requiring a quality certificate for the purchased product. As for the manufacturer, it is better to give preference to original spare parts.
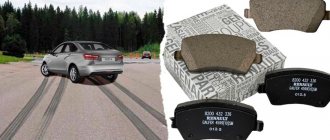
Front VAZ brake pads for Lada Kalina have catalog number 2110-3501080, and cost between 320-400 rubles. A good alternative for them are analogues from foreign companies such as Pilenga, ABS, Bosch, Ferodo, Master-Sport, Hella, Delphi and others.
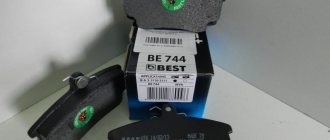
The original rear pads for Kalina are numbered 11180-3502090-55. Their cost is 500-650 rubles.
When is it necessary to change brake pads on a viburnum?
Of course, you don't have to change your pads every year. The manufacturer clearly establishes the mileage that factory products must run. Another thing is that each car enthusiast has a different driving style. Some people like active driving with frequent braking, while others prefer a quiet ride.
In the first case, replacing brake pads may be necessary much faster, for example, after 5-7 thousand kilometers. While with a quiet ride they can last twice as long. But that's not all.
It is advisable to change the pads in the following cases:
- When buying a car on the secondary market;
- when a strong, unremovable squeak appears during braking;
- with a friction pad thickness of less than one and a half millimeters.
To perform the replacement, prepare a group of necessary tools.
You will need:
- A jack to lift the car, remove the wheels and support the vehicle during the entire repair period;
- wheel wrench;
- a flat-head screwdriver, with which you can perform most operations;
- pliers;
- wrenches (socket and open-end). As for sizes, prepare products for “thirteen” and “seventeen”;
- wheel chocks or bricks that can be used to secure the car;
- a knob with a “thirtieth” and “seventh” head;
- clamp.
Replacement algorithm
The process of replacing brake pads on cars with and without ABS has only one difference . In cars with ABS, you should disconnect the wires from the sensors before starting work to avoid damaging them.
The replacement process is carried out in several stages:
- We install wedges under the front wheels.
- We lower the handbrake as much as possible, which will reduce the tension of the cable.
- Additionally, we loosen the handbrake cable by turning the adjusting bolt, accessible from the bottom of the car.
Pins on the diagram.
Tap the end evenly with a rubber hammer (or a regular one through a piece of wood).
After removing the drum, inspect the brake mechanism. Make sure there are no leaks from the brake cylinder.
The work of replacing the front brake pads of Lada Kalina takes place in several stages
We remove the wheel. We tear off the mounting bolts while the car is on the ground, then tighten the handbrake and put the gear shift knob in the first gear position. On the side where the pads will be replaced, the wheel must be hung
Other wheels are strengthened using wheel chocks (in extreme cases, bricks), which will eliminate the risk of spontaneous movement during work. It is important to install the jack correctly - if you make a mistake at this stage, you can simply overturn the car during the work or, in any case, damage its body. To make work easier, turn the steering wheel as far as possible, opening up free space for work.
Remove the brake fluid. This is best done using a special syringe. This must be done to prevent it from spilling directly onto you and the surrounding reality during the work.
Removing old brake pads.
Using a 13mm wrench, unscrew the bolt holding the caliper
Pliers and a screwdriver will help in bending the locking plate: in this case, you need to make sure that the nut does not turn (a 17mm wrench will help to hold the nut). We recess the brake piston a little (since old brake pads take up less space, the latter needs to be freed up for new pads). A clamp or, in its absence, an adjustable wrench will help here; After all, hand force may not be enough to press the piston.
You can do it a little differently: leave the pad on the inside, after which a screwdriver resting on the unused part of the disk (closer to the axis) can be used as a lever. By pulling the handle towards you, you can move the caliper (in relation to the brake disc), while simultaneously pressing the piston deeper.
Installation of new brake pads. We install the pads, lower the caliper, and use a bolt to secure the safety plate, which protects the bolt from loosening and unauthorized unscrewing. Align the steering wheel so that the wheels are aligned strictly in the direction of travel. We put the wheel in place and attach it to the mounting bolts. We tighten the bolts after the jack is lowered. Upon completion of the work, it is important not to forget to top up the brake fluid to the maximum level.
It should be remembered that replacing brake pads on only one side (for example, only on the left or only on the right) is not productive. Moreover, such a replacement can play a cruel joke on a motorist (especially an inexperienced one, but even a professional one), when the braking force is distributed unevenly across the wheels, and as a result, one side slows down more than the other, and the car skids.
Another important tip. Immediately after replacing the brake pads, you need to plan the operation of the car in such a way as to drive at least 200 kilometers in a brake-friendly mode. It is better to cover this distance without sharply pressing the brake pedal, and it is better to reduce the speed in advance, and use the capabilities of the car’s engine to do this.
Also read with this article:
Replacing the thermostat Lada Kalina
How to replace a bumper on a Lada Kalina with your own hands
Replacing the oil filter and oil in the Lada Kalina engine
Adjusting the speed sensor on Lada Kalina. Fast and easy
The main causes and signs of malfunction of the Lada Kalina hand brake
If, after stopping on a slope and putting the Kalina on the handbrake, you notice that the car begins to slowly roll away, you need to inspect and diagnose the parking brake system in the near future. Based on the inspection results, the existing mechanism should be adjusted or its faulty parts replaced.
Diagnostics is also necessary if, while driving, you hear the characteristic sounds of the brake drum rubbing against the pads from the rear wheels.
The reasons for the handbrake malfunction are as follows:
- Wear. This reason is the most common. "Kalina" is equipped with drum brakes, which are blocked by the handbrake - over time, the working surface of the brake pads and drum wears off, which leads to a malfunction.
- Driving with the parking brake lever raised. Even one such trip may be enough to wear out the pads.
- Replacing brake pads or drums without installing new handbrake settings. If the rear wheels of the car remain partially blocked after removing the handbrake, then most likely you just need to loosen the cable tension.
When to replace
Removing the instrument panel assembly with heater Lada Kalina
As in all other cars, replacing the rear brake pads on the Lada Kalina must be done after passing a certain number of km. The required mileage is indicated in the documents for the car, but in fact it varies.
Almost everything depends on the operation of the car, and if on some cars difficulties with the rear brakes arise after 50,000 km, then other car owners enjoy the ideal work of the iron stallion even after 70,000 km. Replacement of rear brake pads. Priora, Kalina. Replacement of rear brake pads with abs. Below we list signs that may indicate the need to replace the rear brake pads on your Kalina:
- deterioration of braking properties;
- when you press the brake pedal, a corresponding grinding noise may appear due to the friction of the iron part of the shoe on the brake drum (after the lining is abraded);
- severe thinning of the lining on the brake pad (as we said above, the acceptable thickness is 1.5 mm).
So, if you noticed one of the 2 signs listed above, or when disassembling the brakes, a third one was found - immediately buy new rear brake pads for yourself! Their cost is even lower than the cost of healing or repairing a car as a result of a tragedy, which can be caused by weak brakes. Detailed article about replacing rear brake pads on Lada Largus, pad part numbers
Next we will talk about how to replace this element on a Lada Kalina car.
Priora Replacing rear brake pads with ABS Priora. Replacing rear brake pads with (ABS). Replacing rear brake pads on Lada Kalina:
When purchasing rear brake pads, pay attention.
Replacement of rear brake pads. Priora, Kalina. Replacement of rear brake pads with abs.
We change the pads correctly!
So, to replace these components on Kalina we will need:
- Balloon key.
- Head for 7 with a knob.
- Pliers (it is advisable to have long-nose pliers on hand, they are more convenient).
- Flathead screwdriver.
- 30mm socket with a wrench (can be useful if you have to remove the brake drum with bearing by twisting the hub).
Step-by-step instructions for replacing rear brake pads on a Lada Kalina car look like this:
- First of all, you need to put the car in gear, install the stops and lift the car with a jack. Then tighten the bolts and remove the wheel.
- After the wheel is removed, the drum studs should be unscrewed. Replacing front brake pads on Lada Largus. For this we need a 7 head with a knob.
- Remove the brake drum. Replacing brake pads yourself. Video step-by-step instructions from the Auto Club b2motor.ru. On the site you can always find other videos on car repair. Underneath it, you need to find the cotter pin at the top and carefully remove it. Long nose pliers may come in handy here as the cotter pin is positioned awkwardly.
- Remove the lower spring. Self-replacement of brake pads on the rear wheels of Lada Largus. To do this, you need to pick up the fastener with pliers and pull it to the right.
- Remove the central retaining spring in the same way.
- After this, you can remove the right block. This can be done without even touching the upper spring; you just need to firmly grasp the block and pull it back, lifting it up until the fixing plate falls off.
- When the spring falls off, the pads are removed by hand. By disconnecting the central spring, you can also remove the left block with the handbrake lever.
- We replace the pads and reassemble in the reverse order.
In terms of time, replacing pads on one wheel takes about 1-1.5 hours, if you have all the necessary tools at hand. Replacing rear brake pads on Kalina with video. In order for the replacement of rear brake pads on a Lada Largus car to be successful, you need a clear understanding of the structure of the brake unit, both as a whole and its individual components. The procedure is quite simple, the main thing is to follow the step-by-step instructions, and then the replacement will be done quickly and easily.
If some points remain unclear to you, you can watch the video instructions for replacing these components. Remember, brake pads must be replaced on both wheels at once, then you will be able to achieve excellent braking in any situation.
Article number and estimated cost of original front pads
The first generation Lada Kalina was equipped with brake disc pads with article numbers 21100-3501080-01 and 21100-3501080-00. Their price ranges from 460 to 500 rubles. The service life of the pads depends on the driving style and for most car owners it is 35-45 thousand km.
New brake pads have been developed for Lada Kalina 2. Their article number is 11180-3501080-00, and the price is 260-290 rubles. Consumables are not interchangeable with products for Kalina 1. Their service life can reach 60-70 thousand km, but usually replacement is required at 40 thousand km. The same pads are installed on the Lada Kalina Cross.
Features of replacement on a car with ABS (ABS)
When installing pads on a Lada Kalina with an anti-lock braking system (ABS) installed, it is important to take into account several nuances.
- Before starting the replacement, you will need to tighten the ABS sensor so as not to damage it when removing the old pads. The sensor is mounted on one screw, which can only be unscrewed using a deep E8 star-head.
- When removing the brake drum from the mount, you should be careful, since there is a built-in ABS sensor disc underneath it. Damage to the disc may cause the braking system to malfunction.
Article on the topic: What to do if the engine breaks down?