Brake pads are a working element of the brake system, which slows down the speed of rotation of the wheels by braking torque due to friction against the surface of the wheel or brake disc. Replacing brake pads is not a complicated procedure and can be done even by a novice car enthusiast, even without experience in such a procedure.
Each part of the car has its own working life, which decreases over time. The wear of brake pads depends on many factors and in each individual case the brake pads will have to be replaced after a different time.
Working principle of brake pads
This mechanism is attached to the central part of the wheel, called the hub, and is something between the wheel itself and the hub. This arrangement allows the blocks to perform their function of reducing vehicle speed. Disc-type mechanisms are located on the front of the rotating axis, while drum-type mechanisms are located at the rear.
The drum mechanism acts on the pads, maintaining them in a compressed state, which is achieved thanks to two special springs. The upper part of the pads fits into the grooves of the brake cylinder, while the lower part fits into the hub.
- When you press the brake pedal, pressure appears on the pistons, which leave the cylinder.
- They push the pads, overcoming the resistance provided by two springs.
- Due to the friction that occurs between the drum and the pads, the drum slows down, which in turn leads to a decrease in the rotation speed of the wheel.
- The more pressure on the brake pedal, the more intense the friction, and the faster the speed drops.
When working with disk-type mechanisms, a slightly different operating principle is observed.
Diagnosis of brake pad wear
As you already understand, brake pads are the main element in the braking system. And they are the ones who ensure the safety of the car while driving. However, like any other spare part, they have to be changed from time to time.
Due to frequent interaction with other parts that are located too close to them (drum, disk), friction occurs between them and special friction linings. The latter, in turn, wear out, and there is a need to replace them.
To determine the degree of brake pad wear, pay attention to the following signs:
- While braking and until the vehicle comes to a complete stop, you hear a high-pitched squealing sound. It is this that indicates that the surface of the linings has completely worn out. Consequently, the drum is now in direct contact with the metal.
- If you notice that your vehicle starts to brake too hard or takes a long time to slow down, this also indicates that there is empty space between the worn out linings and the drum. Moreover, you need to apply much more effort when pressing the gas pedal. Additional effort when pressing provokes a slowdown in the braking process. In the case of a complete absence of friction linings, braking will be harsh, since the friction between the pad and the disc will increase. This, in turn, will cause damage to the drum or disc itself.
- If you notice a vibration in the brake pedal, this is also a sign of a problem. This is explained by the fact that the pads are worn unevenly.
If you notice at least one of the above signs, do not delay repairs.
Difficulties in selecting parts
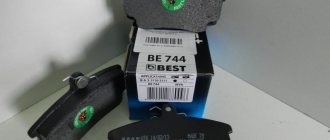
Before you begin replacement, you must select a suitable set of pads. There are many options for the Lada Priora on the market. Conventionally, they can be divided into two categories - parts equipped with ABS and those without this system. It is not difficult to understand what type your Lada Priora is - the diagram of cars with an anti-lock braking system includes an ABS sensor and a wire connected to it.
The basic principles of selection are common to the two categories. The product must be well packaged, have protective holograms and quality certificates. When purchasing a whole set with release springs, it is advisable to check them. We often came across sets from China where the spring brackets were turned in the wrong direction.
There is no need to look for how much the cheapest kit for a VAZ will cost. It is better to give preference to original parts or famous analogues. Even at a higher cost, the pads will provide excellent service life and excellent braking dynamics.
Selection for cars with ABS
Below is a list of pad sets with the best price-quality ratio.
| Part name and number | Minimum price, rub. |
| AT 2090-118BP | 400 |
| AutoReal AV18-350-2090 | 450 |
| Pilenga BSP1005N | 600 |
Selection for cars without ABS
If your Lada Priora is not equipped with an anti-lock braking system, then you should purchase special pads. The most popular sets are the following.
| Parts brand | Initial cost, rub. |
| Fortech FB-2102 | 500 |
| Pilenga BST1002N | 550 |
| Bosch 0986487219 | 800 |
What affects the reliability of the braking system?
It should be noted that there are points that have a great impact on the reliability and service life of brake pads.
These include the following points:
- How and what are the pads made of?
- Driver's driving style: aggressive, moderate.
- Quality of roads.
- Climate and time of year.
- Lifetime.
As mentioned earlier, the car’s braking system requires the most responsible care. You shouldn't skimp on it. Choose only high-quality spare parts from trusted manufacturers.
Moreover, if the pads you choose do not fit the dimensions of your car, do not under any circumstances attempt to modify them.
Understand that any impact in the future can disrupt the progress of their work and lead to irreversible consequences, the least of which will be the rapid failure of the pads themselves.
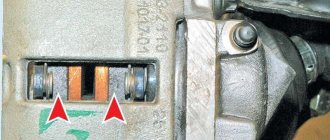
It is necessary to check the condition of the brake mechanism every 10 thousand km. Factors indicating the need to replace parts are:
- If the thickness of the residual friction layer is 2 mm or less.
- If there is damage on the pads that was not obtained naturally.
- If the mechanism has chips, cracks, grooves and irregularities.
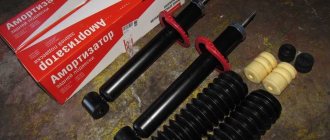
Necessary tool
To replace the pads you do not need to use a special tool, just have:
- Set of wrenches;
- Balloon wrench;
- Pliers;
- Hammer;
- A soft metal drift or wooden block;
- Screwdrivers.
It is better to have a WB-40 cylinder on hand, since the mechanism is susceptible to corrosion and it is not always possible to disassemble it easily.
It is better to replace it in a garage or in a fenced area with little traffic around, so as not to interfere with other road users.
How to replace front brake pads
Replacing the front pads is easier than doing the same with the rear ones due to their design features.
The algorithm of actions is as follows:
- Place the car on a flat surface.
- Set the vehicle's parking brake. Make sure it does not roll back when changing position.
- Loosen the bolts that secure the wheels.
- Use a jack to raise the desired part of the car.
- Now you can remove the wheel from the hub and assess the condition of the brake system.
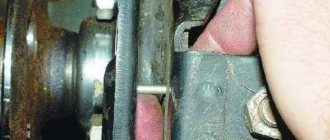
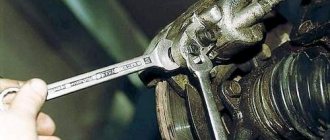
- If there is severe wear, unscrew the caliper bolt and carefully remove the caliper itself from the disc.
- Now you can remove the pads.
Before replacing the part, be sure to lower the piston completely into the cylinder. This is done so that the caliper can be reinstalled in its place.
Since the caliper is made of aluminum, you can apply force to it without damaging it.
Now you can install new pads, put the caliper and wheel back in place, and return the car to its previous position.
Continuation of step-by-step instructions
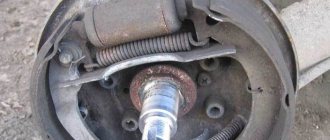
Now let's get back to replacing the brake pads, continuing from the point where we removed the brake drum (Step 8).
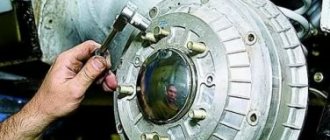
Step 9: Remove the perforated disc called the anti-lock braking system (ABS) rotor.
Now, to remove the brake pads, you need to disconnect the springs that hold them in four places. A simple device in the form of a hook was made from a piece of wire, which is very convenient for disconnecting and putting back on the brake springs.
If someone is used to using pliers or a screwdriver, please do so. This tutorial will use a crochet hook.
Step 10: disconnect one side spring.
Step 11: disconnect the lower spring.
Step 12: disconnect the upper spring.
Step 13: Carefully remove the released brake pad without damaging the ABS sensor.
Step 14: remove the top spring and spacer bar.
And we still have one more spring holding the brake pad, located on the left.
Step 15: disconnect the side spring and move the free block down.
Step 16: disengage the lever from the handbrake cable.
This completes the removal of the old brake pads.
Washing removed parts
If desired, everything you removed can be washed with gasoline or brake cleaner. To do this, it is convenient to use a small paint brush.
We wash the springs, the spacer bar and the lever for the manual drive of the pads; we will need it later.
Step 17: disconnect the brake pad manual drive lever from the old pad. To do this, you need to pull out this cotter pin.
Step 18: press on your finger and disconnect the lever.
Now we do the same with the new block, only in the reverse order.
Step 19: Insert the finger, put on the washer, insert the cotter pin and spread the antennae apart.
Ready! The new block can be installed in place.
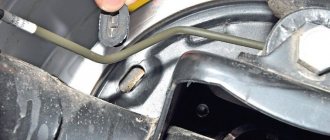
Step 20: You can immediately put the lower tension spring on the pad, and then thread the manual brake lever into the parking brake cable.
Step 21: fix the block using a side spring. For these purposes, it is more convenient to use an awl.
We start the spring. The main thing here is to get into the hole. When the tip of the spring hits the hole, you will hear a characteristic click.
From this moment on, the development of events can take the most unexpected turn. Please be careful, because now we will look at the most common mistakes due to which the brake drum does not fit on the pads.
How to replace rear brake pads
If there is a drum-type mechanism, replacing the above-mentioned parts becomes much more difficult.
- You need to jack up the car and remove the wheel. To remove the drum, open and unscrew the nut that is attached to it. After this, the part is carefully removed from the hub. Be sure to pay attention to the bearing, which, if there is a parking brake, must be removed.
- Now you can start removing the springs. This action will require a lot of effort, as it creates significant pressure. After this, the clamps are removed from the pads. Now it seems possible to remove the pads themselves.
- As in the case of the front part of the car, the piston should also be recessed here.
- New elements are installed, fixed using clamps and springs, and the bearing is returned to its place.
- Now you can put the drum and wheel back in place.
After this, you need to take into account the fact that you cannot replace either the rear or front pads separately. Replacement must be done immediately and on all wheels.
Return to step-by-step instructions
This concludes the review of errors and returns to assembling our brakes.
Step 22: after installing the spacer bar, place the second block in the block with the lever.
Install carefully so as not to damage the ABS sensor. After installation, all that remains is to put on the springs.
Look again at how the spacer bar should be installed.
If it’s the same for you, then everything is fine.
Step 23: The next step is to tighten the top spring. It is more convenient to tighten the spring with a hook.
Step 24: put on the lower spring.
Step 25: We put on the side spring in the same way.
Make sure all four springs are in place before moving on to the next step.
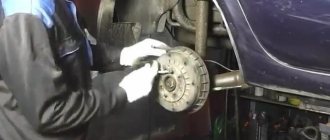
Step 26: put the ABS rotor in place.
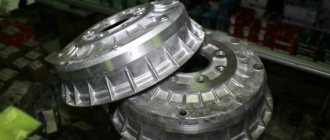
Step 27: put on the brake drum.
Step 28: We turn out the guides that we had screwed into the threaded holes to fix the brake drum with them.
We tighten the guides. If the brake drum turns easily, then everything was done correctly.
Step 29: After installing the brake drum, you can put on the wheel.
Step 30: at the end, do not forget to tighten the handbrake back, which you loosened at the beginning, screw on the casing and hang the muffler on the rubber bands.
At this point, the replacement of the rear brake pads can be considered complete.