The device of the damper and the reasons for its failure
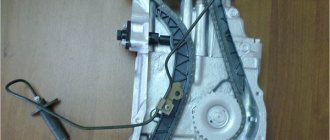
This part is a plate made of durable steel with technological holes for attachment to the gas distribution mechanism. Paired with a damper, there is a shoe, which is designed to stabilize the chain. Its surface is covered with durable polymer material that prevents rapid wear.
At the moment the shoe is triggered, the chain hits the damper. This plate prevents the chain from hitting the cylinder block cover. Over time, a part may fail for the following reasons:
- Loosening the mounting bolts. Due to constant stress and vibration, fasteners can become loose over time. After this, the damper becomes loose, and the fasteners become less resistant to loads - their welded nuts break off.
- Metal wear. The impact load on the plate leads to the appearance of microcracks and subsequent failure. Even one blow of the chain on barely damaged metal can be fatal.
It is important to notice early on that the chain has become loose and the dampener is not working as well as before. If the chain or fasteners break while driving, the engine may become blocked.
How to replace a dampener
Replacing a chain guide on a VAZ 2107 is not a complicated procedure. Each driver will be able to carry out such an operation independently if he takes into account several important points. When replacing a part yourself, you need to proceed like this.
- Remove the cylinder head cover.
- Release chain tension.
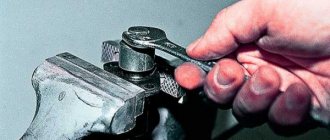
- Secure the part to be removed using a screwdriver or wrench.
- Unscrew the two bolts securing the cylinder block.
- Carefully remove the worn part.
- Install a new damper.
- Tension the chain and secure the cap nut.
- Reinstall all other parts (valve covers, gas actuator).
The long fastening bolt is installed at the top, and the short one at the bottom. If the bolts have a significant degree of wear, they need to be replaced, otherwise even after replacing the damper, the characteristic tapping sound may remain.
If the damper simply breaks into pieces while moving, you need to remove all its components. Sometimes this is quite difficult to do and you have to invent various devices to get the debris out. In such a situation, a magnet attached to the end of a long wire can help out. Place all the removed parts together to determine if there is anything left inside.
Master at work
Start the engine to see if the problem is resolved.
If there is no characteristic knocking sound, it means that the cause of the problem has been identified correctly and the repair has been carried out successfully. If the sound remains and you have not heard it before, and you cannot independently determine its origin, contact the nearest car service station. Qualified technicians will help you identify and solve the problem.
Do not buy the parts needed for replacement at a service station - there they will cost 1.5-2 times more than at the car market or in a specialized store.
How to recognize a malfunction at an early stage
The first signs of problems in the timing block are:
- Grinding and knocking during operation of the power unit. These sounds are clearly audible when the engine is cold started, and they also become more pronounced when the chain sag.
- Loss of engine power. This sign is also more noticeable immediately after the movement begins. Due to the fact that the vibrations of the chain are not completely damped by the damper, the rotation phases of the timing belt and camshafts do not coincide. The cylinders subsequently also work asynchronously. When you press the accelerator pedal, the engine does not operate normally.
As soon as you hear ringing and knocking in the gas distribution block, you should take the car to a service center for diagnostics. Do not expect a complete failure to work on the part of the power unit.
Symptoms of mechanism malfunction
The first signs that the engine chain tensioner or the chain itself is faulty are:
- A sudden stop in the vehicle's movement while the engine is running, and a significant increase in the speed of rotation of the crankshaft, with the same throttle position.
- Instant engine blocking (wedge), accompanied by a characteristic sound.
The causes of such breakdowns can also be factory defects, such as:
- A weak collet-type clamp that cannot lock the rod in one position, preventing the tensioner from working correctly.
- Deformed shape of one of the planes of the product.
- Damper spring faulty.
- Defective threaded connections of installation fasteners.
What you need to have and how to replace it
To carry out repairs you need to prepare:
- a new damper, identical in markings to the old one and purchased specifically for the VAZ-2107 model;
- a set of socket and open-end wrenches;
- long flat-head screwdriver;
- a piece of strong wire with a bent hook.
When you purchase products to repair your engine, you should worry about consumables: don't forget about the sealant and gasket for the cylinder block cover.
Replacing a part with an unworn one is carried out according to the instructions:
- Remove the air filter by unscrewing the 5 mounting screws with a 12mm wrench.
- Then take a 13mm socket with a ratchet and unscrew the screws securing the cylinder block cover.
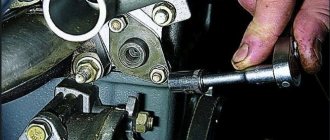
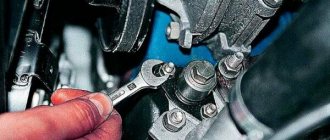
- Loosen the tensioner cap nut with a 13mm spanner.
- Push the shoe to the side with a long screwdriver.
- Now you need to, without releasing the shoe, screw the cap nut back.
- Insert a wire hook into the technological hole of the damper.
- Hold the damper and unscrew its bolts. Be sure to fill in the correct location as the lengths of the fasteners vary.
- Turn the timing shaft a third of a turn clockwise, using a spanner to help.
- Once the chain is loose, carefully pull the guide up.
- Install the new part and reassemble in reverse order.
If you got a car with a classic engine, then after dismantling the air filter you need to remove the carburetor. After assembling the timing block, be sure to monitor the chain tension - it should not be excessive.
To prevent oil loss, before installing the damper mounting bolts, lubricate their seats with sealant. Each time after disassembling the cylinder block, it is necessary to change the cover gasket. This will ensure that the operation of the gas distribution unit is not disrupted.
How often does tension need to be applied?
During operation, the chain is subjected to heavy loads, so its service life is 60-80 thousand km. Adjustment should be carried out every 15 thousand km, but if the driver discovers earlier that something has begun to rattle when the engine is running, then it should be diagnosed. Before tensioning, you need to check its serviceability.
It is also necessary to check the tension in the case when the timing belt repair on the VAZ 2107 was carried out or in the case when, after tensioning, knocking of the product is still observed. The knock, or more precisely, the rustling of the chain, will not be difficult to distinguish even for an inexperienced driver. This rustling noise can be clearly heard if you lift the hood and listen to the engine at idle speed. If you add gas, the rustling disappears, which actually means that it’s time to tighten the timing chain. For this, a timing chain tensioner is used, which come in different types: automatic and mechanical.
Step-by-step instructions for stretching
Now let's pay attention to the question of how to properly tension the timing chain on a VAZ 2107. Initially, it is worth noting that the timing mechanism on VAZ 2107 cars with a fuel supply system - injector and carburetor are absolutely identical
The tension on the VAZ 2107 is performed in the following sequence:
- The car is placed on a flat surface, the “neutral” is turned on, and the wheels are fixed.
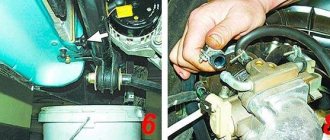
- The tensioner cap is loosened (using a 13 key), which is located near the pump.
- The crankshaft is turned 2 turns clockwise, for which a special key is used (pictured).
- After this, the tensioner is tightened to failure.
- Next, we start the engine and listen to see if the clanging remains.
- If it disappears, then the chain is tight. If there is any left, we recommend repeating the procedure from point No. 2.
If the actions taken are not successful and the noise remains, you will have to resort to a visual inspection of the timing mechanism, and for this you will have to disassemble the engine.
Tension check
The VAZ 2107 chain is located in the front part of the engine. It is not visible, since it is covered by the cylinder head cover and the block itself. Before you start disassembling the VAZ 2107 engine, you need to understand the features of visual inspection and checking its tension. It is rational to check the chain tension only in cases where regular tensioning does not help solve the problem.
To visually check the tension of the VAZ-2107 timing chain, you must first remove the air filter housing, then the cylinder head cover. To do this, you will need a “10” wrench, with which you need to unscrew 8 fastening nuts.
After removing the valve covers, access to the upper part of the product becomes available. Here you need to inspect the tensioner shoe and damper for integrity, and then check the chain mechanism with your hands, and if that doesn’t work, you can use a pry bar or a large screwdriver.
The mount must be installed so that it stands between the chain mechanism and the block body. As a result, we get a lever that is used to check the chain tension on a VAZ 2107 car. If it bends easily, then its tension needs to be adjusted or replaced. The ideal tension is one at which the product does not bend and is taut like a string.
https://youtube.com/watch?v=L27fdFKEj-U
Repair of VAZ 2107 tensioners is not carried out, so the product will have to be replaced with a new one. Replacement is rarely required, but the ANC “Pilot” automatic tensioner is best suited for this. After installing it, you will forget about the noise and clanging of the engine for a long time. But if you already have an automatic tensioner installed, and the engine is knocking or the chain is making noise, then there is no point in making adjustments. You will have to immediately disassemble and replace the timing mechanism parts.
What happens if you don't install a new damper on time?
Many car enthusiasts carelessly use their car even after obvious signs of engine malfunction appear - with ringing or loss of power. There are several reasons why you shouldn't follow their example:
- the engine may seize while driving;
- after a more serious breakdown, repair turns out to be impractical;
- You may be injured as sudden engine stops can be dangerous when traveling at high speeds or in heavy traffic.
If you do not keep track of the condition of the timing chain and its damper, then most often a sudden breakdown of these parts occurs. This sometimes happens when starting the engine or even while driving. After the damper falls apart, the timing chain breaks. Since this happens instantly, the driver does not have time to react. Therefore, valves subsequently fail, and then cylinders. The pistons will not be restored. In such a situation, the car can only be restored by replacing the engine, but for the VAZ-2107 model, repairs are not always advisable. The overwhelming majority of car owners sell their vehicles after such a breakdown for spare parts.
On VAZ-2107 cars, an element such as a chain guide is installed. During the operation of the vehicle, this part wears out or breaks, which leads to the need to replace it. Before you figure out how to replace the chain guide on a VAZ-2107, you should find out what signs can be used to determine a breakdown.
Types of chain drive
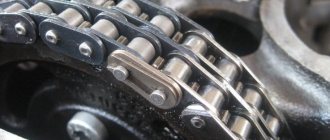
The VAZ “Seven”, like other “classics”, is equipped with a double-row timing chain. However, there is a single-row chain that, if desired, can be installed on a Zhiguli.
Single row chain
A chain drive with one row has less noise when the engine is running compared to two rows. This factor is one of the main factors in favor of choosing single-row chains. Therefore, some VAZ 2107 owners decide to replace the timing drive. The lower noise level is due to the fact that fewer links are driven. Plus, it is easier for the entire engine to rotate such a chain, which has a positive effect on the increase in power. However, due to the low noise level when such a chain is stretched, it is not always clear that the part needs tension.
Double row chain
Despite the advantages of a single-row chain, a chain drive with two rows is the most common, since it is characterized by high reliability and if a link breaks, the entire chain does not break. In addition, the load on the timing drive parts is distributed evenly, as a result of which the chain and gears wear out more slowly. The life of the part in question exceeds 100 thousand km. Although recently, in order to reduce the weight of power units, automakers have been installing chains with one row.
Replacing a double-row chain with a single-row one
If you are thinking about replacing a double-row chain drive with a single-row one, you will need to purchase the following parts:
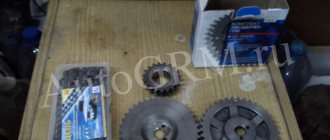
- crankshaft, camshaft and oil pump gears for single row chain;
- sedative;
- shoe;
- single-row chain;
- automatic tensioner.
All of the listed parts are taken, as a rule, from the VAZ 21214. Replacing the chain should not cause difficulties. The only thing that is required is to replace the sprockets, for which you unscrew the corresponding fasteners. Otherwise, the steps are similar to the procedure for replacing a conventional double-row chain.
Video: installing a single-row chain on a VAZ
Despite the fact that replacing the timing chain drive on a VAZ 2107 is not an easy process, every owner of a Zhiguli can do it if you follow the step-by-step instructions. The main thing is to correctly set the marks upon completion of the work, which will ensure synchronous operation of the crankshaft and camshaft.
- Automatic chain tensioner VAZ 2107 injector
- How to replace the chain tensioner on a VAZ 2107
- Replacing timing belt Largus 16 valves with your own hands
- How to adjust the carburetor on oka 1111
- Timing tags Lada Largus 16 valves photo
- Replacing the chain tensioner shoe for a VAZ 2107 injector
Signs of damper failure
The main task that this part performs is to prevent excessive vibration of the timing chain during engine operation. Such an important part as a chain guide is not present on all types of cars, but only on those whose timing belt is equipped with a chain drive. On cars of the classic Lada family, the timing belt is equipped with a chain drive, so both injection and carburetor engines have a chain guide.
The main symptoms of malfunctions of the chain guide on the VAZ 2107 include:
- A loud knocking sound occurs in the engine. Moreover, this sound occurs directly in the front of the engine.
- Engine malfunction. This is due to the fact that if the part in question fails, the valve opening phases shift.
The cause of damper failure is often a weakened chain. To avoid loosening of the chain, it is necessary to periodically check its tension and, if necessary, tighten it. Regardless of whether the 7 has an injection or carburetor engine, if the part in question breaks down, the same replacement work must be carried out.
What is required for replacement
To replace a part on the “seven”, you will need to prepare a set of the following tools:
Drive diagram and location number 3
- Screwdrivers.
- Spanners.
- Hook or long tweezers.
- Sealant.
- New product.
To carry out the replacement, you will also need good lighting, especially when working in the garage. When carrying out work, it is necessary to avoid dust from entering the timing mechanism.
Replacement with "seven"
Not many owners of this car model know how to replace a chain guide on a VAZ 2107. This is due to the fact that the damper is not a part that needs to be changed frequently. Changing it on a “seven” is not difficult, so you don’t have to go to a service station.
The replacement begins with the first step being dismantling the VAZ-2107 chain guide. The process looks like this:
- Initially, you need to remove the air filter housing.
- The second step is to remove the cylinder head cover. It is secured with 8 bolts. After removing the cover, you need to evaluate the condition of the gasket and, if necessary, replace it.
- Set the camshaft sprocket in such a position that the mark on it coincides with the cast on the housing.
- The cap nut on “13” of the chain tensioner is loosened. There is no need to unscrew it completely.
- The chain tension is weakened. This can be done using a screwdriver, squeezing its shoe.
- After loosening the chain, you need to fix the cap nut.
- The damper should be hooked through the technological hole using a hook or tongs. This is done to avoid the damper falling into the engine sump.
- After making sure that the hook securely fixes the part being removed, you need to unscrew its fastenings in the form of two bolts. These bolts are of different lengths, so it is important to remember their location.
- If the product cannot be removed after unscrewing the bolts, then it is necessary to turn the camshaft sprocket bolt, as shown in the photo below.
It is important to know! If the product is torn during operation of the car, you can remove it using tweezers or a hook. If the product falls into the engine sump, you will need to remove the oil sump to remove it.
Installation of a new part is carried out as follows:
- A new damper is installed in place of the old one. To do this, you will also need to use tongs or a hook.
- When the fixing bolts are tightened, the timing chain tension will need to be adjusted.
- At the final stage, you should install the cylinder block cover, as well as the air filter housing.
Main elements of the timing chain tensioning system
The timing chain in the engine is supported not only by the three sprockets mentioned above. It is supported by several other important devices.
The timing chain tensioning system consists of several critical elements
Let's look at them in more detail.
Timing chain stop pin
The timing chain in the VAZ 2107 engine is supported by a complex tensioning system. One of the elements of this system is the limiting finger. This is a small cylindrical part screwed into the wall of the cylinder block. The pin is located next to the crankshaft sprocket. The purpose of the pin is as follows: if the timing chain tension suddenly weakens, the pin will prevent the chain from jumping off the crankshaft sprocket.
The design of the restrictive pin is extremely simple - it is a regular bolt with a head truncated on the sides
At the same time, the chain will begin to touch the limiter with a characteristic ringing sound, which will certainly attract the driver’s attention, since this sound will be heard even in the cabin. If the chain breaks, the limiter will not allow it to completely fly off the sprocket and break the nearby oil pump and timing shaft sprockets. If the timing chain is tensioned normally, it does not touch the limiting pin, since in this case there is a constant gap of about 1.5 cm between it and the pin
If the timing chain is tensioned normally, it does not touch the limiting pin, since in this case there is a constant gap of about 1.5 cm between it and the pin.
About timing chain tensioners
The purpose of the timing chain tensioner is easy to guess from its name. He must constantly tension the chain, preventing it from sagging. If the chain sags by even half a centimeter, it may fly off one of the sprockets (although this happens quite rarely, much more often there are situations when the chain remains on the sprocket, but at the same time jumps several teeth forward, as a result of which the uniformity of its tension is completely disrupted , and the sagging increases even more). At different times, different types of tensioners were installed on the VAZ 2107.
Mechanical tensioners
In a mechanical tensioner, the force required for the tension shoe to press on the chain is created by a conventional spring. It presses on the rod, it moves out of the body and presses on the shoe. And the shoe, in turn, puts pressure on the chain, constantly dampening its vibrations.
The main element of the mechanical tensioner is the plunger spring
The spring in such a tensioner is adjusted with a conventional plunger nut. If the driver needs to tighten the chain a little, he simply tightens the nut slightly, eliminating any slack.
Mechanical tensioners for VAZ 2107 are reliable and simple in design
Automatic tensioners
Automatic tensioners were installed on later models of the VAZ 2107. Unlike mechanical devices, the design of this tensioner includes a toothed bar with a ratchet.
The main element of the automatic timing chain tensioner is a toothed bar
The plunger spring presses on this bar, and the bar transmits this force to the shoe. The ratchet prevents the bar from returning to its original position. This keeps the timing chain tension constant.
Finding automatic tensioners for VAZ 2107 on sale has become increasingly difficult lately.
Hydraulic tensioners
These tensioners were installed in the latest VAZ 2107 models. The main difference between these devices is the principle of their operation. The force in the hydraulic tensioner is created not by a spring, but by oil pressure. It is supplied to the tensioner through a reinforced high-pressure hose.
Oil is supplied to the hydraulic tensioner through a special reinforced hose
Timing chain tensioner
The timing chain tensioner is another indispensable element of the tension system, without which uniform operation of the timing chain is impossible. The damper is a metal plate that is attached to the wall of the cylinder block.
The timing chain adjuster on the “seven” is a simple metal plate held on by two bolts
This plate is located opposite the tensioner, that is, the damper acts on the second half of the chain. Since the tensioner presses the chain very sharply, the opposite side of the chain inevitably begins to vibrate. To dampen this vibration, a damper is needed. The chain, touching the damper plate, loses some of its energy and the amplitude of its oscillations decreases significantly. Without the restraining effect of the guide, the chain will stretch much faster.
Signs of a faulty chain damper
A break or other breakdown of the damper can manifest itself in several ways:
- A loud knocking sound appears in the engine. The sound comes from the front of the engine, from the installation side of the intermediate shaft cover.
- Disturbances and malfunctions of the engine, which can be caused by a shift in the valve opening phases due to a dangling chain slipping through the teeth of the timing drive.
- Engine breakdown (jamming) due to a strong shift in the phases of the timing parts and the “meeting” of the valves with the pistons.
The chain guide of the VAZ 2107 most often breaks due to a weakened chain. It must be tightened regularly, which is described in detail in the article “How to tighten the chain of a VAZ 2107.”
Symptoms of loose chain tension
In principle, the symptoms are quite specific, and it is very, very difficult to confuse them with something else.
- Increased engine noise, even at idle speed;
- Instant increase in noise during a sharp increase in speed;
- The roar increases proportionally with a smooth increase in speed, and decreases gradually with a sharp release of the gas pedal;
- Most often, a loose VAZ 2107 chain rattles because the damper has broken and needs to be replaced.
However, let’s say that this is not the case, and we just need some tension. To work, we will need a special key to turn the crankshaft; on carburetor cars, you can turn it using a ratchet.
Dismantling the VAZ 2107 chain guide
- Turn on neutral speed.
- Remove the engine head cover (it is held on by 8 bolts). This should be done carefully, being careful not to damage the gasket - if it is in good condition, it can be reused.
- Adjust the position of the camshaft sprocket so that the mark on it coincides with the boss on its body.
- Loosen the timing chain tensioner nut (just loosen, there is no need to unscrew completely).
- Using a screwdriver, press down the tensioner shoe, thereby releasing the chain tension.
- While holding the screwdriver, tighten the tensioner cap nut, thereby securing it in the position when the chain is released.
- Hook the tensioner with a hook, threading it through the technological hole. This will prevent the damper from falling into the engine pan after the mounting nuts are unscrewed. Instead of a hook, long tweezers or a magnetic telescopic handle will do.
- Unscrew the two bolts securing the VAZ 2107 damper and pull it out.
Important: if the damper breaks, you can try to remove it with the same hook, tweezers, or magnet. If it falls and it is impossible to get it out, you will have to remove the oil pan and take out the damper from below.
Valve train chain
If during engine operation there is a ringing sound that resembles the operation of a diesel engine, then most likely the Niva Chevrolet timing chain needs to be replaced.
Replacement
If you do not replace it in time, it may break while driving. To replace, do the following:
- Installing the car in the pit
- The motor protection with boot is dismantled
- We raise the handbrake; it is advisable to place special supports under the wheels
- Drain the antifreeze and remove the radiator and fan
- Carefully disconnect the accelerator cable going to the air filter from the valve covers and pipes
- We remove the crankshaft sensor, loosen the bolts that secure the generator
- Move the generator aside and remove the belt.
- We unscrew several bolts that secure the water pump, and then remove it
- We dismantle the tension and bypass roller of the belt
- Remove all interfering pipes
- Cover the cylinder head to prevent debris from getting into it.
- After unscrewing the mounting bolts, remove the camshaft gear
- Remove the oil pipe along with the hydraulic tensioner
- We remove the chain and all gears of the oil pump, crankshaft and camshaft
- We take a new oil seal and install it on the timing cover
Installation
When the Niva Sherole timing chain and all necessary system elements have been removed, you need to correctly install and configure the new parts, for this you need:
- Take the fastening bolt and install it on the shoe
- We check that the shoe is stationary and then tighten the bolt
- We install the new gears in their place so that they coincide with the existing marks
- We install the clamp, if for some reason it does not sit in its place, we file it
Before installing the chain, it must be lubricated with engine oil, after which it can be put in place as follows:
- First on the crankshaft gear
- After that, to the oil pump
- And finally on the camshaft
To ensure better operation and fixation of this mechanism, it contains special timing marks Niva Chevrolet
If they are not taken into account when installing the chain, this can lead to the gas distribution system becoming out of synchronization and increased wear of parts.
Adjustment by marks is carried out in several stages:
- All necessary tools are prepared
- The car is installed on the pit
- The fan is turned off and the radiator mount is unscrewed
- Removing the valve cover
When all the preparatory steps have been completed, the following adjustments are made:
- Rotate the crankshaft until the bearing and camshaft marks match. If the chain is installed correctly, the existing marks on the chain cover and crankshaft will match. If they do not coincide, we adjust the position of the phases
- To make this adjustment, loosen the fastening at the lock washer, then use a 13 key to remove the washer along with the camshaft sprocket
- We set the first gear so that the bolt that secures the crankshaft gear does not turn. Unscrew the fastening bolt and lock washer
- We remove the tensioner.
- Pull the chain towards you and remove it from the sprocket
- To adjust it, move it one tooth
- We begin to turn the crankshaft until the notches coincide
- Install the lock washer. We place the bolt in the place for fastening, but do not tighten it
- Rotate the crankshaft and check if the marks match. If they match, then the work can be considered completed
It is important that the marks match as accurately as possible, since the correctness and stability of the engine will depend on this
Installation of damper VAZ 2107
Installation of the damper is carried out in the reverse order. In this case, you should tension the chain and check the positions of the marks on the camshaft and crankshaft of the engine.
The seats of the damper mounting bolts must be lubricated with sealant. This will prevent oil from seeping through.
Welcome! All the parts that are in a car engine do not last forever, and therefore they must be periodically replaced when they fail; by the way, such parts include the chain guide. After reading this article, you will learn for yourself how to properly replace the chain guide on machines of the “classic” family.
Summary:
How much will it cost to replace a chain guide on a VAZ 2101-VAZ 2107? 1) A chain damper will cost you around 100-400 rubles.
When do you need to change the chain guide on a VAZ 2101-VAZ 2107? The chain damper must be replaced if: 1) A knocking sound appears in the area where the chain is located. 2) And also when the chain oscillates, and when the chain jumps on the sprocket teeth.
What is needed to replace the chain guide on a VAZ 2101-VAZ 2107? 1) Screwdrivers. 2) Wrenches. 3) New chain guide. 4) Hook. (Or anything else that can hook the chain guide!)
classic damper bolts leaking - search on DRIVE2
“Snotty” from under the damper bolts. What to do?
One of the diseases » classics
“is
a leak
of engine oil from under the
timing chain
guide
mounting bolts There is no washer or any gasket provided from the factory. Today we will figure out how to get rid of this.
Oil is pressing out from under the timing stabilizer bolts - a simple solution.
Youtu.be/EsDgKWtWtvU Ever since I bought the car, it was noticeable that engine oil was oozing from somewhere in the front of the engine, flowing down and onto the pulleys, alternator belt and spreading under the hood.
Step-by-step instruction
Before starting work on tensioning the chain, the car must be placed in a comfortable position. Place the gearshift knob in the neutral position and secure the wheels so that the car does not roll during the procedure.
Tools
To carry out the work, the following tools are required:
- set of socket wrenches;
- set of heads;
- pliers;
- screwdriver;
- hammer.
Before starting work, you should make a visual inspection of the chain drive. If mechanical damage is found to the tension roller, shoe, guide, sprockets or chain, the defective parts must be replaced.
Stages
The sequence of work when tensioning the chain both in an engine with an injector and with a carburetor consists of the following steps:
- To access the timing chain, it is necessary to remove the protective cover by unscrewing the mounting bolts that hold it in place.
If they are not set correctly, the valve timing will be disrupted. As soon as you need to exert a lot of force, you need to stop and hold the shaft from turning with a key. It is in this position that the tension will be sufficient.
Sometimes tensioning is impossible because the chain stretches over time and the plunger is no longer long enough to make the adjustment. If you do not plan to change the product, then for temporary driving you can increase the tensioner rod, for example, by attaching a bushing to the end of the rod, with which the air filter is attached. But still, a worn-out product must be replaced in the near future.
If noise occurs in the engine where the automatic tensioner is installed, then no adjustment is made, but the timing parts are replaced. The condition of the gas distribution mechanism must be constantly monitored, replacing the belt and tensioning the chain in a timely manner. It is important to check the chain tension before adjusting the valves.
The ability to change a belt and tension a chain with your own hands allows you to save time and money on visiting a car service center.
Necessary tools and accessories
The replacement work, although not particularly complicated, requires the removal of a sufficient number of elements from the car.
The tools you will need are almost all common and can be found in any garage.
To carry out the work you will need:
Open-end and socket wrenches (for 10, 13, 14, 17, 19);
The chain drive requires constant lubrication, which is why it is located inside the engine under the drive cover.
Therefore, extensive preparatory work will be required to carry out the replacement work.
