Print this article Font size 16
It is no secret that it is impossible to start a car without a starter. Therefore, his condition should always be treated with increased attention. If it was not possible to save the element, then it is quite possible to carry out the repair yourself. It will be much cheaper than going to a service station.
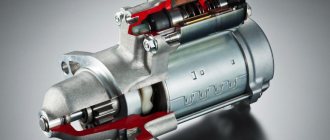
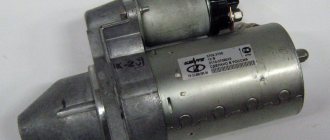
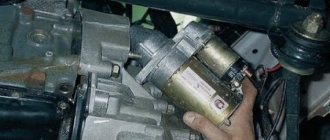
First, study the VAZ 2110 starter from the photo, which will allow you to get a first idea about it. Don't worry if you've never even seen this element. This is not a hindrance to understanding the device.
It may have two problems - a complete breakdown that requires replacement, or it simply does not turn the engine. We will consider each issue separately in order to understand the causes and methods of eliminating the malfunction.
Timing belt broke
VAZ 2110 does not start, the starter turns - perhaps the reason lies in a broken timing belt?
The undoubted advantages of a belt drive over a chain drive are its simple design, low weight and low noise. However, it is not without its drawbacks, the main one of which is the relatively short resource of the timing belt.
Of course, a faulty, torn or misaligned timing belt also causes the VAZ 2110 to fail to start. By the way, on stock, non-deformed models of the 21120 engine, a torn timing belt also causes valve deformation and requires additional repairs. In this case, driving even after replacing the belt without restoring the valves is impossible.
New timing belt VAZ 2110
Check for the presence of a spark in the spark plugs visually by turning on the ignition and pressing the outer metal part of the spark plug against the unpainted metal body of the car or against structural elements. Do not forget that all electrical parts of the product are under high voltage, so it is better to carry out work with insulating gloves. If there is no spark on only one spark plug, be sure to check the others and draw the appropriate conclusions.
The consequences of a broken timing belt depend entirely on the design of the power unit. To imagine what will happen at this moment, you need to turn to the mechanics of the internal combustion engine.
In a running engine, the pistons continuously move from one dead center to another. During the intake stroke, the piston moves down and the intake valve opens; during the exhaust stroke, the exhaust valve opens and the piston moves up. At the moment when the piston is at top dead center, all valves must be closed. If the timing belt breaks, the camshaft stops rotating and the valves stop in one position. At the same time, the crankshaft continues to rotate by inertia, and the pistons rush towards the open valves.
Timing belt VAZ 2110 OPEN
In some engines, for example, the 8-valve VAZ-2111, the pistons have special recesses to avoid contact with the valves in the event of a break. In this case, there will be no consequences, except that the car will not be able to get to the garage or workshop under its own power.
Basic car starter malfunctions
Starter malfunctions are divided into two categories
Since the motor shaft spin-up device consists of two electrical elements, damage to the electrical circuit is also divided into two subcategories:
- electric motor malfunction
- Solenoid relay malfunction
Malfunction of the mechanical part of the starter can be repaired by replacing the bearings or bendix.
Blendix VAZ 2110 in perfect condition
Failures of the electrical component of the structure are eliminated by replacing the entire blocks, perhaps with the exception of replacing the carbon brushes.
What to do if the starter clicks but does not turn
When the ignition switch is turned on, the starter does not turn.
Why does the starter not respond to turning the ignition key? It also happens that you turn the key in the ignition, the starter clicks, and in response there is silence. Agree, the situation is very unpleasant, but quite common. There are many reasons for its occurrence, but in this article we will focus on one associated with the starter, or more precisely with one of its elements - the solenoid relay (hereinafter referred to as VR).
The nature of the malfunction described here is quite specific. An attempt to start the car's power unit is accompanied by VR clicks, but the starter armature does not turn. Motorists who do not have sufficient practical experience rush to blame all the “sins” on the VR, without thinking that in a situation where the retractor clicks, the starter does not turn, and the start does not occur, any of the elements of the electrical supply system involved in the process may be to blame .
So why doesn't the starter turn?
The chain of elements, the performance of which directly affects the starting of a car engine, consists of:
- Rechargeable battery.
- Starter relay.
- Ignition switch.
- Starter.
- Solenoid relay.
To avoid errors in the process of diagnosing a malfunction, it is recommended to start searching for defects by checking the functioning of the battery. It includes two main points:
- Checking the battery charge, monitoring the complete contact of the battery terminals with the wire tips, as well as inspecting them (the wires) for the absence of fractures (breaks).
- Lack of contact between the power unit and the car body due to insufficient tightening of the connection, exposure to corrosion processes, etc.
So, let's try to figure out the situation when the retractor clicks, but the starter does not turn. Firstly, the situation is far from critical, since at least some “signs of life” are given by the launch system. And, secondly, before dismantling the starter, which in itself is not so simple and quick, try to eliminate some defects that can negatively affect the engine starting process:
- Damage to the wires of the electrical supply system.
- Insufficient contact at the junctions of wires with system elements.
- Malfunction of the ignition switch.
- Loosening of the BP fastening to the starter housing.
Once you have determined that the starter itself is the culprit of the problem, and have removed it from the engine compartment, you need to establish the degree of performance of it and the VR. This is done like this:
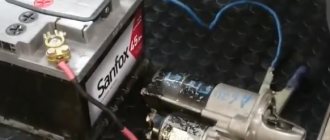
- Take a battery whose serviceability is not in doubt, and connect its “-” terminal to the starter housing, and the “+” terminal to the pin located after the BP.
- The operation of the starter will be evidence of a malfunction of the VR, and “silence” will be an invitation for you to look for the cause inside this unit.
Let's consider the possible causes of a starter malfunction, the symptoms of which we defined as “the retractor clicks, the starter does not turn, but clicks”:
- Unacceptable degree of wear of starter structural elements: bushings, brushes.
- Burnout, break in the power wire between the VR and the starter winding.
- Mechanical deformation (complete destruction) of the overrunning clutch drive fork.
- Short circuit between the turns of the armature winding.
- Starter winding broken.
Attention! If an attempt to unsuccessfully start the engine is accompanied by just one click, the reason lies in the lack of “ground” in the power unit housing, lack of contact on the BP terminals or its loose fastening
Video - Do-it-yourself repair of the starter retractor relay
To summarize the above, we note several key points:
- The occurrence of problems with starting the vehicle's power unit requires immediate elimination in order to avoid a situation in which operation of the vehicle will be impossible.
- The problem mentioned in the title of the article can be solved independently, which will significantly save your money and enrich you with invaluable practical repair experience.
How to remove and install the starter relay
VAZ 2110 starter protection relay
To disassemble the starter you need to follow several simple steps:
- The car should be prepared for further work (washing, placing it in a stationary state).
- The negative terminal from the battery should be removed.
- The air filter housing is dismantled.
- The traction relay wire block is disconnected from the relay.
- Using a key with the number “13”, unscrew the nut securing the tip of the starter power drive.
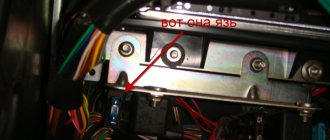
On a VAZ 2110 the starter relay is located
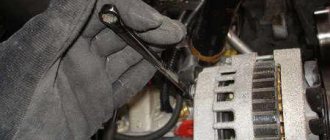
A wrench with the number “15” is used to unscrew the two nuts that secure the starter.
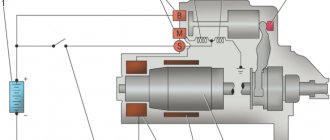
VAZ 2110 starter relay wiring diagram
Assembling the starter and installing it in its original location occurs in the reverse order.
VAZ 2110 installation of an additional relay on the starter
The main malfunctions of the traction relay are several important problems. If one of the reasons is present, then the traction relay should be replaced with a new one.
VAZ 2110 starter relay clicks - needs to be replaced with a new one
If you continue to use a damaged relay in your car, other parts may suffer:
- In the case when the anchor stops rotating. The relay stops working after connecting the starter when starting the car.
- The same armature continues to rotate, but its speed is significantly reduced. This happens after activating the starter and connecting the traction relay.
- The starter works flawlessly, the traction relay is connected, but after a few seconds, the car engine “stalls”.
VAZ 21102 where the starter protection relay is located you need to know
The main reasons for these problems may be:
- Interturn closure of the relay.
- Breaks in the power supply circuit.
- Untimely operation of the armature or its idle operation.
- Oxidation of wires, connections, windings.
- The nuts that secure the wire lugs have loosened and loosened the contact.
To get rid of these problems, you need to do several steps:
- The traction relay is being replaced.
- Check and, if necessary, replace wires.
- The armature rotation must be returned to light operation.
- Clean the bolts and check the nuts for tightness.
Since the traction relay is part of the vehicle's electrical system, its repair or replacement must be carried out with care and special attention. This process can be dangerous to human health
The car can be entrusted to employees of technological service stations and repair shops. If you decide to carry out repairs yourself, you should follow all safety rules when working with electricity.
Repair and replacement of equipment must be carried out on an observation platform or pit. A prerequisite is to remove the mudguard from the car engine.
All the above steps must be carried out in strict order.
After the process of dismantling the starter, you should perform a few more simple steps:
- The lower terminal of the traction relay has a fastening in the form of a nut. It should be unscrewed using a 10 mm wrench.
- The wire is disconnected there.
- Use a wrench with a stroke of 8 millimeters to unscrew the mounting bolts.
- The traction relay is removed.
- The gasket located between the front cover and the relay itself is disconnected.
- The front cover has a spring, an armature and a traction relay. They must be carefully removed from it.
Traction relay
It is imperative to know that you can check the traction relay using standard instruments. To check it, you should use an ohmmeter.
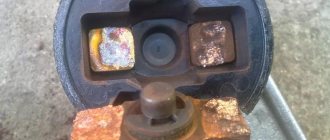
It is necessary to check the presence of a short circuit between the contact bolts and the contact plate. As for the price of relays, they are different.
It’s rare when their cost drops to 750 rubles. Naturally, the cost is indicated depending on the delivery range of the mechanisms and the markup of the sales representative.
Video and photo materials will help you do your own work. The main thing is to do everything as required by the instructions.
Sources
We close the starter in the French special cases
Lada Priora Sedan Logbook Preparing for winter. Starter
Access to the starter is always open from under the bottom - you just need to remove the crankcase protection. An example is in the photo below.
Under the bottom of Renault Megane 2
It is difficult to reach the starter from the engine compartment. In the best case, it is closed by a filter (VAZ), in the worst case, by a battery. You can remove the filter, but what about the battery?
Starter installation location (circle)
Everything is done so that the starter can be changed, repaired, but not short-circuited.
What does terminal S look like?
On Renault cars, the terminal looks like a threaded outlet. The nut screwed onto it is “white”, although it itself is made of copper (see photo).
Starter Renault Logan, phase 1
We have already talked about the VAZ - they use a plug. If you remove it, you can see the “petal”.
The starting method using a screwdriver is not the best. The problem is limited access.
50 Amps
We are going to short-circuit the starter with a screwdriver, but at the connection points where the current will flow, it may “stick”. In this case, without unnecessary panic, remove the negative terminal from the battery.
To remove the minus terminal, you need a 10mm open-end wrench. Keep it with you.
The process of removing the starter and installing a new element
Initially, you need to turn off the power to the car by disconnecting the terminals from the battery.
Starter removal process:
- Place the car on the inspection pit. If this is not possible, use an overpass or just a good jack.
- Lift one side, remove the wheel, remove the boot or crankcase guard (if equipped).
- The next step is to unscrew the top nut that secures the starter. This can be done both from the engine compartment and from under the car - whatever is convenient. Additionally, unscrew the nut that secures the terminal to the solenoid relay. Remove it so it doesn't interfere.
- Disconnect the nearby wire going to the starter.
- The final step is to unscrew the nut, which secures the part from below.
- Now you can pull the element out of the clutch housing.
Checking starter malfunction:
- Take a flathead screwdriver and try to move the coupling forward/backward along the shaft. It should spin easily and not hit anything.
- Use a screwdriver to turn the gear. If everything is spinning in the same direction, everything is fine. If the scrolling goes in the opposite direction, the part will need repair.
- Checking the retractor relay is carried out using two wires with “crocodiles” for convenience. Place the red one on the positive terminal of the battery, and place the other end on the control terminal of the relay. Use the negative conductor to connect the negative battery and the starter housing. After such actions, a click will appear and the clutch will come forward. After disconnecting the wires, the coupling will return.
- The final stage of the test is to disconnect the wire from the control terminal of the traction relay. Connect the crocodile clips in exactly the same way. When voltage is applied, the starter armature should spin at a frequency of more than 5 thousand revolutions per minute. If everything is so, the element is working.
Installing a new starter is carried out in the reverse order of removal. If you do not want to completely change the part in question, but want to repair it, then we recommend that you familiarize yourself with the relevant information. We do not recommend that you do everything yourself without knowledge of the entire process. In this case, it is better to contact a service station.
To summarize, we note that the starter on the VAZ-2110, as on other cars, is a very important unit, the failure of which is a rather unpleasant situation. In the article we examined the main points for dismantling the old part and installing a new element. Carrying out the work should not cause any difficulties. It is enough to use the recommendations from the article to successfully repair your car.
How to quickly close the starter with a screwdriver or other means
What to do if the screen on your phone is cracked. What to do if your laptop screen is broken
Many motorists have to deal with problems related to the vehicle starter at least once in their lives. The starter stubbornly refuses to work as before, although it itself is not damaged (the solenoid relay becomes the problem). We will look at what to do in this case and how to revive the starter in our article. There is Murphy’s law, known to all people on earth, as it is also popularly called the law of meanness. The car breaks down at the most inopportune moment, when you urgently need to go somewhere, and time is running out. In this case, there is nothing left to do but close the starter contacts in order to revive this important element of the car.
Messages 7
1 Topic by ch12o4n2p 2015-09-29 18:04:25 (2015-09-30 16:33:48 edited by ch12o4n2p)
- ch12o4n2p
- New member
- Inactive
- From: Desnogorsk
- Registration: 2015-09-29
- Messages: 3 Thanks : 0
- Car: VAZ 2110 1.6 8v
Topic: Solenoid relay clicks, but starter doesn't turn
Hello comrades! Tell me what could be. The car does not start (2210). The solenoid relay clicks but the starter does not turn. In some cases, everything goes smoothly. The battery is charged. I removed the starter, tried to drive it directly from the battery - no problem. (I noticed a small hardening on the flywheel crown
1mm on each tooth. Could this be the reason? Bendix rests on them and doesn't hit where it should? ) But on the other hand, if you close the starter with a screwdriver, it starts to spin the flywheel without any problems. I also tried replacing the ignition relay. . some kind of mysticism. I changed the brushes and the retractor (which was apparently in vain). In the end, everything is the same. Moreover, if you throw the mass from the battery, and connect the positive terminal and the one from the ignition to the regular places, while leaving the starter dangling on the wires, turn on the ignition, then the starter diligently performs its function. As soon as it is in place, only the click of the retractor is heard.
We are trying to make a friend without his atrium
TIP - before closing the starter, it is advisable to inspect it and make a diagnosis.
Initially, it would be good to try to find out the reasons for the failure of the starter - what if you are lucky and the problems associated with its failure can be eliminated yourself.
The most common breakdowns are the following:
- Starter relay failure.
- The solenoid relay does not operate fully.
- Severe wear on the teeth of the Bendix gear, namely, the gear rotates, but does not engage with the teeth of the engine flywheel ring.
- The stator winding in the starter burned out.
So, let’s start the “heart” of the car.
Method 1, or how to start a car from a push, or “from a pusher”?
Everything is quite simple, but at the same time very reliable. Its essence is that the driver needs to find at least a couple of people, let them be, for example, neighbors in a garage cooperative who sympathize with him. And they don’t need to be of strong build, the main thing here is the number of participants: the more, the better. The entire team (company) rests their hands on the trunk, rear pillars, etc., and begins to push the car, accelerating it. The driver, in turn, sitting behind the wheel, already with the ignition on and, better yet, with third gear engaged, as well as with the clutch depressed, after waiting for the car to accelerate, the clutch is already released. After this, the engine “sneezes” and starts. The higher the acceleration speed, the faster the engine will start.
With this method, it is important to remember that after starting the engine, the car will begin to accelerate and you must immediately depress the clutch and turn off the gear, but, of course, do not turn off the engine!
In addition, do not forget to press the brake so as not to hit the car pulling you in the rear and put your car on the handbrake, and after that you can go and unhook the cable.
Method three, or we start the engine by simply closing the starter.
In addition to the above options, the engine can be started without “violent” methods. Just need to have at least a little idea of how to close the starter directly?
Often, drivers close the starter using everything that is at hand in the car. This could be a screwdriver, a spatula, a wrench, etc.
TIP - a screwdriver will be effective if the starter relay is faulty.
This is easily recognized by the characteristic clicks coming from the engine compartment when starting the engine. This sound tells the driver: “Hey, friend, the relay is on, but the Bendix gear is not able to turn the engine crankshaft.” There is only one way out - you bridge the starter, and with this action you apply voltage to the winding.
In this case, you will need a large screwdriver, but you can use any open-end wrench. Any of these items must close the terminals of the solenoid relay and that’s it. But, do not forget, before closing the starter directly, you must:
- The ignition key must be placed in the appropriate position.
- The gear lever must be in neutral.
- The car must be put on the handbrake.
With this method, a screwdriver (wrench) plays the role of a solenoid relay and the engine of your car must start.
Replacing the unit
Now another question arises - how to disassemble it? There shouldn’t be any particular problems with this matter if you arm yourself with the instruction manual and also read our recommendations.
Arm yourself with a set of keys for 10, 13, 15 and 8 millimeters. Actually, you don’t really need anything else in terms of tools.
The sequence of dismantling and repair is as follows:
- Drive the car into the pit or lift it using a lift. You must have access to the underside of the car.
- If you have just arrived, give the engine some time to cool down. It is better to work with a cold engine.
- Remove the negative cables from the battery.
- First remove the protection and then the tin casing that protects your gearbox. To do this, you will need two keys - 8 and 10 millimeters.
- The power wire plug is removed from the starter. You just need to pull it towards yourself a little.
- Now take a 13 mm wrench and use it to unscrew the power wiring located on the solenoid relay.
- Place the loose wire aside and secure it with something temporarily so that it does not interfere with further repairs.
- The starter is attached to the gearbox housing with two nuts. They are easily loosened with a 15mm wrench. If you have problems unwinding, lubricate the fasteners with the almighty WD40.
- Dismantle.
- Now check the condition of the bushings on the gearbox housing.
- Make sure that the armature shaft is in good condition; when moving, there should be no play or jamming. If such defects occur, then it is recommended to immediately replace the bushings with new and high-quality ones.
- There are always two bushings. One is at the bottom of the starter, and the second is on the gearbox housing. The bushing on the starter can be changed without any problems, but difficulties may arise with the second one. To dismantle it, you need a special tool called a rubber. It is better to entrust the work to specialists from a service station.
- If the cause of the starter malfunction is the bendix or the solenoid relay, there is no need to call the experts for help.
- To remove the relay, unscrew the power wire, or rather its fastening, from the starter housing. You will need a key for 13.
- Using a size 8 wrench, remove the two bolts securing the relay to the starter housing. It is important to be careful here, because when removing the bolts, there is a spring in the relay that can spring back. Hold it with your hand when dismantling.
- Remove the relay piston from the rocker arm hook located on the bendix.
- Proceeding in reverse order, install a new relay.
- If you need to replace the bendix, then remove the solenoid relay, unscrew the two bolts with a 10mm wrench at the back of the starter. Now disconnect the starter housing from the front of the starter where the bendix, rotor and fork are located.
- Use a flathead screwdriver to pry up the plastic fork to remove it from the armature, and remove the armature itself and the bendix from the front of the body.
- Remove the retaining ring located on the tip of the armature and remove the desired bendix.
- The structure can be assembled in the reverse order, but the splines must first be lubricated with Litol.
- Test the new starter in place before beginning installation. To do this, connect the power terminals of the battery.
- The nuts responsible for fastening the terminals are tightened with a 13mm wrench. But it is not recommended to apply much force, since the terminals are made of copper. Clamping too hard will damage the threads, causing even more problems.
We figured out how to disassemble the starter on a VAZ 2110 and we can say that this procedure is not particularly simple, but it does not require mandatory execution by a professional auto mechanic.
The starter on the “ten” is somewhat capricious, but if you operate the car correctly, check the condition of the contacts, and also periodically flush the engine on the injection VAZ 2110, it can last a long time and reliably.
VAZ 2110 won't start, the injector turns the starter
Probably every motorist has encountered a situation in which your car does not start, and there is little pleasure in it, especially if it happens on the road.
To begin with, it is recommended to conduct a general diagnostic of the engine and try to identify the malfunction. In this situation, in order to determine the malfunction of the VAZ 2110 power plant, it is recommended to check all operating systems of the engine, proceeding from general to specific.
The starter turns but the engine does not catch.
The fact that when you turn the key, the engine begins to rotate under the influence of the starter torque is not a bad sign. This indicates, first of all, that the malfunction lies in a malfunction of one of the systems, namely the fuel supply system, air supply system, or ignition system. (Cases of breakdown of the crank and gas distribution mechanisms assemblies are not taken into account, since these breakdowns are extremely rare).
Possible malfunctions of the fuel supply system of the VAZ 2110
One of the major malfunctions of the fuel supply system is: - failure of the fuel pump.
- clogged fuel line
- clogged distributed injection nozzles
To diagnose the performance of the fuel supply pump, it is necessary to remove the hose from the fuel rail and check the pressure in the system. If necessary, the pressure is measured with a special pressure gauge. If there is no pressure in the fuel line, it is necessary to check the serviceability of the fuel pump, as well as the correct operation of the electrical circuit.
Clogged fuel injector nozzles can be checked by removing the fuel rail. A working fuel injector should spray fuel into a vapor state. A faulty or clogged nozzle does not spray, gasoline may not flow at all, or may flow in a stream. Failure of all injection nozzles to pass through may also indicate improper operation of the vehicle's Electronic Control Unit.
Typical malfunctions of the VAZ 2110 ignition system
If the fuel supply and distributed injection systems are fully operational, you should check the serviceability of the vehicle’s ignition system.
In this system, malfunctions in the operation of the following components are possible:
1. Faulty spark plug. As a rule, when 1-2 spark plugs come out, the car will start, but it will be difficult or the engine will start to seize.
2. Breakdown of high-voltage wires; if armored wires are not replaced in a timely manner, they may fail. Accordingly, voltage will not be supplied to the spark plugs.
3. Failure of the ignition module. The electric current converter may fail at the moment the spark is applied; in such a situation, it is necessary to check the voltage at the output.
Possible malfunctions in the timing belt
- the timing belt slips through the pulley teeth by 1-2 positions. Because of this, the position of the valve timing changes and the engine may not start at all. -Slipping of the camshaft pulley, or damage to the shaft. - malfunction or incorrect operation of the crankshaft position sensor. In a situation where it is not possible, from a technical point of view, to identify a malfunction using general diagnostics, it is necessary to carry out general computer diagnostics of the engine with connection to the ECU
DIY starter repair
Maintenance or repair of the starter must be carried out in accordance with certain algorithms, compliance with which requires certain experience and knowledge, as well as the use of the necessary tools. Troubleshooting always begins with disassembling the starter, after which diagnostics are carried out, and if problems are detected, repairs are carried out.
Tools and Supplies
To troubleshoot, you need to prepare the following tools:
- Socket heads for 13 and 15.
- Extension.
- Handle equipped with a ratchet.
- Ohmmeter.
- A special analyzer equipped with a light bulb.
- Phillips and flathead screwdrivers.
Spare parts will be used as consumables to replace failed components. You can determine which parts require replacement at the diagnostic stage described above. To repair the starter, it is recommended to use only high-quality parts.
How to remove and disassemble
To prepare for repairs, it is necessary to completely disassemble the starter. This procedure should be carried out in the following sequence:
- Remove the negative battery terminal.
- Remove the air filter housing to ensure convenience for further operations.
- Disconnect the wire leading to the traction relay.
- Place the disconnected wiring to the side so that it does not interfere with further repairs.
- Unscrew the nuts that secure the starter to the gearbox.
- Remove the unit and carry out further repairs in more convenient conditions.
- Disconnect the wire that is in contact with the mounting bolt.
- Remove the traction relay. To do this, you need to unscrew the two bolts that secure it.
- Remove the relay armature. To do this, you need to lift it up a little, and then remove the loop from the lever.
- Unscrew the nuts securing the tie rods.
- Remove the cover with the drive, as well as the gearbox assembly.
- Completely “remove” the tie rods. This will make it easier to further remove the drive and gearbox.
- Remove the planetary gears. They need to be replaced if there is damage to the teeth or the integrity of the needle bearings is compromised.
- Replace the brush holder assembly (if necessary).
- Remove the cover from the manifold side.
- Unscrew the two screws and then remove the brush holder from the cover.
- Bend the clips and remove the spring.
- Check the anchor for defects. To do this, you need to remove it from the case.
- Remove the gear from the anchor shaft.
- Remove the armature from the stator mechanism.
- Remove the sealing support from the lever.
- Knock the stopper off the retaining ring using a special mandrel.
- Dismantle the restrictor and retaining rings.
- Remove the drive assembly.
General view of a completely disassembled starter
Assembly must be done in reverse order.
Troubleshooting
When conducting a full check of the functionality of the VAZ 2110 starter, you must act in accordance with the following algorithm:
- Check how well the unit rotates. If the crankshaft moves poorly, you should pay attention to the presence of lubricant and, if necessary, lubricate the mechanisms. There are situations when the oil does not correspond to the current season. Replacing it with a more suitable one will solve the problem.
- Check the battery for charge and oxidation of tips and inputs. If necessary, it is necessary to charge and replace failed elements. In such a situation, it is necessary to carry out maintenance of the contact group and the battery itself, after which the functioning of the starter will be restored.
- Inspect the brushes and check the tightness of the wire ends. To do all the necessary actions, you will need to dismantle and disassemble the device, clean the commutator, replace the brushes and adjust the degree of spring tension.
- Determine the presence or absence of clutch slipping. If necessary, it is necessary to completely replace the starter drive. Another way to solve the problem is to wash the threaded shaft and then lubricate it.
- Inspect the flywheel ring teeth for nicks. Their presence may be indicated by a characteristic grinding sound. To eliminate it, you will need to eliminate the nicks or install a new buffer spring if the old one is noticeably weakened.
- Carry out diagnostics of the starter pole fastening. Its weakening may be indicated by the characteristic noise present during operation of the mechanism. The problem can be solved by securely fastening the starter or reinforcing the said fastening.
To ensure that the bolt is in contact with the plate, it is necessary to measure the resistance on the contact bolts
If you check using the described algorithm, you will be able to accurately determine the “source” of the malfunction and effectively eliminate it. However, there are breakdowns that cannot be eliminated during an inspection.
How to fix
After the preparatory work is completed, you can begin the repair procedure. To achieve a positive result, you must act in accordance with the following algorithm:
- Check whether the bolt is locked to the contact plate. You need to “push” the armature inward, and then measure the resistance on the contact bolts using a tool called an ohmmeter. If it is missing, then the relay must be replaced or repaired.
- Repair the relay (if necessary). To do this, you need to unscrew two screws, dismantle the winding terminals, remove the cover and clean the contact plate and bolt heads using special sandpaper. If they are “burnt” quite badly, then you need to turn them 180 degrees.
- Repair the gearbox. The gears, which are located inside the housing, wear out over time, and the properties of the lubricant deteriorate noticeably; moreover, metal shavings appear, making work difficult. Repairs are carried out by replacing worn elements, as well as cleaning the housing from chips and old grease, after which the internal components must be re-lubricated. The wear of the elements of this mechanism in the future can be reduced by periodically “renewing” the lubricant.
- Check the winding using a light bulb rated for 220 V. It should not burn if voltage is applied to the core and collector plate.
- Replace bendix (if necessary). To do this, you need to pull it out of the gearbox cover along with the drive.
- Replace the ring if it has lost elasticity or is severely bent.
Broken gear teeth cannot be repaired, so they must be replaced
It is possible to carry out the procedures in the described algorithm, even in a private garage, without having special tools or equipment for computer diagnostics at hand.
Starter repair, which includes checking, determining the “source” of the malfunction, completely disassembling the mechanism and installing serviceable components to replace the failed ones, can take varying amounts of time depending on the person performing the maintenance and the individual characteristics of a particular vehicle. In a specialized car service, such a procedure takes no more than a few hours, if you do not need to wait a long time for the delivery of spare parts.
Problems with the starter itself
So, we have considered the main external causes and ways to eliminate them. Now let's look at possible problems that may arise in the starter itself. First, let's recall some of its features. On the VAZ “tenth” series, the manufacturer installs a starter with a gearbox. The design also provides for the presence of a planetary reduction gear, which, in turn, consists of gears (ring, internal and central) and a carrier connected to the transmission shaft.
If the starter engages, but a rough noise is heard, this may indicate wear on the gearbox gears. The problem can be resolved quite simply. The gearbox should be disassembled and the satellite gears replaced. One point worth noting. Most often, the needle bearings on which the gears rotate wear out.
When the gearbox wears out, the production of other parts accelerates, and significantly, for example, due to vibration, the liners in which the drive shaft rotates fail much faster than expected.
At this point you need to pay special attention. Over time, the liners can become so loose that the starter does not operate due to a jammed shaft.
In addition, as a result of the resulting vibration, the Bendix gear quickly deteriorates. And it doesn’t just end there. The damaged gear begins to gradually destroy the flywheel teeth. To prevent this, the bushings should be replaced as soon as possible.
If the flywheel crown is worn out sufficiently, this will also bring certain problems to the car owner. In this case, the engine will start, as they say, every other time. The starter works, but you will also hear extraneous noise, indicating a malfunction. Sometimes the ring wears out to such a state that the gear simply cannot fit in and connect with it normally. However, if the flywheel turns even a little, the starter will be able to turn it half a turn. In most cases, this is enough for the car to start.
Wear of the starter brushes is another problem in which this unit will fire every once in a while. By the way, sluggish scrolling also indicates the presence of this problem. When compared with other starter components, it must be emphasized that the brushes here wear out quite quickly. As a result, a moment comes when their length is no longer enough to touch the collector. Because of this, the engine will not spin up.
The starter may also fail to operate due to a short circuit in the rotor winding or its breakage. This malfunction is very dangerous for all electronics. Moreover, a short circuit is quite possible, which can damage the battery. There are even cases where the battery simply exploded. If the starter winding is shorted, you will hear a distinct burning smell in the engine compartment. There is no point in doing repairs here - it is better to just buy a new one. Otherwise, you risk wasting time and money, but repairs in any case do not provide any guarantee of subsequent long-term operation. It is possible that after some time the problem will appear again. Therefore, in this case, it is better not to save, but to immediately replace the starter, because the stingy, as we know, pays twice.
Design and principle of operation
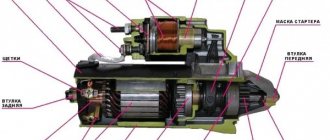
The VAZ 2110 starter does not have a very complex design, but a person who wants to repair this mechanism should know that its elements include:
- Drive shaft;
- Hubs with ring;
- Cover sleeve;
- Gears equipped with teeth and a coupling ring;
- Carrier;
- Drive shaft supports equipped with a liner;
- Anchor core.
- Gear axles are of the planetary variety.
- Permanent magnet;
- Gaskets;
- Frame;
- Collector;
- Lever bracket;
- Drive lever;
- The back cover is equipped with a special sleeve;
- Anchor relay and shaft;
- Holding winding;
- Brush holder;
- Traction relay core;
- Contact plate and bolts;
- Staples.
The starter components described most often require replacement, diagnosis or repair when problems occur.
Four devices creating a magnetic field are mounted to the starter housing. On the inside they are secured with an aluminum sleeve. The lid is tightly attached to the body. Reliable fixation is ensured thanks to two studs. The anchor shaft rotates in special bearings.
The starter plays a major role in starting the car, as it rotates the crankshaft
Through a planetary type gearbox, the torque “goes” to the drive shaft. Its transmission is ensured by a special gear. After the vehicle starts moving, it ensures their separation in order to protect the gearbox from damage.
When starting the engine, voltage is transmitted to two windings of the traction relay. After closing the contacts it stops working. The voltage should not exceed 8 V. If its value is higher or lower, then this “indicates” that there is a problem in the system.
The starter on the VAZ 2110 is located to the left and slightly below the battery
The starter clicks, but does not turn, the reason why we will figure out why the starter does not turn
The starter is a complex electromechanical unit, without which your car is nothing more than a pile of iron. No, of course, you will be able to start the car in some alternative way, but that’s a completely different story. Often the starter, whose task is to start the engine, malfunctions and fails, after which either the starter clicks but does not turn, or the starter does not turn at all, which is even worse.
Reasons why the starter clicks but does not turn
Often the cause is emergency or improper braking, in which the starter, which is engaged with the flywheel, receives a large current. The starter itself is a short-term electrical unit, so if it operates for a long time, it may fail, which in most cases manifests itself in the form when the starter does not turn or the starter clicks but does not turn.
In order to understand why clicks occur and there is no rotation, you need to pay attention to how the starter is designed. The starter contains a so-called traction relay, or as it is also called a retractor relay, which looks like a small cylinder attached to the base of the starter
The starter relay, in turn, is equipped with a pull-in and holding winding. Failure occurs precisely at the moment when a voltage deficiency occurs on the holding winding. The task of the retracting winding is to retract the core, but it returns to its original position because the holding winding cannot hold it. This is exactly what happens when you try to start the car by turning the key in the ignition. And this phenomenon looks to us in the form of clicks, that is, when the starter clicks but does not turn
The starter contains a so-called traction or, as it is also called, retractor relay, which looks like a small cylinder attached to the base of the starter. The starter relay, in turn, is equipped with a pull-in and holding winding. Failure occurs precisely at the moment when a voltage deficiency occurs on the holding winding. The task of the retracting winding is to retract the core, but it returns to its original position because the holding winding cannot hold it. This is exactly what happens when you try to start the car by turning the key in the ignition. And this phenomenon looks to us in the form of clicks, that is, when the starter clicks but does not turn.
As you already know, clicks are produced by the solenoid relay, and there may be several reasons why this happens. Here is a list of the most likely reasons why the starter does not turn, but clicks:
- Rechargeable battery (AB). Most likely, the battery is simply discharged, or is not charged enough, or the terminals have poor contact with the high-voltage wires. Charge the battery and try to start the engine again.
- Poor weight of the body and the engine. In this situation, it is recommended to take another ground wire and try again.
The starter does not turn and one distinct click is heard. In this case, I recommend checking the engine mass, as well as the fastening of the traction relay to the starter housing. The problem may be bad or burnt out contacts on the traction relay. If not, then most likely the breakdown lies in a malfunction of the starter mechanism itself, which cannot be done without completely disassembling or replacing it.
If you are convinced that the reason why the starter clicks but does not turn is the starter itself, here are a few probable reasons why this could happen:
- The power wire connecting the starter winding and the traction relay may burn out.
- Critical wear of starter brushes or bushings.
- Break in the starter winding or short circuit in the armature winding.
- Deformation or destruction of the fork in the Bendix drive.
Let's summarize.
If you notice problems with the starter, do not delay repairs, otherwise at one inopportune moment it will simply stop turning, and according to the “law of meanness” this will happen somewhere far from home or when you are in a hurry... The problem is when the starter clicks but does not turn you can decide on your own. There are an abundance of all kinds of manuals on the Internet for repairing and replacing the starter with your own hands. However, if you are not sure, it is better to trust the professionals, so you can save your time, nerves, and sometimes money.
Checking starter components
You can detect wear on the graphite brushes only by disassembling the starter housing. If the car is used for a long time and under heavy loads, then wear will be clearly visible on the brushes, although the factory safety margin allows it to function for a long time and without failure. In some cases, wear on the graphite brushes can block the operation of the solenoid relay, so the characteristic clicking noise will not be heard.
Burnt windings can be detected not only by visual inspection, but also by the unpleasant smell of burning. This element cannot be repaired or replaced, so you will have to completely replace the starter.
You can check the functionality of the relay without special equipment. Inside it there are three terminals: an input from the battery, an output to the starter and a small terminal to the control system. You can try to close the contacts of large terminals with a well-insulated screwdriver, without touching the housing elements. If rotation occurs, the problem is with the relay. After such testing, the relay will not work for a long time, so it is better to immediately replace it with a new one.
Sources
- ladaautos.ru/vaz-2110/chto-delat-esli-vaz-2110-ne-zavoditsya-pri-etom-starter-ne-krutit-i-ne-shhelkaet.html
- zen.yandex.ru/media/avtobloger/vtiagivaiuscee-scelkaet-no-starter-ne-krutit-prostoe-reshenie-problemy-za-kopeiki-5ce8ce214bdca600b3cba06b
- vazweb.ru/desyatka/elektrooborudovanie/ne-krutit-starter.html
- drive2.ru/c/2562200/
- remont-inomarki.ru/pochemu-ne-krutit-starter-v-vaz-2110.html
The starter clicks but does not turn VAZ 2112
The starter clicks but does not turn VAZ 2112
In a situation where the starter on a VAZ 2112 does not turn, there may be several reasons that led to its malfunction.
The battery is discharged, which is often observed after parking the car on weekends when it is not being used.
Determination of the battery leakage current at rest. After standing for a long time, the starter may not turn, because the entire battery charge was wasted due to leaks.
Here, most likely the culprit is a large current leak in the electrical system, if this is not due to forgotten dimensions. open doors or trunk lid when the battery is drained by a real current consumer. In such cases, you should charge the battery and simultaneously check the amount of charging current supplied by the generator.
When the starter clicks but does not turn the VAZ 2112, there may also be several reasons, which can initially be determined by ear by external signs.
So, if when you turn the ignition key to the “start” position, you hear frequent clicks from the starter, then again the culprit is a discharged battery, poor contact at its terminals, or a bad ground on the starter.
If only one but distinct click is heard, then in this situation the power contacts of the starter solenoid relay are most likely burnt out. which are not able to conduct all suitable voltages. The next reason why the starter on a VAZ 2112 does not turn when the starter clicks once may be a malfunction of the starter electric motor itself or its drive.
In a situation where the starter clicks but does not turn the VAZ 2112 with a single click, it is necessary to remove the starter from the car and carry out a complete troubleshooting. A complete inspection of the starter will allow you to determine why the starter on the VAZ 2112 does not turn and which of its elements require replacement.
So, when troubleshooting the starter solenoid relay, you need to check its contacts and their condition, which can be done indirectly if the relay is rolled and cannot be disassembled. To do this, without removing the starter from the car, you can check with a device how many volts are coming to the power terminal of the relay (direct plus wire from the battery) and how much is transferred to the second bolt, where the output of the starter motor winding is connected. In the case when the same amount of volts is “transferred” as comes from the battery, then the contacts are working properly and the fault needs to be looked for further to find the reason why the starter does not turn on the VAZ 2112. If, say, 12.7 V comes in, but only 4-5 V is transferred, then the contacts are burnt and require replacement, and if the solenoid relay is not removable, it requires replacement.
However, before making a final conclusion about the malfunction of the retractor relay, it is necessary to check the condition of the starter drive, which can be done when the starter is removed from the car.
Photos of various solenoid relays (shown by arrows) of starters of various modifications.
In the drive, there may be a breakdown of the plug connected to the relay core and this may cause insufficient contact, since the core cannot be fully retracted into the relay winding and reliably connect the power contacts.
After inspecting the drive and the solenoid relay, it is necessary to make a complete inspection of the electric motor, which may contain the following malfunctions. Extreme wear of the brushes or commutator plates on the starter armature, inter-turn short circuit of the windings or their breakage, and brush springs may also require replacement, which no longer provide their guaranteed pressure to the lamellas of the armature commutator.
The inspection will not be complete if you do not check the condition of the gears and their teeth in the gearbox, the condition of the overrunning freewheel, as well as the condition of the cermet bushings. in which the starter armature rotates. Often a crack appears on the outer gear ring of the gearbox. which leads to a malfunction of the starter and serves as a failure in its operation. A set of reduction gears is commercially available and replacing it does not require any special knowledge or skills.
From the review you will learn what to do in case of a classic problem, when everything is fine in a VAZ 2111 car, but the starter refuses to work.
Starter brushes VAZ 2110
Everything you need to know about the VAZ 2110 starter brushes, from checking their functionality to replacing them with new ones.
The starter turns poorly on a VAZ 2110
The article discusses the main steps that need to be taken if the starter on the BA 2110 begins to turn poorly.
Home page About the site Write to us Advertising on the site 2012 AUTOGREP “auto Russia” All materials presented on the site are protected by copyright (see Chapter 70, Part 4 of the Civil Code of the Russian Federation). Use of site materials in printed publications or on the Internet is possible only with the permission of the site owner. (c) autogrep.ru.
https://autogrep.ru
How much does it cost to replace a starter?
Beginning car enthusiasts often have questions after visiting a parts store. Most often they are interested in why relays have very different prices. First of all, it is worth remembering that spare parts for the VAZ-2110 are manufactured not only by domestic factories, so you can find relays under brands such as BOSCH or Tomahawk. They are more expensive than those produced in Russia. At the same time, domestic ones have a better price-quality ratio. Brands such as VIS or Torgmash will cost you much less.
If you prefer to install original components from AvtoVAZ (often in stores they are labeled “made in Tolyatti”), then the relay will cost you about 1,000 rubles, and the entire starter – 5,000. Domestic manufacturers of spare parts can offer you more budget options. The price may be half as low, but the quality is not always worthy. Imported analogues, on the contrary, are twice as expensive, so a starter from BOSCH can be found for 10 thousand rubles, a relay will cost about 2,000.
Answers to frequently asked questions
How can you tell if the starter relay is not working?
To determine whether the starter relay is working, apply power from the positive terminal of the battery directly to the control contact of the relay. After this, a click should sound; if it is faulty, there will be no sounds.
How to check whether the starter is working or not?
To check the serviceability of the starter itself, you need to apply current to it directly by connecting the power wires of the retractor relay (thick wire from the battery) and the electric motor (stud with a thick wire from the retractor to the starter). A working starter should start moving.
What to do if the starter does not work after turning the ignition key?
First, make sure there is voltage at the battery terminals. If you don’t have a tester, this can be done using a 12 V lamp. Then try to apply voltage directly to the starter: use a screwdriver to close the pin to which the wire from the battery goes and the control contact located nearby. If there is no reaction, check the quality of the contacts of the terminals on the battery, the ground contacts (with the body and the engine) and the contacts of the starter itself by cleaning and tightening the terminals. If the battery is discharged or the starter is faulty, you need to start the car with a pusher (manual transmission) or tow it to the repair site.
Bendix and planetary gearbox
By design, the rotor of the electric motor is separated from, consisting of a sun gear, which has the shape of a circle with teeth inside. There are also three more small gears that connect to the internal teeth, as well as the electric motor pulley. However, devices with this design have been installed on cars with VAZ 2110 injectors not so long ago.
Bendix starter mechanism
Older types of mechanisms are made without a planetary element and are characterized by a lower number of revolutions. This parameter can be regarded as the main drawback, although they are more reliable by design.
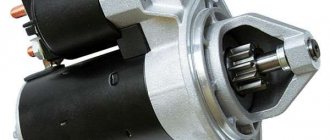
Bendix is a device consisting of two parts - an overrunning clutch, as well as a gear, which is located directly on it. It should be noted that the overrunning clutch is directly connected to the starter pulley thanks to splines installed in a spiral. The mechanism moves along these slots when the driver tries to start the engine.
If the starter does not click and does not work or works slowly even when hot, the problem may lie in the bendix. In addition, there is another fork on the device, consisting of two metal plates mounted directly on the overrunning clutch. This fork is attached to two opposite points of the element. One of the edges of the plates is made in the form of a rectangle. When the driver is driving, the retractor relay acts on these plates. Next, the gear moves along the pulley using splines until the element engages with the flywheel rim.

