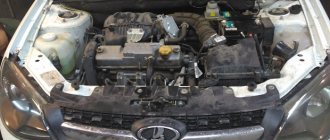
Our neighbor came to us to undergo scheduled maintenance on his brand new VAZ 2170, or Lada Priora in common parlance, to replace the timing belt, pump, oil and other little things.
Different sources indicate different frequency of replacing the timing belt from 80 thousand km to 105 thousand, but we change it at 60 thousand or every four years. We check the belt tension and its condition every 20 thousand kilometers or once a year and this is not our whim, because we all know about the quality of our spare parts. When checking, we pay special attention to the absence of cracks and tears on the belt, as well as oil or antifreeze. And remember that saving on a timing belt can result in many times higher costs for engine repairs.
Important! When the timing belt on the 21126 engine breaks, all 16 valves bend.
And yet, not everyone knows, but on the sixteen-valve Priora engine, lightweight connecting rods are installed, and when the timing belt breaks, not only all 16 valves bend, but in most cases the connecting rods as well. And if they are not replaced, the car will have a decent oily appetite. Therefore, it is better to play it safe.
Together with the timing belt, we also change the pump, since in my experience most of the cases of toothed belt breakage occur due to a jammed pump.
Necessary tool
From the tools we will need: a standard set of keys, hexagons for 5 and 6, a set of heads and a special key for the Priora tension roller, it is slightly different in size from the usual one (the pins that are inserted into the roller are thinner), the price is 100 rubles. But also the Gates timing kit itself. Gates belts are, in my opinion, some of the best timing belts out there.
The procedure for replacing the timing belt on a Priora takes approximately two hours with a lunch break.
When is it necessary to replace the timing belt on a Priora car?
If we take into account the factory maintenance regulations, then he recommends rotating the rubber-mechanical product after 200,000 km . But, as practice shows, motorists prefer to change this part earlier - some at 60,000, and some at 100,000 km. It is believed that during urban travel the element wears out faster.
In any case, the condition of the element must be monitored every 45 thousand km . The first signs that a timing belt replacement is already necessary on a Lada Priora are the following factors:
- extraneous noise during engine operation;
- discoloration of exhaust gases;
- problems when starting the engine;
- extraneous vibrations.
Low mileage does not always guarantee trouble-free operation of the car. Quite often in reviews from car enthusiasts you can come across a situation where the belt drive wears out ahead of schedule due to oil and dirt getting on it. These components enter through seals and cracks in the casing, so it is important to eliminate the causes of leaks and inspect the part.
It is important to understand that replacing the Priora timing belt must be done in a timely manner; in no case should the matter be delayed until it breaks. Otherwise, the cost of repairs may unpleasantly surprise the owner. This is largely due to the absence of recesses for the valves on the pistons, so a break in the part leads to their direct contact, after which the latter usually bend.
Problems with the strength of the belt drive at high speeds generally lead to catastrophic consequences, including breakage of the pistons and even deformation of the connecting rods. In order not to expose themselves to risk, experienced motorists are advised to periodically monitor the condition of the rubber transmission, as well as the degree of its tension.
Preparatory operations
First, disconnect the negative battery terminal, remove the engine protection and drain the antifreeze.
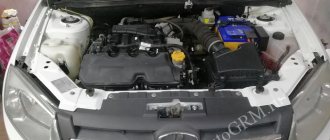
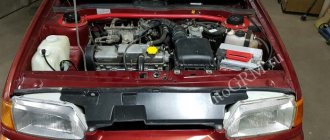
Engine 16 valves Priora.
Remove the protective cover, not forgetting to disconnect the absorber purge valve.
Checking the condition of the belt
The inspection regulations for this unit require an inspection in a cold engine state. Remove the outer protective casing to allow visual contact with the surface of the gas distribution unit parts. Having gained access directly to the timing belt, rotating its drive, inspect both sides of the consumable in detail for the presence of any kind of defects (wear, broken teeth, protruding cord, rubber delamination, etc.). Tensioner rollers are subject to careful inspection; in the presence of mechanical damage and large play, they contribute to increased wear of the consumables. The presence of oil stains on the surface of a rubber technical part, which contribute to the destruction of its structure, is not allowed. If found, immediately remove from surface.
- https://m.etlib.ru/report/1812-zamena-grm-priora-16-klapanov
- https://autogrm.ru/vaz/grm-priora.html
- https://priorik.ru/lajfhak-reglament-zameny-remnya-grm-avtomobilya-priora-na-16-klapanov/
Step-by-step instruction
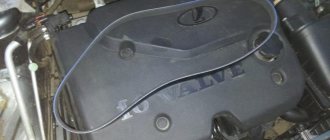
- Remove the generator belt by unscrewing the tension roller fastening. The key is 17.
It will not be possible to completely remove the belt since the engine mount passes through it and if you want to change it you will have to unscrew it. It will not interfere with replacing the drive belt.
Service belt tension roller.
- Remove the upper protective timing cover by unscrewing the 4 bolts. Hexagon 5.
On newer models we will need an asterisk.
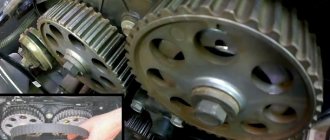
- We tint the marks on the camshaft toothed pulleys with a marker for ease of control.
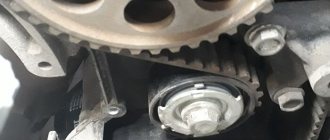
- tension roller
- deflection roller
- Unscrew the bolts securing the lower timing belt protective cover. Hexagon 5.
Lower timing cover.
The front right wheel does not need to be removed, but turned all the way to the right.
- We lock the crankshaft. We place stops under the front wheels, turn on fifth speed and unscrew the crankshaft pulley bolt. 17mm head and extension with a pipe as a lever. Turn off the speed.
Crankshaft pulley.
- We dismantle the pulley and the lower protective cover. behind the pulley, do not forget it when installing.
Set the top dead center
- It is necessary to screw the crankshaft bolt into place and use this bolt to turn the crankshaft clockwise until the marks on the crankshaft pulley and the ebb on the oil pump coincide. The head is 17. We put a mark with a marker for convenience. Many manuals suggest putting a mark on the flywheel, but climbing under the thermostat is not very convenient, so we’ll take the simple route.
Crankshaft mark.
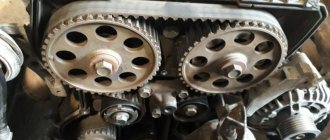
- The marks on the camshaft pulleys should also match the marks on the timing case. The camshaft marks were photographed after installing the new belt, they simply forgot to take a photo during the replacement process, may the inexperienced reader forgive us for this.
Camshaft marks.
- We unscrew the bolts securing the tension and idler rollers and remove them together with the timing belt.
Replacing the pump
- After unscrewing the fastening bolts, remove the camshaft pulleys. Head 17.
Attention! There is a plate for the timing sensor installed on the intake camshaft pulley, do not damage it.
Fastening camshaft pulleys.
- Next, unscrew the generator belt tension roller support (three 13mm bolts) and six 10mm bolts securing the inner casing.
Fastening the casing.
- Unscrew the three bolts securing the water pump. Hexagon 5.
Pump mount.
- Apply a thin layer of sealant to the water pump gasket and install it in place.
We pull the bolts evenly in several passes.
- Reinstall the casing and roller support.
Gas distribution mechanism
Lada Priora boasts a 16-valve engine producing 106 hp. With. and a working volume of 1.6 liters (there is also an 8-valve one, but it is not popular). The timing belt drive is the weak point of the timing belt. If it breaks, the pistons will inevitably bend the valves, and this will lead to large expenses for repairs.
Unlike the power unit with 8 valves, the Priora engine with 16 valves is equipped with two camshafts, each of which has its own gear. The mechanism is designed to remove exhaust gases and timely supply the fuel-air mixture to the combustion chambers due to the synchronous raising and lowering of the pistons (opening/closing of valves).
Due to the design features of the 16-valve engine, the timing belt of the Lada Priora is longer. In addition to the tensioner roller, the drive has an additional support roller.
Installing a new timing belt
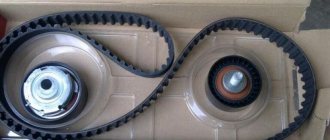
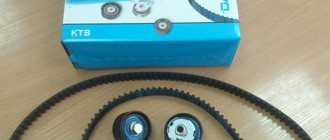
- We get a new timing belt kit.
Timing kit.
Attention! On the tension roller there is a direction of tension (shown by an arrow) and an indicator of the correct tension, indicator type.
Direction of tension on the roller.
- We install the tension and support rollers in their places and check that all marks match. We tighten the bolt securing the support roller, and simply tighten the tension roller.
The timing marks on the camshafts tend to run a bit, so if you're doing it alone, you'll have to be very tricky to hold the camshafts and fit the timing belt. You can fix the pulleys for convenience by installing a homemade clamp between the pulleys from a bolt with a nut and two washers. The Internet is full of pictures and examples, we won’t dwell on that.
- We put the timing belt first on the crankshaft pulley and pump, then on the idler pulley, the intake and exhaust camshaft pulleys and the tension roller. The branch between the crankshaft and intake camshaft pulleys must be tensioned.
- We tighten the timing belt with a roller in the direction of the arrows using a special wrench until the correct tension marks match. That is, when the pointer on the bottom of the roller is opposite the groove on the top. Tighten the bolt. Please note that an under-tightened belt will lead to rapid wear of the teeth, and an over-tightened belt will lead to increased wear on the pump bearing and reduced service life.
Correct tension.
- We check that everything should be on the mark. If the marks do not match, remove and reinstall the belt. If they match, then turn the crankshaft two turns and check the marks and tension again.
The new belt is in place.
- If everything is in place, install all the parts in place in the reverse order of removal. We start the car.
This is how easy it is to replace the timing belt on your Priora in a simple garage or even on the street.
About the resource
Well, now we’ve come to the most interesting thing, namely the resource. You know, now I want to talk specifically about normal belts and tensioning equipment, about “PRIORS” will be a little lower.
Not all manufacturers strictly indicate how often to change the belt, but such information can still be found, even in the car’s operating books.
The average mileage recommended for replacement is 100,000 kilometers. On many foreign cars, this mileage can be much longer, about 150,000 kilometers.
Now the question may arise: what does it depend on? Guys, to be honest, the belt itself can run (as some manufacturers claim) about 200,000 km, but its service life is reduced due to tension and support rollers. They are often the culprits of the cliff!
The support roller is a kind of bearing on which the belt rests, often has a plastic housing.
The tension roller is almost the same plastic bearing, only it is located on a special mount that “tensions” the belt, that is, it keeps it in “tone” and prevents it from “sagging” and jumping onto a tooth.
Both videos must be of simply excellent quality, no, they simply must! With foreign cars this is almost always the case, these “support” and “tensioner” last a long time, and replacement is 100 - 150,000 km in advance.
As you may have guessed, not only the belt is changed, but also the tension and support rollers - THIS IS MANDATORY, REMEMBER THIS! As an indirect reason for a future replacement, there may be noise from the timing drive; when the rollers begin to “bend”, they begin to make noise.
When to change: consequences of untimely change
It is recommended to replace the timing belt on a Priora after different periods of time. The manufacturer claims that it can withstand one hundred thousand mileage, but experience shows that a change may be needed much earlier.
The optimal period is every fifty thousand kilometers. Some argue that over such a short service life, rubber is simply not capable of failure. However, no one takes into account the conditions - roads, fuel quality, etc.
Also, during the operation of the mechanisms, it wears out, the rubber stretches, and therefore does not provide the correct tension of the timing belt, and slippage is possible. The teeth can wear off - because of this, traction with the gears is not ensured.
There is no exact time for a change that would suit all motorists. Some take good care of their vehicles, drive carefully, and use only high-quality fuel. Others use a more extreme type of driving, foreign liquids get on the rubber, etc.
In order not to lose your car during the repair period and not to spend a fortune on restoring the mechanics, write down or remember the date of the last timing belt change on the Priora. Next, regularly check the condition of the rubber; if worn, replace it with a new device.
Signs of possible failure
There are several characteristic signs that should alert the driver:
- When the engine is turned on, extraneous noise occurs. Sometimes drivers confuse a timing belt malfunction with a poorly functioning tension pulley.
- If the color of the exhaust gas has changed.
- The engine doesn't start well.
- An unusual vibration is felt.
Pay attention to these “symptoms”, even if the Priora’s mileage with a new timing belt has not yet reached 50 thousand km
It may fail earlier if foreign liquid gets onto the drive - oil, coolant, as well as dust or dirt.
It’s worse if it’s the coolant that gets onto the drive. Firstly, this means that the gasket that ensures the pump is sealed has failed, or there is a problem with the pump. Then the rubber is damaged and service life is reduced tenfold.
Even if the belt is new, but coolant or antifreeze gets on it, it will fail even after operating for 10 thousand miles. You will have to replace the Priora timing belt and figure out why foreign substances get on it.
How to check the serviceability of the belt yourself
If you suspect that it is time to replace the Priora timing belt, it would not hurt to check the serviceability of this rubber product. Visual diagnostics will allow you to check the serviceability and absence of scuffs on the Priora timing belt.
You should have a choice of one of the tools at hand, or two at once - a 5-point hex key, or a T-30 sprocket bit. If one doesn't work, try the second.
- Open and lift the hood.
- You will see the front panel covering the mechanism and timing belt.
- Take the key and unscrew the five bolts that hold the front panel, remove it.
- In front of you you will see a mechanism, including a tension roller.
- Place a jack on the passenger side and place the wheel in a suspended position. Engage fifth gear while it is working, look at the surface of the belt for damage, even small defects.
- If you notice cracks of any size, mechanical cuts, or threads sticking out, be sure to replace it by contacting a specialist or yourself.
- Check the pump. If any traces of coolant leakage from the pump are noticeable, then the rubber will also have to be changed, even if there is no mechanical damage.
- Check the tension roller. Auto mechanics advise changing it less often than tires. The average lifespan is approximately one hundred thousand kilometers. Change it every other time you change the belt.
- Measure the belt tension. To do this, press on the stretched rubber in the area between the gears of the two camshafts. You need to press with a force of about ten kilograms. Correct tension of the timing belt should not bend more than seven millimeters.
- Check that the rubber is not too loose. Make sure that the Priora timing marks match the original condition. The first, similar to a recess, is located on the outer race of the tension roller. The next one is located at the base of the roller. The maximum deviation is four millimeters; if the tension does not meet the standards, the product will have to be changed.
Found a discrepancy with the standards? Change the product. A belt set with rollers for the Priora 126 engine costs only five thousand rubles. This is a much smaller amount than the cost of a major repair if a component ruptures.
Price
The timing belt itself on a Priora can be purchased in our stores at a price of 1,000 rubles, depending on the manufacturer. The cost of the set (belt + 2 rollers) varies from 2 to 3.5 thousand rubles. Replacement work at a service station will cost from 800 to 1200 rubles.
If you don’t want to spend money on paying for work at a service station, you can change the belt and rollers yourself. This does not require any special skills or tools. But first, let's decide on the choice of spare parts. Below is a table that shows the manufacturers and catalog numbers of the original and best similar timing kits for the sixteen-valve Lada Priora engine.
| Model | Code |
| Lada | 211261006040 |
| Bosch | 1987949662 |
| Conti | CT1137 |
| Contitech | CT1137 |
| Gates | 5631XS |
| Lynx | 137FL22 |
| Optibelt | ZRK1593 |
It is undesirable to use spare parts of questionable quality or unknown manufacturers.
How is a belt drive checked on a VAZ 2170?
The part is a rubber product with teeth located on its inner part. The outer rim shows:
- the type of motor for which the car part is intended;
- number indicating the number of teeth – 137;
- marking indicating the width of the product - 22 mm.
This data will be useful to the owner who does not yet know which belt to buy for the VAZ 2170. All that remains is to prepare the necessary tool for checking:
- inbus key (hexagon) to “5”;
- key to “10”;
- jack.
The drive status check is performed on a cold motor and consists of the following steps:
- Using a hexagon, unscrew the five bolts securing the front upper cover of the timing gear drive and remove it.
- Inspect the part and determine whether the Lada Priora needs to replace the timing belt . To do this, engage fifth gear, lift the right front wheel and rotate it clockwise. The product must be free of cracks, peelings and undercuts exposing the cord threads. If defects are found, the part must be replaced.
- Inspect the condition of the tension roller - there should be no damage to it.
- Check the belt tension by pressing a force of 10 kg on the belt between the camshaft gears and measuring its deflection - it should be no more than 5-7 mm . You can also carry out control by the position of mark 1 on the outer race of the self-tensioning roller, which ideally should be opposite the protrusion 2 . Deviations are permissible within 3-4 mm - they are adjustable, but exceeding these values means the need to replace the belt drive and rollers.
