About the belt
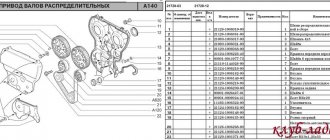
Kalina uses a toothed belt that rotates not only the camshafts, but also the coolant pump. The belt length depends on the engine model. In 16-valve engines, due to the presence of two camshafts, the belt is significantly longer than in 8-valve models with one camshaft.
1 - Crankshaft gear; 2 - Water pump gear; 3 - Tension roller; 4 — Camshaft gear mark strip; 5 - Camshaft gear; 6 - Belt; A-B - Camshaft marks; C-D - Crankshaft marks;
The 16-valve engine belt has 136 teeth with a tooth width of 25.4 mm.
The 8-valve engine belt has 111 teeth with a tooth width of 19 mm.
Step-by-step instruction
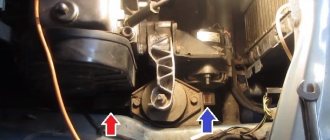
- Loosen the locknut of the generator belt tensioning mechanism. Using a 10-mm socket, unscrew the tensioning mechanism pin and remove the drive belt, checking for wear, cracks and traces of oil. We check the tension roller when rotating; it should not make any extraneous noise. To replace the generator belt on Kalina, you will have to remove the engine mount, first dismantling the protection and jacking up the power unit.
- Remove the upper protective cover of the timing belt by unscrewing the four bolts (hexagon 5).
Set the top dead center
- We turn the crankshaft by the pulley mounting bolt clockwise until the mark on the camshaft pulley and the timing belt guard coincide.
Be sure to rotate the crankshaft clockwise, otherwise increased force will be applied to the timing parts.
Mark on the camshaft.
- We unscrew the bolt of the auxiliary drive pulley (in common parlance - the crankshaft). We block the wheels with stops, tighten the handbrake, engage fifth gear and, with a slight movement of the wrench and a one and a half meter pipe extension, unscrew this bolt. Repair books also advise opening the plug on the clutch housing and aligning the marks on the flywheel, but this is an absolutely useless procedure. Firstly, the flywheel could simply be misplaced according to the marks, for example when replacing the crankshaft oil seal, and secondly, in order to provide access to this mark, it is necessary to remove the air filter housing with the corrugation. And why do we need these extra operations?
Important! Never remove the crankshaft bolt with the starter.
- Next, use the same 5mm hexagon to unscrew the bolts securing the lower timing belt cover and remove it.
- Remove the protective washer.
- The marks on the crankshaft timing belt should be aligned with the oil pump housing.
Crankshaft mark.
- Praise be to the designers of AvtoVAZ, finally rollers with a tension indicator appeared on the Lada Kalina 2 engines, now you don’t need to pull it on by eye and check the tension by twisting the belt, not even thirty years have passed since the invention of such a design. We unscrew the tension roller bolt and dismantle the latter; we also remove the old timing belt. The photo shows that the belt has stretched out because the tension marks have diverged; when checking the condition of the timing belt, if you see this, you will just need to tighten it.
Replacing the pump
- To replace the pump, we need to remove the camshaft pulley, and also unscrew a few bolts of the inner casing and remove it. If signs of wear are found on the camshaft pulley, it is better to replace it.
- Three bolts out and the pump replaced (hexagon 5). The green arrow indicates the hole for the tension roller bolt.
Pump mount.
- Having replaced the water pump, we proceed to the next stage.
Consequences of a broken belt
A design feature of the 16-valve engines on the Lada Kalina is that the valves bend when the belt breaks. This defect is caused by the absence of grooves in the pistons, but the absence of grooves is not due to a mistake by AvtoVAZ engineers, it is necessary to increase the compression ratio in the combustion chamber. Therefore, a broken belt in a 16-valve engine foreshadows a major and expensive repair in 99% of cases.
Bent valves due to broken timing belt
To prevent the belt from breaking, it is recommended to monitor it every 20,000 km and check it.
This problem is not observed on 8-valve engines.
Installing a new timing belt
- We put the casing and camshaft pulley in place.
- Then you should check the coincidence of all the marks, as discussed above.
- We install the tension roller, but do not tighten the bolt.
- We put on a new belt, observing the direction of rotation, first on the crankshaft pulley, camshaft pulley, tension roller and pump, the latter can be swapped.
We make sure that the descending branch of the belt is tensioned.
- We tighten the timing belt. Use a special key to turn the roller counterclockwise, as indicated on its body...
Tension direction.
- ...until the marks on it coincide and tighten the bolt.
Correct tension.
- We turn the crankshaft two turns to make sure that the pistons do not meet the valves and again check that the marks match and the belt tension.
The timing belt is installed.
- We install all the parts in the reverse order of removal, fill in antifreeze and start it.
It couldn’t be simpler; this procedure can be done with your own hands in the field, without going to a car service. In general, I really like Kalina, easy to repair, cheap spare parts, easy to use, what else do you need to be happy?
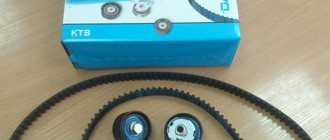
The best timing belt for Lada Kalina
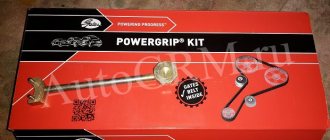
Choosing the best belt for Kalina is quite difficult, since when purchasing you can run into counterfeits of famous brands such as Gates and Dayco. It is these two brands that are most often counterfeited, since they are bought much more often than others. It is recommended to purchase products only from trusted stores.
From the factory, the standard belt on all Lada models is installed by Gates; AvtoVAZ gives its preference to it.
The table below shows timing belts for Lada Kalina with article numbers.
| Brand | vendor code |
| Gates | K015631XS |
| Gates | K015521XS |
| Dayco | KTB842 |
| Contitech | CT1137K1 |
Timing marks VAZ Kalina 8 valves
It is recommended to check the timing belt every 15 - 20 thousand kilometers.
A broken belt on an 8-valve Kalina is not fatal; the valves will remain intact, but on a 16-valve Kalina it will bend them. Therefore, you need to monitor the timing belt and promptly change it to a new one (its service life is from 50 to 80,000 kilometers). The process of replacing the timing belt is almost the same for both 8 and 16 valve engines. First you need to remove the plastic timing belt protection, which is secured with 3 bolts.
Now you need to remove the right front wheel. You will have access to the right engine protection panel. Unscrew the 2 screws that secure it and pull it down. Now we can reach the pulley on the crankshaft.
Before this, you need to rotate the crankshaft and install both sprockets (crankshaft and camshaft) according to the marks:
To unscrew the flywheel you need to lock the crankshaft. On the clutch side, the engine has a special viewing window through which the flywheel is visible. We remove the rubber band and lock it with a powerful screwdriver. For this you will need an assistant.
The pulley can be very tight, so don't be surprised if it won't come off.
Then you need to remove the alternator belt.
We remove the pulley, remove the old belt. To do this, unscrew the tension roller and release the belt as much as possible. Now ATTENTION! Make sure that the gears do not go astray.
We begin to put the new belt on the crankshaft gear. Then we pull it onto the camshaft gear on the right side. We keep an eye on the signs all the time. Next, we pass the belt through the roller and pull it onto the pump.
We tighten the timing belt using a roller. For this I used a homemade key made of steel wire (2-3 mm):
The belt must be tensioned so that it can be rotated 90 degrees, but no more, no less. After tensioning, turn the crankshaft 2-3 turns and again look to see if the marks are off. If it goes wrong, then we remove it and set everything again.
Sometimes it is necessary to carry out certain work, for which it is necessary to initially set the timing belt according to the marks. This may be necessary in such cases as:
- Adjusting valve clearances
- Replacing the timing belt or removing it
To complete this job, we will need:
- 10mm head with crank or ratchet handle
- Flat head screwdriver
- Jack
So, to do this as quickly as possible and without unnecessary problems, we lift the right front part of the Kalina with a jack and set the gearbox to 4th gear.
Then remove the protective casing of the gas distribution mechanism by unscrewing one nut from its side:
And two bolts from the end rear side, as shown in the photo below:
And lift the casing up, moving it slightly to the side:
Now take the wheel with your hand and rotate it until the mark on the camshaft gear coincides with the protrusion of the plate on the back cover. This is shown more clearly in the photo:
Now use a flat screwdriver to remove the rubber plug from the gearbox housing. Its approximate location is immediately behind the 4th cylinder. Then we look through the window and it is necessary that the mark on the flywheel coincides with the triangular cutout on the plate:
To make it more convenient to align the marks, it is better to slowly pull the wheel forward and look at the flywheel (if your arms are long
