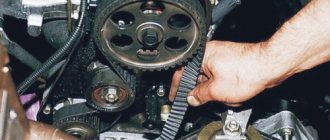
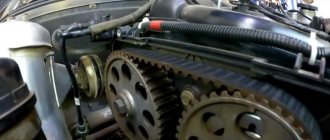
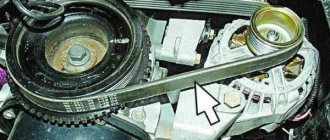
I think that at least half of all owners of VAZ 2110, 2111 and 2112 cars have 16-valve engines in their cars, since at one time they were simply incredibly popular. At first, cars with 1.5 liter engines were produced, and a couple of years later they began to make 1.6 liters. There is no need to explain once again that on the first ones the valves bent when the timing belt broke, but on the last ones there were no problems in this case.
In order to independently replace the timing belt on 16-valve VAZ engines, we will need the following tool:
- Head for 10 and 17.
- Ratchet and wrench.
- Torque wrench.
- A special key for tensioning the belt (into the holes in the tension roller).
- The key is 13.
Replacing timing belt and rollers - 16 valves
I think that at least half of all owners of VAZ 2110, 2111 and 2112 cars have 16-valve engines in their cars, since at one time they were simply incredibly popular.
At first, cars with 1.5 liter engines were produced, and a couple of years later they began to make 1.6 liters. There is no need to explain once again that on the first ones the valves bent when the timing belt broke, but on the last ones there were no problems in this case. In order to independently replace the timing belt on 16-valve VAZ engines, we will need the following tool:
- Head for 10 and 17.
- Ratchet and wrench.
- Torque wrench.
- A special key for tensioning the belt (into the holes in the tension roller).
- The key is 13.
Timing belt damage analysis
1. When the timing belt is slightly damaged or completely torn and the cord is frayed, then most likely the reason for this is overtension.
2. When one of the teeth is missing, this is a sign of weak belt tension.
3. Lack or high wear of teeth on the belt, in turn, indicates incorrect tension.
4. A cracked timing belt indicates severe overheating or hypothermia.
5. When wear is noticeable between the teeth, the belt is most likely not tensioned correctly. (weak or strong).
It is possible that if the belt is loosely tensioned, the belt will jump over a tooth; in this case, “CHECK” lights up and immediately goes out. This is what the camshaft position sensor signals.
6. An oily timing belt indicates that oil is leaking from the engine somewhere. In this case, you need to replace the belt and look for leaks.
7. Noticeable end wear indicates angular or parallel misalignment of the belt.
8. Increased noise indicates excessive or insufficient belt tension. This problem should be corrected immediately to avoid cutting teeth or breaking the belt.
Procedure for replacing the timing belt on VAZ 2110, 2111 and 2112 16 valves
- First you need to remove the cover (protective casing) of the timing belt, for which you will need a 10mm socket and a ratchet.
- Then we remove the fender liner on the right side, as well as the additional plastic mudguard, which will get in the way a little
- We engage fifth gear and press the brake pedal, and the assistant at this time tears off the bolt securing the generator belt drive pulley
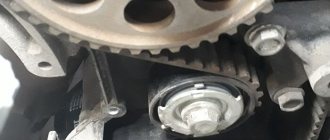
- We align the timing stars and crankshaft pulley according to special marks
- Remove the crankshaft pulley by first loosening and removing the alternator belt
- Unscrew the nut securing the tension roller and remove it from the stud
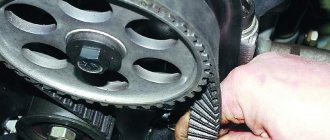
- Carefully disengage the timing belt from the crankshaft pulley and camshaft gears - remove it
- Also, it is worth checking the tension and support rollers and, if necessary, replacing them
- Installation of rollers and belt occurs in reverse order
For greater clarity and accessibility of this material, it is better to look at everything using a real example.
Checking the condition of the belt
First, remember that you need to check the condition of the belt once a year, or every 10-15 thousand kilometers. Replacement is carried out after every 50 thousand kilometers.
To examine the status of an item, follow these steps:
- Remove the plug from the protective front timing cover;
- Remove the alternator belt so that it does not interfere with you;
- Unscrew the six bolts, which will allow you to remove the cover;
- Access the belt and examine it.
Removing the timing belt cover
If you notice any of the following, be sure to replace the belt:
- The element has bulges or cuts;
- Broken threads and traces of delamination appeared on it;
- There are abrasions, cracks or folds;
- Oil is leaking.
Video review on replacing the timing belt and rollers with 16-cl. engines VAZ 2110, 2111 and 2112
The video review below was prepared, among other things, for this article in order to show everything as clearly as possible:
If after watching the video you still have any questions, you can ask them either here in the article, or subscribe to my channel and you can discuss everything under the video! I'm glad if I helped anyone, see you later!
Regarding the price of these parts, it is worth saying that many kits have completely different price tags, and the difference depends primarily on the manufacturer. Eg:
Rem. timing belt kit + two rollers (VBF) - RUB 3,980;
As you can see, prices for parts can vary quite a bit. From personal experience I can say that I have seen both BRT (for 8-class) and GATES (for 16-class) from the factory - the factory ones, of course, run for 70,000-100,000 km, but it’s quite easy to find such quality in a store problematic!
Source
What can cause a timing belt to break?
In a VAZ-2112 car with 16 valves, rupture of a belt part can occur due to:
- Strong or, on the contrary, weak tension. To make sure it is tensioned correctly, it is recommended to use a special device called a frequency meter. Measurements should only be taken from a cold engine, the indicator should not exceed 155 Hz +/- 3 Hz.
- A rupture will be inevitable if the part has been in use for a long time and the replacement was not made in a timely manner. Since there is a constant temperature difference during the working position, the belt element gradually collapses, cracks appear on it, which leads to rupture.
- Due to improper placement of the bearing, which can jam and tear the timing belt.
- Due to leakage of the oil seal, which coats the part with oil.
- Due to a low-quality timing belt, which was installed in the 16-valve VAZ-2112 engine by the manufacturer.
These are the most basic reasons that lead to the rupture of the HMS belt. If you carefully monitor the technical condition of the machine and repair it yourself at the slightest sign of breakdown, you can avoid very unpleasant situations that can happen at any time.
Replacing the timing belt VAZ 2110 16 valves
Replacing the timing belt VAZ 2110 16 valves in VAZ 2110, VAZ 2112 cars. Requires regular performance. Of course, an injector with sixteen valves adds agility to our Lada and this is pleasantly pleasing. There is a fly in the ointment. The timing belt must not be allowed to break due to wear. This leads to damage to the cylinder head.
Belt faults
You can determine that the timing belt has become unusable by visually inspecting it. Its further use is not recommended if:
- there are cracks or cuts on the surface of the belt;
- delamination of its structure takes place;
- its teeth are damaged on the inside.
The listed malfunctions are a consequence of:
- operation beyond the recommended period;
- contact with the surface of active substances (oil, coolant, fuel, etc.);
- mechanical impact due to malfunction of the water pump, tension or support rollers;
- incorrect belt tension adjustment.
Failure to timely diagnose the condition of the belt can cause the rollers, pump, and generator to go out of working order if fragments of a broken timing belt get on its pulley or shaft.
But the main danger is that if it breaks, the pistons and valves begin to move randomly, which leads to their collision.
If this happens, the valves bend, damaging the top surface of the pistons, as well as the cylinder head and timing components.
In this case, it will not be possible to do without a major overhaul of the engine.
The timing belt on a VAZ 2112 should be changed at least every 50 thousand kilometers. In addition, its condition must be checked once a month. If the slightest damage is detected, the belt must be replaced.
Installing timing marks VAZ 2110
The crankshaft is installed so that the piston of the first cylinder is at top dead center, this position must correspond to the mark on the crankshaft timing pulley, it must align with the rib on the oil pump housing
In addition, there is a mark on the flywheel; it should be located in the center of the ignition timing scale; it is clearly visible through the inspection window located on the flywheel housing.
Having installed the crankshaft, install the camshafts in this way. So that the valves have a position corresponding to the moment of compression of the fuel in the cylinders. When the piston is at top dead center.
For this purpose, there is a mark on the camshaft timing pulley.
must align with the slot on the body of the protective casing
this is typical for both pulleys
The process of tensioning the timing belt “from start to finish”
We perform all operations on a cold engine . Let's say the belt is now being replaced and the nut on the roller is not tightened. Then just skip "step 1":
- We take a crocodile clip for the battery and fix the belt on the pulley. Then use a 17mm wrench to loosen the nut (see photo).
First step before adjustment
On a VAZ-2112 engine, the timing belt tension depends on the force applied to the adjusting key. The force should be 2.0 N*m. And our distance from the axis to the “ear” is 51 mm (see below). Multiply 0.051 by 39.2266 (4 kgf in Newtons) and you will get what you need.
Plate drawing
The plate shown in the drawing is made from steel 2 mm thick. The pattern must be made based on the characteristics of the bending equipment. When bending, the length decreases, which means that the dimensions of the pattern will be larger than 94x75 mm.
Threads for M4 screws are cut in the standard way. Each screw should protrude 7 mm beyond the plane.
Belt tension
Having installed the tension rollers, install the belt as shown in the photo
The hole for fastening the left tension roller is offset from the center. Due to this, the timing belt is tensioned. Using holes into which a special key is inserted (a screwdriver is also suitable)
After tensioning the belt, turn the crankshaft two turns and align the marks again. This is necessary for self-testing. If this time the marks coincided clearly. Then after installing the generator drive pulley and protective covers, the engine can be started. replacing the timing belt VAZ 2110 16 valves must be done every 80,000 km
Source
How to change the timing belt yourself
You can replace it in a VAZ-2114 car (8 valves) yourself if you read the operating instructions, in which everything is clearly described. It is recommended to change this element no less than after 35-45 thousand km, but it is better to be guided by the situation. After all, replacement may be needed earlier, and if you wait for the “recommended kilometers” to run, you can only wait for the belt to slip off the gears, fray, burst, or even break completely. In the VAZ-2114 car, you can install a special injector that will notify you when the timing belt comes off or breaks. Before deciding whether it needs to be replaced, it is necessary to inspect it, and if it is in poor condition, then it is not recommended to delay replacement. Information on which belt is best to choose can be found in the instructions for the VAZ-2114.
Timing marks - installation of timing marks using the example of a VAZ 2110, 2111 and 2112 engine
Dear friends, today we will tell you the basics of setting timing marks using the example of a VAZ 16 valve engine. It's no secret that correctly set timing marks are the key to proper engine operation. If the marks are set incorrectly, then normal engine operation is impossible. It is also important to tension the belt correctly, this greatly affects its durability. So, when do we have to deal with the procedure for setting timing marks? When, according to the regulations, we need to replace the timing belt at the next maintenance, by the way, the rollers are also necessarily changed along with the belt in this case. Also, if our pump is “covered,” the timing belt will have to be removed, since it is this that drives our “water pump.” Well, what if (the worst case scenario) is that our belt broke. Here, if the engine is “plug-in”, then this is a huge nuisance, the pistons meet the valves, and at a minimum, we are guaranteed to remove the cylinder head and replace the valves. So, what are timing marks and where are they applied? The first is the marks on the camshaft pulleys, both on the intake and exhaust:
What problems can arise with the timing system?
- When changing the belt, you need to pay attention to how it is damaged. Based on the types of damage, it is not difficult to determine the types of malfunction.
- The main reasons for replacement, and the possible consequences of untimely replacement:
- Tearing, fraying, and damage almost always occur due to excessive belt tension.
- One of the teeth is missing, indicating that the belt tension is too weak.
- If one or more teeth are heavily worn, this indicates that the tensioning procedure was incorrect.
- The appearance of cracks indicates a temperature difference above maximum levels.
- The appearance of oil on the surface indicates its leakage. If detected, it is necessary to urgently replace the belt and find and eliminate the leak.
- Significant wear of the belt ends means misalignment during installation, straight or parallel.
Belt life
From time to time you need to inspect the belt and replace it if:
- the belt structure began to delaminate;
- cracks appeared on the surface;
- the teeth that are on the inner surface of the consumable are damaged.
But what could be the reasons that the consumable has reached a state where it is no longer possible to do without replacing it:
- the consumable was not properly tensioned initially;
- the belt has been used longer than expected;
- a lubricant has reached the surface;
- the water pump did not work well;
- the tension roller had play.
If you do not periodically inspect the belt and do not change it on time, this can ultimately lead to a break. And a break is very serious, since in this case the pistons will collide with the valves. As a result, they will be damaged and the engine part will have to be seriously repaired. A broken belt drive will cause real chaos, as a result of which other timing parts will also suffer serious damage.
The manufacturer promises that you should be interested in the condition of the belt only after 50,000 km. This is not entirely true, because premature wear of consumables can be influenced by a number of factors, such as aggressive driving or weather conditions. Therefore, it is recommended to inspect the belt drive after 20-25,000 km.
Types of alternator belts
As for the types of belts, they are as follows:
- wedge;
- polycline;
- serrated.
The V-belt cut has the shape of a trapezoid. Such a part is capable of transmitting great forces and withstands significant loads. Transmits rotation from the crankshaft to no more than two devices, because cannot bend in the opposite direction. Serpentine belts are much wider, similar to rubber belts that are somewhat glued together. They have longitudinal grooves on the inside. There are transverse grooves on the inner surface of the timing belt that help transmit rotation most accurately.
Note. In modern engines, the belt can provide the functions of many components: generator, compressor, power steering, pump, etc. Connecting them can be quite difficult. Therefore, it is recommended to have a diagram on hand that will make the replacement easier.
Recommendations for purchasing consumables
When buying a timing belt, choose only high-quality consumables. Here are the best belts to buy:
- The Lada automobile plant produces fairly durable belts. By the way, here excellent quality is combined with low cost, which may well be the deciding factor for some car enthusiasts.
- The Japanese company Lynx produces very high quality consumables. The belt is made of high quality material and at the same time it is inexpensive.
- Bosch belts are the embodiment of quality and durability. Consumables from this company have proven themselves well in the market and are very popular among car enthusiasts. They will definitely work out the allotted time to the end.
- The German company ContiTech also produces consumables that you can pay attention to. The belt drive here is made durable by adding fiberglass, synthetic rubber and polyamide fiber to the structure.
- Optibelt. The service life of this company's belts is very high. There is not yet a single case known when they failed ahead of schedule.
- Gates. Belts are made here only from high-quality materials. Cases of their breakage have not yet been recorded.
- The Russian company BRT produces belts that are not inferior in quality to their foreign counterparts. Moreover, they are cheaper.
Causes of belt breakage
One of the common problems with the model is the failure of the timing belt. The reasons for this may be different:
- Simple wear and tear caused by a long period of use of the vehicle;
- Regular increased loads under which the engine has to work intensively;
- Mechanical damage as a result of improper operation or received during the repair of other components;
- Manufacturing defect.
Regardless of the causes of the problem, it must be eliminated.
Over time, it stretches so much that the gear teeth jump by 1-2 links. This disrupts the valve timing and causes interruptions in engine operation. But this is the best-case scenario for such a situation. The worst is when the strap breaks and the valves bend.
Installation process
First, about what we will need for this:
- jack;
- screwdrivers with different blades;
- hexagons;
- socket wrenches;
- roller tension wrench;
- extension tube.
- We install the car in a level position and fix it.
- Now you definitely need to turn off the power to the car. To do this, disconnect the left terminal of the battery.
- We remove the bolts that secure the belt drive housing.
- Disconnect the crankshaft sensor. Now it’s very important: we check the alignment of the marks that are located on the camshaft gears and on the rear surface of the housing.
5. The marks on the flywheel crown must also match. Their combination must be checked. To do this, unscrew the plug located on the crankcase. The flywheel gear is located above it, and the mark is located on it. It should be aligned with the notch on the crankcase. 6. Now we need to loosen the gear tension and check the position of the mark on the crankshaft pulley. Now you can remove the belt. In this case, the flywheel must be fixed. To do this, you need to insert a metal pin between the crankcase and the crown. 7. Now take the 17 key and unscrew the bolt securing the generator pulley. We check the marks placed on the oil pump and crankshaft gear.
8. Take a 15mm wrench and remove the tension roller. We remove the timing belt drive and begin installing a new consumable. 9. First, pull the belt onto the generator pulley. Use a special wrench to turn the tension roller to the right. This is done using a special key. If you don’t have one, then pliers with curved tips will do just fine. Adjust the belt tension. It should be optimal - the belt should not sag, and it should not be overtightened. If you grab the belt with your fingers and can only turn it 90 degrees, then everything is fine. Incorrect tension will certainly lead to premature wear of the belt drive. 10 We assemble all other parts from the reverse. Don't forget to remove the screwdriver that we jammed into the crankcase. 11. Now all that remains is to start the engine and check its operation. If there is no extraneous noise and the engine runs as usual, then everything is fine.
How to change it yourself?
Before changing the timing belt yourself, you need to study the diagram of the gas distribution mechanism, stock up on the necessary tools, and also imagine the order of work in the form of a sequence of actions.
Before replacing, study the timing diagram
There are differences between modifications of the VAZ 2112, but the basic algorithm is approximately the same for all modifications. This algorithm can also be used on VAZ cars of other modifications, for example, 2110. It is necessary to have a good manual that explains the progress of work step by step. And if you have at least a little experience in car maintenance and minor repairs, we can calmly carry out timing belt maintenance ourselves and change the necessary parts.
Tools and materials
The set of basic tools is small:
- socket heads for 10, 15 and 17;
- spanner or open-end wrench 17;
- large flat screwdriver;
- key for the tensioner pulley (if power steering is installed on the car).
The materials required are a new timing belt.
Step-by-step instruction
- The work begins by removing the negative terminal of the battery.
- Using a 10mm socket, unscrew the six bolts and remove the gas distribution mechanism cover.
- The crankshaft sensor chip is disconnected.
- The crankshaft sensor mount is unscrewed. Then you need to remove the sensor.
- The sensor hole must be aligned with the part of the pulley where there are no teeth. This is done so that the crankshaft sensor can detect TDC (top dead center). In addition, the area without teeth is used to block the pulley. After alignment, you need to put a 12mm hexagon in the hole of the sensor and fix the pulley.
- When the pulley is blocked, the generator nut is unscrewed.
- The belt tension roller bolt is loosened. After this, the belt is removed. Often during this operation the tension and support rollers and the pump are also changed.
- Installing a new timing belt. There are two ways to correctly install this part. First: put on the belt with the tension roller removed. The tension is adjusted after installing the roller. Second: install the belt by turning the exhaust camshaft pulley using a 17mm wrench.
- Next, you need to tighten the timing belt using the adjusting bolt. It rotates using a 10 key. Rotation clockwise increases the tension, counter-clockwise weakens it.
Replacing a belt on a car with power steering
If your car has power steering. then the procedure for replacing the timing belt has some differences. Before starting work, it is necessary to remove the power steering reservoir, since it blocks access to the timing belt.
In addition, cars with power steering do not have an adjusting bolt. The belt is tensioned using a tension roller and a special key. If such a key is not available, you can use a homemade device consisting of two nails and a screwdriver. During operation, it is necessary to check the degree of belt tension and, if necessary, tighten it. Finally, you need to tighten the tension roller nut.
Features of labeling
Before tensioning the belt and tightening the bolts, you need to check the position of the marks. If the marks are set incorrectly, this will, at best, manifest itself in a decrease in engine power and traction characteristics. In the worst case, in those engines where valve bending is possible, it can occur even with a fully functional timing belt.
In order to avoid these problems, it is necessary to follow the order of placing labels:
- After installing the timing belt, but before tensioning it, the marks on the crankshaft pulley and the oil pump housing are aligned.
- Marks are placed on the intake and exhaust camshaft pulleys.
- The belt is tensioned, the tension roller nut is tightened.
- The crankshaft rotates two revolutions. If after this check the position of the marks remains the same, you can replace the crankshaft sensor, connect the power connector and replace the timing cover. Replacement of the VAZ 2112 timing belt is completed.
The stages of replacing the timing belt can be seen in the photo below.
Blocking the crankshaft pulley
Placing marks on the crankshaft
Marking valve pulleys
Belt tension on 8-valve VAZ engines
Before tightening the timing belt on the VAZ, the following preparatory work should be performed:
- Hang up and remove the right front wheel;
- Unscrew the 3 bolts securing the front timing cover;
- Remove the cover;
- Use a 17 key to loosen the tension roller.
After this, you should check the drive marks. One of them, located on the crankshaft pulley, must coincide with the installation tab of the rear cover. At the same time, check the mark on the flywheel. It should be flush with the alignment mark on the block boss.
IMPORTANT! In reality, it is not always possible to achieve an exact match of marks. Therefore, the mechanism is adjusted with an error of +/- 1-2 mm. This does not have a noticeable effect on the driving performance of the car.
If the marks match, the question of how to tighten the timing belt can be considered resolved. Without removing the belt, it is necessary to move the weakened tension roller to the right so that the necessary tension occurs. After this, the roller is tightened tightly. To adjust the roller, a special “horned” key is used. If it is not available, you can use two Phillips screwdrivers, which are inserted into special holes on the roller.
If the marks do not match, the timing belt on the VAZ-2109 must be removed from the pulleys. After this, the pulleys themselves are individually set according to the marks. It is better to start reinstalling the belt from the rear branch. After installing it, the roller is tightened.
IMPORTANT! When installing the timing belt on a VAZ-2114 and other front-wheel drive models, the pulleys located according to the marks can shift by 1-2 teeth. If this happens, the marks should be set with an error to the left, which allows you to compensate for the offset. After installing the belt, the pulleys themselves will move into the required position.
It is necessary to finish tensioning and fixing the belt, and then manually turn the engine 2-3 turns by the crankshaft pulley. To do this, it is convenient to use a “19” head with an extension. The gearbox must be in neutral. If after turning the marks have not moved relative to each other, the procedure can be considered completed. Assembly is carried out in reverse order. » alt=»»> The question of how to check the consistency of the tension should be answered. To do this, hold the strap between your thumb and index finger and turn it 90°. The technician must be able to do this, otherwise the belt is considered over-tensioned.

