What is it for
But it must be turned on through the ignition switch. It should have an ACC position. When we remove the ignition key from the lock, the music should go out. When we insert the key, it should turn on. There is no such provision on the VAZ lock. A simple lock with three positions: zero, ignition on and starter.
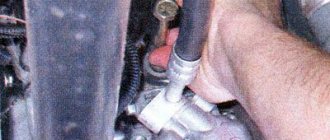
To correct this situation, the radio was not constantly energized, even when there was no key. Therefore, we connect the red conductor through a simple five-pin relay. We connect it to the control conductor of the alarm, which goes into the blocking.
What to do if the immobilizer does not work?
If the locking device is “buggy” and does not see the key, it is necessary to determine their cause based on the signs of malfunctions. If you cannot solve the problem quickly, you can try to bypass the immobilizer.
Causes of malfunctions
All failures in the operation of the blocking device can be divided into two groups:
- Software. This type of malfunction is associated with incorrect functioning of the software installed in the microprocessor module. Also, software problems may affect the operation of the immobilizer unit or the chip in the remote control. To fix the problem, you will need to dismantle the mechanism and reflash it. If the malfunction directly affected the key, the chip must be repaired or completely replaced in case of a serious malfunction.
- Hardware related problems. The main problems include circuit failure or malfunction of one of the components of the blocking system. To determine the cause, a complete diagnosis of the device will be required.
It is important to remember that the battery in Lada Prioras should not be allowed to be completely discharged. As a result, chaotic information will be recorded in the immobilizer memory, which will lead to failures.
User Pavel Master spoke about problems in the functioning of the locking system due to a faulty key.
More details about the problems:
- Malfunctions in the operation of the immo can occur as a result of disconnecting the battery from the vehicle's electrical network. In Lada Priora cars, the blocking unit is not always firmly attached to the key, so de-energizing the on-board network will lead to problems. But this problem is more typical for reflashed devices.
- The battery discharged when trying to start the power unit. If the engine does not start due to problems in the power system, the driver may crank the starter mechanism for a long time. This will eventually lead to battery discharge. In particular, this problem often occurs in winter.
- The blocker may not function correctly as a result of replacing the motor or microprocessor unit. When changing the power unit, you also need to buy an electronic control module and a new chip tag for the device. Otherwise, there will be a need to re-bind the key to the immo block.
- Malfunctions in the operation of the blocking device can be caused by problems with electrical equipment and devices. One of the safety elements associated with the immobilizer may have burned out.
- Damage to the firmware of the blocking device. The immo coding is stored on a specific microprocessor unit board. If the memory malfunctions, it will have to be programmed again.
- The chip in the key is faulty. The problem may be software in nature or the problem may be due to physical damage. To determine the cause, you will have to disassemble the key.
- Problems are often caused by interference from mobile phones and smartphones, which is especially noticeable when the ignition is activated.
Signs
It is necessary to remove and repair the blocking device for the following “symptoms”:
- the starter unit does not rotate the crankshaft when trying to start the power unit;
- an indicator appeared on the control panel in the car’s interior indicating a malfunction in the internal combustion engine;
- the starter mechanism turns the crankshaft, but the engine does not start;
- the driver tries to close the doors with the key, but the locks do not respond to these actions.
One of the signs of a faulty anti-theft system is shown in a video made by user Igor Bakhirev.
How to bypass the immobilizer?
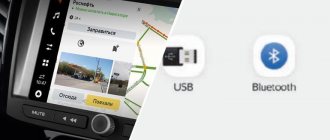
Disabling the blocking device yourself involves using a bypass module. There are many options for installing such a “device”. It is recommended to purchase a branded device, for example, Starline, which will bypass the blocker. It can be ordered online or purchased in store.
A simple option for installing a crawler:
- First you need to find the device block. To complete the task, you must disable the microprocessor module used to control the power unit. The device is dismantled and put aside. It is located in the lower compartment of the center console.
- After the block is in your hands, it must be disassembled. To do this, use a wrench to unscrew the four bolts on the device body.
- The next stage will be the modification of the microprocessor module, in particular, to bypass the blocker, a resistor chip must be resoldered. Before disabling the immobilizer on the Priora, the unit is connected to the computer via a special cable.
- Using the PAK bootloader, you need to diagnose the firmware, in particular, two memory slots - Flash and Eeprom. The version of the software you are using must be saved in case errors are made during the process and you have to install it back. If the firmware reading is completed, the new untrained software is installed on the microprocessor module. Then the resistor element is soldered to its original place. If necessary, a new chip with untrained memory can be used.
- The next step will be to deactivate the anti-theft system. This must be done to prevent the possibility of blocking it during operation.
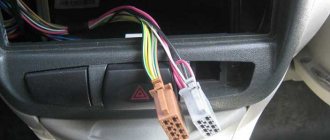
- To perform the task, a plug block with 20 contact elements is disconnected from the device. Wires numbered 9 and 18 are cut off from the connector and then connected to each other. The connection point must be insulated with electrical tape.
- Then the block with wires is connected to the microprocessor module. The device is installed in its original location.
User Dmitriy Epishev spoke about the procedure for bypassing the immo in Lada Priora cars.
How does it all work
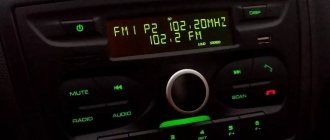
The radio is on, we set the car to security, everything turns off. We disarm the system, the radio turns on again, the settings are not lost. How does it work with autorun? We prepare for automatic start and start the car using the key fob.
We started it, the engine is running, the music is turned off, it’s very convenient. If you forgot to do this, she will not scream when the car starts. We disarm the car and turn the key in the lock. We release the handbrake, the music system is connected.
How to disable the blocker on Priora?
To independently remove and turn off the system, you will need a K-Line class adapter. It will need to be connected to the computer and the blocker itself. You must first download software to change the firmware on your PC.
The procedure may differ depending on the board in the installed immobilizer - M73 or M74.
Step-by-step instruction
A guide that will allow you to remove immo on the M73:
- The Openbox program is installed on your computer or laptop. The blocking device is connected to the PC. The utility starts and the standard EEPROM firmware is read.
- Data about the installed software is saved in the computer's memory. They will be needed in case the removal procedure fails.
- Then the HxD file editor is downloaded and installed. The downloaded firmware opens on the computer. At the very beginning of the text you need to add a line that consists of the characters FF. The changes are saved.
- The edited file is loaded into the memory of the microprocessor module. It is possible to use ready-made software options; you can search for them on the Internet.
- The module is then disconnected from the computer and installed on the car.
If the Priora uses a January 7.2 microprocessor unit, then to disable the immo, you need to assemble a circuit that has a positive cable switch.
After this, the procedure is performed as follows:
- ChipLoader software is downloaded and installed on the PC. The program version must be 1.97.7 or higher.
- The utility is launched and the required type of microprocessor module is selected in the main window.
- The unit itself is connected to the computer. The main program window opens, where you need to select the connection setup option.
- Basic firmware data is downloaded from the Eeprom memory card.
- Then you need to click on the “remove immobilizer” button. This will cause the utility to automatically adjust the basic parameters in the memory file.
- Then the software closes. The module is disconnected from the computer and installed back on the car.
The Xilvlik channel talked about the process of disabling the standard blocking device.
If the car is equipped with an immobilizer with an M74 board, then the shutdown procedure is as follows:
- The battery in the vehicle is disconnected. The block with wires is disconnected from the microprocessor unit.
- A cable harness made according to the diagram shown in the photo is connected to the device. It is recommended to use a double switch. This will allow voltage to be applied to the device in stages.
- The circuit is connected to the battery and to the PC using a VAG-COM cable.
- The first button of the switch is activated, with its help an impulse is sent to allow the programming procedure to be carried out.
- The WinFlash program runs on your computer or laptop. A settings window opens where you need to select the module type. The information transmission speed parameter is also indicated here. When performing a task, it is recommended to specify a minimum value.
- The second button is activated. Then a message about the start of communication with the module will appear in the main window of the utility.
- The standard software of the blocking device is saved, and the Eeprom memory is changed to a new one. The flashing procedure will take some time.
- If the process is completed, the program is turned off and the device and wiring are disconnected.
- The unit is then connected back to the vehicle. After this, it will be necessary to adapt the zero voltage of the throttle valve. To accomplish the task, you need to accelerate to about 4 thousand revolutions per minute, and then slow down the engine several times. The second speed is used. You need to brake to about 1 thousand rpm.
Photo gallery
Circuit for disabling the blocker
Reading the Eeprom Memory File
Removing immo information from the firmware
Diagram for connecting a module with an M74 board
How to check the cooling system pump?
By checking the pump without removing it from the engine, we can only indirectly assess its performance. When the volume of pumped coolant decreases, the stove begins to heat poorly. But before removing the water pump to inspect the impeller, we recommend checking the thermostat and also making sure that there is no air lock in the cooling system.
After removal, pay attention not only to the integrity of the blades and where the impeller fits on the drive shaft, but also to the shape of the blades. For example, on the VAZ 2121 over many years of production, impellers were installed that differed in the diameter of the pump wheel, the number and profile of the blades. Installing a less efficient pump on a more heat-loaded engine modification will result in the cooling system fan turning on more frequently and an increased risk of overheating.
Be sure to inspect the engine block where the housing fits and the pump itself. Fogging or a slight leak of coolant from the drain hole does not mean that the pump should be replaced. If a significant leak is detected, try to pinpoint the location of the leak. If the leak is only at the junction of the housing and the engine block, most likely the problem can be eliminated without replacing the pump. It will be enough to apply sealant and install a new gasket.
Risk of timing belt breakage
The danger with a misaligned water pump timing belt is that there are no obvious signs of failure. First of all, you need to pay attention to the timing belt. If it is pulled to any side, uneven production is observed, it is necessary to check the pump and rollers. The cause of the misalignment may be a manufacturing defect, bearing wear, or uneven fit of the housing to the engine block (dirty, rusty mating planes). Sometimes the malfunction begins to manifest itself after an accident, when elements of the body or attachments hit the pump pulley.
What does it mean about a breakdown?
Signs of a pump malfunction are quite simple to identify, for example:
- coolant leak;
- extraneous noise in the pump;
- backlash;
- leakage of liquid on the pump itself.
If the problem of water or antifreeze leaving the system does not mean immediate repair, then noise and play indicate bearing wear. Such a development of events can lead to dire consequences - the pump may jam. As a result, the timing belt breaks under tension or simply falls off.
In this case, the piston will begin to hit the engine valves, leading to their deformation. The valves themselves bend greatly, damaging the body and working surfaces. This is how the failure of one small part of an adjacent unit leads to an expensive overhaul of the car engine.
Wiring diagram of power windows Lada Priora
Left front door wiring harness diagram : 1 - block to the rear wiring harness; 2 - to the speaker; 3 — window lift electric motor; 4 — switch block; 5 — door lock; 6 — rear view mirror;
Wiring harness diagram for the right front door : 1 - block to the rear wiring harness; 2 - to the speaker; 3 — electric window lift motor; 4 — switch block; 5 — door lock; 6 — rear view mirror; 7 — block to the rear wiring harness;
Checking the new pump
Obviously, liquid leakage is impossible on the new part. Until the engine is installed and started, it will be impossible to recognize damage to the seal. If used spare parts are installed, there should be no drips on its surface.
To check the integrity of the bearing, you need to intensively loosen and twist the pulley - there should be no play. Even minimal. If some minimal deviations still occur, then you need to pay attention to the locking screw and, if possible, tighten it. Is there any backlash left? This means you need to replace the pump with a new one.