In what cases will adjustment help?
Let's list the main malfunctions that you can fix yourself by just adjusting the car hood lock:
- The hood has become difficult to close; it requires repeated slamming and significant force to close it
- It has become problematic to open it (we pull and pull, but the reaction is zero)
- Doesn’t “bounce” when the cable is pulled; when closing, an extraneous knock of metal on metal is heard
- Rattling when the engine is running, in the pits.
Since it is almost impossible to describe all the models in one article, let’s take as an example a masterpiece of the domestic automobile industry - the VAZ car. Whatever they say, Lada cars roam the expanses of the former CIS more often than any foreign car. And, given their survivability, I think this will last for a long time... And based on the principle that this procedure, on almost all cars, comes down to similar actions (if you do not take into account the design features of the locks), you can derive a general adjustment formula. Let's start adjusting the locks, for example, for VAZ 2108, VAZ 2109, VAZ 21099.
Tools
To adjust we need:
19mm wrench.
Screwdriver, I usually use a "magic" set.
Oil for lubricating the lock (only liquid oil is suitable; “solidol”, “litol” and other similar lubricants are not suitable, since they harden at low temperatures, which makes the mechanism difficult to operate).
Desire, some free time, a head and two arms (preferably straight).
Leveling feet
These small but important details help to correctly align the hood overhang in relation to the headlights, radiator trim and front fender tips. For adjustment, 4 rubber bands are installed, 2 of which are twisted along the edges of the internal rigidity of the hood, and two are closer to the center.
The outer ones serve to change the position relative to the headlights, and the central ones do not so much change the position of the overhang as serve as elastic supports. They play the role of a pushing element when the lock opens.
If the central rubber bands are too twisted, then this may be a circumstance due to which the hood of the VAZ 2114 does not close. The essence of adjusting the central rubber bands is to ensure that they create little resistance when closing. Ideally, the hood should close under its own weight when lowered from a height of 10-15 cm.
The adjustment process on the selected car model
The device of the hood lock VAZ 2108/2109/21099
To begin, open and secure the hood. Let's pay attention to the lock and try to understand the principle of its operation.
The photo shows the main elements of the castle:
- Lock latch spring
- Lock-nut
- Latch
- Safety hook
- Safety hook handle.
From what we saw, it follows that after we pulled the opening handle in the cabin, the cable opens the latch, which releases the lock latch. Thanks to the latch spring, the hood “jumps” up, but it is still held half-open by the safety hook. And only by pressing the handle of the safety hook, we can fully open it and gain access to the engine compartment. Quite a reliable system. At first sight…
Adjustment, although not a very difficult operation, requires patience and accuracy. Sometimes you have to repeat the same jewelry movement many times until everything starts working as it should!
Vertical adjustment of the lock
If the hood does not want to close normally (you slam it, put pressure on it, but it still closes with difficulty, or does not lock in the closed position at all), or a rattling noise appears when driving on our perfectly smooth roads (sometimes it is noticeable even just when the engine), then adjustment in the vertical direction is necessary. Namely, adjusting the length of the lock latch.
Measuring the hood opening
There is often a case when the hood of a VAZ 2114 does not close due to the skew of the hood opening. If the car has been in an accident before, then the first thing you need to start with is to establish the symmetry of the hood opening. To do this, you need to measure it along two diagonals and compare the data obtained. You can measure with a regular tape measure, taking the bolt heads on the wings on one side and the adjusting rubber bands on the other side as reference points.
The next thing to do is to set the height of the side members of the car to the same height. Unfortunately, this can only be done by an experienced bodybuilder.
If discrepancies are identified along the diagonals and side members, then this is a direct route to the body shop. But if the car has not been in an accident before, then you can skip these measurements and immediately start with adjustment work.
How to replace and adjust the hood lock on a VAZ 2114 - Repair 2114
1. Before work, it is necessary to mark the position of the latch on the hood with a marker.
2. Using a screwdriver and a 17mm wrench, loosen the locknut.
3. Unscrew the locking nut and washer.
4. Using a screwdriver, remove the lock washer of the safety hook axis.
5. Then we take out the axle and remove the lever from 2 plastic holders.
6. Remove the safety hook assembly with the drive lever.
7. Remove the upper end of the lock spring from the panel hole.
8. Disconnect the drive rod from the spring and remove it from the body panel.
9. Installation is carried out in reverse order.
Adjusting the hood latch .
The adjustment is made by changing the position of the lock latch.
1. Loosen the locknut and position the latch so that when closing the hood it fits exactly into the hole on the front panel.
2. In order to adjust the protrusion of the lock retainer, unscrew the lock nut and use a screwdriver to adjust the protrusion. After that, fix it with a lock nut.
3. Check the lock and, if necessary, repeat the adjustment operation until the lock operates smoothly.
Video on adjusting the hood lock:
Adjusting the hinges
This adjustment should ensure the correct position of the hood in relation to the front fenders of the car.
To do this kind of work you need:
- Check the position of the hood relative to the top of the wings. They must be in the same plane. If this parameter is violated, then the next step is executed.
- Place the hood in the open position.
- The hinges are adjusted using 2 8mm wrench bolts. However, two bolts cannot be unscrewed at once. The adjustment will be greatly disrupted, and without experience it will be difficult to return to the original position. Therefore, you need to start by unscrewing one bolt, and, rocking the hood up and down, achieve a change in the vertical position. Then the bolt needs to be tightened and the hood lowered.
If the flatness is restored, and the hood of the VAZ 2114 does not close properly, then it is worth proceeding with the following work.
Adjusting the hood latch is easy to do with your own hands
Let's take a closer look at the hood of our car. Has there been any strangeness in his behavior? Often we do not pay attention to such little things as the fact that the hood has become a little worse to close, more and more effort is required each time to open it, and a rattling noise has appeared (at first light and intermittent). After all, all this happens gradually, and therefore imperceptibly. We forget about such a simple matter as adjusting the hood latch.
Timely diagnosis is the key to safety
We notice a flat tire or a “sick” starter immediately and take urgent measures to eliminate the problem. And a tired hood lock, according to most car enthusiasts, “does not affect speed.” Indeed, it does not affect, but many are terribly annoyed by repeated clapping, nervously tugging at the handle in the hope that Sesame will finally open. And all this happens, as a rule, at the most inopportune moments. It seems like a small thing, but an irritated driver is a threat on the road, and for absolutely all road users.
Or a hood that opens of its own accord while driving... Even at low speed this can create serious problems.
Let’s not put off such a “trifle” as adjustment. Moreover, all operations can be performed independently, without resorting to the help of service station workers, and most importantly, completely free of charge!
And this happens sometimes!
In what cases will adjustment help?
Let's list the main malfunctions that you can fix yourself by just adjusting the car hood lock:
- The hood has become difficult to close; it requires repeated slamming and significant force to close it
- It has become problematic to open it (we pull and pull, but the reaction is zero)
- Doesn’t “bounce” when the cable is pulled; when closing, an extraneous knock of metal on metal is heard
- Rattling when the engine is running, in the pits.
Since it is almost impossible to describe all the models in one article, let’s take as an example a masterpiece of the domestic automobile industry - the VAZ car. Whatever they say, Lada cars roam the expanses of the former CIS more often than any foreign car. And, given their survivability, I think this will last for a long time... And based on the principle that this procedure, on almost all cars, comes down to similar actions (if you do not take into account the design features of the locks), you can derive a general adjustment formula. Let's start adjusting the locks, for example, for VAZ 2108, VAZ 2109, VAZ 21099.
Lock settings
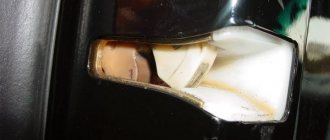
The main culprit that prevents the VAZ 2114 hood from closing is the lock. It consists of a hood pin, which is located in the center of the internal rigidity, and a response spring located on the top bar of the radiator frame. The pin can be adjusted in horizontal and vertical positions. To change the height, there is a threaded part that is wrapped into a floating washer. And to move and fix it in a horizontal plane, there is a wide lock nut.
Adjustment work is performed in the following sequence:
- Carefully inspect the response spring. It often becomes the reason why the hood of a VAZ 2114 does not close. If during operation it becomes deformed, it changes its shape, becomes in the center of the response hole and creates an obstacle in the path of the pin. The spring can be removed and bent, giving it the correct shape, but metal fatigue will quickly return it to its original position. Therefore, it is better to buy a new part.
- Center the hood lock pin. To do this, use a 27mm wrench to loosen the locking nut so that the lock can move freely. Then you need to close the hood. The mating hole accurately centers the pin. After this, the nut must be tightened again.
- Insert the retaining spring into place.
Now, if after the basic adjustment the hood of the VAZ 2114 does not close, then the reason may be the incorrect height of the pin. If it is twisted too much inside the rigidity, it will not allow it to close easily. You'll have to unscrew it a little and check again how hard the hood closes.
Repair
To repair the lock and replace parts, you will need the following tools:
- open-end wrench for 17 and 19;
- liquid oil for lubrication;
- Screwdriver Set;
- pliers or pliers.
Repairing a lock yourself requires some skill and slowness, so you need to count on at least 2 hours. First you need to determine which mechanism in the lock has failed; most often it requires repair:
- springs (zam, hook, latch);
- replacement of traction.
Replacing the lock spring
The lock spring is located on the car frame. Wear of the metal part, deformation and cracks cause the hood to not close tightly. Using the VAZ 2114 as an example, you can install the lock spring in several stages:
- Disconnection from the spring of the traction mechanism. A screwdriver is used.
- Removing the spring.
- Installing a new lock spring.
Replacing the latch spring
If you need to change the latch lock spring, for example, on a VAZ 2114, you will need a flat-head screwdriver and a 19mm wrench. You can change the spring in three stages:
- Kickback (loosening) of the locknut.
- Unscrewing the pin.
- When the locking mechanism is removed, the spring is replaced with a new one and a similar assembly is performed in the reverse order.
Replacing the hook spring
Unlike the previous two spring replacements, replacing the lock spring will require either pliers or fine tweezers. Repair is more painstaking and requires a certain skill. The work is carried out according to the following principle:
- Use a screwdriver to pry off the lock washer that holds the hook axis.
- The washer is removed from the grooves with tweezers (or pliers).
- The hook axis is removed.
- The spring is removed.
After replacing the spring, reassemble the mechanism in the reverse order.
Replacing traction
It is necessary to change the lock drive when the locks are in working condition, and when the hood is opened using the handle from the passenger compartment, the lid does not open. Replacement of traction is carried out according to the following principle:
- The cable is released from the hook (the hook itself does not need to be removed).
- A 13 key is used to secure the handle axis.
- The handle is removable.
- Use pliers to straighten the bent part of the cable.
- The locking sleeve extends and the end of the cable is released.
- The loop is removed from the draft lever.
- The rod is pulled out from the motor side.
- The shell is released from the holders and the part is replaced.
Causes
Initially, you need to ensure the integrity of the lock itself and its elements; if something is broken, you will have to replace it. Let's look at the main causes of breakdowns that you can actually fix yourself. The hood may begin to close poorly due to the displacement of the position of the lid or its latch. This can be corrected by simple adjustment, having with you a 13 mm wrench and a screwdriver. You just need to move it in the desired vertical or horizontal direction.
- If you have to make significant efforts to close the hood, but you still manage to slam it, this does not mean that the problem is solved. This fact only means that the height adjustment of the latch is broken, the play is noticeable, and the hood will bounce and rattle while driving. The solution to this is to loosen the lock nut of the latch with the same key, while holding it with a screwdriver so that it does not turn with the fastener.
- There are cases when the latch has moved horizontally, then when closing the hood you will feel a hard blow, and opening it is problematic. It is necessary to adjust as follows: loosen the lock nut and move the latch to the desired location. Before tightening the nut, you should check that the hood closes easily and tightly. If you did not achieve the desired result, then you should repeat the steps.
- Sometimes the hood needs to be adjusted in relation to the latch and fenders. This happens if the lock does not lock and the lid does not fit into the space allotted to it. In this case, it is necessary to open the cover and loosen the mounting bolts. Smoothly lower the lid without clicking the lock, and set equal gaps along the edges by simply pulling the hood in the desired direction. You can use identical pegs and insert them between the hood and fenders to achieve the ideal. When the gaps are set, lift the hood and tighten the mounting bolts.
After completing all the work and checking the functionality, it is worth lubricating all the parts and checking the tightness of the nuts, however, you should be careful with the lock nut and not overdo it, since the hood may not open easily enough.
Next, let's look at the reasons that are more difficult to eliminate:
- fatigue of the metal from which the spring is made. It is inserted into the “TV” and weakens over time, which is why it does not work properly. You should pull it - if the resistance is weak, it means it is faulty. The solution to this is a simple replacement of the spring;
- support tins are another possible reason that the hood on the VAZ-2115 does not open. They sometimes break or become loose. In this case, you can close the hood. It is necessary for one person to pull the handle that opens it, and the second to slam the hood. The fact is that the entrance to the lock guide should not be closed by the spring, while being to the side and covering only a third. If this is not the case, then the support washer will bend, it will be necessary to straighten it and place another one. This defect can be corrected by shortening the cable going to the lock.
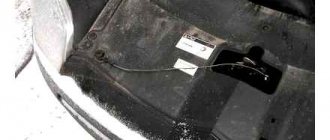
How to open the hood if the cable is broken
If the cable breaks, the lever in the cabin will move freely and without resistance. First you need to figure out where the break occurred, and then act according to the situation. If the cable breaks near the lever, it is easy to notice and then pull it with pliers. If there is a break in the engine compartment, crawl up from below and then pull the cable with pliers. If the cable breaks or falls off near the lock, then you need to look for a way to reach the lock latch and bend it. Details on how to do this are below.
If the cable breaks near the lever
Opening the hood with a broken cable using pliers when a small end remains
First, clear access to the place where the cable is attached to the lever. Then, using pliers, pull on the metal core (not the braid) and the hood should open. For convenience, make a loop at the edge of the cable. The cable fastening could come off or break - in this case, it needs to be returned to its place or replaced. If the broken cable cannot be secured, it will need to be replaced.
If the cable breaks under the hood
In this situation, you need to find where the cable runs in the engine compartment. And then we do the same thing - we pull the piece of cable with pliers.
You may have to remove the fender liner to do this. Sometimes you need a hole, an overpass, or at least a jack. This way you can gain access to the hood cable for BMW, Volkswagen/Audi, Hyundai/Kia cars. By the way, on some models (Tuareg, Creta) there is a connector for two hood cables hidden behind the fender liner; you can disassemble it and pull the one that leads to the lock.
In some cars it is easier to reach the cable from above. On a “classic” VAZ, you can hook it with a wire loop through the holes in the air ducts or by carefully bending the corner of the hood. On a VAZ 2110, by sticking your hand into the air intake, you can open the hood lock by grabbing it with pliers.
If the cable breaks near the lock
The most difficult case is when the cable breaks or falls off the fastening, near the lock itself. The general algorithm in this case is to find access to the lock mechanism and, using available means (wire, long screwdriver, etc.), press the latch so that the hood opens. Most often, this requires completely or partially dismantling the lockers, engine protection (as in the case of the VAZ 2115), radiator grille, bumper, or making holes in these elements. The opening method directly depends on the design and model of the car.
In the Volkswagen Passat, you can get to the lock by removing the emblem. It is scrolled counterclockwise and removed, then the protective plug is dismantled. After which the lock can be opened using a mirror and a metal loop. In Ford Mondeo, Ford Focus 2, it is possible to remove the lock cylinder by drilling holes in the plastic plug behind the emblem. But on Focus 3 the problem is solved differently.
Removing the lock cylinder in a Ford Mondeo
Opening the hood with a hook in a Volkswagen Caddy
If the hood rises a little, secure it with a wooden block wrapped in rags to prevent scratching the coating. This will allow you to slide a metal rod with a loop at the end under the hood. With its help you can reach the lock latch located in the center of the hood. This method is suitable for Hyundai Solaris, Zhiguli or ZAZ Tavria and Slavuta cars. Instead of a bar, you can use an inflatable air cushion, similar to those used in blood pressure monitors.
Removal
3. To make it easier to disconnect the hood lock cable, remove the sound signal (see “Sound signal - removal and installation”).
10 mm socket wrench
Unscrew the two bolts securing the hood lock.
Warning! To avoid injury, perform the following operation carefully - the radiator fins have sharp edges.
5. Use pliers to straighten the end of the lock drive rod. Slide the locking sleeve from the end of the rod and disconnect the rod from the lock lever.
6. Remove the hood lock.
7. To remove the hood safety hook using a 10 mm
unscrew the two bolts securing the hook bracket and remove the hook.
Other Possible Causes
If the problem is not a violation of debugging, it means that one of the parts of the locking system has broken. Let's not consider the option of the integrity of the lock: I think you checked it first.
One of the most likely failures is fatigue of the metal from which the spring inserted into the radiator “TV” is made. As a result, it weakens and stops working as it should. Its weakening can often be easily detected by simply pulling on it: the resistance will be quite weak. The spring is changed, the hood fixation is restored.
