Interior ventilation
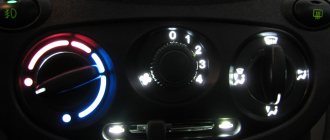
To ventilate the interior, set the ventilation and heating control unit controls to the following positions.
- Turn control knob 2 to the minimum temperature position (see Fig. 1 and 2).
- Place the regulator handle 4 opposite the pictogram.
- Open the nozzles on the instrument panel.
- Set the desired air supply speed with switch 1.
- If the windshield fogs up, set the regulator handle 4 opposite the pictogram.
Lada Granta stove repair
Although there is no dispute about the quality of the supplied stove, according to laws that do not depend (or depend) on us, the stove may break. The reason for breakdowns of the Lada Granta stove may be as follows:
- clogged radiator
- faulty pump
- loose contacts and staples
- airlock
When the cause of the stove's inoperability is a pump malfunction, then you should be wary. Because this can lead to overheating of the engine and ultimately “jamming”; engine repair will be very expensive. It is better to contact specialists to solve such a problem.
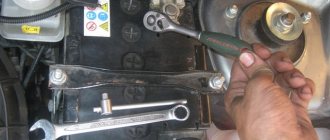
Loose terminals and brackets should be tightened, this is done as follows:
1) Disconnect the battery terminals for your safety and to prevent short circuits when working with electrical wiring
2) Remove the instrument panel. we take out the radio (if you installed it), air supply or temperature regulators.
3) Disconnect the wiring harness connectors for the rear window heating switches, hazard warning lights, etc.
4) Install the loosened staples in their place
5) Reassemble everything in reverse order
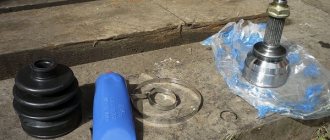
Airing, or an air lock, can also cause poor operation of the stove. To solve this problem, first drain the antifreeze by first removing the throttle body hose and opening the expansion tank cap. We remove the hose supplying air from the radiator to the stove from the radiator side and blow it through. This way we eliminate the antifreeze in the stove, which was the cause of the blockage.
Preventing glass fogging
When the air humidity is high (during heavy rain), the car windows may fog up. To prevent the windshield and front door windows from fogging up, do the following:
- Turn regulator handle 2 to the middle position.
- Place the regulator handle 4 opposite the pictogram.
- Move switch 1 of the electric fan operating modes to position “2”.
- To prevent the rear window from fogging up, press the button in the 3-button switch block.
Air distribution of heater/air conditioner and ventilation of LADA Granta
Fig. 1: Distribution of air flows from deflectors and air ducts of the heating (air conditioning) system and ventilation of the LADA Granta interior. The following air flow distribution elements are located in the cabin:
- front door glass blower nozzles;
- side air supply nozzles to the driver and passenger in the front seat or to the front door windows;
- windshield blower nozzles;
- central air supply nozzles to the cabin;
- air ducts supplying air to the feet of passengers in the rear seat;
- air ducts for supplying air to the driver's and front passenger's footwells.
The quantity, temperature, direction and intensity of air flows are controlled by switches installed in the system control unit.
Quick heating of the interior
To do this, do the following:
- Turn control knob 2 to maximum heat.
- Place the regulator handle 4 opposite the pictogram -
- Switch the operating mode switch 1 of the electric heater fan to position “3”.
- Open the side and center vents on the instrument panel.
- Set lever 5 to the extreme right position - no outside air enters the cabin (recirculation mode).
WARNING
[td] It is not recommended to use the recirculation mode for a long time while the vehicle is moving, as this usually leads to fogging of the windows.
Heating and ventilation system on Lada Granta, design
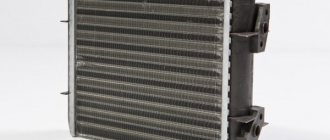
- radiator;
- several air ducts: to the glass blower grilles, to the right, central and left deflectors;
- Control block;
- radiator cap;
- air duct;
- seal;
- stove body;
- a hole connecting the air duct to the rear passengers;
- fan;
- fan housing;
- damper drafts: recirculation, temperature controller, air flow distribution;
- Fan resistor is optional.
Heater control Lada Kalina
Hello everyone, it’s no secret that the heater on the Lada Kalina car heats just fine. Today I would like to talk about the heater control unit and its control. Of course, this is aimed at beginners; for experienced drivers, this article will not be interesting, but for beginners it may be useful. So, let's go. The control unit on Kalina has four regulators.
The first is a temperature regulator for the air supplied to the cabin.
The second is an air flow power regulator with four speeds.
The third regulator changes the direction of flow.
And the fourth regulator is the recirculation damper control.
The extreme right position drives air only inside the cabin, and the extreme right takes air from the street. By the way, if you suddenly notice that your windows are sweating, look at what position this lever is in. Usually they sweat when this lever is positioned on the right.
We carry out diagnostics
If it is cold outside and the interior cannot warm up properly, then you need to check the operation of the cooling system, which has a direct effect on heating the interior.
Coolant level
To do this, you need to open the hood and, with the engine not warmed up, check where the coolant is located.
If its level in the tank is between the minimum and maximum marks, then everything is in order. But, when this level decreases, problems with the tightness of the cooling system are possible, and this leads to a decrease in pressure inside the system. If the problem is not corrected, the stove will not be able to warm the air in the cabin effectively enough.
Thermostat
This is a native Luzar thermostat
We are talking about the possible sticking of the thermostat valves in a position where the coolant circulates only in a larger circle. So, during the cold period, the coolant will not warm up to normal temperature, and therefore the interior will not become warmer.
Thermostat location under the hood
You can verify the presence of this particular breakdown by the fact that the car, while stuck in traffic jams, begins to overheat very quickly. In addition, when moving along the highway at a stable speed, the engine loses its temperature too quickly, if we talk about the cold season. However, even if these “symptoms” are not observed in your car, this does not mean that the thermostat is working properly. It is quite possible that its defect lies only in tangible problems with the interior heater.
For even more complex cases, you can check the pipes that connect to the heater radiator. Normally, one should be hot and the other just slightly warm. If the second of the pipes is very cold, this will indicate that the stove radiator in your car is clogged. It won't be easy to clean it. Most likely, you will have to completely remove the entire stove.
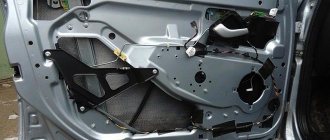
Removing the heater control unit
Removing the instrument panel trim, article - How to remove the central trim of the instrument panel Lada Granta
Using a screwdriver, press out the two clamps of the shell tip holder (the clamps are shown by arrows)
Remove tip 2 of the damper rod shell from holder 1 on the heater body
Using pliers, we recess the traction lock on the damper drive pin
Remove the black rod from the recirculation damper drive
We also remove the blue rod from the temperature regulator damper drive, the green and yellow rod from the air distribution damper drive
Remove the control unit with rod assembly
FakeHeader
Comments 67
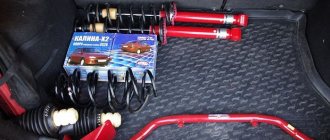
Well, tell me about the switches, how much did you buy them and how are they installed there without modifications? And then in one store they said that they don’t fit there and they have to be finished off. I want these for myself
There is no need to add anything)
In general, look, initially these were different blog posts, i.e. First we bought the side twisters, then the central one. For the side ones (in Kabardino-Balkaria at least) they ask only 150 rubles for each, i.e. pair - 300.
The central (round) one is supposedly sold only with the “tunnel” itself, such as one that burns with white light, which is why it is more expensive than the side ones. For her alone 300 rubles. I put the tunnel aside and used only the twister itself.
Installation. You just pull out the old ones, snap the new ones back on))) that's all! The only thing you need to do is pry the central one off with a flathead screwdriver, just don’t break it.