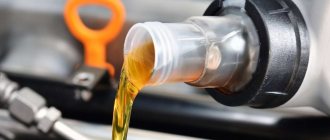
Filling with oil
Many car owners are faced with the task of having to perform maintenance on their car. At the same time, some perform the maintenance with their own hands and enjoy the repairs, and at the same time save their money, some prefer to spend money (so as not to get dirty and mess around) and take the car to a car service center, blindly trusting their iron horse to strangers. And, by the way, changing the oil of the VAZ 21213, as in other models, is a responsible process and the service life of all components of the car directly depends on its correct and timely implementation! The replacement process is simply elementary, it doesn’t take much time, and anyone can do it themselves.
Chevrolet Niva
...and, unscrewing the plug manually, drain the oil.
...and, unscrewing the plug manually, drain the oil.
Attention! Be careful - the oil is hot.
Drain the oil for at least 10 minutes.
After wiping the plug, screw it on and tighten it. We remove oil leaks from the engine oil pan.
Place a container under the oil filter. Unscrew (counterclockwise) the oil filter. If this cannot be done manually...
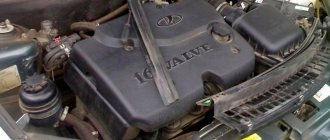
Engine
Changing the lubricant in the engine is an elementary process that is carried out according to the regulations either every 10 thousand kilometers, or every two years - depending on what comes first in your case.
Useful tips for the amateur
So:
- Lubricant replacement should be done in a timely manner; the engine life before major overhaul directly depends on this.
- The replacement procedure is best performed on a warm engine.
- It is recommended to fill in the grease of the same brand that was poured into the engine during the previous maintenance.
- If you decide to change the brand of oil, or you don’t know (forgot) which brand was used during the last change, you need to flush the entire engine lubrication system with flushing oil or lubricant of the brand that you will continue to use
- To flush the engine, drain the old grease as described below and fill in the flushing fluid to the bottom mark of the level indicator dipstick
- Then start the engine for 10 minutes, after which we drain the flushing lubricant
Attention: this procedure (rinsing) is performed with the old filter!
Work tool
This:
- Funnel
- A key set to “17” or a hexagon set to “12” (depending on which plug is installed in your pan)
- New oil filter
- Clean rags
- Special filter remover (many people do without it)
- A canister of new oil with a volume of at least four liters
- The empty waste container is also more than four liters
- Overpass or inspection hole
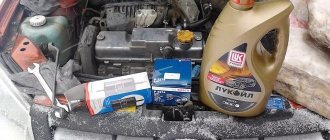
To replace the lubricant in the engine, the instructions prescribe the following actions:
- We drive the car into a pit or overpass
- Be sure to stop the car with the parking brake
- You can additionally place shoes or boards under the wheels (to prevent the car from rolling away)
- Warm up the car engine to at least 50-60 degrees so that the lubricant is more fluid
- Place the drain container and unscrew the plug
Unscrew the plug using a hexagon to “12”
- We drain the waste into a prepared empty container.
Draining the waste
- We continue to drain the grease for about ten minutes (so that there is as much glass as possible)
- Screw the drain plug back
- If you are planning to flush the engine, see the steps described above.
Attention: there is about 150-200 grams of lubricant in the filter housing, unscrew it and place a container for processing
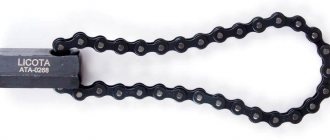
- Use a puller or other available means (screwdriver, or just your hands) to unscrew the oil filter
Unscrew and remove the filter
- When choosing motor oil, pay attention to its viscosity
- The manufacturer regulates the viscosity either 5w-30 or 5w-40
- In addition, mineral or semi-synthetic oil is used (when using synthetic oil, in VAZ engines it seeps through the seals and flows out little by little)
- Be sure to lubricate the sealing gasket of our new filter with fresh oil, and also fill it into the filter to about half the volume (which will prevent engine parts from rotating dry in the first seconds of operation)
Lubricate the filter gasket and fill it with grease to half the volume.
- Screw the filter onto the fitting, tighten it 3/4 of a turn by hand from the moment the gasket touches the cylinder block
- Remove the cap from the oil filler neck
- To control the amount of oil being poured, take out the dipstick - level indicator
- A sufficient level of lubricant on the dipstick is located in the middle, between “min” and “max”
Lubricant level marks on the dipstick
- We start the engine, wait for the red lubricant pressure lamp to go out on the dashboard, and stop the engine
- Check the oil level again with the dipstick and add if necessary.
That's all, the engine oil change is complete, this unit requires the most frequent replacement, in gearboxes and axles the replacement is performed less frequently, but do not forget to check its level in all units, otherwise the cost of the issue will be their repair and replacement.
Chevrolet Niva
... loosen the filter with a puller (for clarity, we show the operation on the removed filter).
... loosen the filter with a puller (for clarity, we show the operation on the removed filter).
If there is no puller, we pierce the filter housing with a screwdriver (closer to the bottom, so as not to damage the engine fitting) and unscrew the filter, using the screwdriver as a lever.
Transmission
The gearbox is the most stable part of the car. Transmission failures occur less frequently than other parts of the car. The main factor that keeps the gearbox in working condition is the quality of the oil poured into it. The purpose of the gearbox is to transfer power to the drive wheels from the engine by changing the gear ratio and ensuring stable engine operation under different driving conditions. The oil in the VAZ 21213 gearbox is changed after 60 thousand kilometers. And every 20,000 kilometers it is necessary to check its level in the gearbox and top up if necessary. The normal level of lubricant in the gearbox housing is located at the edge of the filler hole.
Tools
This:
- Key to "17"
- Hexagon on "12"
- Rags
- Processing container
- Syringe for filling oil
The replacement procedure occurs in this order:
- We carry out the work by driving the car onto a pit, overpass, or lift
- You must first warm up the chassis by driving about ten kilometers.
- Using a hexagon on “12”, unscrew the drain plug and drain the lubricant into a container prepared in advance
Using a hexagon, unscrew the drain plug
- After lubricating the glass, use a rag to clean the magnet of the plug from dirt and metal particles and screw it back in
Clean the drain plug with a rag and screw it back in
- Now unscrew the filler plug using a key set to “17”
Unscrew the filler plug with a key set to “17”
- We fill in new gearbox oil with a syringe to the bottom edge of our filler hole (the front driveshaft is removed in the photo for clarity)
Fill the gearbox with lubricant using a syringe
- Screw the filler plug back
This completes the oil change in the box of the VAZ 21213, without any difficulties.
Replacement frequency, what oil to fill
According to the manufacturer's regulations, service replacements of engine oil for Niva 2121 and other modifications are carried out after 10,000 kilometers or at intervals of 1 year. But some car owners consider this interval to be a little too high, recommending that it be shortened taking into account operating conditions.
At the factory, Niva models are filled with oil from different suppliers. Most often this is Petro-Canada Supreme 10W-40 or Lukoil Genesis Advanced 10W-40. But for accurate information about what is poured into your car from the factory, you should contact the feedback system of AVTOVAZ PJSC. When applying, you must indicate the year and month of manufacture of the car.
Products from other manufacturers can be used as lubricating fluid. When choosing, it is recommended to pay attention to semi-synthetics with a viscosity of 10W-40. The following motor oils are most popular among model owners:
- Lada Professional 10W-40
- Shell Helix HX7 10W-40
- Total Quartz 7000 10W-40
From this list, anyone can choose based on preference, price or love for the brand.
When using this car in winter, you should select oil taking into account the climate zone, as well as the recommendations of AvtoVAZ. Viscosity 5W-40 will allow you to operate the car down to -30°C, and 0W-40 up to -35°C.
If you use motor oil of different viscosities for winter and summer, but of the same brand and manufacturer, then flushing is unnecessary.
How much oil is in the engine lubrication system, volume table
| Model | Engine capacity | Motor marking | How many liters of oil are in the system | Original oil / factory filled |
| Niva (Lada VAZ 21214, 21213, 2121, 2131) | gasoline 1.8 | VAZ-2130 | 3.75 | Lada Professional 10W-40 / Petro-Canada Supreme 10W-40 |
| gasoline 1.7 | VAZ-21214 | |||
| VAZ-21213 | ||||
| gasoline 1.6 | VAZ-2121 | |||
| VAZ-2106 |
Review of popular models on the market
On the VAZ 2121, the rules for replacing the oil filter depend on the type of oil used: when filling a car with semi-synthetics, the part must be changed at least once every 10,000 km, when using synthetics - every 15,000 km.
It must be remembered that replacing the filter must be done with a complete replacement of the technical fluid - otherwise the effectiveness of the vehicle maintenance procedure will sharply decrease.
| Manufacturer of the part | Product code | Approximate cost, rub. |
| MANN | W920/21 | 295 |
| MANN | W920/24 | 301 |
| WIX | WL7168 | 310 |
| STARLINE | SF OF0957 | 240 |
| STARLINE | SF OF0954 | 255 |
Oil filters on cars of different years of manufacture may have slight differences in the housing - that is why before purchasing a part it is important to check its compatibility with the car.
This can be done by checking the product code of the part indicated on the packaging with the vehicle’s VIN code on the manufacturer’s official website.
How to distinguish a fake from an original product
Spare parts for Niva on the Russian market are often counterfeited due to the popularity of the car itself.
To avoid purchasing a low-grade fake, it is recommended to pay attention to the following factors before purchasing a part:
- Condition and completeness of the packaging - the packaging wrapper, like the part itself, should not have any signs of damage. As a rule, deformation of the box indicates the handicraft production of the part or its improper storage;
- Availability of manufacturer's data - each package must contain the manufacturer's address, as well as the production batch number and the correct barcode, which can be used to determine the authenticity of the spare part.
You can protect yourself as much as possible from purchasing a counterfeit part only if you purchase from an official dealer or certified service station.
Remember, the lack of a guarantee for the return of a low-quality product from the seller is a reliable sign of counterfeit. Don't try to skimp on parts for your car - choose carefully!
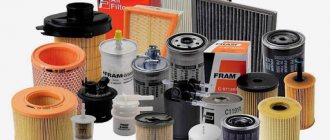
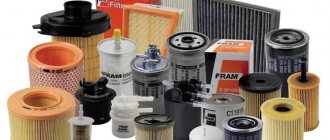
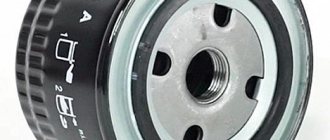
Purpose and types of engine oil filter
The main function that the filter element performs is to clean the car engine from various particles (dust, metal, etc.). Small particles can enter the engine from the environment through the air or fuel elements. This is an important, but not the only function of the cleaning element. The filter, together with motor lubricant, performs the following number of functions:
- Removing heat from rubbing engine parts;
- Creating a film between rubbing parts that prevents them from abrasion;
- Reducing the noise level that occurs during friction of parts.
There are three types of filters:
- with full flow;
- with partial flow;
- with combined flow.
To find out which filter is considered the best, let's briefly consider the purpose of each.
Structure of a car oil filter
Full flow conducts the main flow of oil through its cleaning elements, which moves from the oil pump. After which, the already purified composition is supplied to all components and assemblies of the engine. In addition to the cleaning element, the full-flow oil filter has a valve in its design. The valve is designed to regulate the pressure in the system. This valve prevents a decrease in pressure, which creates a risk of damage to seals and rubbing parts. When the cleaning element becomes clogged, the valve opens and allows oil and contaminants to enter the engine. Thus, serious damage to engine parts is prevented, but the filter allows uncleaned oil to pass through.
Partial capacity filters differ in the quality of cleaning from the previous type. But this quality affects the duration of the cleaning process. Cleaning takes much longer, but with less risk of pressure loss in the system if the filter is clogged.
About Longlife motor oils
Some motorists believe the assurances of store salespeople that Longlife oils are excellent lubricants, but they have certain features that complicate everything a little.
You should not assume that changing the oil in Niva with Longlife will save you money and extend the life of the engine. Such oil should be used only in cases where the manufacturer has certified it for a specific unit and when the modes of use of the engine and oil coincide.
In the cities of our country, no one washes city streets in the morning, as happens in European countries. Consequently, the harsh operating conditions of the engine force you to change the oil in the VAZ 21214 more often.
Experienced motorists advise dividing the replacement interval recommended by the manufacturer in half and performing work every 10 thousand kilometers.
We recommend reading the article about choosing gear oil for Niva.
Transfer case
The transfer case transmits torque from the engine to the rear and front axles, allowing you to turn on both axles at the same time, or one of the two as needed.
Tool
This:
- Hexagon on "12"
- Rags
- Tube (lever to make it easier to rotate the hexagon)
- Container for waste grease
- Oil filler
The oil change is performed simultaneously with the gearbox, after 60 thousand kilometers. Replacement procedure:
- Performed on a lift, overpass or pit
- Pre-warm the transmission after driving less than 10 kilometers
- Unscrew the plug with a hexagon “12” and drain the used lubricant
Unscrew the drain plug
- Clean the magnet of the plug and screw it back in
- Then use the same hexagon to unscrew the filler plug.
Unscrew the filler plug
- Fill in new oil with a syringe
Fill in fresh lubricant with a syringe to the level of the bottom edge of the hole.
- Checking the level - the hole is the lower edge of the filler hole
- Be sure to clean the breather from dirt, which is located on the side of the rear cardan (for clarity, the breather is shown on the removed box)
Cleaning the breather
That's all for replacing the lubricant in the transfer case.
Differences between replacing the oil filter without oil and with oil
It is recommended to change the MF without replacing the lubricant only in extreme cases: if the filter has broken down or if it was not replaced during a scheduled oil change.
When removing the old MF, some amount of lubricant will come out of the system. You cannot collect it and pour it back in - this dubious method of saving can be fraught with severe contamination of the liquid and, accordingly, an early failure of the filter. Instead, it is necessary to replenish the missing amount of fluid with new, identical oil to the one used.