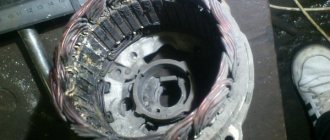
Generator device
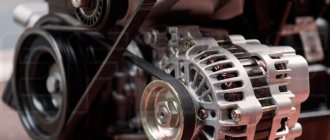
A generator is an electrical machine that converts mechanical energy into electrical energy.
The main elements of the generator are the stator and the armature. The figure below shows the Priora generator disassembled and all its parts are described.
Initially, the generator produces alternating current, after which the alternating current, passing through the diode bridge, is rectified and becomes constant.
Basic generator malfunctions
The following parts are most often susceptible to breakdown in a generator:
- Electric current collector brushes;
- Breakdown of the diode bridge;
- Break or short circuit of the stator winding;
- Bearing failure;
- Excessive wear of collector rings;
- Damage to the voltage regulator;
- Generator pulley wear;
- Capacitor breakdown;
In case of all the above-described breakdowns, it is necessary to repair the generator.
What kind of generator does the Priora have?
Which generator is installed on the Lada Priora depends on its configuration and attachments, such as air conditioning, heated seats, heated windshield, etc. The more different “chips” there are in a car, the more powerful the generator should be.
Car without air conditioning
In a car without an air conditioner, a 90A generator is installed, which is quite enough for the “NORM” package.
Detailed Specifications
| Parameter | Magnitude |
| vendor code | 3282.3771 |
| Current | 90 A |
| Voltage | 14 V |
| Weight | 5.5 kg |
Car with air conditioning
In this configuration with a large number of attachments, a large amount of current and power generated by the generator is required. The “LUX” and “NORMA+” packages are equipped with high-power 115A generators.
Detailed Specifications
| Parameter | Magnitude |
| vendor code | 2170-3701010-10 |
| Current | 115 A |
| Voltage | 14 V |
| Weight | 5.3 kg |
Stories from our readers
“Fucking basin. "
Hi all! My name is Mikhail, now I’ll tell you a story about how I managed to exchange my two-wheeler for a 2010 Camry. It all started with the fact that I began to be wildly irritated by the breakdowns of the two-wheeler, it seemed like nothing serious was broken, but damn it, there were so many little things that really started to irritate me. This is where the idea arose that it was time to change the car to a foreign car. The choice fell on the melting Camry of the tenth years.
Yes, I had matured morally, but financially I just couldn’t handle it. I’ll say right away that I am against loans and taking a car, especially not a new one, on credit is unreasonable. My salary is 24k a month, so collecting 600-700 thousand is almost impossible for me. I started looking for different ways to make money on the Internet. You can’t imagine how many scams there are, what I haven’t tried: sports betting, network marketing, and even the volcano casino, where I successfully lost about 10 thousand ((The only direction in which it seemed to me that I could make money was currency trading on the stock exchange, they call it Forex. But when I started delving into it, I realized that it was very difficult for me. I continued to dig further and came across binary options. The essence is the same as in Forex, but it’s much easier to understand. I started reading forums, studying trading strategies. I tried it on a demo account, then opened a real account. To be honest, I didn’t manage to start earning money right away, until I understood all the mechanics of options, I lost about 3,000 rubles, but as it turned out, it was a precious experience. Now I earn 5-7 thousand rubles a day. I managed to get the car buy after half a year, but in my opinion this is a good result, and it’s not about the car, my life has changed, I naturally quit my job, I have more free time for myself and my family. You’ll laugh, but I work directly on the phone)) If If you want to change your life like me, then here’s what I advise you to do right now: 1. Register on the site 2. Practice on a Demo account (it’s free). 3. As soon as you get something on the Demo account, top up your REAL ACCOUNT and go to REAL MONEY! I also advise you to download the application to your phone, it’s much more convenient to work from your phone. Download here.
The service life of a generator varies greatly and depends on the quality of its workmanship. For example, a standard generator can last 140 thousand km, which is almost 10 years of operation.
Which generator is better to choose? First, decide on the manufacturer. It is much easier to find spare parts for Russian generators, while for unpopular generators it is almost impossible to find a replacement for a broken part. Decide on the current strength. From the factory, the tens generator has a current strength of 80A, this is quite enough even if there are additional current consumers. If the generator is missing, then first try to inspect it and clean the contacts. Powerful 120A generators are installed, as a rule, when the car has “strong” acoustics; they do not harm the battery. Anyone who wants to install a 3-level voltage regulator (VR) in the future is recommended to first determine on the manufacturer’s website which generators it is structurally compatible with. They say that generators with the numbers -03- at the end of the model number have a new model LV, which is better than the old one. Also, pay attention to the presence of a guarantee, then you can easily exchange the generator for a new one in case of a defect. By the way, the defect rate of generators is almost 25-50%!
The best generator for Priora
Below is a list of third-party generators for Priora that have proven themselves in the market and do an excellent job.
Generator BATE
Manufactured specifically for Priora 2170-72 vehicles, it has a similar design to standard generators, so replacing the standard generator with a BATE will not cause any difficulties.
Detailed Specifications
| Parameter | Magnitude |
| vendor code | 5132.3771 |
| Current | 90 A |
| Voltage | 14 V |
| Weight | 5.5 kg |
Generator Pramo
This generator is most often used to replace the standard “KZATE” as it has a rectification current of 115A, which is quite enough to operate all the functions of the “LUX” configuration.
Detailed Specifications
| Parameter | Magnitude |
| vendor code | 9402.3701-14 |
| Current | 115 A |
| Voltage | 14 V |
| Weight | 5.4 kg |
Generator LKD
An excellent generator for those who use a powerful audio system. This generator is capable of rectifying current up to 120A, which allows it to cope with almost any task that requires high current and voltage.
Source
Who to buy from?
If you need a new generator for your Lada Kalina car, then the motorist has four options where you can purchase it:
It is important to choose reliable suppliers who have all the documents to engage in sales activities. The most economical option would be to buy a used generator at a car dismantling point or as advertised by Kalina car owners. But there is no guarantee that the device will work for a long time.
If the generator is seriously damaged, it does not have to be repaired, but completely replaced. Parts necessary for repair may be missing, or the breakdown may not be repairable at all. Meanwhile, the on-board voltage and the quality of battery charging depend on the good operation of the power unit. It's a shame when, despite a good motor, electrical equipment does not work properly.
And if we are talking about VAZ cars, then sometimes a replacement is in demand due to the lack of power of standard devices. Modern automakers offer many additional devices that increase the level of comfort when traveling, but they also consume a large amount of electricity, and old devices cannot cope, so they have to be replaced with more powerful ones.
Many people are interested: which generator to buy if they have a VAZ? Here you need to consider them separately by model, so before you go shopping, read the recommendations of specialists and compare them with your wishes and capabilities.
Generator connection diagram for Lada Priora VAZ-2170, 2171 and 2172
Lada Priora VAZ-2170, 2171 and 2172 are equipped with a generator 5102.3771 with the following characteristics:
- Maximum output current at 14 V = 80A
- Adjustable voltage, Volts = 13.8–14.4
- Power density = 205 W
- Generator weight = 5.4 kg.
The figure above shows a wiring diagram for the generator on the Priora , here is its explanation:
1 – battery;
3 – main fuse block;
6 – battery fault warning light
The voltage to excite the generator when the ignition is turned on is supplied to the “D+” terminal of the regulator through the battery warning lamp No. 6 in the instrument cluster. After starting the engine, the excitation winding is powered by three additional diodes installed on the generator rectifier block. The “W” output of the generator is not used on Lada Priora cars. The operation of the generator is monitored using the battery warning light located in the instrument cluster. When the ignition is turned on, the lamp should be on, and after the engine starts, it should go out. If the lamp does not go out after starting the engine, you need to take a multimeter in your hands and check the presence of voltage supply to the on-board network from the generator.
Source
Step-by-step instruction
- Remove the engine protection from below.
- Remove the ridge belt driving the air conditioning compressor and generator.
- Disconnect the contacts from the generator: first, under the rubber protective cap, terminal B+ (it is secured with a 10 nut), then terminal D (white chip).
Using a 10 mm wrench, unscrew the generator contact
- Unscrew the top mount of the generator from the top of the engine compartment with two 13 mm spanners.
Using two 13 mm wrenches, unscrew the top mount of the generator - Remove the bolt.
Remove the generator mounting bolt - Unscrew the lower mounting bolt from the bottom of the engine compartment using a 17mm wrench.
Unscrew the lower mount of the generator with a 17mm spanner - Unscrew the compressor mount to the bracket with a 12mm wrench. The compressor is secured with 4 bolts: one short, three long. Start with the bottom ones. It is more convenient to unscrew the upper ones using a wrench, an extension, a cardan and a 12mm socket.
Start with the lower air conditioning compressor mounting bolt. - Move the compressor first downwards, then to the right towards the body side member. There is no need to remove the tubes. On a note. It is not necessary to secure the compressor. It will be held in place by the surrounding parts.
- Remove the bolt with metal sleeve from the lower mounting.
Remove the bolt with metal sleeve from the lower mounting of the generator - Pull the generator down from the engine compartment.
Pull the generator down from the engine compartment
Priora generator operating principle
A mod generator is installed on Lada Priora cars. 5102.3771 AC, three-phase, with built-in rectifier unit and electronic voltage regulator, clockwise rotation (viewed from the drive side)
Rice. 1. Generator connection diagram
Mod generator 5102.3771 has a number of advantages over earlier domestically produced analogues.
The most significant difference is the increased current output of the generator at low engine speeds (the increase is 4–6 A when the generator rotor speed is reduced by 300 rpm), which is especially necessary when operating the car in winter, and will also allow the future use of an automatic transmission in the car design .
Technical characteristics of the generator 5102.3771
Maximum output current at 14 V, A. 80
Adjustable voltage, V. 13.8–14.4
Engine-generator gear ratio. 1:2.4
Specific power, W/kg. 205 Weight, kg. 5.4
The voltage to excite the generator when the ignition is turned on is supplied to the “D+” terminal of the regulator through the 6th battery discharge warning lamp located in the instrument cluster.
After starting the engine, the excitation winding is powered by three additional diodes installed on the generator rectifier block.
The “W” output of the generator is not used on Lada Priora cars.
The operation of the generator is monitored using a low battery warning lamp located in the instrument cluster.
When the ignition is turned on, the lamp should be on; after starting the engine, it should go out if the generator is working.
If the lamp burns brightly or burns at full intensity, it indicates a malfunction.
Stator 4 (Fig. 2) and covers 3 and 6 are tightened with four screws.
Interchangeability of autogenerators
Interchangeability of generators for Lada cars is achieved if the following requirements are met:
- the main technical characteristics of the installed generator are not lower than those of the device being replaced;
- the gear ratio from the internal combustion engine to the generator is the same;
- the devices have similar electrical circuits;
- The new generator is suitable in terms of weight and dimensions and type of fasteners.
Most Russian-made automobile generators have a 2-leg mount. These fasteners are found on both covers. For equipment of foreign brands, installation is carried out using 1 paw, the fasteners are located on the front cover.
In order to correctly install and securely fasten a foreign generator in a car from AvtoVAZ, it is necessary to replace the bracket.
Possible generator malfunctions
Cause - Remedy
The warning light does not light up when the ignition is turned on, control devices do not work:
Fuse F12 in the mounting block has blown - Replace the fuse
Open circuit in the instrument cluster power supply - Check the connections of the orange wire from the mounting block to the instrument cluster
Open circuit in the instrument cluster power supply: no voltage is supplied from the ignition switch to the mounting block - Check the connections of the blue wire with a black stripe from the ignition switch to the mounting block and the wire itself
Ignition switch does not work - Replace ignition switch
The warning light does not light up when the ignition is turned on and does not light up when the engine is running, the control devices are working, the battery is discharged:
Instrument cluster malfunction - Replace instrument cluster
Open circuit between the instrument cluster and the generator terminal (D+) - Check the connections of the brown wires with a white stripe from the generator to the instrument cluster
Worn or stuck brushes, oxidation of slip rings - Replace the voltage regulator, wipe the rings with a cloth soaked in gasoline
Voltage regulator damaged - Replace voltage regulator
The leads of the excitation winding are unsoldered from the slip rings - Replace the generator rotor
The warning light is bright or dim when the engine is running, the battery is discharged:
Alternator drive belt slipping - Adjust belt tension
Voltage regulator damaged - Replace voltage regulator
The diodes of the rectifier unit are damaged - Replace the rectifier unit
Additional power diodes of the field winding are damaged - Replace the rectifier unit
Open or short circuit in the stator winding - Replace the stator
The warning light comes on when the engine is running, but the battery does not charge.
Voltage regulator damaged - Replace regulator
Increased generator noise:
Damaged generator bearings - Replace the rear bearing or the front cover along with the bearing
Interturn short circuit of the stator or short circuit to ground of the stator winding (generator whine) - Replace the stator
Short circuit in one of the generator valves - Replace the rectifier unit
Source
Generator - removal, installation, repair and maintenance VAZ 2170 2171 2172 Priora
Design features of the VAZ 2170 2171 2172 Priora generator
On Lada Priora - VAZ 2170 2171 2172 cars, an alternating current generator model 5102.3771 is installed, three-phase, with a built-in rectifier unit and an electronic voltage regulator, right rotation (when viewed from the drive side). Mod generator 5102.3771 has a number of advantages over earlier domestically produced analogues. The most significant difference is the increased current output of the generator at low engine speeds (the increase is 4–6 A when the generator rotor speed is reduced by 300 rpm), which is especially necessary when operating the car in winter, and will also allow the future use of an automatic transmission in the car design .
Technical characteristics of the generator 5102.3771 Maximum output current at 14 V, A. 80 Adjustable voltage, V. 13.8–14.4 Engine-generator gear ratio. 1:2.4 Specific power, W. 205 Weight, kg. 5.4
Rice. 1. Generator connection diagram: 1 – battery; 2 – generator; 3 – main fuse block; 4 – ignition switch (lock); 5 – mounting block; 6 – battery discharge warning light
The generator connection diagram is shown in Fig. 1. The voltage to excite the generator when the ignition is turned on is supplied to the “D+” terminal of the regulator through the 6th battery discharge warning lamp located in the instrument cluster. After starting the engine, the excitation winding is powered by three additional diodes installed on the generator rectifier block. The “W” output of the generator is not used on Lada Priora cars. The operation of the generator is monitored using a low battery warning lamp located in the instrument cluster. When the ignition is turned on, the lamp should be on; after starting the engine, it should go out if the generator is working. If the lamp burns brightly or burns at full intensity, it indicates a malfunction. Rice. 2. Generator 5102.3771: 1 – pulley; 2 – front bearing; 3 – front cover; 4 – stator; 5 – coupling bolt; 6 – back cover; 7 – casing; 8 – rectifier block; 9 – output “D+” of the generator; 10 – output “B+” of the generator; 11 – rotor contact rings; 12 – voltage regulator with brush holder; 13 – rear bearing of the rotor shaft; 14 – rotor
Stator 4 (Fig. 2) and covers 3 and 6 are tightened with four screws. The rotor shaft 14 rotates in bearings 2 and 13, which are installed in the covers. Power is supplied to the rotor winding (excitation winding) through brushes and slip rings 11. The three-phase alternating current induced in the stator winding is converted into direct current by the rectifier unit 8 attached to the cover 6. The electronic voltage regulator 12 is combined into one unit with a brush holder and is also attached to cover 6.
Possible generator malfunctions, their causes and solutions VAZ 2170 2171 2172 Priora.
| Causes of malfunction of the VAZ 2170 2171 2172 Priora generator | Remedy | External manifestations of failure of the generator VAZ 2170 2171 2172 Priora |
| Fuse F12 in the mounting block has blown | Replace fuse | The warning light does not light up when the ignition is turned on, control devices do not work |
| Open circuit in the power supply circuit of the instrument cluster: no voltage is supplied from the mounting block to the instruments | Check the connections, contacts and orange wire from the mounting block to the devices | The warning light does not light up when the ignition is turned on, control devices do not work |
| Open circuit in the power supply circuit of the instrument cluster: no voltage is supplied from the ignition switch to the mounting block | Check the connections, contacts and blue wire with a black stripe from the ignition switch to the mounting block | The warning light does not light up when the ignition is turned on, control devices do not work |
| The ignition switch does not work | replace ignition switch | The warning light does not light up when the ignition is turned on, control devices do not work |
| instrument cluster malfunction | replace instrument cluster | The warning light does not light up when the ignition is turned on and does not light up when the engine is running, the control devices do not work, the battery is discharged. |
| Open circuit between instrument cluster and instrument cluster terminal D+ | Check the connections, brown wire contacts with a white stripe from the generator to the instrument panel | The warning light does not light up when the ignition is turned on and does not light up when the engine is running, the control devices do not work, the battery is discharged. |
| Wear or souring of generator brushes, oxidation of generator slip rings | Replace the generator voltage regulator, wipe the contacts of the generator slip rings | The warning light does not light up when the ignition is turned on and does not light up when the engine is running, the control devices do not work, the battery is discharged. |
| Damaged. Generator voltage regulator is faulty | Replace generator voltage regulator | The warning light does not light up when the ignition is turned on and does not light up when the engine is running, the control devices do not work, the battery is discharged. |
| The leads of the excitation winding came off from the slip rings and were unsoldered. | Replace the generator rotor | The warning light does not light up when the ignition is turned on and does not light up when the engine is running, the control devices do not work, the battery is discharged. |
| Alternator drive belt slipping | Adjust the tension of the generator belt | The warning light is bright or dim, the battery is low |
| Damaged. Generator voltage regulator is faulty | Replace generator voltage regulator | The warning light is bright or dim, the battery is low |
| The rectifier block valves are damaged | Replace the generator rectifier unit | The warning light is bright or dim, the battery is low |
| Damaged additional power diodes of the excitation winding | Replace the generator rectifier unit | The warning light is bright or dim, the battery is low |
| The leads of the excitation winding came off from the slip rings and were unsoldered. | Replace the generator rotor | The warning light is bright or dim, the battery is low |
| Open circuit or short circuit in the stator winding | Replace generator stator | The warning light is bright or dim, the battery is low |
| Damaged. Generator voltage regulator is faulty | Replace generator voltage regulator | The warning light comes on when the engine is running and the battery is being recharged. |
| Generator bearings are damaged | Replace the rear bearing or replace the front bearing along with the front generator cover | Increased, extraneous noise in the generator |
| Inter-turn short circuit or short circuit to ground in the stator winding | Replace generator stator | Increased, extraneous noise in the generator |
| Short circuit in one of the generator ventilators | Replace the generator rectifier unit | Increased, extraneous noise in the generator |

