Fuel injectors play an important role in the fuel system; stable engine operation, fuel consumption and much more depend on their serviceability and performance. Today I won’t talk for a long time about the reasons why the injectors become clogged, it seems to me that everyone already knows about this, instead I propose to go directly to the work of cleaning the fuel injectors of the VAZ 2115.
For those who are not aware or are simply interested in what a nozzle is and how it works, I recommend reading this article.
Before cleaning the injectors, you need to prepare the following set of “tools”:
- Five-cc medical syringe;
- Special liquid for cleaning (flushing) the carburetor;
- Two copper wires length (~1 meter);
- Light bulb (small one from a headlight);
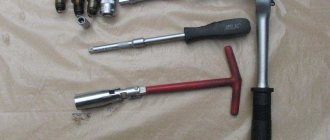
- Hex key at “5” and key at “24”;
- O-rings for injectors (if the old ones are finished).
From all these seemingly unrelated parts, you need to build a device for washing the injectors with your own hands. And this is done as follows, see the diagram:
Take the injector, connect the wires to it (+ and -, respectively), and set the button (breaker) to minus. It is necessary to connect the previously prepared syringe to the back side of the nozzle (input), and install the tube of the cleaner can into the thin hole of the syringe. All this must be connected to the battery. Read the operating principle of this mechanism below.
Alternatively you can do this:
Injectors - what are they?
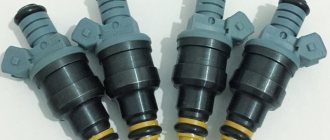
Let's figure out what injectors are and what they are needed for. Injectors are an electromagnetic mechanism designed to spray fuel into the cylinder. Their number depends on the number of cylinders in the car. The VAZ car has 4 cylinders, therefore there are also 4 injectors.
A serviceable and clean injector sprays fuel evenly without any delays or jerks.
A clogged injector may not spray fuel at all or, on the contrary, pour it in drops. As a result, the engine cannot operate normally and correctly.
see also
Additive for diesel injectors
- 25 6 48k
Injector cleaners
- 46 2 113k
How to clean injectors yourself
- 37 0 32k
Checking pump injectors: software diagnostics and measurement with a multimeter
- 87 0 37k
How to check an injector nozzle
- 41 0 85k
Injector performance calculator
Online injector performance calculator
Every car owner of an injection car sooner or later encounters problems in the fuel system and begins to think about cleaning the fuel injectors.
The task of the injector is to maintain the pressure created by the fuel pump and only at the right moment to open for a fraction of a second to allow the required amount of fuel to pass through.
There are a lot of different additives in the fuel, which during engine operation stick to the seat of the injector locking needle. As a result, the injector begins to spray fuel incorrectly or leak fuel when it should be closed. In such cases, it is necessary to clean the injectors or replace them.
The recommended period for cleaning injectors is 25,000 km - 30,000 km . Failure to properly maintain fuel injectors can lead to their complete failure, and then only replacement will be necessary.
Symptoms of clogged injectors
Loss of dynamics is one of the main signs of clogged injectors. If they are contaminated, the car simply will not accelerate properly.
- Unstable idling, the engine at idle will operate unstably and intermittently.
- Starting difficulties can occur when there is contamination or when the injectors stop holding pressure. Fuel begins to drip into the cylinder, which can cause popping sounds in the exhaust pipe.
- Ringing fingers are inevitable when the spray nozzle is clogged; this is due to the fact that the fuel entering the cylinder is mixed with air and the concentration of fuel in this mixture is quite small, so the engine experiences detonation.
Driving with dirty injectors will not provide any driving pleasure. And driving with such a problem is highly not recommended.
How often should you clean the injector, and is it necessary to do it?
Against the background of the above, the conclusion suggests itself about the need to periodically check the condition and efficiency of the injector. The question is in what time frame this work is required.
Let us highlight the following trends:
- 30000 km . If the car owner fills the car with low-quality fuel during the initial period of operation, the injectors gradually become clogged with tarry deposits, which leads to deterioration in engine performance. In such a situation, it is worth figuring out how to clean the injector, and when it needs to be done for preventive purposes.
- 30-50000 km . In the absence of action on the part of the owner, the efficiency of the sprayers decreases by 5-7%, and the “gluttony” of the vehicle increases (on average by 2-3 liters). To eliminate existing contaminants, you cannot do without cleaning the injector.
- 50-80000 km . Further the situation worsens. After this period, the performance of the sprayers decreases by 12-15%, and the power unit itself begins to operate unevenly. Over time, the plunger damages the seat, causing the nozzle diameter to become larger. At the same time, contamination of the system occurs. How to clean the injector in this case? The only solution is considered to be a full-fledged flushing, but due to the increase in the diameter of the nozzles, this is not worth doing. And in general, replacing the part should be preferred over cleaning.
- 80,000 km or more . In this case, the efficiency of the nozzles decreases and the sprayers operate unevenly (deviations reach 30-50%). The issue of cleaning the injector becomes irrelevant, and the optimal solution is to install new parts, regardless of the condition of the latter.
It is worth noting that the nozzle is a consumable item, so you should not be afraid of replacing it. Each product has its own resource, after which a new element must be installed.
Manufacturers of many cars recommend replacing them at intervals of 100-120 thousand kilometers. This is true even with apparently normal operation of the products.
Do injectors need to be cleaned? Given the use of low quality fuel, the sulfur content of which is tens of times higher than EU standards, this is necessary.
The main thing is not to delay this process and do the work from the perspective of prevention, not “treatment.”
Experts recommend performing this work once every 25-30 thousand kilometers, but to get results it is important to understand how to clean the injector, what methods exist, and what their features are.
When to clean injectors
Cleaning of injectors on Lada cars is carried out according to the condition of the car. If there are no problems with your car, then there is no need to clean them. Also, to find out for sure whether the injectors need to be cleaned, you first need to diagnose the fuel system. You can learn more about how to diagnose the fuel system in our article.
The manufacturer recommends cleaning the injectors every 50,000 km. Since the fuel at our gas stations leaves much to be desired, just before this mileage they begin to become clogged and flushing them will be useful. You can wash it at a service station, or you can do it yourself. Next, we will look in detail at how to wash the injectors on a VAZ car at home.
Basic methods for cleaning an injector
Today, there are several options for cleaning the injector with and without removing the injectors, they differ in their operating principle and efficiency:
- Application of automotive chemicals (special products). This method is good because it is accessible, because car stores are stocked with many types of fluids for restoring injectors. How to clean the injector this way? It is enough to select the appropriate option, add the product to the fuel tank (taking into account the manufacturer’s instructions), refuel and continue to operate the car. What are the features, pros and cons of the method, we will consider below.
- Using the capabilities of ultrasound. This option is more advanced and high-tech, and therefore gives better results. The difficulty is that the work is carried out using expensive equipment that is available only in specialized workshops. The operating principle is based on the use of ultrasound. When compared with other methods of cleaning the injector, this technique is the safest and most effective.
- Chemical method (washing). This cleaning option is good because it covers the injectors and the fuel system as a whole. Here a special washing stand is used, which is connected to the fuel system of the machine. Before performing work, the fuel tank is turned off. As a result, the flushing fluid cleans the pressure regulator, intake valves, injectors and even the fuel rail. PHOTO 6 But there are many ways to clean the injector (nozzles) using a chemical method at home.
Some options for self-washing the injector offered by drivers.
Methods for cleaning injectors
Injector flushing additives
There are a huge number of different additives for flushing the injector. Such additives are poured into the car tank and mixed with fuel. The mixture of fuel and additives enters the main elements of the fuel system and flushes them, including the injectors. But, as a rule, such washings do not bring much results, since all the dirt that was washed away to the injectors gets and settles on them, which can only aggravate the situation. Using this method is not recommended.
Source
Recommendations and tips
An indicator of normal operation of the nozzle is a high-quality spray of liquid. Also, after washing the injectors, it is recommended to replace the fuel filters; if necessary, the fuel pump mesh filter is additionally cleaned. This is necessary to prevent dirt from the fuel system from re-clogging the injectors.
We also recommend reading the article on how to clean injectors with ultrasound. From this article you will learn about the advantages and disadvantages of this method, as well as the features of such cleaning.
Please note that the cleaning method by washing only removes surface deposits. If the injectors on a 2114 or VAZ 2115 have persistent and heavy contamination, it is necessary to perform deep cleaning of the injectors with ultrasound or washing on a bench. In difficult cases, ultrasonic cleaning of injectors is combined with washing to obtain better results.
Cleaning injectors on VAZ 2113, VAZ 2114, VAZ 2115
Welcome! Fuel injectors are needed to spray the fuel that comes from the gas tank into the car engine, and to be more precise, they pour fuel directly into the cylinders so that it mixes with air and ignites the fuel-air mixture, if you don’t already know , but on a given mixture (namely, a mixture of fuel with air), the car’s engine works, if one thing is removed (Air, for example), then the engine will no longer start, because there will be no oxygen due to which gasoline should ignite (But pure gasoline it doesn’t burn), that’s why people (Scientists) gave this mixture the name “Fuel-air mixture” on which the engine runs and thus the car drives.
Note! To clean the fuel injectors, take with you a suitable tool, these include: A set of all kinds of wrenches in which there must be wrenches, as well as take screwdrivers, buy the liquid at the auto store “For cleaning carburetors” it’s called, but you still have when purchasing with talk to the seller, because if the liquid turns out to be too toxic, it can simply damage your injectors when you clean them from the inside, and you will also need wires that will have to be led from the battery and connected to the injectors (two thin wires of normal length will do just fine or better yet, a big one so that it’s enough, about 1 meter will suit you perfectly)!
Summary:
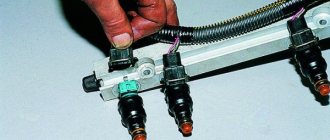
Where are the fuel injectors located? They are located on the fuel rail, but there is one But! As cars of the Samara 2 family were produced, they were equipped with completely different engines which, in principle, are similar to each other in operating principle, but different in spare parts (Although most of the parts in them are also similar) and therefore fuel rails on the same models (VAZ 2114 for example) may be completely different, but they all have the same location, namely under the receiver they are located, so that you can understand in more detail where it is, see the photo below, on which the location of the ramp itself is indicated by an arrow.
When should you clean fuel injectors? As soon as they become clogged due to poor-quality gasoline, they need to be cleaned, just clean them, for example, every 30,000 thousand km, we do not recommend that, as some auto repairmen claim, because if high-quality gasoline was poured into the car, then even after 50,000 thousand km, they will not be clogged and remember once and for all, if the car is still driving normally, without interruptions, and also has a smooth idle, then there is no need to get into the engine at all, by the way, about the fuel injectors , they only need to be cleaned when they become clogged, because cleaning does not lead to anything good, and there are even cases when after cleaning the injectors become unusable (In a word, cleaning the injectors harms them and therefore it should be carried out only when absolutely necessary), symptoms that the injectors the following will be clogged: The car will not drive properly, jerks will be noticeable when driving, and there will also be an uneven idle, the car may still have difficulty starting, and it may simply stall at idle, well, that’s all, these are the most striking symptoms that will happen to a car when the injectors are clogged.
CAR INJECTOR SYSTEM VAZ 2114
The VAZ 2114 is equipped with an engine with a distributed fuel injection system (injector), and the stable operation of the engine of this car depends on the quality of gasoline. A low octane number of fuel leads to a drop in power and unstable operation of the power unit. As a result, any parts of the internal combustion engine (ICE) may fail. Mechanical impurities in the fuel lead to clogging of fuel filters, damage the fuel pump, and clog the injectors. You have to disassemble the fuel system (TS) and clean the injector. How the VAZ 2114 injector works, how to clean it and in what cases, how to remove and install the fuel rail, we will look at in this short article.
The VAZ 2115 injector is no different from the VAZ 2114, so when considering the device of the “fourteenth” model, we will also keep in mind the “15th”. The mechanical part of the injector includes:
- Intake manifold;
- Fuel rail (or rail, which is the same thing);
- Throttle assembly;
- Air filter with housing;
- Air pipe (injector corrugation);
- Injectors.
The device of a gasoline injector
Car enthusiasts who replace the carburetor in their “eights” and “nines” with a distributed injection system are puzzled by the purchase of these particular listed parts, not counting the electrical filling.
How to clean the injectors on a VAZ 2113-VAZ 2115?
Note! You probably already know that there are two ways to clean injectors, the first method is to ultrasonic clean them, a very effective method, but there have also been cases when people’s injectors simply failed, this may be due to the inexperience of car service workers in the first place (Just like that cleaning is carried out only in a car service using a special device and you can’t do it at home) and secondly, the device itself with which they perform cleaning does not work correctly (If everything is fine and the cleaning technology is followed, then nothing will happen to your injectors happens), the second method is already performed at home and also if you approach it with normal carburetor fluid (Not too caustic), then in this case nothing will happen to the injectors, we will describe this method in this article.
1) Let’s get down to the work itself, first you will need to remove the fuel rail and then you will need to remove the injectors from it, how to do all this, read the article entitled: “Replacing fuel injectors on a VAZ” (In this article to which a link is given It is also described how you can check the performance of the injectors, you will also carry out this check and perhaps you will not even need to clean them if they splash the same level of fuel into all containers), after removal, prepare a work area that should not be too dirty (It is best to use some or put a cloth and then place the injectors on it) and also prepare all the tools that will be needed, but you also take into account the fact that the battery should be nearby, so do all the work next to the car.
Note! By the way, you can also replace the battery with a charger, it will be even more convenient, in general, take any charger (it’s better to use old phones) and connect two wires to it (both contacts need to be tied to its tip with electrical tape so that they stick ) and these same two wires will go to the injector when cleaning it (more on this a little later)!
2) Now take the cleaner itself and remove the top cap from it, then place the back part of the nozzle on the protruding nipple from under the cleaner (it must be seated tightly so that the nozzle does not fly off during the work) as shown in the photo below and proceed to work , if you do all the work using a battery, then we would like to immediately note that it provides a current of 12 Volts, so be careful not to burn the injector (Just do not hold the contacts for a long time so that the injector works and everything will be fine for you, for 10-20 seconds will be enough), but if you used the charger, then we have already told you everything about how to connect it, namely in point 1 in “ Note! “We described everything, so let’s say a few words about the battery, you also need to connect these two wires to it and put one of the wires on the minus terminal, and the other on the plus, and after that you can connect these wires to the injector, read more about this in paragraph below.
3) In conclusion, these two wires will have to be connected to the contacts of the injector (There will only be two contacts on it, clearly look at the photo below), when connecting them, do not hold them for a long time (When connected, the injector will begin to spray the cleaner), otherwise you will burn the injector and it will stop working, you need to continue the operation until you see the nozzle begin to spray fuel with a normal jet (Strong), so as soon as the jet starts to beat normally, immediately stop working and move to another fuel injector.
Additional video: You can see the process of cleaning fuel injectors using a phone charger in the video below:
Note! And you can do exactly the same process of cleaning fuel injectors, but only using a battery, in another video, which is also posted below:
Source
Washing with removal of injectors
What you need:
- Set of wrenches;
- O-rings for injectors 16 pcs;
- Carburetor cleaner;
- Syringe;
- Injector plug 1 pc. or mother chips 2 pcs;
- Two-core wire up to 1 m long;
- Intake receiver O-rings;
Injector removal process
- First, we relieve the pressure in the fuel rail; how to do this is written above.
- In order to dismantle the fuel rail, it is necessary to remove the intake manifold.
- We remove the intake manifold corrugation by unscrewing the clamp from the DZ and unscrewing the clamp from the low crankcase ventilation, and remove the chip from the mass air flow sensor.
- Unscrew the dipstick with a screwdriver and pull it up.
- Unscrew the breather clamp, remove the hose and bend it down.
- We remove individual ignition coils except for the 4th cylinder (it does not interfere).
- Unscrew the two nuts securing the intake manifold from above.
- Unscrew the 2 bolts and 3 nuts securing the intake manifold.
- We move the intake manifold towards the radiator and lift it to the top.
- Under the hood we find a fuel line pipe (if the engine has a return line, there will be two pipes, one of them goes to the fuel rail, so you need to connect to it).
- We take two Keys on “17” and unscrew the fitting connection, carefully without damaging the tube.
- You need to unscrew it like this: position the keys like scissors and squeeze them; you must follow the correct direction so that the fitting and nut are unscrewed and not tightened.
- After the fitting connection is unscrewed on the tube, you will see a rubber ring; it must be removed; if it is in poor condition, it is better to replace it.
- Disconnect the injector wiring harness.
- Using a screwdriver, unscrew the bolt securing the fuel rail tube to the cylinder head.
- Unscrew the two hex bolts to “6”.
- Pull the fuel rail towards you; with a little force, the ramp should come off.
Removing injectors from the fuel rail
- We remove the chip from each injector and dismantle the wiring harness.
- Remove the retaining rings from the injectors
- Pull out the nozzles in a circular motion
Preparing to wash the injectors
In order to wash the removed injectors, it is necessary to prepare a washing device. The injectors are flushed under pressure. To do this, we assemble the injector power supply circuit. The injector receives power from 9 to 12 V. The power source for opening the injector can be a crown battery or a car battery. We will use a rechargeable battery.
So, let's start assembling a device for washing injectors on a Lada car
For convenience, it is better to carry out the procedure together.
- You need to prepare a syringe. Pull the piston out of it; the syringe cylinder should fit tightly onto the nozzle with the ring. You can also use a hose of a suitable diameter instead of a syringe and tighten it with a clamp. We will use a hose.
flushing with a syringe
flushing through a hose
- Next, we twist the wires with the injector plug or with the “mother” terminals.
- We connect the nozzle to the power source, observing the polarity. "+" and "-"
- The injector should click, which means the injector is opening.
- We hold the nozzle and spray carburetor cleaner into the hose and hold it, creating pressure in the hose between the nozzle and the cleaner bottle.
- Then you need to open the injector by connecting the wires to the battery
- The injector will spray carburetor cleaner and clear itself.
- You can complete the procedure as soon as a uniform spray of fuel begins to emerge from the injector.
- Next, you should do the same procedure with all the injectors.
- Assembly should be carried out in the reverse order of disassembly.
Advice
For easier installation of the fuel rail with injectors into the cylinder head, it is recommended to lubricate the O-rings with engine oil.
Now you know in what ways and how you can wash the injectors. We hope our article helped you and you chose a method of washing injectors that is convenient for you.
How to clean injectors on a VAZ 2114 with your own hands
The VAZ 2114 car is equipped with an injector, as well as a “Check engine” sign, which indicates problems with the car’s engine. When this icon lights up, for the sake of safety and preservation of engine operation, it is necessary to urgently diagnose the cause of the error and eliminate the malfunction in a timely manner. But if, in addition to the illuminated “Check engine” icon, there are other symptoms, then you need to rule out a problem such as clogged injectors.
Main features
So, signs of clogged injector nozzles:
- misfires at idle,
- the engine is unstable,
- fuel consumption increased sharply,
- slow acceleration of the car when the gas pedal is fully pressed.
Why is it important to identify this malfunction? The injector supplies fuel to the system and is its main element, therefore, extending its service life is of great importance for the operation of the entire engine.
Extending the life of injector nozzles
How to extend the life of injectors? At the initial stage, with low mileage, various special additives that are added to the gas tank with fuel can help out. They can be bought in specialized stores, car markets and junkyards. The cost of additives is low. This method is good if you do it regularly, and it can extend the life of the injectors, but it will not clean them completely. Some car enthusiasts, on the contrary, are against the use of chemicals, believing that additives clog the injector even more.
It is recommended to clean the injectors every 40 thousand km. Many auto repair shops provide cleaning services. The cost starts from 1,500 rubles, and the procedure is done on special equipment using ultrasound. But in order to save time and money, you can carry out this procedure yourself . Cleaning VAZ 2114 injectors with your own hands is not difficult even for a beginner. But first you need to determine the performance of the injector nozzles. If you suspect this malfunction, then how to check the injectors of the VAZ 2114? Many car enthusiasts do this on a special stand, but it makes no sense to buy it for rare diagnostics. In this article we will talk about checking without additional devices.
Injector cleaning options and basic tools
Now let's take a closer look at how to clean the injector, and what tools can be used to solve such a problem.
Automotive chemistry
As noted above, the simplest option is to use a special additive, which is added to the fuel tank, mixed with fuel, passed through the system and cleans the injectors. This product is recommended to be used as a preventive measure, once every 5000 km. In addition, it should be used in “young” cars with low mileage.
What is the reason for such a requirement? If the vehicle's fuel system has not been cleaned for a long time, a large number of deposits accumulate in it.
If the car owner decides to clean the injector using additives, the latter cause the dirt to fall away from the walls, after which the main elements of the system become clogged. The first thing that gets dirty is the fuel pump.
The main representatives of auto chemical products include:
Liqui Moly (Liqui Moly) Injection Reiniger High Performance series.
According to the manufacturer, this product can help out even with serious contamination.
Its use eliminates the consequences of using low-quality fuel. After cleaning, engine power increases, fuel consumption decreases and the volume of harmful emissions into the atmosphere decreases.
How to clean an injector using Injection Reiniger High Performance? The packaging contains instructions according to which it is recommended to add 300 ml of liquid to a full tank of fuel from time to time.
Regular use of the product helps to avoid contamination, keep the system clean, and increase the efficiency of intake valves and injectors.
The use of the composition is recommended in case of problems with starting, a decrease in engine power, deterioration of exhaust gases, as well as in the event of other malfunctions associated with contamination of the injector.
Liqui Moly (Liqui Moly) series Langzeit Injection Reiniger.
The product also fights existing stains and prevents the formation of new deposits. Used to clean injectors, intake valves and other elements of the fuel system.
Regular use of the product allows you to maintain engine power, reduce the risk of failures in its operation and extend the service life of the catalyst.
To clean the injector, just add 10 ml of liquid per 10 liters of fuel. The additive mixes itself with gasoline and performs a cleaning function.
Liqui Moly (Liqui Moly) series Injection-Reiniger.
Another modern product that provides quick cleaning of injectors and other elements of the fuel system.
The use of the additive guarantees the removal of carbon deposits and deposits that appear on fuel lines, intake valves, dispensers and other components.
Periodic use of the fluid ensures smooth running, engine response, better combustion of the combustible mixture, reduction of harmful emissions, and reliable protection against rust.
Features of the product include compatibility with catalysts, as well as the possibility of use on all types of gasoline engines with an injection system.
According to the manufacturer, the anti-corrosion characteristics of the additive are maintained for 2000 km.
To clean the injector using this product, just stir it in a ratio of 1 to 230.
So, 200 ml of additive is enough to prepare 70 liters of fuel. The tank should be 75% full when adding.
Liqui Moly (Liqui Moly) Injection Reiniger Light series.
This is a mild cleaner that is suitable for gasoline engines with various injection systems. Used as preventive maintenance and periodic cleaning of the fuel system.
The manufacturer claims that the cleaner does not lift dirt from the fuel tank and does not clog fuel lines. Existing contaminants are dissolved and removed from the system.
If you clean the injector in a timely manner using Injection Reiniger Light, engine starting is improved, the volume of harmful emissions is reduced, and reliable protection against corrosion is provided.
The peculiarity of the additive is that it has no negative effect on the catalyst.
To clean the injector, you need to add 0.25 liters of additive to a full tank of fuel. The volume of gasoline should be no more than 70 liters.
Liqui Moly (Liqui Moly) Injection Reiniger Effectiv series.
This composition is suitable for cleaning injection power systems in the presence of obvious symptoms of contamination - engine problems, engine failures, and others.
The best option is to use the product every 2000 km. The additive is especially useful when low quality fuel is poured into the car.
To clean the injector, 300 ml of additive per full tank of fuel is enough. The product is mixed with gasoline, cleans the fuel system, protects it from corrosion and deposits in the future.
JET 100 ULTRA XADO.
Universal cleaner for injector and carburetor.
Its advantages include high efficiency, as well as the ability to remove all types of contaminants (dust, deposits, gasoline films, varnishes and others).
The use of the additive helps restore the factory characteristics of the injector, remove existing dirt from the fuel system, as well as the line through which the air flow is supplied.
The advantages include safety for catalysts, reduced fuel consumption, and restoration of the previous engine power.
Before cleaning the injector, it is recommended to start the engine and spray the mixture onto the throttle valve.
After this, the engine should run at high speeds for 4-5 minutes.
You can clean the injector in another way - spray the composition directly into the fuel tank. In this case, 20 liters of fuel requires spraying for 12-15 seconds.
The advantage of this method is the possibility of comprehensive cleaning of the system - intake valves, fuel tank, gas lines, injectors and other elements.
XADO MaxiFlush.
Concentrated additive containing highly effective elements. Purpose: cleaning the fuel system of gasoline engines.
The result of using the additive is to normalize engine operation, eliminate problems with idling, and reduce the volume of harmful emissions in the vehicle exhaust. Used in injector cleaning installations.
The advantages include quick removal of contaminants, cleaning of the combustion chamber, fuel nozzles and other elements.
If you clean the injector using XADO MaxiFlush, you can reduce fuel consumption, restore the spray pattern and optimize the fuel combustion process.
Regular use of the additive helps to increase the reliability of the system and increase the efficiency of injectors by 3-4 times.
To completely clean the system, 300-350 ml of product is required. If the composition is used in professional installations, mixing is carried out in the ratio of 300 ml of additive per 700 ml of gasoline.
If you need to clean the injector without additional equipment, you should add the product to the tank at the rate of 300 ml of additive per 40-80 liters of gasoline.
Features of the composition include a mild effect on catalysts and lambda probes. Cleaning frequency is every 15-20,000 km for prevention.
EGR Verylube XADO.
A modern product for cleaning the recirculation system valve, as well as the injector flap. Can be used for carburetor engines.
The use of an additive helps restore factory parameters. To clean the injector valve, it is recommended to heat the engine and spray the mixture onto the throttle valve, after which the engine should run at high speed for 4-5 minutes.
XADO VERYLUBE.
A universal composition designed for cleaning carburetor and injection engines. Its advantages include high speed of action and increased efficiency.
As a result of application, it is possible to clean the injector, remove carbon deposits, films and deposits from the elements of the fuel system.
The use of the composition as a preventive measure helps maintain engine performance and injector efficiency throughout the entire service life of the vehicle.
As a result of use, the volume of harmful emissions into the atmosphere is reduced. The product has a loyal effect on oxygen sensors and catalysts.
To clean the injector using this additive, you need to warm up the engine and spray the composition onto the car's throttle valve. The engine should run for another 4-5 minutes at high speeds.
An option with complex cleaning is possible, when XADO VERYLUBE is added directly to the car tank. In this case, the intake valves, pipelines, spark plugs and other elements are cleaned.
To achieve the result, it is enough to spray the additive into a tank with 20 liters of fuel for 12-15 seconds.
Ultrasonic cleaning, its features and disadvantages
An excellent option is to clean the injector using ultrasound. In this case, the injectors are removed from the engine, after which they are diagnosed on a special stand, and then, if necessary, placed in a bath with a special liquid.
After this, the part is exposed to ultrasonic waves. The ultrasound source is located at the bottom of the container into which the sprayers are lowered.
The following happens: under the influence of ultrasonic waves, the water in which the nozzles are located begins to vibrate. But since the liquid cannot vibrate at a frequency equal to the frequency of the ultrasound acting on it, microbubbles are formed and explode.
During microexplosions, water under high pressure acts on the nozzles, clearing them of contaminants.
As a result of such manipulations, the nozzles and the outer part of the nozzles are cleaned of contaminants.
It is worth noting that removing contaminants from the inside of the nozzles is only possible by opening and closing the nozzles directly in the bath. Otherwise, you will only be able to clean the outer part of the part.
In general, the use of ultrasound is most effective, because even the most persistent contaminants are eliminated. The disadvantage of this method is that it costs a pretty penny for the car owner.
The principle of ultrasonic cleaning is simple. First, the injectors are removed from the machine, they are inspected and installed in a special stand.
At the initial stage, the quality of the spray is checked, after which the sprayers are cleaned in an ultrasonic bath in a gentle mode. Once this work is completed, the check is performed again. If the result cannot be achieved, cleaning is carried out a second time.
If required, a new filter and o-rings are installed. Then the injectors return to their place.
According to experts, it is possible to clean the injector using ultrasound even after 100 thousand kilometers. But here everything depends on the degree of contamination of the part.
As for the disadvantages of this method, there are two of them - high price, as well as risks for nozzles, which may fail during the cleaning process.
There is a danger that the car owner will spend a lot of money on cleaning, but there will be no result.
Chemical method (liquid washing)
Another way to clean the injector is to use special chemical compounds.
The bottom line is that cleaning equipment is connected to the injector using adapters. In this case, it is not fuel that is supplied to the injectors, but a flushing composition (for example, Liquid Moly, Carbom Clean, Vince). The washing mixture is supplied using tubes.
Thanks to the use of a fitting, the fuel pump, filter, tank and fuel line are not involved in cleaning.
The mixture of gasoline and cleaner is supplied under pressure, which is set taking into account the manufacturer’s recommendations. As a result, contaminants are broken down and released through the nozzle holes, after which the residues are burned in the cylinders. The procedure takes 30-50 minutes.
Despite its apparent effectiveness, this method does not always guarantee results. It is rarely possible to clean the injector 100%, because a small amount of the flushing compound remains in the injectors and oil system. Therefore, immediately after completing the work, it is recommended to drive 12-15 km in forced mode, and then change the oil and filter.
The disadvantage of this method is its high time and financial costs. The method is suitable for cars that have traveled a short distance, and dismantling the sprayers is associated with great difficulties.
Let's look at liquids that can be used to clean injectors:
- WYNNS - a German product intended for cleaning the injector. It is versatile and suitable for all types of gasoline engines (with direct injection and carburetor). As a result of the application, it is possible to clean the fuel system, reduce the volume of harmful emissions and improve the characteristics of the injector. There is no need to change spark plugs after cleaning is completed. The frequency of application is once every 20-30 thousand kilometers.
- Runway is an injector flushing fluid, sold in a 0.3 liter container. Its action is aimed at flushing the injector, maintaining and normalizing the injection quality. The composition lubricates the system and protects fuel injectors from contamination. Regular use guarantees improved vehicle response, reduced emissions, and reduced fuel consumption. The advantages include the absence of soot and deposits after use. To clean the system, just pour the liquid from the bottle into a tank with 50-60 liters of fuel. The frequency of manipulations is once every 3-5000 km.
- WYNNS Injection System Purge — flushing liquid for removing deposits and contaminants in injection engines. Using the product, it is possible to clean the combustion chamber, valves and their stems, injectors and other elements of the injection system. The result is restoration of injector efficiency, normalization of engine operation, improvement of compression ratio and other parameters. The cleaning liquid is safe for catalysts and spark plugs. Used once every 20-30 thousand kilometers.
- KENT - a powerful carburetor and injector cleaner. Available in 0.5 liter bottles. This is a fast-acting composition that has the following advantages - versatility, high drying speed, safety for catalysts, removal of various contaminants (varnish, glue, grease), as well as ensuring uninterrupted operation of the engine.
- Toyota D -4 Fuel Injector Cleaner is a composition that can be used to clean various types of fuel systems from the accumulation of carbon deposits. The use of the composition helps remove moisture, provides protection against corrosion and the appearance of ice “plugs”. Use for preventive purposes ensures cleanliness and maximum efficiency of injectors. Recommended for use on Toyota vehicles.
The use of a cleaner is important when fuel consumption increases, engine malfunctions at idle, and “dips” appear during the acceleration process. It is not recommended to use the composition on carburetor engines. The optimal time to clean the injector is during the oil change period. To do this, just add Toyota D-4 Fuel Injector Cleaner to a half-empty tank. Immediately after mixing, fuel must be topped up to 100%. One bottle of the composition is enough for 70 liters of gasoline.
Functionality check
Checking functionality yourself:
- Check the performance of the injectors on a cold engine, but with the engine running. We touch each nozzle with an ordinary hand. The working nozzle should pulsate and “tremble”. But this method is not entirely informative.
- There is another way to effectively diagnose. Add idle speed and let the car run. Then we loosen the cap nuts holding the injectors one by one, and the engine speed should decrease. When this does not happen, it is concluded that this injector is not working. If a malfunction is detected, you can clean the injectors yourself.
How can you clean the injectors on a VAZ 2114 yourself in order to reduce the cost of replacing spare parts, repairing and servicing the car? Cleaning injectors on a VAZ 2114 is quite simple. First you need to remove them. For safety reasons, turn off the engine and let it cool. Disconnect the negative cable on the battery, remove the protective casing and air filter. We unscrew the high-pressure pipeline from the nozzle and pump, remove it from the bracket supporting it.
Using a spanner, unscrew the nozzle along with the old washer and remove it. In this case, it is necessary to disconnect the electrical connector and slide the lock along the ramp. to take it out. And so all 4 pieces. Now let’s get to the main question: “How to clean the injectors on a VAZ 2114”? The injectors need to be examined first. If there are signs of leakage, it is better to immediately replace the spare parts with new ones. For the rest, it is necessary to remove the o-rings from the atomizer and body. Prepared injectors should be soaked in acetone or gasoline for a while, this will allow them to be better cleaned.
While they are soaking, you can simultaneously clean the ramp and valve cover. It is even better to blow out the ramp with a vacuum cleaner. The time has passed to begin the cleaning procedure itself. A lot of coke, resembling tar, always forms around the nozzle of the spare part itself. It definitely needs to be removed. Next, using a blunt pin or needle, carefully clean the funnel-shaped surface around the nozzle. The outside of the nozzle is clean. But the most difficult thing is internal cleaning. How to clean VAZ 2114 injectors from the inside? To do this you will need: electrical tape, a can of carburetor cleaner, a syringe, a tube.
The product is supplied under pressure through a tube, simulating injection.
It will take several such movements for each nozzle so that they break through and begin to spray the liquid evenly.
Then you need to let the injectors dry, put new o-rings on them and reassemble everything in the reverse order, while changing the fuel filter and the fuel pump mesh.
All this will extend the life of your car. “In the future, it is necessary to refuel only with high-quality 95 grade fuel at proven gas stations, as recommended in the VAZ 2114 passport.”
Do-it-yourself cleaning of injectors on VAZ-2113, 2114, 2115
An important element in the entire engine system are injectors.
They are responsible for fuel injection, which means the operation of the entire engine depends on their lifespan. Injectors can become unusable due to many factors. The VAZ 2114 injectors themselves last approximately 100-120 thousand kilometers.
However, this is provided that gasoline complies with European standards, but in Russia the standards are often not met, which is why the injectors fail after 60-80 thousand kilometers, or even earlier.
Failure of injectors can adversely affect many vehicle systems. However, the life of the injectors can be increased if they are cleaned in a timely manner.
Why do you need to clean injectors:
- to extend the life of injectors;
- Dirty injectors increase fuel consumption and reduce the vehicle's dynamic performance.
In other words, cleaning the injectors will help the car drive smoother.
Features of the injection VAZ-2115
Main parameters:
- produced at the Volzhsky Automobile Plant;
- year of production - 1997.
Auto design:
- body - four-door sedan (5 seats);
- location - front.
Engine and fuel:
- petrol;
- 1.5 and 1.6 l;
- four-stroke, 77 horsepower.
The transmission is mechanical.
Dimensional characteristics:
- length - 43.30 cm;
- width - 16.50 cm;
- height - 14.02 cm;
- ground clearance - 1.65 cm;
- rear track - 13.70 cm;
- front track - 14.00 cm;
- weight - 1.0 t.
Speed data:
- 100 km/h in 14.00 seconds;
- maximum takeoff run - 160 km/h.
Other parameters:
- gasoline consumption - 7.6 l;
- volume - 43.0 l.
Injector malfunctions
You can understand that the nozzle requires cleaning by the following signs:
- unstable engine operation;
- unexpected sharp increase in fuel consumption;
- misfires at idle;
- reducing the acceleration speed of a car when the pedal is fully pressed to the floor.
Remember that with these signs the nozzle may no longer be working, so you need to check its functionality before cleaning. This is checked this way: with the engine running but cold, you just need to touch the injectors - they should pulsate.
Replacing injectors
Of course, a car service center can replace the injectors for you. The price for this service starts from 1500 rubles. However, to save time and money, it makes sense to change the injectors yourself.
Removing injectors yourself
Here is a simple algorithm for removing injectors that all car owners can perform.
1.Disconnect the negative terminal from the battery
2.Take two 17mm wrenches and relieve the fuel pressure by unscrewing the fuel pipe fittings.
3. Separate the electrical connector from the fuel rail.
4.Take a Phillips screwdriver, unscrew the screw on the bracket on which the fuel pipes are attached, and remove it.
5.Use a 5mm hexagon to unscrew the two screws on the fuel rail mounting
6. Move the ramp in the direction of the injector axis, remove all 4 injectors from the engine and remove the ramp towards the left side of the vase.
7.Press the spring clip (1) located on the injectors, move it aside, and disconnect the electrical connector (2)
8.Using a screwdriver, move the injector clamp along the ramp and remove it (on new ramps, the bracket is simply removed).
9.Remove the nozzle from the hole on the ramp, slightly rocking it from side to side.
10.Remove the O-rings that are located on the nozzle body and sprayer using a thin screwdriver
That's all, now the injectors are ready for cleaning.
Do-it-yourself injector cleaning
For cleaning you will need electrical tape (wire) to secure the joints, a carburetor cleaner in a can, a syringe and a thin tube. The cleaning algorithm is as follows.
1.Insert the tube into the cap (nozzle) of the can 2.Insert the end of the tube into the hole of the syringe (without a needle) 3.Attach the end of the syringe to the nozzle 4.Start injecting the product through the tube, simulating fuel injection.
You need to inject until the coming out stream becomes smooth and clean. Then this will mean that the injector is clean.
Another way, if you have a battery nearby, you can try applying voltage to the injector with ordinary wires (polarity does not matter) simulating their operation and at the same time spraying liquid to clean the carburetor.
After this, you need to put on new O-rings and you can begin assembly, having first checked the resistance, which should be in the range of 11-15 Ohms. Reassemble the injectors in the reverse order of disassembly.
Washing without removal
What you will need:
- Set of wrenches;
- Screwdrivers “+” and “-“;
- Flushing fluid;
- Fuel hose;
- Fitting for tubeless wheel – 2 pcs;
- Bottle;
- Clamps;
- Drill 10 mm;
- Compressor with pressure gauge (can be used for a car);
Making a device for washing injectors without removing them from the car
- In a 1.5 liter bottle, drill a hole in the bottom with a diameter of 10 mm.
- Insert the wheel fitting into the drilled hole.
- Similarly, drill a 10 mm hole in the bottle cap.
- Insert the wheel fitting into the bottle cap and screw it on.
- Unscrew the spool valve from the fitting in the bottle cap.
- We attach a fuel hose to the fitting installed on the cover and secure it with a clamp.
This is what should happen
Nozzle cleaning device
Relieving pressure in the fuel rail
- In order to relieve pressure in the fuel rail, you need to remove fuse F3 (15A) it is located under the central panel where the foot air ducts are.
- After that, you need to start the car at the residual pressure and let it run until the car engine stops.
- After which you can start working
Connecting the device to the fuel line
- Under the hood we find a fuel line pipe (if the engine has a return line, there will be two pipes, one of them goes to the fuel rail, so you need to connect to it).
Connect to the “straight” hose
- We take two Keys on “17” and unscrew the fitting connection, carefully without damaging the tube.
- You need to unscrew it like this: position the keys like scissors and squeeze them; you must follow the correct direction so that the fitting and nut are unscrewed and not tightened.
- After the fitting connection is unscrewed on the tube, you will see a rubber ring; it must be removed; if it is in poor condition, it is better to replace it.
- Next, we connect the hose from our device to the tube and tighten it with a clamp.
- Pour washing liquid into the bottle and tighten the cap.
- We pump a pressure of 3 atm into the bottle with a compressor.
- We hang the bottle with the cork down and start the car.
Washing process
- We start the car on the flushing fluid and let it use up half of the flushing fluid.
- Next, we stop the car engine and let it sit for 20 minutes. This is necessary so that all the dirt in the injectors becomes sour and dissolves.
- We start the engine again and press the accelerator pedal and keep the speed around 3000 rpm. This must be done until the flushing liquid runs out.
- Next, remove the flushing device and screw the fuel line hose into place.
Attention
Don't forget to install the rubber O-ring when connecting the tube and the fuel line fitting.
