The Russian auto industry, unfortunately, only recently began to really listen to consumer feedback and make adjustments to the design of its cars. For several years, the question of an integrated seat heating system has been raised, which is very relevant in cold regions. This request was taken into account, but installation of this system at the factory is carried out only on new models, and is planned for those that are under development.
Thus, consumers actually received nothing, since the Russian auto industry refuses to produce this system separately for specific car models.
Solution
The obvious solution would be to install heated seats on your viburnum yourself. However, there are many nuances in this matter that require a qualitative study of the theory. There are a large number of different systems on sale, with different operating modes, and, accordingly, with different prices.
Depending on the complexity of the design and the number of built-in modes, installation can take up to several hours. In this case, if you do not have enough knowledge and experience, it is better to turn to specialists. Since if you install it yourself, there is a very high chance of damaging the product, after which you will have to overpay for the second set.
Kalina heater diagram
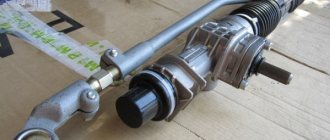
The Lada Kalina heater device is designed for heating and cooling the car interior. If the car does not heat up, the windows fog up, or you feel discomfort, then you need to test the performance of the heating system. Understand the functioning of the stove on Kalina.
General layout of the Kalina stove
The location of the stove was designed for easy installation of an air conditioner. The system is simple, but at the same time quite reliable.
- Left side flow outlet.
- Left air duct.
- Heated side window.
- Air flow splitter.
- Stove.
- Right ventilation duct.
- Right side flow exit.
- Bottom heating duct.
- Interior heating duct.
- Central outlet of ventilation flows.
The supply and exhaust principle is used. The air masses inside the car are heated using a special liquid, which simultaneously cools the engine. The operating principle of the Kalina stove is based on the fact that the liquid warms up the radiator, where heat exchange occurs, and the heated air passes into the cabin through the air ducts.
If we analyze Kalina’s heater, the operating principle and the heater circuit will differ in configuration. The first option has a simple and reliable design. And in the other - full electronic control. The air passes through the filter into the air intake, and then the fan blows further through the system. The engine is running and warmed up. Antifreeze moves through the system in which the heater radiator is involved.
Standard heating
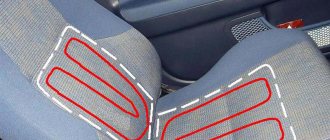
The most common type of heating, installed on most cars. It is distinguished by reliability and safety, proven design safety and relative ease of installation. This option is perfect for long-term service. This design of heated seats for the Lada Kalina uses threads that perform the heating function. The system is also equipped with the ability to self-lock, which eliminates the possibility of increased wear or overheating of the system.
Standard heating is located not only on the seat itself, both driver and passenger, but also on their backs. This placement allows for maximum uniform heating of surfaces, which has shown good heating results in cold weather.
Selecting a heating kit for installation
The assortment presented in stores is wide enough so that every customer can choose the appropriate kit for installation with their own hands. These are mainly products from German, Russian and Chinese manufacturers. As practice shows, German kits (for example, WEACO) are the most reliable; their only drawback is their high price. But they are absolutely universal, they can be used in any car, both in the front seats and in the rear seats. This heating has several degrees of protection against overheating and two operating modes.
As an alternative to German products, domestic production kits and Autoterm have proven themselves well. Their products are not inferior to German ones in terms of reliability, and their consumer qualities are also quite high. All models of built-in seat heating are protected from overheating by means of a thermal relay; they use reinforced cable as a heating element. Some models have an automatic shutdown feature when overheating.
The most affordable ones are Chinese kits. Perhaps this is their only advantage, since there is no need to talk about reliability. Due to the fact that the cheapest materials are used in their production to reduce cost, the power button of such seat heating kits can easily break, the wiring burns out, and the heating is often uneven. We must not forget that a burnt-out heating element can cause a short circuit in the car's electrical wiring or a fire in the cabin. In this case, it is not worth taking risks, since the savings are very dubious.
Universal
There are a large number of universal seat heating systems on the market, including for Kalina 2. At the moment, the most popular configuration is “Emelya”. This is due to the excellent price/quality ratio, as well as high safety and availability in different regions.
Compared to the standard set, the universal one is larger in size, but its characteristics are better. It heats up faster due to the use of slightly different technology in the design. As a rule, most motorists whose car does not have a heating system installed from the factory prefer the Emelya system. It fits well on virtually any make and model, making it truly universal.
Why built-in heated seats are better
The first problem is that the quality of many capes leaves much to be desired. It is not uncommon for a cape to catch fire directly under a person sitting on it. The risk of getting burned is quite high, not to mention the fact that the clothes will probably be ruined.
The second problem is that the capes heat up differently. For some, the temperature reaches 40 degrees, and this adversely affects reproductive function in men.
The third problem lies in the fact that there is usually only one cigarette lighter socket in a car, therefore, it will only be possible to connect the heated driver’s seat, and, as a rule, there are also passengers in the car. You can, of course, use a splitter, but the current consumption will be too high, and the fuse in the splitter will not withstand it. In addition, when using capes and covers, extra wires appear in the interior, which can interfere with driving the car. Using covers on the rear seats of a car is out of the question due to the insufficient length of the electrical cable.
Procedure
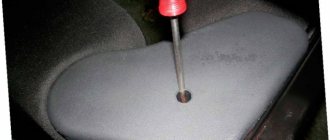
Initially, you need to remove the seats, depending on the make and model, the process and tools may vary. Next, you need to separate the backrest and seat, since the system will be installed alternately.
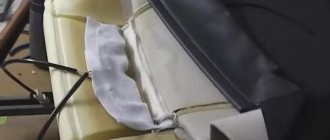
- After this, you need to lift the lower part of the trim on the back of the seat and install a heating system there. In the same way, install the system on the seat itself.
- After this, it is necessary to return the casing to its original place as carefully as possible, without damaging the appearance. Once the casing is in place, you need to connect the system connectors to each other.
- On the gearshift lever, connect the white wire to the power supply, which must first be removed. Absolutely all kits include a fuse; its installation is mandatory.
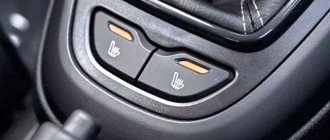
- Determine the most convenient and ergonomic location for installing the heating system control buttons.
- After all the above steps are completed, the backrest and seat are placed back in their place and carefully secured.
Replacing the heater fan
Disconnect the negative terminal of the battery
We remove the glove box, see the article on removing the glove box
We move the instrument panel cross member to the side (removing the cross member is described above).
Press the latch of the wire block and disconnect the fan block
Use a Phillips screwdriver to unscrew the three fan mounting screws.
Removing the heater fan
When installing the fan, orient it so that the motor ventilation duct is directed towards the additional fan resistor
Recommendations
When installing most heated seat systems, it is absolutely not necessary to remove the seats. The installation can be done this way. However, to ensure maximum comfort for the specialist, it is recommended to remove the seats. In addition, some models require the removal of seats, since the specific design does not allow them to be properly installed in any other way.
In general, installation is not a difficult process if you select an average, popular system model on the market. To carry out such work, it is enough to acquire basic skills and abilities, knowledge about the structure of a specific type of system, its functioning.
If the system is quite complex, it is recommended not to install it yourself. Otherwise, there is a high risk of connecting something wrong, as a result of which half or the entire structure will not work.
Power supply or how to connect the heated front seats on the Lada Granta correctly
The cost of installation work at an unofficial service station is at least 2,500 rubles. For this money, already purchased heating elements will be installed in the car seat and the circuit will be connected according to the manual. All that remains is to make an anti-freeze product according to a home recipe and hit the road. This is for the quick ones. Painful owners will probably not like the electrical part of the integration.
Disadvantages of the standard kit
The instructions indicate how to install heated seats on the Grant and connect it to the on-board network. According to what is written, the electrics connect and function like this:
- The permanent plus is taken from the hazard warning button.
- The ground is connected to the bracket for fastening the standard wires of the negative pole.
- The standard fuse is replaced with a more powerful one.
- The heating is turned on/off using the buttons directly.
Only one function is correctly implemented - turning off the heating when the ignition is turned off. Otherwise, the connection scheme is not entirely successful:
- The positive wire that goes to the emergency light is thin and will probably work at the limit.
- The contact group of buttons operates in a dangerous mode, since it is not intended for power loads.
Competent connection diagram
An unfortunate result of the standard connection algorithm is a melted fuse. Such a reaction indicates that the circuit is operating at its limit. An alternative scheme for connecting heated seats will help to avoid this. It involves the use of two four-pin relays and powering them from switch K4, which supplies the output “+” after turning on the ignition.
Additional items
It is advisable to carry out installation work after purchasing an additional mounting block of reduced size. You will also need regular contacts for connecting two relays and two Lyra contact elements linking a 10A fuse. We also add additional wires with a cross-section of 4 and 1.5 mm2 to the shopping list.
Search "+"
So, in order to connect the heated front seats on the Grant, you need to find out the number of the output plus of relay K4, which appears after turning on the ignition. This can be either the 87th or the 30th contact.
Usually this is contact element No. 30, but it doesn’t hurt to make sure once again. We remove the relay and diagnose. The test is carried out by connecting a 12V lamp to the 30th contact of the mounting block and ground. After activating the ignition, the lamp should light up.
Connecting elements
It is convenient to disassemble the connection map of the key components of the circuit in the figure. The sequence of actions when assembling the chain is as follows:
- Pull out the “+” terminal, found during the K4 relay test, and connect two wires to it: one (4 mm2) - to the fuse and then to the 87th contact, the second - the control plus from the heating button (pin No. 1). Make a jumper and integrate it back.
- On the “+” route to the seat heating relay, install a 10A fuse by integrating the “Lira” contacts.
- At the second end of the received “+”, make branches for the second switch and control button, connect them to the 87th and 1st contacts.
- Make two ground wires with jumpers that will be attached to the 85th, A and C terminals.
- Route the control wiring and the backlight wire from the buttons to the mounting block. Connect 2nd contacts to 86th; B – with fuse fastening element F9 or F10.
- Connect your “+” heating elements to the 30th contacts of each relay.
It is convenient to make jumpers or branches using male-female contact pairs. It is better to avoid “twists” by connecting the wires directly in the block and making bends.
Summary
The technology for installing heated front seats on the Lada Granta consists of two stages: installing heating elements under the factory seat covers and connecting them to the on-board electrical network. The proposed electrical circuit organization scheme raises doubts.
The manufacturer of the branded kit suggests connecting the heaters directly to the buttons, and powering them from the alarm control button. Since the circuit is quite loaded, it is better to organize the heating power through two relays with a separate fuse. It is also advisable to replace the buttons - they do not indicate the operating mode.
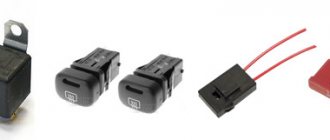
Double-glazed window control unit “Norma” 1118 – 6512010 for VAZ 11183 “Kalina”
©Aktuator On cars of the Kalina family, 2 types of non-interchangeable (by wiring) glass control controller 1118 - 6512010 and 11180 - 3763040 can be installed. 1118 – 6512010 has one 25-pin connection connector, 1118 – 3763040 (1118 – 3763040 – 10) – two connectors.
Remote control system for double-glazed windows “norm” on a VAZ 11183, Kalina. Controls power windows and central door locking. When the connector is removed, the engine does not start; the device performs some of the anti-theft functions.
Connection
* A regular shock sensor from any alarm system (Alligator, Saturn, Clifford, APS) is suitable.
+ 12 V connect to pin 12; body – on the 6th; We connect the signal wire (a ground appears on it at the moment of activity) to the 1st contact.
During normal arming, Kalina now reacts to an impact on the body (it sounds a horn and blinks turn signals). Similarly, instead of a shock sensor, you can connect a volume sensor (for example, single-level MMS‑1).
You can also connect a pager: + 12 V of the pager transmitter on pin 12, minus on pin 21.
Double-glazed window control unit 1118 – 3763040 (- 10 ) for VAZ 11183 “Kalina”
| Appearance | Controller board | Reverse side |
Double-glazed window control unit 2170 – 3763040 for VAZ 2170 “Priora”
| Appearance | Controller board |
1 . 1 Malfunction in the VZ communication coil circuit
1 . 2 Malfunction in the circuit from the block to the communication coil to the APS ECU
1 . 3 Transponder missing in OK
1 . 4 The transponder in OK is faulty (detected during pre-production preparation)
1 . 5 The transponder in the Republic of Kazakhstan is faulty (detected during pre-production preparation)
1 . 6 Malfunction of the input transponder circuit in the APS ECU
1 . 8 The communication coil came off from the VZ pad on the inside
2. 2 Malfunction of W‑Line circuits in the APS or ICS units
2. 3 Lack of supply voltage on the APS or KSUD unit
2. 4 The “Normal” electrical package is faulty (the control driver has burned out)
2. 5 KSUD does not contact
Abbreviations: IS – status indicator; VZ – ignition switch; OK – training key; RK – working key; RC – remote control; KSUD – engine control system controller; ECU - electronic control unit