September 25, 2019 Lada.Online 41 864 9
Cars of the Lada Kalina family in the Luxe configuration have a center console with a visor, which allows you to place a multimedia system. Currently, this console is not produced by the factory, but you can install it yourself on the Lada Kalina in the “Standard” or “Norma” configuration, as well as on the new Lada Granta FL family.
The modification process depends on which instrument panel (dashboard) is installed on your car.
LED Strip Light
In addition, an excellent addition to all of the above tuning options to complete the interior improvement picture is to install new lighting around the entire perimeter of the cabin. To do this, you will need to lay a diode strip of the desired color (or different shades) and connect it to a standard battery, that is, the on-board network. Additional lighting due to the LED strip will give the interior an attractive appearance and highlight all the changes made.
The following tuning of the Lada-Kalina interior is carried out with your own hands:
- Installing a diode strip around the perimeter of the car allows you to provide additional lighting for literally the entire interior. The brightness and shade of the backlight directly depend on the LEDs you have selected. This lighting option allows you to increase illumination by an average of two or even more times. If necessary, you can install separate ribbon inserts into the roof of the cabin, and it is quite possible to create the effect of a “starry sky”.
- Attaching an LED strip to the elements of the front dashboard, in its lower part, allows you to additionally illuminate the areas at the feet of the driver and passengers. This tuning will increase the comfort of being in the car.
- Also, in some situations, the LED strip is mounted on the car body. Most often, such lighting is used as auxiliary or even main running lights. However, such tapes are often exposed to external mechanical influences from the environment, which is why they can quickly fail.
If you want to become the happy owner of an original and stylish car and proudly drive on the roads, tuning will help you with this. Such improvements will help improve not only the appearance of the machine, but also increase its efficiency. You are guaranteed the envious glances of all surrounding car owners!
Share:
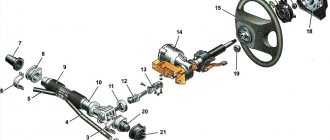
Removing the instrument panel on Lada Kalina 1
The first step is to disconnect the battery from the power supply system. Disconnect the negative terminal from the battery. If the temperature in the cabin is below +15°C, it needs to be warmed up to +20°C. The dashboard of Lada Kalina 1 is well illuminated by a flashlight, but additional light sources can be used.
The procedure for dismantling the shield:
- The steering column is installed in the lowest position.
- Removing the instrument cluster trim, unscrew the 2 screws at the top.
- Pull the cover towards you, overcoming the efforts of the two lower clamps.
- Use a Phillips screwdriver to unscrew the 2 screws located on the sides of the instrument panel.
- Move the top part of the shield towards you, tilting it.
- Disconnect the connector with wires by turning the lock.
- Remove the instrument cluster from the recesses into which the structure's shafts are inserted.
Tip: the screws can fall behind the panel while unscrewing. It is recommended to use a screwdriver with a magnetic tip.
After this, the Lada Kalina 1 dashboard is repaired or replaced. You can replace the light bulbs by turning the desired socket counterclockwise.
The lighting devices are assembled with a socket, the power of each is 1.2 W. EEC designation W1,2W.
External tuning of Lada Kalina, Kalina 2 | motorring online store
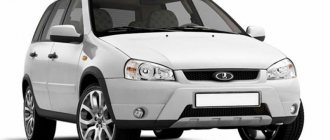
Would you like a brief history of the LADA Kalina model? The development of the car at AVTOVAZ began in 1993. In 1998, the designed model was named “Kalina”. Serial production started only on November 18, 2004. A total of 5 years to give the car a name, and 11 years to develop it. Not fast!
But it is worth noting that at that time this model was truly new for AVTOVAZ: a new platform, a new level of comfort and quality and a new design. By the way, about the design: the first generation of the model was made in the so-called “biodesign”, which was fashionable in the global auto industry right in the early 90s, when the model began to be developed. But after 11 years, the trends changed; the exterior of the car at the time of its release seemed outdated to Russians, but there were many people who liked this car. For the rest, external tuning became the solution! By the way, LADA Kalina quickly became a real popular and mass car, so there were never any problems with the range of tuning for this car:
- radiator grilles and bumper grilles
- side mirrors (including electric ones) and covers for them
- "sabers"
- door handles and trims
- eyelashes and overlays for lamps
- PTF frames
- spoilers
- door moldings
- alternative optics
- bumpers
- lockers
- towbars
- roof racks
- and other.
The manufacturer managed to modernize the design of the model when the second generation of Kalina was born in 2020. Despite the fact that the overall power structure of the body has not undergone any changes (including doors, windshield), the car received complex-shaped headlights and lanterns and a massive bumper with a powerful radiator grille. You should be careful with tuning the “second generation”, since the exterior of this generation turned out to be quite successful.
By the way, on the basis of the LADA Kalina 2 station wagon and hatchback (the second generation sedan was never produced), small-scale modifications (a kind of factory tuning) also appeared, which turned out to be very popular in the market. On the “base” of the station wagon, they made a “pseudo-crossover” Kalina Cross - an all-terrain station wagon, which, in addition to high ground clearance, also received “off-road” appearance modifications. And the hatchback got sporty variations – Sport and NFR.
What conclusion do we draw? “Kalina”, despite its popular name, is excellent for exterior modifications, that is, external tuning.
Eliminating air pockets in the radiator
Since the system in question is absolutely sealed, getting rid of air is not so easy. The car must be placed on any inclined surface with the front facing up (the steeper, the more effective). You should warm up the power unit until the second circulation circle opens, move the temperature regulator to the maximum position, direct the air flow into the cabin and activate the fan at second speed. Next, increasing the engine speed to 4.5-5 thousand, we hold it for some time.
Then the pedal is released until the idle speed appears. If the problem is not completely resolved, the procedure should be repeated.
Despite the fact that modern domestic cars have updated characteristics, some factory defects are still present. Modification of the cooling system on the Lada Kalina is available in several ways and helps to avoid the formation of air locks. Moreover, the procedure does not require significant financial investment.
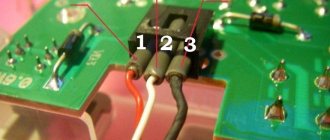
Connection of the wiring harness of the 1.6 l Lada Kalina engine management system (ECM)
Connection of the wiring harness of the engine control system (ECM) VAZ 21114 – 50 (1.6l): 1 – ECU; 2 – diagnostic block; 3 – additional fuse block; 4 – speed sensor; 5 – rough road sensor; 6 – oil pressure warning light sensor; 7 – throttle sensor; 8 – coolant temperature sensor; 9 – coolant temperature indicator sensor; 10 – mass fuel flow sensor; 11 – idle speed regulator; 12 – cooling system electric fan relay; 13 – ignition relay; 14 – fuse 50 A; 15 – electric fuel pump relay; 16 – crankshaft position sensor; 17 – control oxygen sensor; 18 – phase sensor; 19 – knock sensor; 20 – solenoid valve for purge of the adsorber; 21 – electric fan of the cooling system; 22 – diagnostic oxygen sensor; 23 – block of the ignition system wiring harness to the instrument panel harness; 24 – ignition coil; 25 – spark plugs; 26 – nozzles; 27 — block of the ignition system wiring harness to the injector wiring harness; 28- block of the injector wiring harness to the wiring harness to the ignition harness; 29 – block of instrument panel harnesses to the ignition harness; 30 – ignition switch; 31 – mounting block (starter relay); 32 – immobilizer control unit; 33 – contacts of three-terminal blocks of the instrument panel wiring harness and the front wiring harness; 34 – instrument cluster; A – to the positive terminal of the battery; B1, B2, B3 – grounding points; C - to the starter.
Technical features of the system
The unified layout and closed design of the engine cooling system (SOD) of the Kalina are also characteristic of other VAZ models. The system is designed to remove thermal energy from heated engine elements using antifreeze or other coolant.
The SOD consists of the following functional parts.
- Cooling radiator. Reduces coolant temperature due to the flow of cold air masses.
- Fan. Used for rapid cooling of antifreeze in the Kalina cooling system.
- Expansion tank. Designed to compensate for the volume of coolant (coolant). The need for this unit is related to the expansion/constriction property of the coolant.
- A pump or centrifugal pump, which is responsible for the forced circulation of antifreeze through the appropriate channels.
- A thermostat whose task is to regulate the volume of antifreeze in the Kalina cooling system.
- Temperature sensor involved in SOD control.
The operation of the cooling system is based on the close interconnection of various parts, elements and sensors, including devices that are designed to measure oil temperature. The passage of coolant in a large or small circle depends on the engine temperature. In the first case, antifreeze passes through all components of the SOD, except the radiator. With such circulation, the thermostat is closed. As the engine temperature rises, this element gradually opens. The antifreeze, having passed a large circle, enters the radiator. The latter device is cooled by oncoming air masses. If this is not enough, a signal is sent to the ventilated unit, which begins to forcibly direct air masses to the cells.
The cooled liquid enters a small circle. Next, taking into account the engine temperature, the antifreeze automatically circulates in a small or large circle. At the same time, the optimal operating temperature is maintained, which should be in the range of 95-105°C. This factor has a direct impact on the performance of the Kalina stove. In this case, it will not be able to supply warm air masses into the cabin.
If there are any doubts about the operation of the ODS, you need to diagnose the car, finding out the causes of the malfunction. You can fix the breakdown either with your own hands or with the help of a car mechanic.
Instrument cluster 2192-3801010-40 (lux) for VAZ Granta, Kalina 2 FL
VAZ offers Kalina-2 cars with two interior trim options. The first is used in luxury trim levels (where a media center is installed), the second is an integral part of the “Norma” and “Standard” trim levels. We will talk about what methods exist for dismantling the climate control module panel and the radio panel. Moreover, one of the considered options is suitable for the “Lux” configuration, the other – for more affordable versions (Norma, Standard). The dismantling methods in the two indicated cases are noticeably different. Let's start looking.
How to remove the center console in a luxury package
Let's say it was decided to dismantle the panels located on the center console. You can see that there are two of them. One is the front panel of the air conditioner, the second protects the radio and contains air duct grilles in its design. These two parts are not connected to each other. However, it will not be possible to remove the radio panel unless you first remove the climate control panel. Below it are metric screws (A, B) that secure the media center shield from below.
Central console of Kalina-2, Luxury package
The question arises, why are we even talking about how to dismantle the center console, since after this the car can be removed from warranty? Usually the shield is removed to install additional equipment (for example, a rear view camera). But connecting any equipment, the use of which has not been agreed upon with the dealer, will void the vehicle warranty. If you haven't changed your mind yet, continue reading.
The climate control shield is held in place by 4 clips, which are located on the bottom and top sides of the part closer to the corners. Having disconnected even two clips (1, 2 or 3, 4), you can try to pull the panel towards you to dismantle it. But if you have no experience working with such a mount, it is better not to try - you may scratch the outer surface of the shield. In fact, all you need to do is use a flathead screwdriver (some people use a thin-bladed knife and a screwdriver).
Instrument cluster 2192-3801010-40 (lux) for VAZ Granta, Kalina 2 FL
Before shipping, we check all combinations for functionality, eliminating the possibility of defects.
Vehicle instrument clusters are designed to process and display information about the functional and technical condition of components, assemblies, systems and vehicle movement parameters.
The electronic instrument cluster performs the function of displaying all the vehicle parameters necessary for the driver. The instrument cluster combines all control and measuring instruments - backlight lamps, warning lamps, coolant level and temperature indicators, fuel level indicator, speedometer, tachometer, clock, thermometer, total and daily vehicle mileage counter.
The dashboard of the Lada Kalina 2, Grants looks attractively modern, it not only fits beautifully into the interior, but is also very easy to use, you don’t need to be distracted from the road, everything is located next to each other, you just need to look a little at the instrument panel.
The instrument cluster has 25 built-in warning lights that illuminate when certain conditions or malfunctions occur.
1. Tachometer. Do not exceed the maximum permitted engine crankshaft speed (threshold – 5500 rpm).
2. The indicator lamp for turning on the left turn signal (with a green filter in the form of an arrow) lights up with a flashing light when the left turn signal is turned on (synchronously with it). Flashing of the warning lamp at double frequency indicates a burnt-out lamp in any direction indicator.
3.Induction type speedometer shows how fast the car is currently moving. The scale is graduated from 0 to 200 km/h, the division value is 10 km/h. The speedometer is driven electrically by a sensor mounted on the gearbox housing.
4.Indicator lamp for turning on the right turn signal.
5.Indicator of liquid temperature in the engine cooling system. If the indicator needle enters the red zone (more than 115 °C), which means the engine is overheating, a constant (for 5 s) sound signal is heard. It will be repeated until the arrow leaves the red zone (less than 110 °C). If the arrow is in the red zone, you should stop, let the engine cool and eliminate the cause of overheating.
6.Fuel level indicator. Indicates the need for refueling to avoid engine interruptions.
7. Signal lamp for reserve fuel remaining. Lights up orange when the vehicle needs to be refueled to avoid interruptions in engine operation. Simultaneously with the warning lamp coming on, an intermittent (2 repeated on/off for 0.25 s) sound signal is heard.
8. Button for resetting the daily mileage counter and switching operating modes of the liquid crystal display of the trip computer. By pressing the button while the car is stationary, the daily mileage counter in the liquid crystal display is set to zero or the mode for displaying daily or total mileage is selected.
9. Indicator lamp for turning on the hazard warning lights (with a red light filter). Lights up with a flashing light when the hazard warning lights are turned on.
10. Electric power steering warning lamp (connected if the vehicle is equipped with electric power steering). Lights up orange when the ignition is turned on and goes out after the engine starts.
11.The high beam indicator lamp (with a blue filter) indicates that the high beam headlights are on.
12.The control lamp for turning on the external lighting (with a green filter) indicates that the side lights in the headlights and rear lights are turned on.
13.The parking brake indicator lamp (with a red filter) lights up when the ignition is on, if the car is braked by the parking brake.
14. Airbag warning light (connected if the vehicle is equipped with airbags). Lights up orange when the ignition is turned on and goes out after the engine starts.
15. The emergency oil pressure drop warning lamp (with a red filter) lights up when the ignition is turned on and warns that the pressure in the engine lubrication system is below normal. When the engine is running, an illuminated warning light and a constant (for 5 s) buzzer signal indicate insufficient pressure in the engine lubrication system.
16.Immobilizer warning lamp. Lights up in orange and displays the status of the immobilizer (control of the electronic anti-theft system).
17. Liquid crystal display. Displays the amount of fuel, optionally total or daily mileage, time, outside temperature or on-board computer functions.
18.Warning lamp for driver's seat belt not fastened (can be connected in an optional version). Lights up red when the ignition is turned on if the driver's seat belt is not fastened. Simultaneously with the lamp lighting up, an intermittent (5 repeated cycles) buzzer signal is heard.
19.The battery discharge warning light (with a red filter) lights up when the ignition is turned on. The lamp's burning is accompanied by an intermittent (5 repeated switching on/off for 0.5 s each) buzzer signal. Immediately after starting the engine, the lamp should go out. The lamp burning or glowing at full intensity while the engine is running indicates a lack of charging current caused by a malfunction of the generator or voltage regulator or weak tension (break) of the generator drive belt.
20. Brake system emergency warning light (with red light filter). Lights up when the ignition is turned on and goes out after the engine is started. When the brake system emergency lamp comes on and the buzzer sounds (5 times) when the engine is running, the brake fluid level has dropped below the “MIN” mark on the brake master cylinder reservoir.
21.Warning lamp for front passenger airbag deactivated (connected in variant).
22. Signal lamp for malfunction of the electronic brake force distributor (connected in a variant). The lamp lights up red when the ignition is turned on and goes out after 2 seconds (self-test mode).
23.Anti-lock brake system warning light (connected as an option if the vehicle has an anti-lock brake system). The lamp lights up red when the ignition is turned on and goes out after 2 seconds (self-test mode). Illumination of the lamp while the engine is running indicates a malfunction of the anti-lock braking system.
24. “CHECK ENGINE” warning light. Lights up orange when the ignition is turned on and goes out after the engine starts.
25. The door open warning light (with a red filter) lights up when the ignition is turned on if at least one of the doors is open.
Installation of the EKP can be done independently, without contacting specialized maintenance services; for this, the EKP is equipped with all wires and instructions.
Other article numbers of the product and its analogues in catalogues: 21920380101040.
VAZ 2190, Kalina 2.
Any breakdown is not the end of the world, but a completely solvable problem!
How to independently replace the instrument clusters of a Lada Granta, Kalina 2 car.
With the AvtoAzbuka online store, repair costs will be minimal.
Just COMPARE and BE SURE.
Don't forget to share the information you find with your friends and acquaintances, because they may also need it - just click one of the social networking buttons located above.
Dismantling the console containing the stove control unit
As you know, some trim levels of the Kalina-2 car do not have climate control. Here the driver can only control the operation of the stove. The stove control panel is held in place by 4 clips. In general, the mount used here is the same as in versions with climate control, but you won’t be able to remove the control unit panel unless you first remove the three control knobs.
Central console of Kalina-2, Standard equipment
Let's say we managed to dismantle the stove control unit panel. Then, all that remains is to remove the top flap, which is adjacent to the air ducts. This part itself needs to be pulled towards you from below, but first you need to unscrew two screws (they are circled in the figure). You won’t be able to simply grab and pull out the panel; you need to tighten the side clips with a screwdriver. In fact, the entire process is shown in the video we've posted below.
Instructions for flashing the dashboard firmware
Remove the instrument panel and rear cover. Usbdm OSBDM V4.95 programmer (when purchased, the kit includes a disk from which we install the HCS12 Programmer and USBDM driver software). For Windows 8 or 8.1, driver authentication must be disabled before installing the software. After installing the software, connect the programmer to the PC (the COM and USB lamps should be on).
Connect to the device:
- power supply (9-14 V) on pins 19 and 21 (you can do it without power, to do this, move the jumper under the programmer cover to 3.3v);
- minus on pin 17;
- programmer cable (the PWR lamp will light up).
Launch the HCS12 Programmer software and make the settings:
- On the Interface tab, click detect. USBDM-js16-001 will appear in the window. The bottom checkboxes must be activated;
- On the Target tab, click on the Load Hex Files button and select the firmware (must be in the root of the disk), check the box Auto Reload. select the HY-MC9S12HY64 chip. select Unsecure. select EraseSelective and check the box Enable Sounds. (to reset the mileage and erase the immo, select EraseMass, but this is not recommended);
- On the Advanced tab, check the Enabled checkbox and check the field below (there should be a letter F at the end, if there is another letter, then change it to F).
When all the parameters are set, we start the process of flashing the instrument panel (on the Target tab, click Program Flash). After 10 seconds, the update will be completed; when asked about connecting the next device, answer “No”. We check the version of the instrument panel again. All!
Painting Kalina door trims
The door trims will need to be removed. Similarly, we clean them from dirt and degrease them. Sanding and priming before painting is also optional. We apply 2-3 layers of paint with the same paint with intermediate drying. After complete drying, install the upholstery in the reverse order.
Painting the plastic interior of Kalina
You will need to remove the tunnel, the sides of the dashboard and the door pillar linings. Then we thoroughly clean and degrease the parts. It is not necessary to sand or prime first, but those who are worried about quality should not skip these steps. Spray paint for bumpers is suitable for painting. Apply 2-3 layers and get black plastic interior:
Rework by replacement
This option seems obvious: the speedometer and tachometer can be left in place, and the computer display can be replaced. In reality, such a replacement is difficult to perform. The on-board computer in Kalina-2 is integrated into the tidy circuit, so you cannot get rid of it. The instrument cluster unit is usually replaced as an assembly, and third-party companies have been able to provide several suitable solutions.
You can install a more “complicated” dashboard than in Kalina, produced by ITELMA. This company is a supplier of electronics for all VAZ cars. We will leave the choice to the owner. Happy tuning!
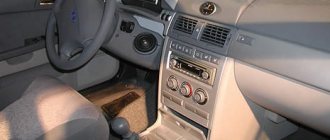
Salon
Changes in the interior space directly depend on the preferences of the car owner. For long trips, Kalina lacks sound insulation and comfortable seats. The seats can be taken from another car or the existing ones can be modified by adding lateral support and increasing the lower part.
To travel short distances, the Kalina must be equipped with a good stereo system and additional interior lighting (back row lighting, front passenger and driver foot lighting). Another way to change the appearance of the interior is to change the color scheme of the dashboard. This can be done by covering its individual parts with vinyl film.
Car tuning emphasizes the individuality of its owner. Makes the car unique and noticeable. The changes made should not impair safety or make the car less comfortable; otherwise, each owner can make changes according to his needs and his understanding of comfort.
Rear sofas - what to replace them with in the VAZ 2110?
If everything is approximately clear with the front seat options, then the rear sofas require a special approach. We are talking about an unconventional size and rather strange types of fastening of a sofa from AvtoVAZ. If you are far from automotive, it is better not to modify the rear seats yourself. To do this you will need the help of specialists
It is important to find a car of the same size, as wider cushions and backrests will have to be redesigned. The installation process is quite complicated:
you need to choose good rear sofas from models such as Volkswagen Polo, Hyundai Solaris, KIA Rio, Renault Logan, and you can also pay attention to Toyota Corolla; Next comes the dismantling of the seats of your car, which is not particularly difficult - just unscrew a few fasteners to get all the structural parts without any difficulties; Next, you should try on new seats, it is quite possible that you will have to order their re-upholstery at a studio, since it is very difficult, and sometimes impossible, to guess the size perfectly; the next step is the installation of fasteners, it is necessary to remove the fastening parts from the VAZ seats and rearrange them on the purchased pillows and backrests for high-quality fastening; after that, all that remains is to install the finished seats in place and enjoy the updated interior of your car, also don’t forget to take a photo and share it on the forums and in the logbook.
Of course, this sounds much simpler than it is done. The process may take more than one day, especially if the seats need to be altered, shortened or lengthened. When choosing seats for the rear of a car, it is best to buy a whole interior set. This will help significantly reduce the cost of further alterations. After all, if you install chairs of different colors, you will have to sew covers or change the upholstery and spend extra money.
Step-by-step installation of a Lada Granta radio: how to install it yourself in standard, normal and luxury
The Granta in Standard and Norma configurations comes from the factory without a radio. AvtoVAZ did everything to simplify the installation process: it ran the power and acoustic wires, installed the antenna and threw the wire into the cabin. All that remains is to plug in the speakers and head unit. Let's look at how the Lada Granta radio is installed.
Installation of 1 din radio in Grantu standard and norm
What is needed to install a radio in a VAZ 2190:
- The radio itself is also the head unit;
- flat screwdriver;
- Straight arms.
Abbreviations and symbols in the text:
- GU – head unit;
- MMS – multimedia system;
- DIN (din) – installation size for acoustics in a car.
Step-by-step instructions for installing the head unit
- a narrow flat screwdriver or plastic spatula for installing acoustics;
- 1-din radio with frame.
Step 1. Using a flat-head screwdriver, remove the plastic plug for the radio. To do this, carefully pry it around the edges and pull it towards you.
The placeholder for the radio is installed from the factory.
Step 2. On the back of the plug there is a mount for ISO connectors. There are two connectors: music power and wires for the speakers.
Step 3. If necessary, connect an adapter for your radio to the ISO. Usually it comes included.
If an adapter is not needed, proceed to step 4.
If an adapter is needed for acoustics, it is included in the kit. Example in the picture.
Step 4. Remove the glove compartment. Holding the glove compartment clamps in the upper position, forcefully lower the glove compartment down.
Overcoming resistance, we pull the lid towards ourselves - the glove compartment is removed.
Removing the glove box on a Grant is easy when you know where its latches are located.
Step 5. Using a flashlight, we climb under the panel in the area of the front right passenger's feet. Behind the felt on top we find a thick black wire - at its end there is a plug for the factory antenna.
We extend the plug to the installation location of the radio.
Here we are looking for the antenna wire.
Step 6. Install the metal slides for the radio. Use a screwdriver to bend the fastenings of the slide at the top and bottom to ensure secure fastening.
Step 7. Connect the power connectors, speakers, antennas to the radio. We insert it into the slide all the way. We attach a decorative plastic frame.
What to do if the length of the wires and antenna is not enough
To get by without extending the wires, you will have to suffer:
- We put our hand under the panel in the glove compartment area;
- We put the radio in the slide and connect it to the plugs;
- We blindly connect the power, the connector for the speakers, the wires for the amplifier, and the antenna.
Disadvantages of the method: we spend a lot of time, the process is dreary and inconvenient. We'll probably rip off your wrist.
Plus: there is no need to build up wires, which will then interfere with the installation of the PG, resting against the back wall.
As you can see, immediately behind the GU in Grant there is a vertical partition, which greatly interferes with blind installation.
If the radio tape recorder dangles in the slide and rattles
It happens that the acoustics hold weakly in the sled, although they sit firmly. Solving the problem:
- Using the keys for dismantling (included with the control unit), remove the radio;
- We take a small piece of vibroplast (resin-based foil) and glue it onto the slide from the inside, top or bottom - this way we will ensure that the tape recorder is completely pressed against the slide without unnecessary vibrations;
- Once again, use a screwdriver to press down all the fastenings of the slide: some might have been under-tightened;
- We put the acoustics back and check - all unnecessary vibrations during shaking should disappear.
Removing the standard radio in Grant Lux
The difference between grants of the luxury configuration: the MMS (multimedia system) installed from the factory. This is a 2 din device.
To remove standard acoustic grants:
- take a knife or plastic spatula to dismantle the acoustics and disconnect the decorative trims to the right and left of the radio. It is not necessary to take pictures;
- in the gap between the cover and the panel we find the head unit lock. There are two of them on both sides. Press it out with a screwdriver;
- we take out the GU on ourselves.
Everything is described in detail in the video:
Replacing the standard MMC in Grant
The process - after removing the acoustics, we install a new system.
Difficulties: you may have to finish the fastenings of the new system for VAZ ones. Plus you need the right frame. The factory MMC frame may not fit.
Have you bought a new 2 din radio, but there is no frame for sale? You can do it yourself. Example at the link.
How to install 2 din in grant norm or standard
Everything is more complicated here. Need to:
- dismantle the center console trim - unclip the fastenings, move it forward and disconnect the buttons and heater handles;
- cut out a vertical plastic partition that will not allow you to install a 2 din device;
- file the plastic casing of the central air duct;
- try on a new acoustic unit, adjust the fastenings if necessary;
- install adapters from the delivery kit on the wiring (if required);
- install the device;
- if we leave the old center console trim: we cut out the partition, try it on, put it in place with the buttons and handles connected, adjust the decorative frame of the control unit, install it;
- if we install a new trim on the console under a 2 din device: we transfer the heater control unit and buttons from the old trim, install them in place, and put a decorative frame on the control unit.
Dimensions of the radio for installation in the Lada Granta
The standard size of 1 din device for installation is no more than 178*50 mm.
Size 2 din GU: 178*100 mm. Installation will require modification of the interior space. According to reviews, you can install an MMC measuring 178*120*100 mm.
Chip tuning Lada Granta
An undoubted advantage to engine performance will be competent chip tuning of the Lada Grant. Reflashing the electronic engine control unit will also give the car an additional increase in power, but what is more important in this case is, perhaps, the elasticity of operation, engine life and efficiency. An excellent solution could also be to install an electronic gas pedal on the Grant.
This will not only increase the sensitivity of the engine and reduce the reaction time to movement of the accelerator pedal, but will also make driving more comfortable. Precise fuel dosage will ensure both efficiency and improved vehicle dynamics as a whole. In addition, electronic gas pedal kits will allow you to regulate and switch engine operating modes based on the driver’s personal preferences.
We get rid of all viburnum rattles, remove the panel
In order not to miss a single cricket, you cannot do without removing the Kalina panel.
In addition to what was mentioned above, we add sound insulation to the Kalina panel: 1) We make the dashboard heavier. To prevent the plastic from rattling, it is made heavier. Vibrating material is suitable for this. We cover the back side of the panel with vibration tape. 2) Pasting the panel with foam or bitoplast. Which in total will not only get rid of squeaks, but also reduce the noise level of the engine. Sound insulation of Kalina air ducts. The last element that is located under the panel. We cover them with bitoplast and the edges with modellin.
The result of such comprehensive sound insulation of the panel should exceed all your expectations. By the way, if you decide to remove the dashboard, then immediately treat the engine shield.
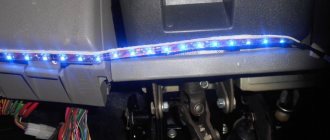
Lighting
The interior lighting of the Lada Kalina leaves much to be desired. Only the front part of the car is equipped with a small lamp. The rear area of the cabin does not have any lighting devices. According to numerous reviews, tuning the interior of the Lada-Kalina hatchback includes installing a rear row light, which an LED strip will help with. You can connect it to the front lamp, and hide the wiring under the ceiling card. For convenience, you can mount a separate switch in the rear row area. Thanks to this, passengers have the opportunity to turn it on themselves if necessary.
The procedure for removing the instrument panel on Lada Kalina 2
The dismantling steps for Lada Kalina 2 differ from the first model. The reason is that engineers increased the number of attachment points, which reduced the “rattling” effect after long-term use. Correct replacement of the dashboard is carried out in compliance with standard conditions: heated interior, lighting, disconnected battery.
How to remove the panel on Lada Kalina 2:
- Removing the protective plug located in the lower left part; it is secured with latches. In early models, it is necessary to unscrew the screws to completely remove the fuse box cover.
- Unscrew the 2 screws of the decorative trim and dismantle it.
- Remove 4 bolts on the dashboard (2 each on the bottom and side).
- Tilt the shield, disconnect the connector by turning the lock.
- Remove the panel.
To remove plastic parts, you can use a set of polymer pullers. It will also be needed to replace moldings, clips, and decorative overlays.
After dismantling, the on-board computer readings are reset to factory settings, with the exception of mileage. If the machine is used for personal purposes, you can reconfigure the system yourself. In company vehicles, it is recommended to record the data before starting work. They may be needed to check the condition of the machine.
Interior tuning
Car owners also make a lot of changes to the Kalina’s interior.
Replacement of upholstery. The standard interior trim in Kalina is a combination of plastic inserts and leatherette. Many tuning enthusiasts remove the tabs and replace them with leatherette. Connoisseurs of comfort also get rid of leatherette, replacing it with velor or carpet. These materials can transform the interior, but they cannot be called durable.
Replacing seats. When a car undergoes deep tuning, it rarely happens without replacing the standard seats with sports ones. They are more suitable for the aggressive driving style for which the car is being prepared. Anatomical Kalina-Sport seats with high headrests and back support are in great demand. The cost of one such seat is from 7 thousand rubles.
Tuning enthusiasts often install sports seats on Kalina, making aggressive driving easier.
Dashboard and steering wheel trim. To add individuality to the dashboard, Kalina owners usually use vinyl film. Film painted to look like carbon is in particular demand. It looks very stylish on the dashboard. But there is also a minus - after 5 years, even the highest quality vinyl film becomes unusable. As for the steering braid, you can purchase it at any specialized store. The range of braids is now very wide.
Additional interior lighting. For illumination, various LED strips are used, connected to the vehicle’s on-board network. The cost of one such tape is from 400 rubles. Most often, additional lighting is installed on the floor of the car. Its purpose is not only aesthetic, but also practical: if the driver drops some small item on the floor of the cabin, it will not be difficult to find it.
They started lighting door handles in the Kalina cabin just a couple of years ago
Viburnum instrument panel, sound insulation without removal
The main source of squeaks on the Kalina panel, and indeed any other Russian car, are panel elements (glove compartment, fuse box, panel trim, etc.), air ducts, wiring harnesses and connectors.
There is no need to remove the dashboard assembly, but you will have to remove the attached elements. As a result, you should have something like this in front of you: Soundproofing Kalina’s glove compartment takes place in two stages: 1) We glue all the places where the glove box comes into contact with the panel, using anti-creak. 2) We glue the insides of the glove compartment with bitoplast so that its contents do not rattle during the trip. Sound insulation of the plastic interior of the Kalina. We remove the central tunnel, plastic lining of the window pillars and side panels. Depending on the situation, we glue all the plastic with anti-creak or bitoplast. We pay special attention to clips. Sound insulation of the Kalina instrument panel. First you need to remove the panel. Then glue the mask and the instrument cluster itself with modelin.
Noise insulation of the central lining of the Kalina console. Here we pay attention to the wires and pads. We wrap the wires in anti-creaking material and, if possible, secure them with plastic clamps so that they do not dangle. We fill all the connectors on the wire side with hot glue from a gun so that they don’t make noise. We also glue the edges and contact points with anti-squeak.
Sound insulation of the Kalina steering column casing. In addition to the wires, you should also pay attention to the ignition switch, which can make squeaks when it comes into contact with the plastic casing. Modeling tool, clamps.
Sound insulation under the Kalina panel. Under the cover we secure all the wiring and cables with clamps. We cover the contact points with anti-creaking or bitoplast.
The whole procedure will take you no more than one day, as a result of which about 90% of the crickets will be “killed”.
Design solutions.
The appearance of the Kalina corresponded to fashionable trends at that time; biodesign was very popular in the 90s, thanks to which the front of the car turned out to be “cute and smiling.” Thanks to its smooth lines and rounded shapes, the car looked quite modern and harmonious, as evidenced by the fact that it was in demand not only in Russia, but in countries such as Germany, for example.
In addition to the exterior, the designers abandoned previous interior developments, which did not at all match the appearance of the car. This is how the updated interior appeared, which was designed using the latest equipment in mathematical models. The spaciousness and ease of seating of the Kalina were many times higher than the level of previous models.
They didn’t skimp on Kalina’s interior design at all, as a result of which the interior turned out to be not only modern, but also very ergonomic.
Let's move on to specific examples. One of them is the seatback tilt adjustment mechanism. These mechanisms are manufactured by the German company Keiper, which specializes in the development of these units. This is not the only example of the participation of foreign companies in the development of the Kalina’s interior; the seats were also designed with the help of other foreign companies.
In the late 90s, the Kalina filling differed in many ways from its relatives:
- instrument panel lighting with LEDs;
- electric reverse gear lock;
- factory air conditioner, which could regulate the temperature itself;
- light switch;
- new generation headlights;
- recirculation of the heating system and ventilation system.
The design of the platform is what really did not give the designers freedom of action. The steering rack is located quite high and is attached to the engine shield. Because of this, it is problematic to balance the driving performance of the car. By experimenting with the suspension, Kalina managed to give it precision when cornering, unlike the VAZ-2110.
At first, the Kalina was equipped with an eight-valve 1.6-liter engine.
However, everything can't be perfect!
The first cars became famous for the fact that up to 50% of their power steering units were faulty, they simply failed! This significant flaw caused a lot of noise among the people, because there were cases when cars turned completely in the wrong direction.
Later, of course, this defect was corrected by the Kalina designers. The front of the production car was slightly modified, but the light and smooth steering wheel was appreciated (mostly by women). Electric power steering instead of hydraulics is the right solution for Kalina.
Thus, through experiments with the internal and external appearance of the Kalina, by 2001 it had acquired its final form. The changed appearance of the Kalina was very reminiscent of the Opel Corsa, and the sedan was similar to the Chevrolet Corsa.
Ultimately, the designers came up with a car tailored for the B-class. It could be compared to the Fiat Palio and Renault Symbol. However, Kalina turned out to be more affordable in its price category and more compact.
So, VAZ managed to create a new generation car, which was different from its predecessors in almost every way, even though the platform was not the first freshness. In Kalina-2, which is successfully used today, a fairly large number of technical solutions remain from the old version of Kalina.
Installation of the Luxe central console from Lada Kalina on Lada Granta
Options
If we don’t go into prices and just compare the options available in cars by trim level, we get the following.
Lada Kalina 2 cars in the “standard” configuration, unlike the standard Grants, have electric power steering, driver airbags, a short steering rack, athermal windows, top handrails, a cigarette lighter, an ashtray, power windows for the front doors, 14” wheels, bumpers in body color.
In the “norm” and “luxury” trim levels there is such a range of additional equipment that it’s impossible to say for sure, so let’s compare the “norm” Kalina 2 and the “luxury” Grant since they are approximately the same in price.
Lada Granta in almost the most expensive version (369 thousand rubles) in contrast to Norma Kalina 2 (about the same cost - still unknown):
- - fog lights
- - electric windows for rear doors
- — electric drive and heated exterior mirrors
- — exterior mirrors and door handles painted in body color
Kalina 2, unlike Granta, has only a heated windshield.
In addition to these options, the luxury Granta and norm Kalina 2 have the following general options:
- — Security alarm function with remote control
- - On-board computer
- — Heated front seats
- — Athermal glass
- — Air filter entering the cabin
- — Power windows for front doors
- — Climate system (air conditioning)
- — Anti-lock braking system with emergency brake assist (ABS BAS)
- — Multimedia system with 1 DIN control unit (without CD drive, FM, USB-Flash, stereo, SD card, Bluetooth, Hands Free, 7” LCD touch display)
Body and paint
After the release of Granta, many began to measure the thickness of the body and were surprised: the new AvtoVAZ product had a very thin layer of metal body! The manufacturer explained this by saying that for the Granta a completely different metal is used, with better qualities and, in general, equal in characteristics to the first Kalina.
We beg to differ with this and assure you that bending the body of a Granta is not that difficult; the body is really made of thin metal. They even saved on the plastic bumper - the thickness is no more than 2-3mm. At the time of writing, it is not yet known about the thickness of the body of the updated Kalina 2, but if compared with the first Kalina, the Grant is inferior here.
Here we also note the quality of door locking. If everything is still fine on the new Grant, then over time, closing/opening the doors (especially) the rear ones becomes difficult, you need to make an effort. There is no such defect observed on Kalina.
The rest is no less interesting...
Owners of the Lada Granta can boast of the aerodynamic characteristics of their cars - sedans (the Lada Granta is currently available only as a sedan, and the Kalina 2 is only available as a hatchback and station wagon) traditionally have the best performance.
If we judge the little things, then there are little things like hydraulic headlight adjustment, limit switches on the doors, which are not present on the Grant. And the trunk opening mechanism on the budget car is like on the old VAZ 21099, with a torsion spring.
Both cars have high ground clearance, comfortable seating, easy operation and a warranty of 36 months or 50 thousand km (whichever comes first).
Suspension and chassis
AvtoVAZ tried their best and made an improved suspension for the new models with a longer service life than before. Colleagues from Renault helped our engineers in setting up
Torpedo
The dashboard is considered one of the important elements of the interior. For tuning the interior of Lada-Kalina, two main options are used. The first, which costs a budget, is to buy a special panel trim and attach it over the standard dashboard. This option is considered inexpensive because during its installation it may be difficult to select the exact dimensions. Therefore, the overlay will have to be trimmed a little. This is a rather complex and difficult process, which, if done incorrectly, can completely ruin the appearance of the salon. The second option is to purchase a completely new dashboard. In this case, installation will not take much time. However, you will need to spend a lot of money.
Carbon film covering the interior of a viburnum
| Just a few years ago, car interior styling was limited to painting or reupholstering with different materials (leather, carpet). After the advent of vinyl film (3D carbon fiber, etc.), it became easier to make a car exclusive. Do you know how to tune the interior of a Lada Kalina with carbon film? |
The complexity of the process depends on the film, the relief of the part and the experience of the craftsman. The procedure is as follows:
- Cutting out the required piece of film with a margin of 15-20mm at the edges.
- Degreasing the part.
- Removing the protective layer from the film.
- Gluing the part to the film.
- Smoothing the film over the entire surface of the part.
- We glue the edges and bends using heat with a hairdryer.
- Cut holes in the part (if any).
How to stick carbon film is shown in the video:
Which film to choose for interior reupholstery? It is recommended to buy vinyl film with air channels. They are obtained by applying glue to the sticky part of the film in a grid, and this grid can also be different (cubes, diagonal, etc.). Air channels will allow you to easily expel air from under the film, which completely eliminates the occurrence of air bubbles.
New Lada: Brake discs on Lada Granta: selection and replacement
Covering Kalina's interior with such a film: Let's look at an example of how to cover Kalina with film; the center console of the panel will act as a part. To remove this plastic cover you will need to unclip 2 plugs next to the emergency lights button and unscrew 2 screws. Then we pull the central panel towards ourselves, unlatching the latches. Then you need to remove all the buttons, plugs, air ducts and control unit from the console, so that only one skeleton remains. The part is embossed and has a complex shape, so the process requires patience and effort. It is better to do the work with an assistant, so that one heats the film with a technical hair dryer, and the other stretches the film. The most difficulties will be in the lower part of the console, where the radio is. To avoid folds, I had to make a small patch, which is very difficult to notice at the bottom. In general, novice specialists should start with simpler parts, for example, buttons, windshield pillar trims, door handles, in general, any smooth elements of the Kalina’s interior.
Photo of the Kalina interior after it was covered with carbon fiber: By the way, if such tuning is combined with improvements to the interior lighting, then the interior will cause admiration.
Photo source:
VAZ Kalina station wagon - tuning as a means of transformation
Cars of the Kalina series have proven themselves well on Russian roads. If you add tuning to their practicality and unpretentiousness, you will get an excellent car that will look great in a diverse traffic flow.
1 History of the five-door Lada Kalina car
The Volga auto giant began mass production of the VAZ 1117 Lada Kalina station wagon in 2007, and the car was first presented at the famous auto show in Germany in Leipzig a year earlier. The seventeenth model is currently the last in this series. The continuation of this VAZ line should be the Lada Kalina Cross.
VAZ 1117 Lada Kalina
2 How to make a standard car exterior original and expressive
If funds allow, you can try airbrushing the body. Which one? It all depends on your tastes and preferences. But we advise you to avoid unnecessary display and provocative drawings in the form of grinning predators and half-naked girls. The car will be decorated with various interweaving patterns, ornaments, and natural compositions. Of course, you can’t do this with your own hands.
The station wagon will receive further improvement by replacing the standard wheels with more elegant alloy wheels. VAZ Lada Kalina will look more presentable with black or metallic wheels. You can put your car in low-profile tires. Just remember that it is good on flat sections of city streets or country highways. Tuning the car's headlights will also add originality.
Wiring diagram of the 1.4 l Lada Kalina engine control system (ECM)
Connection of the wiring harness of the engine control system (ECM) VAZ 11194 (1.4 l): 1 – ECU; 2 — block of the ECU wiring harness to the instrument panel; 3 - main fuse block; 4 — speed sensor; 5 — rough road sensor; 6 — oil pressure drop warning lamp sensor; 7 — throttle position sensor; 8 — coolant temperature sensor; 9 — coolant temperature indicator sensor; 10 — mass air flow sensor; 11 — idle speed regulator; 12 — electric fuel pump relay; 13 — fuel pump fuse (15A); 14 — ignition relay; 15 — ignition relay fuse (15 A); 16 — ECU power supply fuse (7.5A); 17 — crankshaft position sensor; 18 — control oxygen sensor; 19 — phase sensor; 20 — knock sensor; 21 — solenoid valve for purge of the adsorber; 22 — diagnostic oxygen sensor; 23 — ignition coil; 24 — spark plugs; 25 — nozzles; 26 — ignition coil harness block to the ECU; 27 — ECM wiring harness block to the ignition coil wiring harness; 28 — block of the ECM wiring harness to the injector wiring harness; 29 — block of the injector wiring harness to the ECM harness; A – to the positive terminal of the battery; B1, B2, B3 – grounding points of the ignition system harness; C1 is the grounding point for the ignition coil wiring harness.
Cover trims
If sticking special decorative trims on the dashboard does not seem enough, you can dismantle the plastic door trim yourself and improve it. For example, tuning the interior of a Lada Kalina, which imitates natural materials, always looks impressive and attractive. After removing the trim of the standard parts, cover its elements with durable vinyl or carbolic film. After the material is glued, all parts are assembled strictly in the reverse order. Most often, car enthusiasts use film with a pattern similar to the texture of wood. Let us remind you that special pads can be mounted on parts of the speaker system housing.
To do the work yourself, you will need a stationery knife, scissors and the material itself. Experts advise sticking the film directly onto the plastic.
Pre-mark the places where the holes for the buttons will be located. To do this, use a paper stencil. For convenience, remove the plastic panel. After you cut out the pattern, clean the plastic parts and degrease their surface. Only after this can the film be applied.
Torpedo Granta dorestayl
The panel from Kalina began to be installed on the pre-restyling Granta immediately before the release of the updated Lada Granta FL family.
If the dashboard of your car is like in the left photo, then you will need to replace a number of parts of the instrument panel (dashboard) with parts from the Lada Kalina dashboard:
- 21925-5325011-00 Instrument panel VAZ-21925 Luxury with air duct SB AVTOVAZ OJSC
- 21920-7905020-00 USB cable 2192
- 21925-5326014-00 Overlay for the instrument panel console LUX
- 21920-5326014-00 Instrument panel console trim NORMAL - lower, depending on the climate unit
- 21920-5303014-00 Glove box body 2192
- 21920-3710010-00 Hazard switch
- 21920-5303016-00 Cover of the glove box of the instrument panel
- 21920-5325322-00 Fuse box cover
This is a global alteration of the car interior, which cannot be called rational.
After this, you can begin installing the center console according to the instructions below.
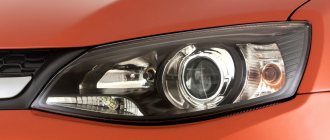
Head optics: how to improve them?
In many ways, the exterior style is determined by the installed head optics and rear lights. The design options available at the factory cannot be called attractive, since they are still manufactured using old technologies and are of low quality.
The features of such tuning include the following points:
- You can upgrade the existing structure or purchase a new one. Some tuning salons provide the opportunity to buy new optics and lights that are ideal for the car.
- There are quite a large number of ways to modernize an already installed structure. An example is recommendations related to replacing a standard light source with a diode one.
Why are diode light sources so popular today? There are quite a few reasons:
- Low cost. Diode light sources are among the cheapest, which allows you to save on tuning and further maintenance.
- Attractive view. Diode strips have long been used in tuning many cars.
- Low power consumption. Due to this, the load on the installed generator is reduced and the amount of fuel consumed is reduced, and when the engine is off, the battery is less discharged.
- High reliability. The service life of high-quality diodes is quite long, since they are not negatively affected by high humidity and other influences.
- Compact sizes. Due to this, a larger number of light sources are placed in a small area.
- Long service life.
If you pay attention to new cars from almost all manufacturers, head optics and rear lights are made using diode technology. In addition, the following types of tuning of optics and flashlights are carried out:
- Protective glass is tinted.
- The surface of the protective glass is polished.
- Install various eyelashes and extensions.
When performing tuning, you should remember that headlights and taillights perform an important function and are not a decorative part of the body. That is why all changes must be thoughtful.
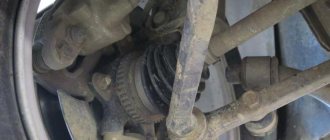
Thermostat from grants for VAZ Kalina
How to install a thermostat from Granta on Kalina
Rules (changed on April 14, 2013): 1) Respect the worldview of others because you respect your own! 2) Do not create topics of the same type, because...
It’s hard to find something useful in the midst of a bunch of such topics! (secondary topics will be deleted!) 3) Do not flood, try to answer the questions posed clearly and on topic. 4) Mat is prohibited! Right up to the exclusion of the user from society. 5) Commercial activities are permitted with the consent of the administration
And now attention: 6) If we want to implement something, write here: 7) If we want to purchase something for Priora, then we ask here:
It is better to insert text with a small description and a link to the on-board magazine. Entries with links to the logbook without the main text will be deleted! 10) Blog here we ask questions that arose during the operation of the Priors or if we want to get advice on what and how to do! (for example: how to lower a Priora, how to change a light bulb in the glove compartment, how to make a Shumka, etc.), or maybe they just decided to share the result of how they solved some serious problem. If some kind of discrepancy appears, it is better to outline it and add a video or photo. Entries with a link to the in-flight magazine will be deleted! Entries with advice on appearance will also be deleted; after all, the blog is for urgent and fundamental issues. For example: what color should I buy the wheels? what color should I paint it? etc.
Here's everything you need to install a Grant thermostat in a viburnum
1-Thermostat
21900-1306010-00 grant 2-gasket.
Granta torpedo in Kalina Drive
The original device (namely its color, rattling and general unbearability) has been triggering me for a long time. If I tried to do something with the first one by painting the shell black, then the last one was at the level of chronic underdigestion. Besides, sooner or later I will want to plug in the 2din... The obvious way out of the situation was the panel from Kalina 2. Having gone to the well-known ad site, I was slightly shocked by the prices. The lowest offer (about 9k rubles) was an incomplete shell without frame and buttons. For a complete version, at least 15k.
And then a Granta torpedo falls out of the recommendations. 3000 rubles. Complete set with all buttons, support frame and outer foliage. Let's take it!
There is nothing to describe in detail about the replacement, everything fits bolt-on. The designers of AvtoVAZ deserve special mention, who agreed on the fastening of the passenger airbag during the design. 5 beautiful M5 nuts, which I spent almost an hour and a half on.
As a result, the original dashboard, frame and side brackets for attaching the frame to the body are discarded. Everything is assembled in reverse order. The Grant frame has all the same attachment points as the Kalinov frame + additional attachment to the stove body from below. I'm not entirely sure about the need for side frame fastenings. Even without the frame it stands as if welded. As a result, I tinkered with the frame and wiring until the evening, threw on the shell and went home...
The next day began with soundproofing the engine shield - 2 layers of 3mm STP + 4mm noise reduction in one layer. I also glued the dashboard in some places so that it wasn’t too thin. It is worth noting that the grantotorpedo has more attachment points to the frame and all of them are represented by bolted connections, and not by self-tapping screws in the case of the original one. Therefore, the dashboard fits like a glove and does not make a single squeak.
The only thing that was required was to remove the seat for the viburnum instrument cluster and extend the wires to the emergency signal chip.
It’s no secret that most of the technical solutions of Grants migrated to Kalina, and the body and interior of these cars have a lot in common. If you think that the appearance of Kalina 2 is more modern, then you can borrow some of the parts for Granta from this model!
What makes the front of the Kalina 2 more attractive? The hood, fenders and fog lights of these two cars are no different and have the same catalog number (hood 21900-8402010-00, fenders 21900-8403010-00, 21900-8403011-00). The only differences are in the bumper and headlights.
You will need: Kalina 2 bumper (part number 2192-28030152) and left (number 21920-3711011-00) and right headlight unit (number 21920-3711010-00).
When installing the bumper and headlights from Kalina 2 on the Grant, no modifications are required. There will be inconsistencies only when connecting:
- head optics (headlights have different connectors, so you will have to buy chips and connect them according to the diagram);
- electric headlight leveler (depending on the configuration, you may need a headlight leveler control unit from Kalina 2 (21920-3709590-00), and connect according to the diagram).
You can install similar headlights and a bumper from Granta on Kalina 2. It turns out Granta station wagon or hatchback.
How do you evaluate this crossing of two Lada cars? Which option do you prefer? Don’t forget about upgrading the interior, for example, covering the interior decorative trims with vinyl film.
Because you are not a trusted user (phone number is not verified). Enter and confirm your phone number. Read more about trusts.
Because The topic is archived.
Well, something like “rip out the standard central egg-shaped trim, plug the air ducts and install our ready-made crap into which you can stuff any standard TV.”
PS: do not send to LKforum. There, in reality, everyone is completely sick. One crazy guy, for example, stuffed a tablet into the steering wheel and is happy. 
think about whether you need it, the previous owner put me on the farm like this ->
and also some kind of completely fucked-up Chinese radio with speakers of similar quality :), as a result, now I’m redoing everything little by little, and there’s no way back to 1din along the way, and what’s not good about 1din?
in general, I’ll also listen to the options 
Do-it-yourself: modification of Lada Grant and Kalina
The announcement of the Lad recall caused mixed reactions. Some shook their heads meaningfully: they said, this was to be expected, while others, on the contrary, regarded the news as a change for the better. After all, this is the first time that the Volzhsky Automobile Plant is conducting such a global and noisy campaign to eliminate faults.
Our opinion did not coincide with either one or the other. First of all, let’s reassure the owners: it’s okay, there’s no need to grab your head and rush headlong to the dealer. Even in the plant’s recommendations, sent to all technical centers for the modification of these models, the words “possible” and “if necessary” appear repeatedly. As confirmation: on the machine on which these flaws were eliminated, there is nothing discouraging. Therefore, we are ready to say with confidence: the promotion is largely of an advertising nature.
It is more likely to draw attention to the product than to eliminate serious design flaws
Dealers are already sending out written invitations to all owners of cars included in the recall list (by identification number - VIN) for unscheduled free maintenance. It is up to the car owner to decide whether to conduct it or not. If you are undecided, we suggest that you, together with the dealership specialists, go through all the operations and look at specific examples to see how practical this is. We will supplement the factory instructions with our comments.
Important note: the recall campaign has been launched primarily for Granta; only the operation to protect the fuel pipes is carried out for both models
Installation of roof rails or special boxing
Despite the fairly large interior space of the car in question, tuning quite often involves the installation of roof rails or a special box. The features of such minor tuning include the following points:
- Rails are installed for transporting skis or other large cargo. Examples include bicycles, surfboards and much more. The cost of such an element is relatively low, but it significantly increases the attractiveness of the car and its practicality in use. When installing roof rails, it is worth remembering that they will be subject to quite a large load during operation. Therefore, you should ensure the reliability of the fastening.
- Luggage boxes today are often found on cars of foreign origin. This accessory is suitable for long trips, as it allows you to place a fairly large number of different things. It is worth considering that the luggage box is only an accessory that is used as needed. With its everyday use, fuel consumption increases significantly, as the resistance during movement increases. In addition, the luggage box makes the car look more massive.
The cost of roof rails and luggage box is relatively low, which allows you to expand the capabilities of the car at the lowest cost.
Correct installation of the Kalina 2 dashboard
Mount the instrument panel according to the standard scheme. First, clean the parts from dust and clogging. Check the integrity of the housing and replace the light bulbs if necessary. The temperature in the cabin should not fall below +15°C. In winter, it is recommended to carry out work in a heated garage or similar room.
Installation of the instrument panel:
- Connect the electrical connector and battery.
- Check the operation of the instrument module.
- Disconnect the battery.
- Screw the shield with 4 bolts.
- Install the decorative panel and secure it with 2 screws.
- Replace the protective plug or fuse box cover.
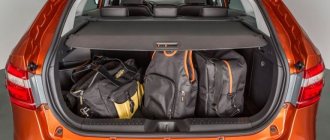
Interior tuning of Lada Kalina station wagon
The primary measure in the Lada Kalina station wagon is to increase the sound insulation properties of the body. If we compare it with the fashionable Priora model, the “culprit” of our review is significantly inferior to it in this discipline. Most likely due to the lack of linings in the area of the wheel arches. Some owners of station wagons do not “stress” over such a troublesome procedure as sound insulation and resort to installing more powerful audio systems. Here the owner will need to first decide on his own priorities, and then begin modernization.
Let's touch on the interior trim. AvtoVAZ provided its buyer with a relatively good solution, since the elements are upholstered in durable and inexpensive synthetics. Those who are not satisfied with the standard seat material can be upholstered in leather, which is very expensive (about 30 thousand rubles).
Also, when tuning is carried out, the owners of the Lada Kalina station wagon replace the instrument panel. The manufacturer foresaw this development of the situation and met its buyer halfway, ensuring the possibility of complete dismantling of the panel.
What budget can the owner count on if he “dared” to perform tuning of the interior space of the Lada Kalina station wagon? In ordinary cases, it is not at all more expensive in comparison with similar measures in other AvtoVAZ models.
Lada Kalina instrument panel harness connections
Connections of the instrument panel harness: 1.3,4, 5 – blocks of the instrument panel wiring harness to the front wiring harness; 2.6 2.6 — blocks of the instrument panel wiring harness to the rear wiring harness; 7,8,9, 10 – contacts of the mounting block block; 11- lighting control module; 12 — instrument cluster; 13 – heater motor switch; 14 — blocks of the instrument panel wiring harness to the air supply wiring harness; 15 – ignition switch; 16 – anti-theft system block; 17 – block of the instrument panel wiring harness to the ignition system wiring harness; 18 – cigarette lighter; 19 – alarm switch; 20 - rear window heating switch; 21 — stop signal switch; 22 – light signaling switch; 23 – on-board computer mode switch; 24 – wiper switch; 25 – sound signal switch; 26,27 – heating and ventilation control lighting lamps; 28 – lampshade lighting of the glove box; 29 – glove box lighting switch; 30.31 – block of wiring harnesses to the radio; 32 – heater electric motor; 33 – heater resistance; 34 – electric amplifier control unit