Lada Priora is a car loved by many. Oddly enough, just for convenience, Priora made two types of watches. Setting them up is easy - more on that later. The clock on the Priora is in 2 places: the dashboard, the control panel, where the speedometer is. Sometimes additional equipment is installed on the Priora - some believe that it is better to install a voltmeter in the dashboard in order to always know the network voltage. Of course, every trip for your beloved “swallow” should be comfortable. For each of us, time is important, so “time” should always be “at hand”, and while driving – before our eyes. It is inconvenient to be distracted and look at the phone screen while driving, so the clock on the Priora must always be precisely adjusted so as not to distract the driver from driving.
Our article will help you set up, modify or remove your Priora watch. Step-by-step implementation will save even those Priora owners whose watches do not work. The built-in standard ones are always in front of your eyes - on the dashboard, also in the factory interior, the time is built into the dashboard.
How to set the clock on the Priora instrument panel
- Specifications
- Controls
- Dashboard
- On-board computer
- Lighting engineering
- Interior heater
- Air conditioner
- Circuit breakers
- Replacing lamps
- Passport details
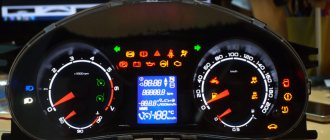
The LCD of the on-board computer is located on the dashboard and contains three lines:
- the top line displays the total/daily mileage counter;
- The middle line displays the functions of the on-board computer, the display of which is carried out sequentially, at the choice of the driver:
- The bottom line displays the icon for the selected mode.
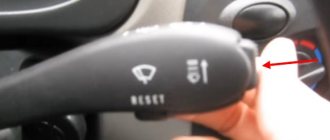
To switch between the bottom line display modes, use the keys on the steering column wiper switch: the keys (position 2) located at the end of the switch switch functions “in a ring” forward and backward; the “Reset” key (position 1), located at the bottom of the switch, resets the values to “zero”.
The top line readings (total/daily mileage) are switched by a button located on the right side of the dashboard (under the fuel gauge). If the daily mileage counter is displayed, then to reset it, you must press and hold the button for 3 seconds.
The procedure for setting the clock on the Lada Priora:
- To switch from the current time indication mode to the installation mode, you must press and hold the “Reset” key for more than 3 seconds, while the hours and minutes will begin to flicker;
- The minutes are set by pressing the “ring forward shift” key located at the end of the steering column wiper switch;
- The clock is set by pressing the “ring back shift” key located at the end of the steering column wiper switch;
- When you press the key once, the minutes/hours value increases by “1”; to change the values faster, you need to press and hold the key;
- When setting the minutes, the seconds counter is reset to zero (setting the hour counter does not affect the seconds counter);
- To return from the installation mode to the indication mode, you must briefly press the “Reset” key or, in the clock setting mode, do not press any key for 1 minute.
Detailed information about the displayed functions (their ranges) of the Lada-Priora on-board computer:
- current time
(hour, min) - 0:00-23:59 (resolution 1 minute); - outside air temperature
(°C) — -40°C..+70°C; (resolution 1°C); - driving time
(hour, min), defined as the time during which the engine has been running since the last reset - 0:00-99:59 (resolution 1 minute; to reset, you must hold the “Reset” key for 3 seconds) - average fuel consumption
(l/100km) - 0.0-19.9 (resolution 0.1l/100km; after zeroing, the first 500 meters of the distance traveled are not indicated); - instantaneous fuel consumption
(l/100km) - 0.0-19.9 (not displayed if the speed is less than 1 km/h); - approximate remaining power reserve
(km) - 999-30 (resolution 5 km); - average car speed
(km/h) - 0-250 (resolution 1 km/h; after zeroing, the first 500 meters are not displayed); - amount of fuel consumed
(l) - 0-9999 (resolution 1 l; to reset, you must hold the “Reset” key for 3 seconds).
To the top of the page
The topic will be quite simple, but at the same time, not every car owner knows how to set the clock on their Priora. This is done quite simply and it will take a maximum of a couple of minutes to complete such a procedure. Below we will consider the procedure for a car with an old-style instrument cluster, that is, the first releases up to 2012.
Reviews
Delivery of goods is carried out throughout Russia and the CIS:
1. Russian Post (from 350 rubles and above)
Delivery to all regions of the Russian Federation and CIS countries
2. Transport Companies (from 350 rubles and above)
Delivery throughout Russia and the Republic of Kazakhstan
- TK Energy (nrg-tk.ru)
- TC Business Lines (dellin.ru)
- TC SDEK (www.cdek.ru)
- TK PEK (pecom.ru)
- TK KIT (tk-kit.ru)
3. Pickup
The order can be picked up at the office at Tolyatti, 40 Let Pobedy 38, TD “Malachite”, 1st floor.
The waiting time for sending an order in our online store is approximately 2-7 working days, large orders 7-14 working days. days; color of bumpers, mirrors, body parts, spoilers, etc. 7-14 work. days; production of exhaust systems Stinger, STT, Dk-pro 7-14 slaves. days; sewing covers, upholstery, steering wheels, gear knobs, eva mats, etc. 7-14 work. days.
During this period, we will send you a tracking number by email. email to track the parcel en route.
Payment can be made in the following ways:
1. Payment to a Sberbank card
You can pay using the SBERBANK-Online application and other Bank applications.
After placing an order, making payment, do not indicate comments , we ourselves will understand by the amount of the order and the name of the sender. After receiving the funds, the status of your order will be changed to paid until 17.00 of the current day, or from 9.00 of the next Moscow time.
2. By bank card
Automatic acceptance of payments using MIR Bank cards, VISA International, Mastercard.
You can also pay with credit cards with a grace period.
To select payment for goods using a bank card, on the corresponding page you must click the “Pay for order by bank card” button.
2. Payment to QIWI wallet 89272115207
3. Payment on Yandex.Money 410013993950891
5. Payment to a bank account for legal entities and individual entrepreneurs (commission 6%)
Send your organization's details to [email protected] for invoicing. After paying the bill, be sure to send a payment order.
4. Cash on delivery of Russian Post (commission from 4%)
IMPORTANT! When sending by cash on delivery, RUSSIAN POST will take a commission for providing the cash on delivery service of 150-300 rubles, and the delivery cost also increases due to the evaluation of the goods.
Cash on delivery delivery is possible only within Russia.
ATTENTION! When choosing cash on delivery, the delivery cost is paid in advance before shipment, for the product itself upon receipt.
The amount of the order by cash on delivery should not exceed 5000 rubles; also, painted parts, goods made to order, covers, upholstery, door inserts, EVA mats, steering wheels, etc. are not sent by cash on delivery. (minimum 50% prepayment).
Be sure to save the payment receipt or a screenshot of the transfer.
The best guarantee of order fulfillment and quality is the feedback from our customers.
Reviews of our work can be found in our VKontakte group https://vk.com/topic-136384247_36675422?offset=180
We guarantee product quality, integrity and timely fulfillment of all requirements for the shipment of goods.
Source
Setting the clock on the standard on-board computer of the Lada Priora
- First of all, using the button at the end of the right steering column switch, select the “current time” item on the instrument panel display.
- Next, you need to press and hold the “Reset” button, which is located at the bottom of the switch until the readings (time) on the dashboard begin to blink.
- Now, using the buttons that were described in the first paragraph, we set the current time.
- By pressing the upper key we adjust the minutes, and the lower key – the hours.
- After setting the required data, you can exit this menu item by clicking on the “Reset” button.
As you can see, everything is banal and simple, and to explain some points it’s worth taking a couple of photos.
If this process is not clear to anyone from my description, then a video from my YouTube channel will be embedded below specifically for this purpose.
Product delivery options
Note! Below are the shipping methods available specifically for this product. Payment options may vary depending on the shipping method. Detailed information can be found on the “Delivery and Payment” page.
Parcel by Russian Post
Available payment methods:
- Cash on delivery (payment upon receipt)
- Using cards Sberbank, VTB, Post Bank, Tinkoff
- Yandex money
- QIWI
- ROBOKASSA
Shipping throughout Russia. Delivery time is from 5 to 12 days.
Parcel by Russian Post 1st class
Available payment methods:
- Cash on delivery (payment upon receipt)
- Using cards Sberbank, VTB, Post Bank, Tinkoff
- Yandex money
- QIWI
- ROBOKASSA
Shipping throughout Russia. Delivery time is from 2 to 5 days. More expensive than regular delivery by Russian Post, approximately 50%. Parcel weight up to 2.5 kg
Express Parcel EMS
Available payment methods:
- Cash on delivery (payment upon receipt)
- Using cards Sberbank, VTB, Post Bank, Tinkoff
- Yandex money
- QIWI
- ROBOKASSA
Shipping throughout Russia. Delivery time is from 3 to 7 days. More expensive than regular delivery by Russian Post, approximately 100%.
Transport companies
Available payment methods:
- Using cards Sberbank, VTB, Post Bank, Tinkoff
- Yandex money
- QIWI
- ROBOKASSA
Delivery is possible to any locality where there is a representative office of the transport company. Delivery time is from 2 to 10 days. Sending large parcels is approximately 50% more profitable than by Russian Post.
Video on setting the clock on the Priora instrument cluster
The review was prepared using the example of the dashboard of the Kalina car, but there is absolutely no difference between them with regards to this function.
Below you can leave comments or ask your questions if you have any questions on this topic.
Lada Priora is a car loved by many. Oddly enough, just for convenience, Priora made two types of watches. Setting them up is easy - more on that later. The clock on the Priora is in 2 places: the dashboard, the control panel, where the speedometer is. Sometimes additional equipment is installed on the Priora - some believe that it is better to install a voltmeter in the dashboard in order to always know the network voltage. Of course, every trip for your beloved “swallow” should be comfortable. For each of us, time is important, so “time” should always be “at hand”, and while driving – before our eyes. It is inconvenient to be distracted and look at the phone screen while driving, so the clock on the Priora must always be precisely adjusted so as not to distract the driver from driving.
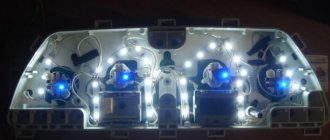
Do-it-yourself dashboard overexposure
You will need: remove and disassemble the instrument cluster, SMD LEDs (unsoldered from LED strip or LED lamp), soldering iron.
The process of replacing LEDs on the instrument panel board consists of unsoldering the standard SMD LED and soldering a new one in its place. During such tuning, there are several important points to consider:
- take your time so as not to damage the conductive traces of the board;
- observe the polarity (SMD LEDs have a bevel on one side, install a new LED in the same position);
- do not overheat the LEDs; high temperatures may cause them to fail;
After soldering the required LEDs, it is recommended to check the backlight. To connect the instrument cluster at home, you need to apply +12V to pins 19 and 21, and ground to 17. You can also verify that the installed LEDs are working properly using a multimeter in “tester” mode, connecting the probes to the LED according to the polarity (red probe is plus) :
If all LEDs are installed successfully, reassemble in the reverse order. Relighting the instrument cluster of Grants or Kalinas is a great way to make your car more individual and stylish. It is noteworthy that there are a lot of options for implementing such panel tuning, but which style suits you best? Participate in the survey, share video materials and photos of your improvements.
Let us remind you that the website presents other modifications to the instrument panel, for example, you can reflash it and install an outside air temperature sensor.
Photo: logbook ARIST0KRAT and serg156
Keywords: instrument panel Lada Granta | dashboard of Lada Kalina | interior lighting for Lada Granta | interior lighting for Lada Kalina | torpedo Lada Granta | Lada Kalina torpedo
4
1
Found an error? Select it and press Ctrl+Enter..
Production of LADA cars has been launched in Ukraine, new details
Review and replacement of heater handles for Lada Largus
How to remove the floor tunnel Lada XRAY
Lada Granta FL turned out to be better than Datsun on-DO, but worse than Renault Logan
How to set the standard clock on a Priora
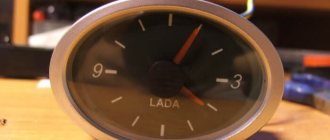
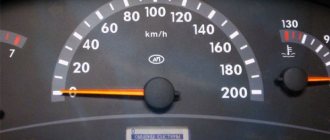
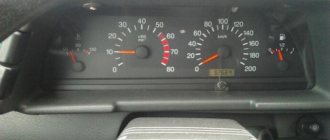
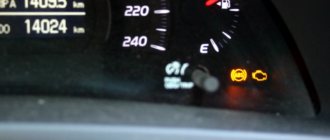
The standard device is as simple as possible - the time is displayed on the display located in the center of the dashboard, under the speedometer. The total mileage is also reflected there. Analog (center console) are configured separately, manually. In the Lada Priora, everything is adjusted using the “old-fashioned method”: one press of the button in the center of the dial starts the hands moving 1 minute forward. If you hold the button, the minute hand will “run” forward even faster, followed by the hour hand.
Engineers installed the simplest classical method, passed on from older models. When setting the central panel clock: your attention should be completely concentrated on the right switch lever. On the right is a rocker with two buttons. At the bottom, under the thumb, there will be a “reset” button conveniently located.
To set up an electronic clock in 2170, you need to:
On the right switch lever behind the steering wheel, find a “rocker” with lower and upper buttons and a “Reset” button; Press the bottom button until the display shows the time; Press the “Reset” button; Change time: the top button is responsible for minutes, the bottom button for hours; Press the “Reset” button to set the time.
folloart
Led style ing led_style_ing — Relighting the instrument panel on a Priora with navigation.#instrument panel…
- Navigation
- Home All
- fashion
- film, music & books
- food & drink
- home decor
- fitness
- travel
- girls & beauty
- funny
- photography
- men's fashion
- art
- animal
- cars
- sport
- Fashion
- Language
- English
- Russian
- About
- About us
- Privacy Policy
- Help&FAQ
Search
Led style ing @led_style_ing 6 months ago
Led style ing led_style_ing
Overexposure of the instrument panel on a Priora with navigation.instrument panelundercamrydashboardrelightinginstrument panelnavazprioraprioratuningvaz2112vaz2110tuningpaneliconpanelpodkamrituningpanelkatyuningpanelandbuttonsoverexposure southpereslighttidydashboardrelightprioraprioratuningpriora05priorabpantuningvaz21 14vaz2112vaz2110bpanoperskiye211021112114priora2prioracluboperskiye
Source
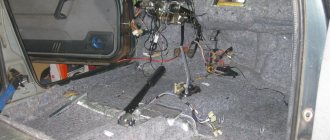
How to remove a watch on a Priora
You can remove the device according to the instructions below:
- Unscrew the two screws of the center console behind the “Open” cover and the two screws under the ashtray;
- Remove the radio;
- Unscrew two more screws;
- Remove the decorative panel;
- Armed with a knife or flat-head screwdriver, press the tight latches of the case;
- Carefully pull the device out of the socket.
It is recommended to work carefully, trying not to scratch the decorative panel.
How much do watches cost?
Instead, you can put three options:
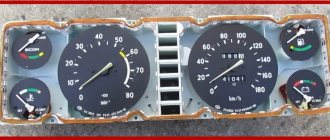
- Analog – original and with modifications;
- Conventional electronic;
- Voltmeter and various accessories.
Analog ones are available in parts stores and the aftermarket. Their price starts from 200 rubles - lovers of the classics can get themselves a new device to replace the faulty ones. A factory malfunction may be the result of a breakdown in the electrical wiring or the mechanism itself.
The main modifications made by the craftsmen are the backlighting of numbers and hands, as well as a black bezel instead of the original gray one. It will become easier to tell the time at night, but note: according to statistics, in order to tell the time, a person looks at an analog device much longer than at an electronic one. This can play a key role in a traffic situation, because according to traffic rules it is not recommended to be distracted from the road.
Regular electronic watches are sold in 2 versions: assembled and in parts. Collected ones can cost from 450-500 rubles. They come in a variety of colors, with tinted glass, but most sellers only offer the original gray bezel, so aesthetes will have to paint this part black themselves. You can assemble this simple device yourself: tint the glass, connect the electrical, set the time. The whole set will cost about 400 rubles.
The voltmeter and various modifications are the result of an engineer’s wild imagination; these specimens deserve attention.
Network voltmeter - instead of a clock
You can actually put a voltmeter in the Priora instead of a clock! This device helps monitor the mains voltage and generator operation.
It doesn't end with the voltmeter! You can add a voltmeter and a thermometer to the electronic clock discussed above, which will show the temperature inside the cabin. You can choose the display color of these models - fortunately there is a choice. The backlit device also looks great in the evening when dusk sets in, adding coziness to the Priora’s interior.
Time in any car is part of a comfortable trip. They, like any other element, should become part of the interior. There is no limit to perfection - you shouldn’t be content with factory solutions.
Voltmeter selection
Of the domestic automobile voltmeters on the market, you can only find devices from UAZ and VAZ 2107. Both of them are poorly suited for installation in a Priora. The first one has a rough appearance and is more suitable for installation on a tank than in the interior of a modern car. The second does not have an external housing, and its dimensions do not allow the device to be neatly placed on the Priora panel. Therefore, it is better to find special tuned devices or use a digital car voltmeter made in China, inserting it into a button or instead of the dial of a Priora watch. Such devices are distinguished by good accuracy, low price and attractive appearance of the digital panel.
How to set the time on the Priora tidy
- Specifications
- Controls
- Dashboard
- On-board computer
- Lighting engineering
- Interior heater
- Air conditioner
- Circuit breakers
- Replacing lamps
- Passport details
The LCD of the on-board computer is located on the dashboard and contains three lines:
- the top line displays the total/daily mileage counter;
- The middle line displays the functions of the on-board computer, the display of which is carried out sequentially, at the choice of the driver:
- The bottom line displays the icon for the selected mode.
To switch between the bottom line display modes, use the keys on the steering column wiper switch: the keys (position 2) located at the end of the switch switch functions “in a ring” forward and backward; the “Reset” key (position 1), located at the bottom of the switch, resets the values to “zero”.
The top line readings (total/daily mileage) are switched by a button located on the right side of the dashboard (under the fuel gauge). If the daily mileage counter is displayed, then to reset it, you must press and hold the button for 3 seconds.
The procedure for setting the clock on the Lada Priora:
- To switch from the current time indication mode to the installation mode, you must press and hold the “Reset” key for more than 3 seconds, while the hours and minutes will begin to flicker;
- The minutes are set by pressing the “ring forward shift” key located at the end of the steering column wiper switch;
- The clock is set by pressing the “ring back shift” key located at the end of the steering column wiper switch;
- When you press the key once, the minutes/hours value increases by “1”; to change the values faster, you need to press and hold the key;
- When setting the minutes, the seconds counter is reset to zero (setting the hour counter does not affect the seconds counter);
- To return from the installation mode to the indication mode, you must briefly press the “Reset” key or, in the clock setting mode, do not press any key for 1 minute.
Instructions - how to set the clock on a Priora
Lada Priora is a car loved by many. Oddly enough, just for convenience, Priora made two types of watches. Setting them up is easy - more on that later. The clock on the Priora is in 2 places: the dashboard, the control panel, where the speedometer is. Sometimes additional equipment is installed on the Priora - some believe that it is better to install a voltmeter in the dashboard in order to always know the network voltage. Of course, every trip for your beloved “swallow” should be comfortable. For each of us, time is important, so “time” should always be “at hand”, and while driving – before our eyes. It is inconvenient to be distracted and look at the phone screen while driving, so the clock on the Priora must always be precisely adjusted so as not to distract the driver from driving.
Our article will help you set up, modify or remove your Priora watch. Step-by-step implementation will save even those Priora owners whose watches do not work. The built-in standard ones are always in front of your eyes - on the dashboard, also in the factory interior, the time is built into the dashboard.
Why do you need a voltmeter in the Priora cabin?
Most modern car models do not have a voltmeter on the instrument panel. Manufacturers decided that information about the on-board network voltage is not needed by the driver. This indicator is monitored by the on-board computer, which signals problems in the event of an obvious malfunction of the charging system or the vehicle’s on-board network. At the same time, a voltmeter is one of the most popular additional devices installed by car owners. This is caused by the following circumstances:
- the device allows, if necessary, continuous voltage monitoring;
- analysis of voltmeter data allows you to determine the load on the generator and its operating efficiency.
How to set the standard clock on a Priora
The standard device is as simple as possible - the time is displayed on the display located in the center of the dashboard, under the speedometer. The total mileage is also reflected there. Analog (center console) are configured separately, manually. In the Lada Priora, everything is adjusted using the “old-fashioned method”: one press of the button in the center of the dial starts the hands moving 1 minute forward. If you hold the button, the minute hand will “run” forward even faster, followed by the hour hand.
Engineers installed the simplest classical method, passed on from older models. When setting the central panel clock: your attention should be completely concentrated on the right switch lever. On the right is a rocker with two buttons. At the bottom, under the thumb, there will be a “reset” button conveniently located.
To set up an electronic clock in 2170, you need to:
On the right switch lever behind the steering wheel, find a “rocker” with lower and upper buttons and a “Reset” button; Press the bottom button until the display shows the time; Press the “Reset” button; Change time: the top button is responsible for minutes, the bottom button for hours; Press the “Reset” button to set the time.
How to remove a watch on a Priora
You can remove the device according to the instructions below:
- Unscrew the two screws of the center console behind the “Open” cover and the two screws under the ashtray;
- Remove the radio;
- Unscrew two more screws;
- Remove the decorative panel;
- Armed with a knife or flat-head screwdriver, press the tight latches of the case;
- Carefully pull the device out of the socket.
It is recommended to work carefully, trying not to scratch the decorative panel.
How much do watches cost?
Instead, you can put three options:
- Analog – original and with modifications;
- Conventional electronic;
- Voltmeter and various accessories.
Analog ones are available in parts stores and the aftermarket. Their price starts from 200 rubles - lovers of the classics can get themselves a new device to replace the faulty ones. A factory malfunction may be the result of a breakdown in the electrical wiring or the mechanism itself.
The main modifications made by the craftsmen are the backlighting of numbers and hands, as well as a black bezel instead of the original gray one. It will become easier to tell the time at night, but note: according to statistics, in order to tell the time, a person looks at an analog device much longer than at an electronic one. This can play a key role in a traffic situation, because according to traffic rules it is not recommended to be distracted from the road.
Regular electronic watches are sold in 2 versions: assembled and in parts. Collected ones can cost from 450-500 rubles. They come in a variety of colors, with tinted glass, but most sellers only offer the original gray bezel, so aesthetes will have to paint this part black themselves. You can assemble this simple device yourself: tint the glass, connect the electrical, set the time. The whole set will cost about 400 rubles.
The voltmeter and various modifications are the result of an engineer’s wild imagination; these specimens deserve attention.