More than 20 years ago, development of a car began, which later received the name Lada Kalina. Although prototypes of cars with various body styles were presented to the public back in 1999-2001, the first Kalinas for mass use rolled off the assembly line only 5 years later. Interestingly, Kalina was initially produced only as a sedan. Now this series is classified as the first generation of cars.
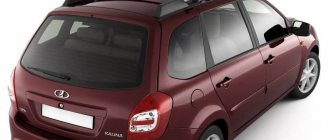
The second generation has 2 body styles: hatchback and station wagon. AvtoVAZ positions the Lada Kalina as a compact, maneuverable city car with a European level of showroom comfort. At the same time, it is emphasized that the car’s suspension height is almost comparable to SUVs. And, of course, Lada Kalina is famous for the fact that the current president of the country once drove along the federal highway.
Like any car, the Lada Kalina has its pros and cons in design, operation, and repair. However, now we are interested in a small but very important detail - the trunk lock of the Lada Kalina with station wagon and hatchback body types. We will talk about it in detail.
Features of opening the trunk of the Lada Kalina
Owners of the Lada Kalina car are almost unanimously surprised: with all the bias towards Europe, the trunk lock of the Kalina hatchback in the basic configuration for some reason can only be opened with a key. For many, the situation immediately became quite common: the driver gets into the car, starts the engine, and then remembers that he needs to put something from the passenger compartment into the trunk. Further actions are similar to a joke.
You need to turn off the engine, remove the key from the ignition, get out of the car, and so on. If you imagine all this in an environment of time shortage, one can only feel sorry for the owner. In addition, if someone happened to approach the trunk of a car with something heavy in their hands, the procedure for opening it with a key turned into something difficult. Another problem could have arisen: in regions where real frosts occur in winter, the lock cylinder would at times freeze tightly.
What’s interesting is that any car owner sees a separate button on the Kalina key, which for this brand of car replaces the standard key fob. She's supposed to open the trunk. If you press and hold such a button for a couple of seconds, you can hear a click - this is a signal that everything is in order with the electrical package control unit.
Then another interesting detail became clear: the craftsmen who climbed under the trunk trim to understand the internal structure realized that there was still a place for the lock activator and even a standard electrical connector for wires. And then the same craftsmen began to solve the problem of how to modify Kalina to increase the comfort of use. The complete trunk lock drive is not available for sale as a single set, so the parts will have to be obtained separately.
Lada Kalina hatchback › Logbook › Opening the trunk using the original key fob and a separate button
Good afternoon everyone!
The time has come for the first entry in my BZ. I have been thinking about the idea of opening the trunk using a button on the key and a button in the cabin for quite some time. Either there was no time for implementation, then my hands were out of w... ahem... in general, I was finally mature enough to realize my idea both morally and financially.
1. Actuator selection
I originally bought this actuator:
But, unfortunately, his efforts were negligible to open my trunk.
The option of installing such an actuator was considered:
but, after rummaging around in the garage, a wild thought came to me...why not put this?
YES YES! It's exactly what you're thinking. This is a pull-in relay. Preventing throwing tomatoes and rotten eggs, I want to say that this option suits me quite well. The effort is just awesome. In my case, this is what the doctor ordered.
2. Connection diagram
In my Kalinka, the control unit for the electrical package is “NORM”, and it has an old operating algorithm. You mean, if you press the button to open all the doors, or arm the car using the original key fob, then contact 19 will work and the trunk door will open. I found the diagram on the Internet and modified it a little. Initially, the scheme solved the problem of the button for opening all doors, but when arming, the tailgate still opened. This is, in fact, what happened in the end, after a lot of three-story matting and destroyed nerve cells.
I would like to note that this circuit is only suitable for low-current activators. In my case, the power supply of the retractor must be turned on through an additional relay, due to the high current consumption. Yes, and the standard wiring will not be enough; you will have to pull a wire of a larger cross-section.
3. Additional button
I put the button here
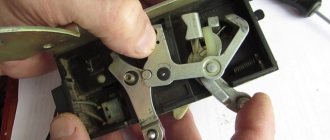
4. Trunk lock
Regarding whether to file down a tooth or not to file it down. There are a lot of articles on the Internet about how a lock from a Priora station wagon is suitable for Kalina, with the top tooth cut off already from the factory. I started looking for this unit. In our car markets we have never heard of such a thing, but on Tyrnet this miracle costs 360 Khokhlobaks. The toad inside me took over and I went for the grinder. This is what happened in the end
I advise you not to overdo it with sawing... you can ruin the lock.
5. Summary
The trunk door opens with the original key fob. When you press the button to open all doors and when arming, the relay opens the contact to the activator and the door does not open.
I'm glad it's an elephant. This is my first blog post, so don't judge too harshly. If you have any questions, I will be happy to answer!
Good luck to everyone in your endeavors.
Price tag: 300 UAH
Installation of the activator: preparatory work
Since there is space for a trunk lock activator in Kalina, it makes sense to use it. Absolutely any activator will do. Of course, for those who are interested in the quality and long service life of the entire device, it is better not to stop at extremely cheap options. Experienced car owners still advise choosing domestic Kalina electric lock drives, regardless of body type. They are somewhat more expensive than similar products made in China or Taiwan, but still more reliable. Main parameters of the activator:
- 12 volts;
- two-pin;
- lock-unlock functions.
In order for the system to open doors by pressing a button to work fully, one activator will not be enough. You will also need such a thing as a rotary washer. According to many car owners, the easiest way is to grind it yourself. You will need a steel plate and a machine. There are quite enough drawings with dimensions that will show what kind of rotary washer for the Kalina activator should be on various auto forums.
It is possible that after the washer is manufactured, it will have to be modified when installing the activator. The activator installation technique itself will require some tricks. For example, the first step is to remove the trunk trim. It is secured with pistons, which immediately became unusable for most car owners. Conclusion: pre-purchase of “hedgehogs” for subsequent installation of the trunk trim in place is mandatory.
Another nuance lies in the types of locks on the Lada Kalina. Firstly, locks on cars produced before 2010 and after differ in their design. Accordingly, the types of activators will differ slightly. This issue is resolved upon purchase. Secondly, most of those who independently installed the lock activator for Kalina station wagon either modified the lock itself or replaced it with another one. It remains to figure out why this is needed and how it is done.
Removing the lock, drive and latch of the trunk lid
To remove the lock, remove the four pistons by prying them off with a screwdriver.
. and remove the lock drive trim.
. disconnect the rod from the lock drive.
Squeezing the clamps, disconnect the lock wire block from the rear wiring harness block. We use a marker to mark the position of the lock relative to the trunk lid.
Using a socket or a 10mm wrench, unscrew the three nuts securing the lock.
Remove the trunk lock with rod and wires. We install the trunk lock in the reverse order according to the previously marked marks. To remove the lock drive, disconnect the lock rod from the drive (see above).
We use a marker to mark the position of the lock drive relative to the trunk lid.
Using the “8” socket, unscrew the two nuts securing the lock drive to the trunk lid.
Remove the lock drive.
Using a screwdriver, remove the retaining ring.
Remove the pressure lever.
. and remove the lock.
Remove the pusher with the washer and spring.
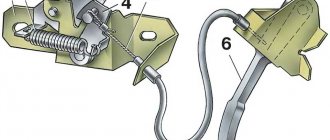
We take out the cylinder lock mechanism. We assemble and install the lock drive in the reverse order according to the previously applied marks. To remove the lock retainer.
. Using a Phillips screwdriver, unscrew the two screws securing the clamp.
Remove the lock. We install the clamp in its place and tighten the fastening screws without tightening them completely. Close the trunk lid and then open it. The latch must take the correct position, therefore, without moving the latch, tighten the screws that secure it.
Source: wiki.zr.ru
Methods for installing the trunk lock activator
The first option is to saw off one “tongue” from Kalina’s lock. Particularly gifted craftsmen do this without any removal of the lock, right on the spot, using an angle grinder. You have to work very carefully. If you don’t have a grinder, the same steps can be done with a hacksaw. It just takes much longer, and one can only guess about the physical effort required for such a process. If you are not confident in the intricacies of your own work, it is better to remove the lock for modification. In this case, it will be easier to work with both a grinder and a hacksaw.
The second option is to replace the lock. Many car owners installed a trunk lock for their Lada Priora instead of the original one. This option is perfect for those Kalina owners who do not have the desire and/or ability to cut anything. All other steps for installing the Kalina station wagon trunk lock activator are extremely simple.
- A rotary washer is installed on the plastic activator pusher, then the entire system is secured with a locking ring.
- The complete activator is placed in a standard place.
- The activator wires are connected to the corresponding connectors. Naturally, all electrical work is carried out only with the battery disconnected. The point is not what can “knock” an electric current: 12 volts of direct current for a person is just nonsense. But capricious electronics, if something suddenly “shorts”, may suffer. In the best case, problems with functionality will begin, in the worst case, something will completely fail.
- The next stage is installing and adjusting the rods.
- A check is in progress. First, the lock itself, regardless of whether the original one was modified or another one was installed (from Priora). All detected problems are corrected. The activator is being tested.
If everything worked perfectly, then it is quite possible to install the trunk trim in place, if only there were “hedgehogs”. Car owners are advised, since they had to remove the trunk trim, to also check which parts are making noise, knocking or vibrating. If such small problems are discovered, they can be solved by installing plugs from pieces of foam rubber of the required size. This will not only solve the problem with the lock, but also increase comfort when driving the car.
DIY lock repair step by step
I had to implement it in my own way, so that I could forget about the problem forever.
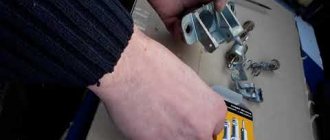
To work, you will need a minimum of tools - a set of 8, 10 wrenches, a drill, a screwdriver, a vice and a file.
The materials you need are a piece of metal perforated profile or DIN - 35 rails, approximately 350 mm long, a pair of M5-M6 screws, with nuts and spring washers, several “hedgehog” fastening inserts, well known to all owners of VAZ cars.
First of all, remove the plastic cover. To do this, you need to unscrew the 2 screws securing the pocket handle and remove the cover plate by slightly prying it up with a powerful screwdriver from below. The force should be applied in the downward direction (open upward) to avoid breaking the guides.
The fastening latches may break, but there is nothing to worry about - they are considered disposable items, are inexpensive and are sold at any automotive store. Then we measure the required length of the profile so that the existing perforated holes coincide with those located on the body.
Cut to size and file the sharp edges. You can use a steel strip 20-40 mm, 2-4 mm thick. This bus is used for grounding loops. It will require drilling 3 holes of 9-10 mm. The third hole in the middle is for attaching the pressure plate.
The best option is to make a strip from a DIN rail, which is sold at any electrical goods store. I found a perforated steel profile in the garage, so I made a strip from it. The second design detail is the aforementioned pressure plate.
Its purpose is to provide a rigid connection between the bar and the lock plate.
The pressure plate can be made from any suitable piece of metal 2-4 mm thick, for example from a piece of the same profile. The main thing is to choose it so that the bent part of the eye rests against the lock plate with little effort when assembled. There is nothing complicated, look at the photo and everything will become clear.
Next, we attach the pressure plate to the rail with an M5 screw and nut. By attaching the bar to the surface of the door, we make sure that the bent ear rests on the surface of the lock plate. The bar needs to be slightly bent in a vice so that it follows the shape of the door surface. If necessary, the ear is bent in a vice with light blows of a hammer.
We fasten the rail with screws to the trunk door and check the functionality of the lock.
At the same time, we adjust the force of locking the trunk by rotating two rubber bushings located at the edges of the door. The trunk should close smoothly the first time.
Luggage compartment lock
You can, if desired, modify the trunk lock of the Kalina hatchback in exactly the same way as was considered in the case of the Kalina station wagon. One of the main nuances, oddly enough, is not in the electrics or body design features, but in the fastening of the trunk trim. The point is that the Kalina hatchback is supported not only by pistons, but also by plastic corners.
That is why, when removing the trunk trim of a Kalina hatchback, you must pull the trim from the top: while the “hedgehogs” are easy to replace, the stationary plastic holders are only easy to break. And more about plastic. The bottom line is that the Kalina hatchback has a plastic trim on the trunk lid. According to the observations of many car owners, these are two problems at once. The first is that plastic is not entirely suitable for this part.
Constant efforts to open the fifth door, combined with a small number of stiffeners, gradually lead to the appearance of cracks in the plastic. Then everything follows domino rules. Perhaps the plastic will soon “fly”, and then you will have to think about repairs. Or, which is no easier, the plastic cover may remain in place, but will begin to “walk” along the metal part. And these are scratches on the coating and subsequent corrosion.
There are also aesthetes among Kalina hatchback owners who simply do not like the look of the trunk lid opening button. In general, all of the above reasons often lead hatchback owners to the same decision: an opening button on the fifth door is not needed. To solve all the problems at once, you can not only modify the Kalina trunk lock, but also remove the button from the fifth door, and, on the contrary, install a button in the car interior.
Door adjustment process
To eliminate defects in the operation of door elements, it is necessary to find out the cause of its occurrence. In some cases, treating moving parts of the mechanism with lubricants helps. The seals between the trim and the body are subject to wear and tear, and they also require replacement periodically. If manipulation of the replaced elements is not enough, technical intervention is required. Regulation is necessary for the following factors:
- the gap in the extreme part of the structure causes the door on the Kalina car to not close tightly;
- The problem is caused by a faulty door lock.
New Lada: The hood lock on the Lada Kalina does not open well. Violation of the geometry of the structure in the doorway is the most common cause of the defect. Gaps can appear in any part of the joint with the body. Most often this happens from above and below. The adjustment in these cases is similar, but has minor differences.
Installation of the locking device drive
Removing the fifth door opening button is the easiest thing. It is more difficult to seal the remaining hole. This can be done using a special putty. One of the tricks is to process the hole cavity so that the surface becomes as rough as possible. This will create optimal adhesion to the putty. Next comes sanding, priming and painting. The work can be done independently without special training and practical skills. After that, you don't have to worry about aesthetics.
Installation of the structure on the body
In order to equip a car with a luggage structure, you can use one of the proposed methods.
- The sedan is mounted using longitudinal supports called roof rails. Free up space in the engine compartment of the Lada Kalina, remove the heater radiator, how to remove it. How to change the front strut on the fret Kalina, how to change it. The installation process involves the initial fastening of the railing system, after which crossbars are installed on them.
- Installing a trunk under the door. In this option, the installation of supports will take place behind the clearance. For longer operation of this design, it is recommended to choose those models that have a security key. This will protect the sedan from unauthorized removal of the trunk.
Today, most car owners prefer the first system. And all because it is possible to independently choose the distance between the crossbars and their number, which allows for the refusal to use baskets or hanging floorings.
When choosing a trunk for a Lada Kalina car, the use of hanging devices also plays a key role. This point greatly influences the selection of the trunk itself, as well as the type of fastening it to the car. If there are no roof rails, the crossbars are equipped with flooring. If this is not taken care of, then the ability to transport goods that do not have a solid form will be lost. Usually the flooring is selected so that it has the appearance of a basket, that is, it has sides. A detailed article on how to independently replace the front struts on a Lada Kalina. Choice of shock absorbers. Since today the roof rail system is the most relevant among drivers, let’s consider the rules for its installation.
- Initially, you need to open all the doors of the car and lock them open.
- Next, you should remove the rubber seal that is provided in the cabin.
- There is a protective film on the mounting holes, which is also removed.
- After this, roof rails are installed on the roof, and it is necessary to ensure that their holes coincide with the factory slots.
- Next, screws are used to secure the roof rails to the body.
- Once the installation is complete, the seal is returned to its place, and the doors are removed from the latches and closed.
Thus, to install a roof rack on the Lada Kalina, a lot of time and effort will not be required.
Advantages and options for upgrading car locks
Any option for modifying your own car has its pros and cons. It was already discussed at the beginning why exactly it is worth modifying the trunk lock of the Kalina hatchback and station wagon. Now about the possible options. Installing the trunk lock activator alone solves one problem - the issue of using the key. The downside is that when the ignition is on, pressing the trunk open button will not help Kalina hatchback and station wagon: the engine will definitely have to be turned off.
True, you no longer have to remove the key from the ignition. That is why the issue of installing a trunk release button for Kalina hatchback and station wagon remains relevant. This modification option has its drawback: you will have to run the electrical wire through almost the entire car. Most car owners are willing to put up with such inconveniences, since they are one-time use.
The Kalina hatchback trunk lock drive and the issue of modification are a matter exclusively for the car owner. It is possible that it is impossible to independently modify the trunk lock of the Kalina hatchback, and there is nowhere to turn. In some regions, purchasing a lock for a Lada Priora car can be difficult. According to many motorists, this disadvantage can somehow be put up with.
For particularly skillful car owners, options for controlling door opening/closing mechanisms, including the fifth door, are available. For example, the simplest option is one in which all the doors of the car are unlocked simultaneously. And the most complex option, which is not achievable for everyone, since it requires a somewhat non-standard approach, is that the driver, passenger and fifth doors are controlled separately.
Naturally, the options for modifying the Kalina hatchback and station wagon lock differ in cost, execution technique, and time required for a full range of work. The decision which option to choose is always up to the owner.
We will arrive in 15 minutes or any other time
We open VAZ cars of all models
We will open doors, glove compartments, hoods, trunks, etc.
Let's recharge the battery and start the car
Decent craftsmen with more than 5 years of experience
Recommendations
Comments 20
I also want to do this for myself, maybe one of these days I’ll do it
great post. A question from a teapot, so to speak. I don't know much about electrics. But still not enough to pull out the right one from the pile of wires. The question is exactly this. I have a viburnum with an alarm. Moreover, when the electrician installed it, he said that the trunk would be opened with the alarm key fob and with the standard key fob, and said to buy an additional regular four-pin relay. I installed the activator - but it’s not convenient to open it from the key fob - I want to embed a button into the interior. Maybe someone can tell me where and where to get what.
Here you can do everything elementary. The button is placed in the gap of the positive wire. It takes a long time to draw a picture, I’ll try to explain it with my fingers. Take a two-contact button that works to close. Connect one contact to 12V, the other to the plus of the activator. It is advisable to place a diode in the gap in the power wire that goes from the signaling to the activator. Everything will work.
Well, thank you. Almost understandable. I can most likely figure this out.
Here you can do everything elementary. The button is placed in the gap of the positive wire. It takes a long time to draw a picture, I’ll try to explain it with my fingers. Take a two-contact button that works to close. Connect one contact to 12V, the other to the plus of the activator. It is advisable to place a diode in the gap in the power wire that goes from the signaling to the activator. Everything will work.
Hello! Please tell me if it's not difficult. I installed the activator, now the trunk can be opened with the factory key fob. When the car is started, the key fob won't open it. But it opens if you press the unlock button on all doors. Everything would be fine, but I close the doors with a button in the cabin when I drive or stand in remote places. Then I open it in the city, and naturally, the trunk opens with them, I have to get out and slam it. How to prevent the trunk from opening with this button. And also, I want to make a separate button to open the trunk from inside, where should I connect it?
We will open Lada Kalina in Moscow and Moscow Region
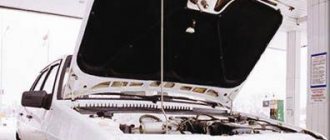
LOOKservice emergency service technicians will come to the rescue when you need to open a Lada Kalina or other car without damage. You can call a specialist in Moscow and the Moscow region around the clock who knows how to open the hood of a Kalina, the trunk and the door without a key. The company's services may be required in the following emergency cases:
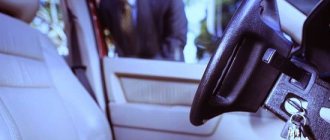
- The doors locked spontaneously, the keys remained in the cabin;
- The battery is dead;
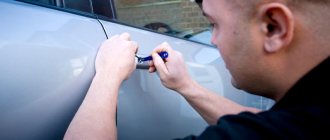
- The lock cylinders are faulty or dirty;
- Locks froze in the cold due to moisture that accumulated on the seals;
- The key is lost or broken;
- The alarm went off from the inside and the driver was locked inside the car;
- The car stalled in a traffic jam, the central locking was blocked;
- The key fob is discharged, the car does not open;
- The lock in the glove compartment is broken;
- The trunk does not open;
- The key broke in half in the door keyhole;
- The gas tank cap does not come off;
- The lock of the tank filler cap is broken.
The most common Lada Kalina problems and ways to solve them
1. You can’t open the doors of Kalina
If you forgot your car keys at home or in the showroom, you can use string to get into the car without damage:
- To do this, tie a lasso from a rope (strong thread or lace will also work).
- Pass the rope through the seal into the interior, throw the lasso over the button, tighten it and pull it up.
How to dismantle the lock to replace the cylinder?
You can gain access to the lock mechanism by removing the plastic upholstery inside the luggage compartment. This protective component is fixed by means of two bolts, which are located in the places where the special handle is installed. They are also called latch caps. They are pryed off with an ordinary screwdriver.
Structurally, the trunk lock in the Lada Kalina is made of two parts, regardless of the body type, hatchback, station wagon or sedan. They are presented in the form of a cylinder and the unlocking mechanism itself. If it is necessary to replace the trunk lock, then the dismantling of these components is carried out in a separate order.
When you only need to replace the larva, this can be done in a few simple steps. Here you will need a screwdriver and a socket.
- By unscrewing the bolts, we release the necessary part of the body.
- Next, remove the retainer using a screwdriver. It is attached directly to the body of the larva itself.
- It is recommended to remove it very carefully, while holding the spring.
- Installation of a new element is carried out strictly according to the reverse manipulation algorithm.
If there is a need to replace the lock itself, the operation becomes a little more complicated due to the need for additional actions.
- First, the door lock is unscrewed using a screwdriver. This is not difficult since the element is held in place with only two screws.
- Now we pull the trunk lock outward, and it freely comes out of the landing niche.
As you can see, removing the trunk lock is not difficult.
see also
Comments 37
the door closes so clearly, how did they achieve this... is it noisy or heavy or something?
Hello, please explain about the trunk opening from the button. Today I tried to install it, installed the actuator, it works, it pulls the rod. I really didn’t saw the tooth! But the question is this, the cylinder is of course closed, otherwise the point of the lock (so that they don’t come up and open it in any time, even during the alarm). I press open the trunk from the key fob, the actuator clicks and the door moves away a little. Then it’s clear that the tooth is holding it, do I understand correctly? So, in order to eventually open the door further, what should happen? Previously, I pressed the cylinder and it opened, now the larva is not active - since the lock is closed! I have to pull the door towards myself and click again... what kind of nonsense? Did this happen to you? Or do I have a malfunction? help, thanks in advance!
Hello, everything is connected correctly for you, and since the tooth is not sawed down as you describe it will be, the best option to avoid sawing the tooth is to buy a trunk lock from a Priora station wagon, there is a lock with a rounded second tooth, actually I ended up with it then I did just that, because the lock with the sawn tooth began to jam over time. If anything, write, I’ll try to explain in more detail
Well, I’ll try to saw it... why is it needed? They say it’s to protect against opening... but it was removed on the K2 and Priore... is this AvtoVAZ nonsense or what? I’m afraid of the minuses without a tooth, can there be any? It won’t open on its own on bumps?
There won’t be any downsides 100 percent, it’s just AvtoVAZ’s omission that they didn’t immediately think about rounding off the tooth
So is it better to cut it down or round it off, as it were? This is important, I can do it better.
There won’t be any downsides 100 percent, it’s just AvtoVAZ’s omission that they didn’t immediately think about rounding off the tooth
one or two teeth? Some say two, others one...
You file down one tooth, like in my photo, only I just filed it down, or you can file it down and slightly round it. And the best thing is to not have to worry about cutting it down, go and buy a lock from a Priora station wagon, it will replace the Kalinovsky one as if it were a native one, it can be changed simply by unscrewing two bolts. It’s not expensive, in my opinion if I’m not mistaken it’s something less than 500 rubles
How to install the activator
The only way for the viburnum to get into the trunk is to turn the key and press the button. Naturally, doing this is not always convenient. Weather, busy hands and other troubles contribute. At this stage, many car enthusiasts begin to think about the trunk activator. It is quite possible to do this, you just need to try a little.
The Kalina station wagon trunk lock activator is easy to install. It is enough to take a self-drilling screw and secure it on one side with it and on the other with a wire holder. To check the device, you need to connect it to the standard connector.
The only problem in all this work may be the back door being picked up at the wrong time. After the current stops supplying the activator, it closes with the first latch, but the trunk is not completely closed. In order to get into the so-called fifth door, you will have to use the key again.
A lock with a button is not difficult. But during work it is necessary to assemble the circuit and stretch the wires. In this case, one programmable alarm channel (additional) should be used.
There are two main connection options. First: the button goes to +12 on the activator, bypassing the relay. The advantage of this connection is its simplicity and the absence of unnecessary elements, the disadvantage is the need to run additional wires.
Installing the activator using the second method is more labor-intensive. You will have to use additional elements, namely diodes. In addition, there is a need to search for “mass”. The main advantage is the use of a minimum number of wires.
Many experts prefer the first option due to its simplicity. The wire can be copper PV-3 with a square cross-section. It must be pulled along the left side and thresholds. The switching can be crimping and electrical tape on top.
How to install the activator
The only way for the viburnum to get into the trunk is to turn the key and press the button. Naturally, doing this is not always convenient. Weather, busy hands and other troubles contribute. At this stage, many car enthusiasts begin to think about the trunk activator. It is quite possible to do this, you just need to try a little.
The Kalina station wagon trunk lock activator is easy to install. It is enough to take a self-drilling screw and secure it on one side with it and on the other with a wire holder. To check the device, you need to connect it to the standard connector.
The only problem in all this work may be the back door being picked up at the wrong time. After the current stops supplying the activator, it closes with the first latch, but the trunk is not completely closed. In order to get into the so-called fifth door, you will have to use the key again.
There are two main connection options. First: the button goes to 12 on the activator, bypassing the relay. The advantage of this connection is its simplicity and the absence of unnecessary elements, the disadvantage is the need to run additional wires.
Installing the activator using the second method is more labor-intensive. You will have to use additional elements, namely diodes. In addition, there is a need to search for “mass”. The main advantage is the use of a minimum number of wires.
Many experts prefer the first option due to its simplicity. The wire can be copper PV-3 with a square cross-section. It must be pulled along the left side and thresholds. The switching can be crimping and electrical tape on top.
How to remove the trunk trim of a Kalina hatchback
The door trim in any car, including Kalina-2, is a monolithic plastic part called the “card”. To remove the card from the door, you need to lower the side window as far as possible. The design of the upholstery in “Kalina-2 Lux”, as well as “Standard” and “Norma” is different: where there are speakers, there are acoustic pads on the cards. But the upholstery fastening nevertheless does not differ in its design in all trim levels. Let's take a closer look at how to properly dismantle the door card and then install it. Happy reading.
- Theory and preparatory actions
- Changing the front door trim
- Changing the rear door trim